Cleaning, flushing, triple-rinsing… whatever you call it, sprayer sanitation is a time-consuming and distasteful task.
Methods vary, but they generally span from the classic triple rinse (30-45 minutes) to a full tear-down and decontamination (many hours and likely an overnight soak). The operator decides how much time and effort to invest depending on the chemistry they’ve just used and the crop they intend to spray next. Learn more about the power of dilution in this article and in this article.
Unfortunately, two facts are certain:
- At minimum, operators should rinse the sprayer at the end of each day… and they generally don’t.
- It is only after spraying a sensitive crop that the operator truly knows whether the sprayer was cleaned sufficiently.
CONTINUOUS RINSING
We’ve promoted Continuous Rinsing as a viable alternative to Triple Rinsing in previous articles (see HERE and HERE). Executed correctly, the method:
- greatly reduces the time required,
- is as effective,
- eliminates operator exposure, and
- reduces potential environmental contamination.
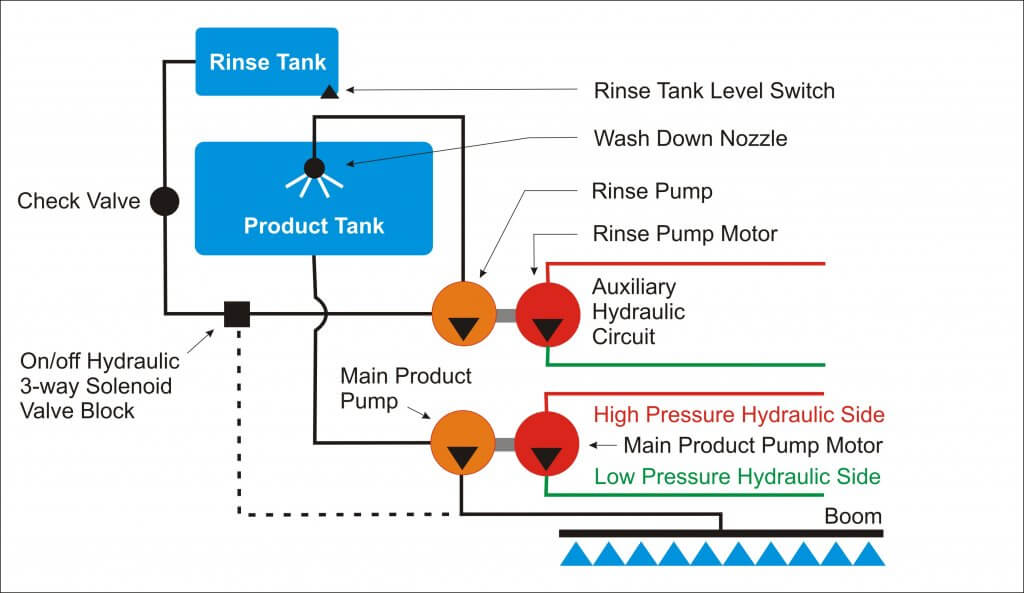
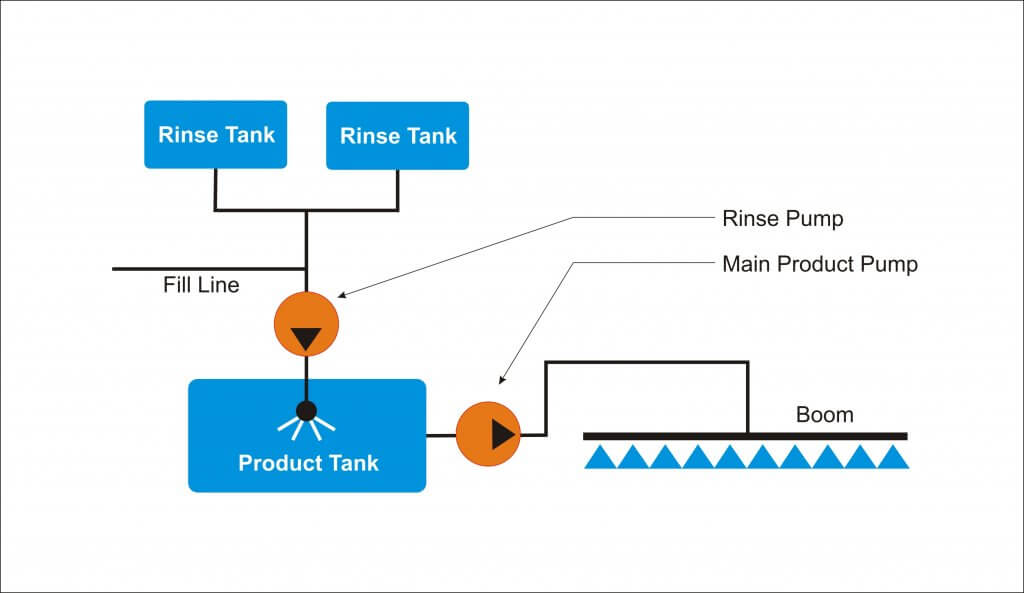
Continuous rinsing requires the installation of a dedicated “rinse pump” to transfer clean water to the product tank from the rinse tank via the wash-down nozzles. This permits the main product pump to operate simultaneously, emptying the product tank and spraying the rinsate out the boom.
Imagine your sprayer empties at the end of the row. You position the sprayer at a headland or a row you sprayed earlier. A toggle switch in the cab engages the rinse pump and the wash-down nozzles start spraying clean water into the product tank. You then resume driving and spray until the rinse tank is empty. During the process, any solution in the return/bypass line is quickly diluted, and any standing volume in the system is displaced by clean water.
It takes five minutes and you never left the cab.
Remember: Rinsing can dilute residue to ~2-5% in most of the sprayer plumbing, but it is not intended to replace the more rigorous decontamination process. Closed circuits, filters and dead-end plumbing can still harbour residue >15%.
INSTALLATION
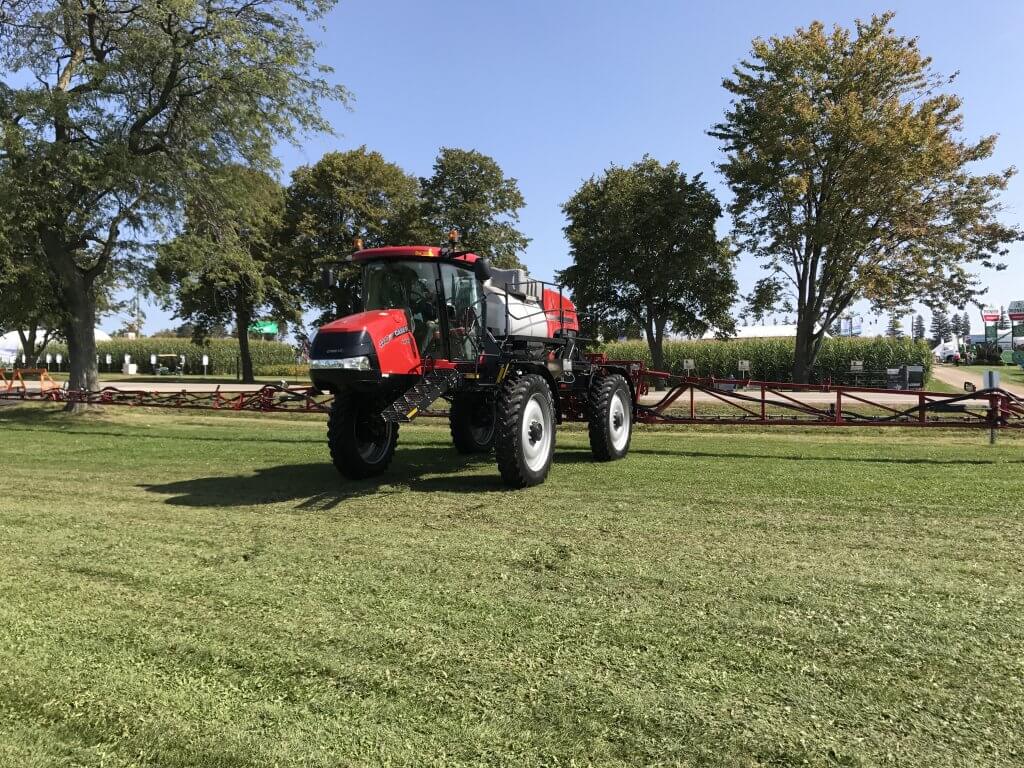
Working with GreenLea Ag Center in 2017, we installed a Continuous Rinse system on a Case IH Patriot 4440. It has a 1,200 gal. product tank, a 140 gal. rinse tank and a 120 foot boom. A parts/price list for the Patriot installation appears at the end of this article.
Additionally, we have included the parts/price list from our 2016 HJV Equipment installation on a RoGator 700, which had a 700 gal. product tank, 50 gal. rinse tank and a 90 foot boom.

Still further, we have included three homegrown solutions from operators that developed their own continuous rinse systems.
SIZING THE RINSE PUMP
It is very important that the rinse pump has the capacity to operate the wash-down nozzles and still supply clean water at a rate approximately equal to the rate at the boom. Basically, “in must equal out”. If the rinse pump supplies too much clean water, the volume rises in the product tank and efficiency is reduced. If it cannot supply enough, the main product pump will lose suction and not function correctly.
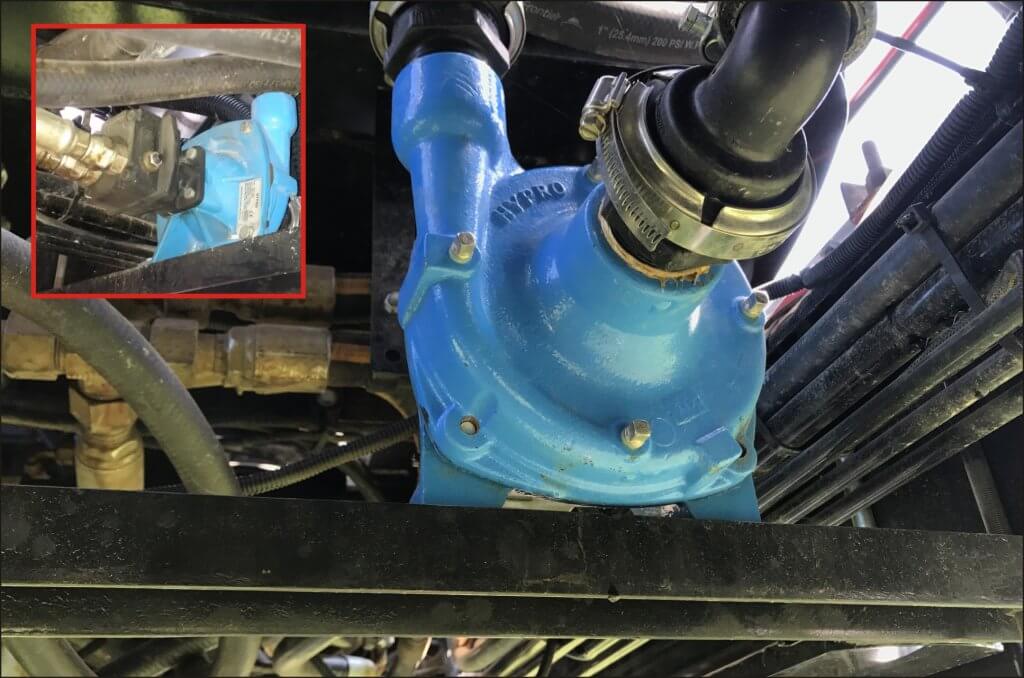
We installed a Hypro 9303C-HM1C centrifugal pump (max flow rate of 114 gpm at 130 psi), matching the make and model of the exiting product pump. A length of channel was installed on the chassis to mount the pump and close-coupled hydraulic rinse pump motor, and a valve block.
Really, electric pump installation is easiest. An alternate pump that has been used is this one from Pattison Liquid. For added benefit, it’s a chem transfer pump that can handle the pesticide formulations. If the pump doesn’t give enough flow, a second one can be installed parallel to double the flow.
HYDRAULICS
Let’s being with advising caution: If you are uncertain about your hydraulic capacity (and tightly designed systems rarely have extra) then consult with a manufacturer-certified service technician, or consider an electrical alternative.
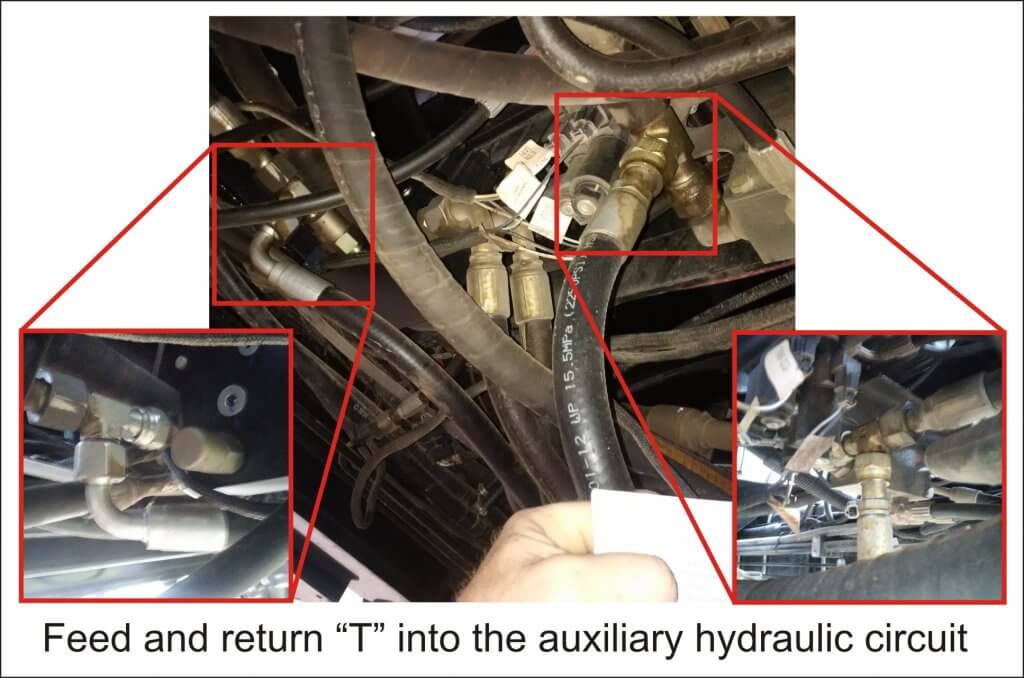
For the Patriot, the auxiliary hydraulic circuit was used to drive the hydraulic rinse pump; we piggy-backed off of that existing system. In this case, Continuous Rinsing increased the load on the auxiliary hydraulic circuit, but only marginally, so performance was acceptable.
We drew that hydraulic flow directly from the auxiliary pump output using a ‘T’ piece to ensure full pressure was available when needed. Then we broke into a common low pressure return manifold using another ‘T’ piece to provide the return flow.
Originally, we were concerned that robbing too much hydraulic flow could compromise sprayer operations. We therefore exchanged the hydraulic motor that came with the pump for one that required less hydraulic flow. However, the pump operated at such a high speed that the rinse tank was drained in two minutes! We felt this would not give the operator enough time to make minor adjustments (see the “Avoid Airlock” section later in the article). We also felt the rinsate would not have enough time to hyrdate any residue in the tank and lines. We therefore returned to the motor that came with the pump, slowing the pump and bringing our rinse time to approximately five minutes.
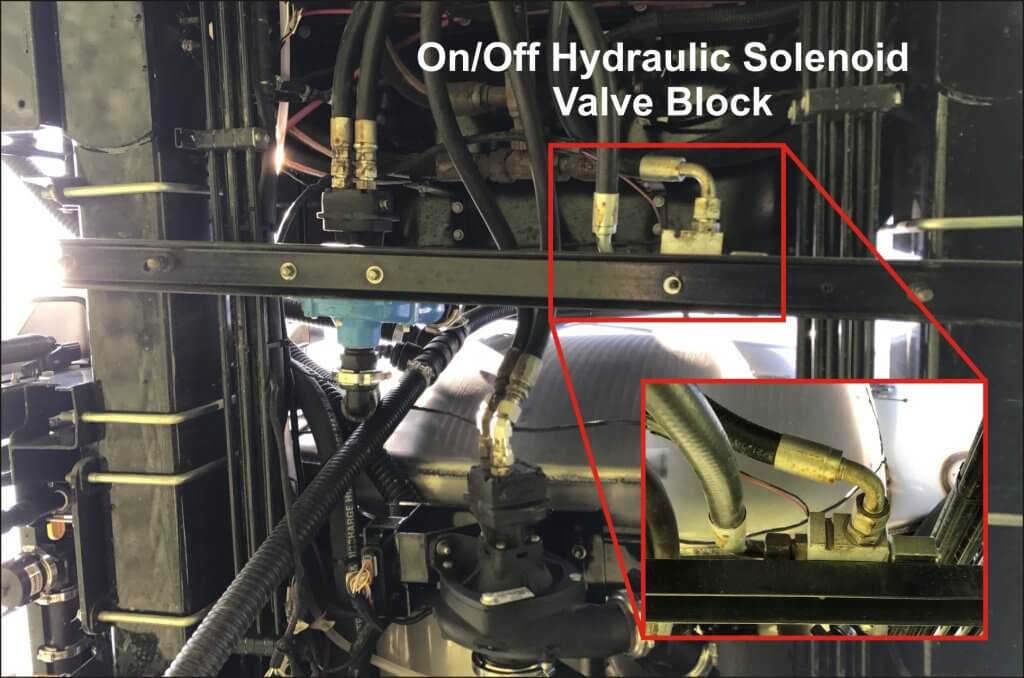
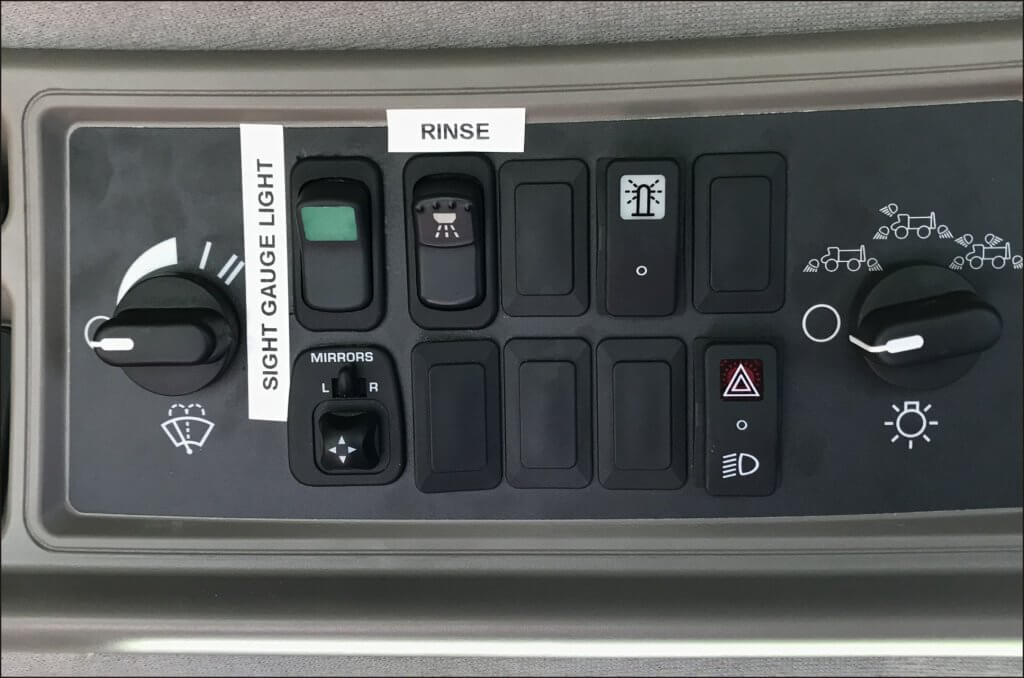
We installed an on/off hydraulic control valve block and solenoid controlled by a toggle switch in the cab. When the rinse switch was engaged, 12 volt DC opened the solenoid, allowing hydraulic oil from the auxiliary pump to turn the rinse motor, which in turn powered the rinse product pump.
AVOID AIRLOCK BY BALANCING FLOW
While Continuous Rinsing works well with an unbroken stream of clean water, there is demonstrated benefit to allowing the pump to draw a small amount of air. The bubbles are reputed to scrub the lines more effectively than water alone. It is possible that the new Hypro 9307 series centrifugal pump, which claims to eliminate dry run, would facilitate this.
However, avoid excessive cavitation or airlock of the main product pump. This will damage the pump seals and interfere with pump suction. If the main product pump is a piston-diaphragm pump, avoid losing the prime by letting a small volume of rinse water build up in the product tank before spraying the rinsate.
Maintaining the balance between the supply from the rinse pump, and demand by the product pump, will take careful trial and error. If the sprayer employs a rate controller, speeding up or slowing down travel speed is a means for making adjustments to match the two flows. Alternately, an operator can adjust the pressure regulator manually. Remember, the nozzles won’t need to work optimally so you have the option to use fairly low pressures to match flows.
In the case of an operator applying 28-0-0 using dribble bars or fertilizer nozzles, there is likely too much flow at the boom for the rinse pump to keep up. While we have not tried it, but as long as there was sufficient volume in the clean water tank, it might be possible to rinse the boom section by section, starting with the outside sections and moving in towards the centre.
LESSONS LEARNED
The installation was a learning process, during which we noted the following:
- At first, the rinse tank slowly emptied through the rinse pump, even when it wasn’t in use. We prevented this by installing a 10 psi check valve between the pump and main tank.
- The rinse pump ran dry and burned the seals when the operator forgot to turn it off after the rinse tank was empty. We considered a timer or alarms to prevent this, but chose to install a level sensor (essentially a float) which would cut the 12 Volt DC feed to the on /off solenoid, effectively turning the system off when the rinse tank was empty. Note: the sensor is not in the parts list – it was purchased for ~$10.00 CAD from Amazon.
- When deciding where to draw hydraulic flow to run the rinse pump, we first tied into the main hydraulic circuit (i.e. not the auxiliary). This negatively affected both steering and boom control. Beware drawing flow from critical safety systems such as steering.
FUTURE DEVELOPMENT / OTHER ADVANTAGES
GreenLea was exploring an option to use the rinse pump to bypass the product tank, and flow directly to the boom. This can be accomplished by teeing an electrical 3-way ball valve just after the pump to allow flow directly from the rinse tank (see dashed line in the flow schematic shown earlier in the article). Imagine being rained out, or having excess mix left in the tank at the end of the day. This system would allow the dilution of any corrosive chemical from a sensitive precision application system without losing or contaminating the spray tank. It should be noted, however, that high precision spray systems (e.g. AIM Command, Pro and Flex) would still require the operator to open the boom flush valves manually to allow the boom purge.
Growers have suggested the system might also be used to get a sprayer to end of a row if it threatens to run empty before completing the pass. A small volume of clean water added to the tank would displace the 15-30 gallons of unusable volume and stretch the application. Be aware that this would also dilute the product due to the agitation/bypass and should only be considered when a minute or less of additional spray is required.
HOMEGROWN SOLUTIONS
Tyler Patriot (Electrical)
David Kucher (@DavidKucher) from Saskatchewan installed Continuous Rinse on his Tyler Patriot (75 foot boom, 800 gal. product tank).
Here’s what he had to say:
The rinse system I was using on my sprayer previously involved a lot of time and effort. Plus, the quality of job it did was sometimes imperfect (I keep pictures on my phone of a canola crop that was damaged because of a poor rinse job from a few years ago). The old system used the main product pump to rinse, so there was a bunch of valves under the sprayer that needed to be turned, and the pump had to reprime for each rinse. It was tedious.
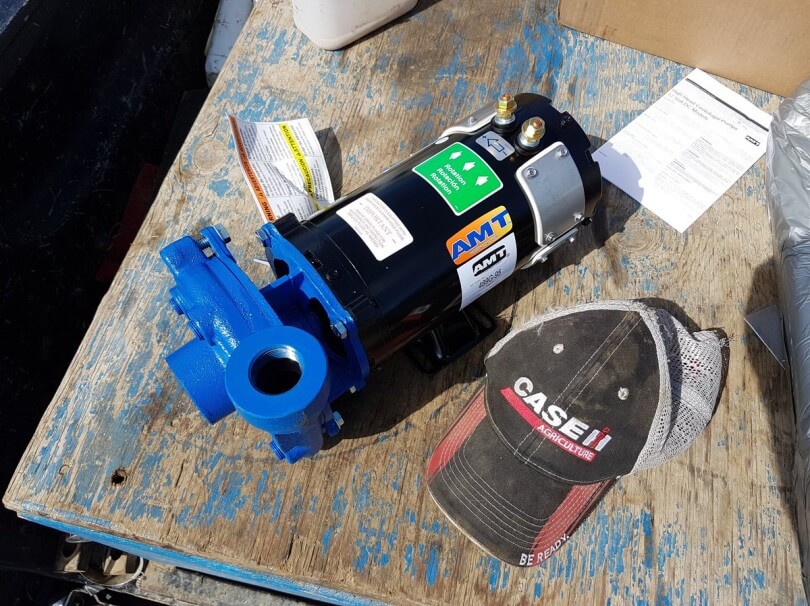
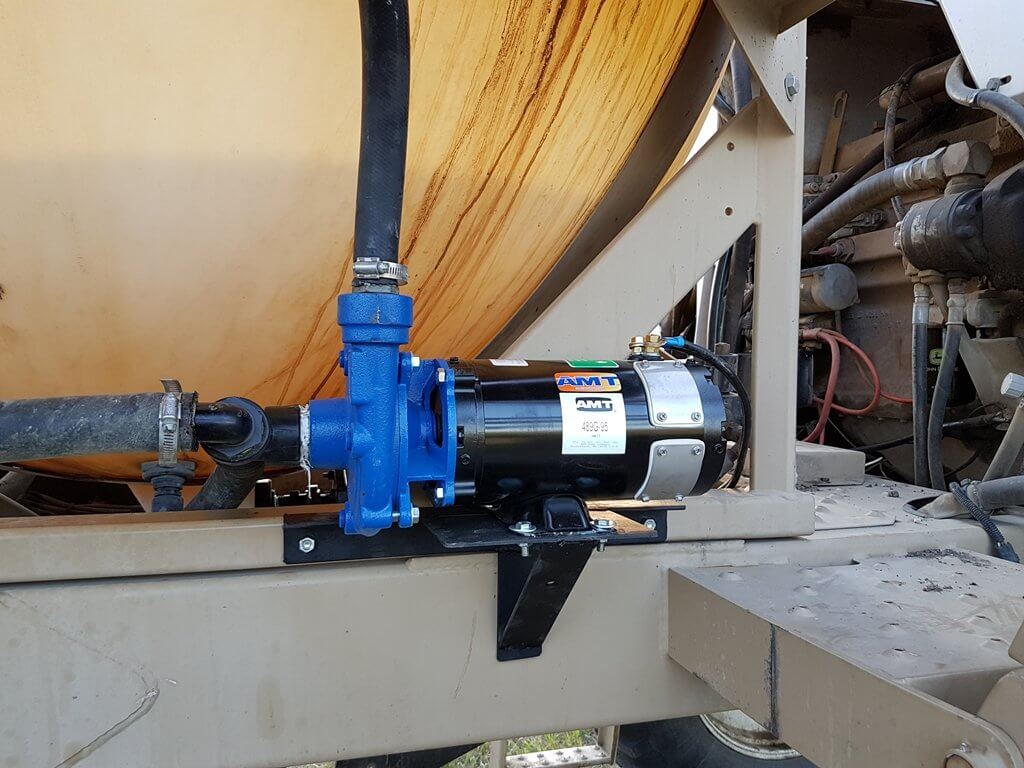
Uncertain about the hydraulics, David elected to use an electrical pump, but had difficulty finding one that would produce enough pressure and flow. Most electric pumps were too small and it would have taken more than one, plumbed in parallel, to achieve the volume numbers required. However, David found a high-flow 489G-95 AMT High Head Washdown Pump (1 HP, 1-1/4×1 IN/OUT, 12 VDC,Cast Iron,Buna-N) which he got from the US for about $1,200.00 CAD. Max flow was 56 gpm.
Note: In 2020 this pump model changed to the 12DC-95.
He removed the majority of plumbing, valves, and related complexity from the old rinse system. The Continuous Rinse was comparably simpler and isolated from the rest of the sprayer plumbing. It just involved a fill line from his two clean water tanks, the new rinse pump, and the existing rinse nozzle inside the product tank.
When the product tank empties, David holds down a push button dead-man switch he installed to activate the rinse pump. If he wants to do a more thorough job, he flushes the product tank and plumbing for about two minutes, then stops, gets out and opens the boom end valves. Then he climbs back in and does another one minute flush.
Approximately 30 gallons of water go through on each flush and my only issue is that I waited so long to install the system.
Author’s note: Positive displacement electrical pumps (which have zero risk of seal loss) are reasonable alternatives to centrifugal pumps. Depending on the size of the sprayer, multiple pumps plumbed in parallel can provide sufficient flow. We elected to use two Hypro electric roller pumps (model 4101 N-H) for the 2016 RoGator 700 installation. Cheaper, low amperage 12V diaphragm pumps from Delevan and FLOJET with capacities of 5-8 gpm are also available.
John Deere 4830 (Hydraulic)
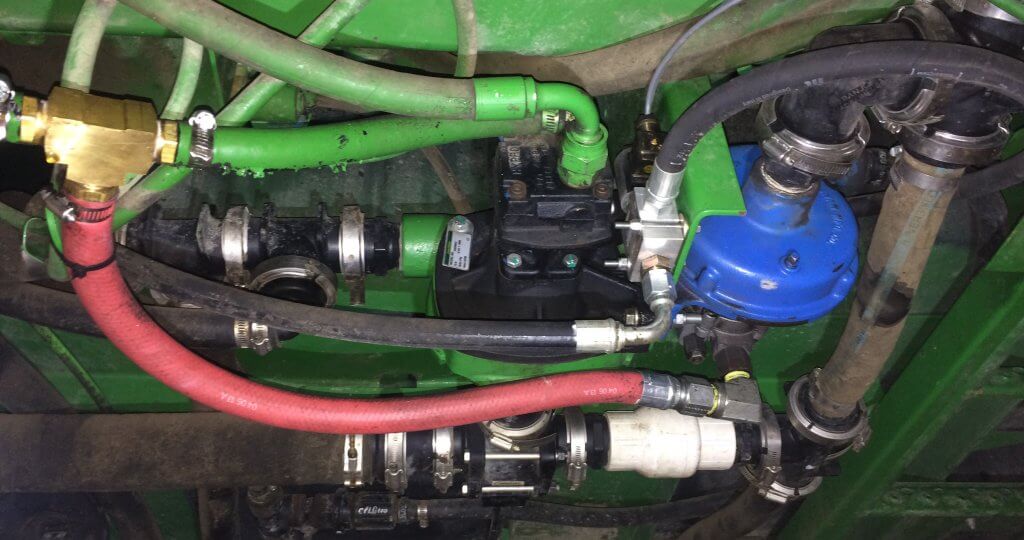
Russ Enns (@EnnsFarms) from Saskatchewan installed a Delavan HD Magnum 125 hydraulic driven pump (1-1/4” suction, 1” discharge, 5-7 gpm of hydraulic flow). He mounted it on the same mounting plate as the main product pump, just on the opposite side, using the same bolt holes.
It was tied hydraulically to the main product pump, so the rinse pump could only run when the product pump was operating. The hydraulic supply from the sprayer went through an electric/hydraulic block via a solenoid resting in the closed position. A rocker switch in the cab used 12V to activate the rinse pump from the cab. Return hydraulic pressure from the rinse pump was tee’d into the main solution pump hydraulic return.
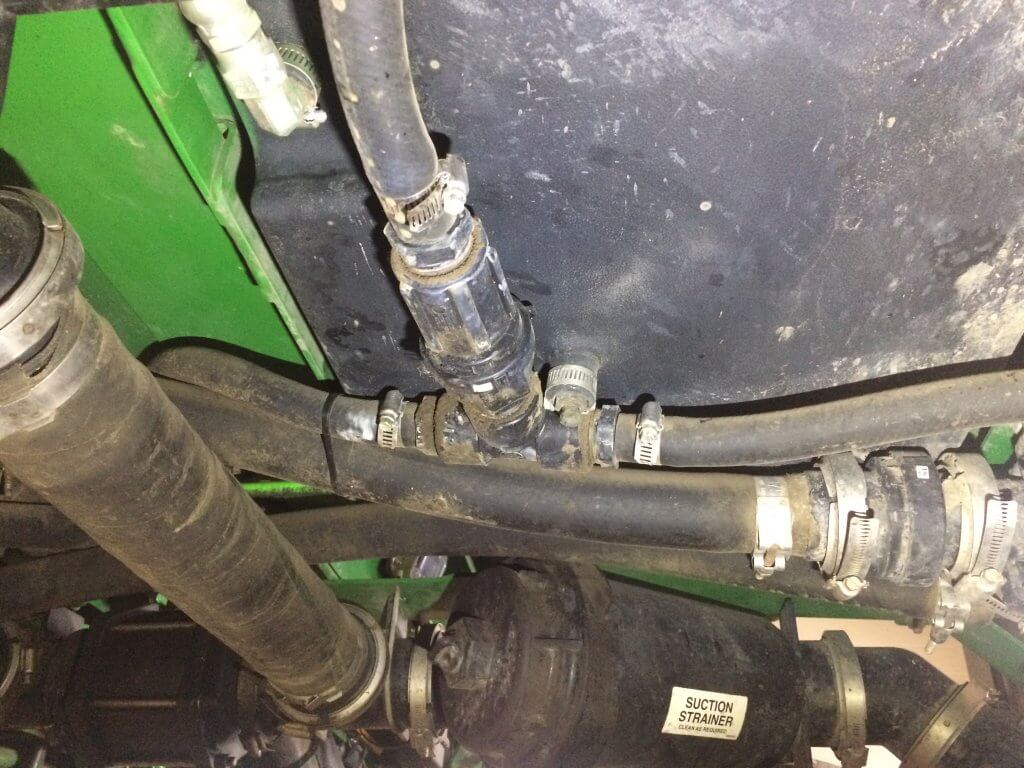
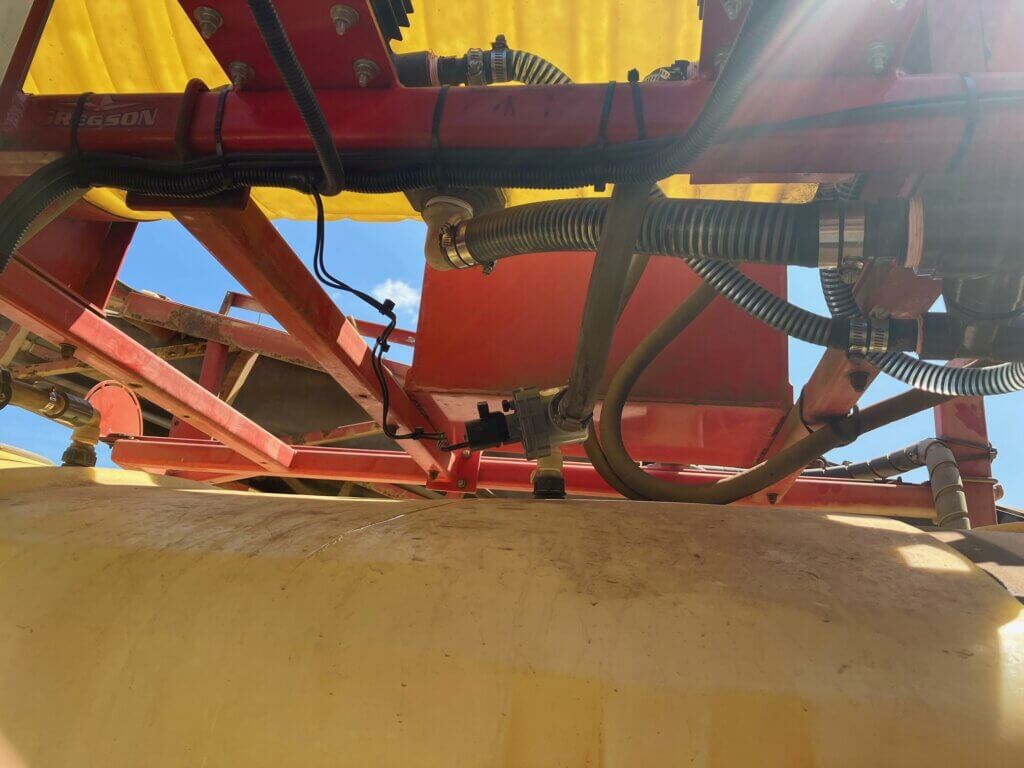
The clean water intake for the rinse pump was tee’d into the factory rinse tank. The discharge side of the rinse pump was plumbed to a check valve and tee’d into factory tank rinse system. Here’s the discharge line, check valve and tee into factory rinse (below).
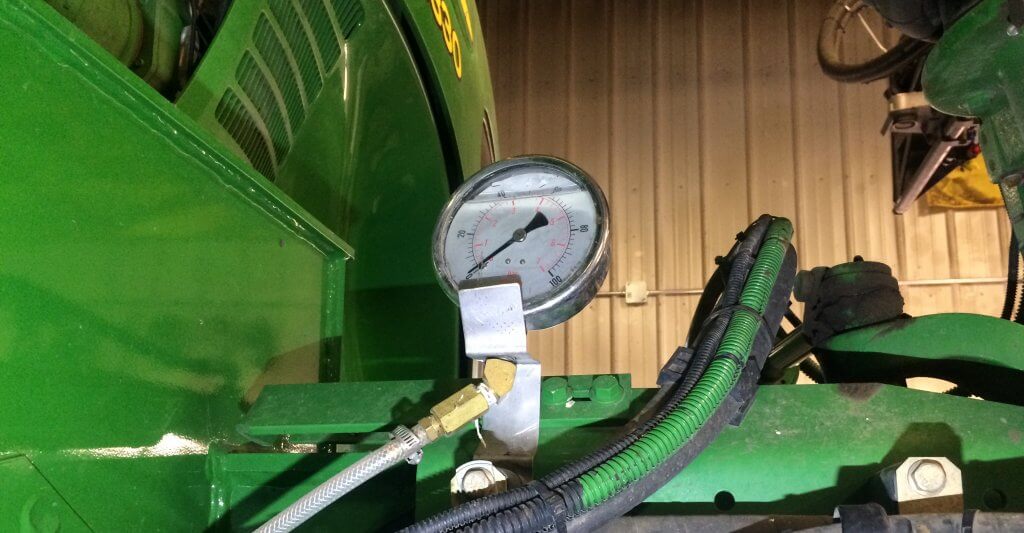
Russ mounted a large pressure gauge on front right axle to monitor rinse pressure. It’s easy to see from the cab, and easy to tell from the pressure when the rinse tank is empty.
In this case, Continuous Rinse is used in tandem with an Accu-volume tank gauge so Russ could monitor the level in the main product tank from the cab. Depending on the nozzles being used, he found that the rinse pump supplied clean water faster than the rinsate could be sprayed.
So, after finishing a field (or changing chemical, etc.) Russ turned on the rinse system while spraying the rinsate out on the field. The Accu-volume alerted him if clean water was accumulating in the product tank. If it got to ~20 gallons, he would briefly suspend the rinse pump while spraying to allow the level to drop. Then, he would start the rinse pump back up. He repeated this process until the clean water tank was empty.
Russ had many of the main components on hand, but estimates replacement value at ~$1,200.00 CAD. He noted that while installation was straight-forward, he originally piggy-backed the rinse pump’s hydraulic supply off the main solution pump, and it didn’t work correctly. We did that too, Russ 🙁
Time savings and environmental considerations are the biggest benefit of this system to me. Being able to finish spraying a field, and immediately start rinsing and spraying the diluted solution is a huge time saver. I feel it’s a far more thorough rinse and a better/quicker dilution rate compared to how I previously handled rinsing and spraying out the diluted solution. Another benefit is that even though it’s plumbed into the factory rinse, the factory rinse system can still be used normally if for some reason the continuous rinse pump quits.
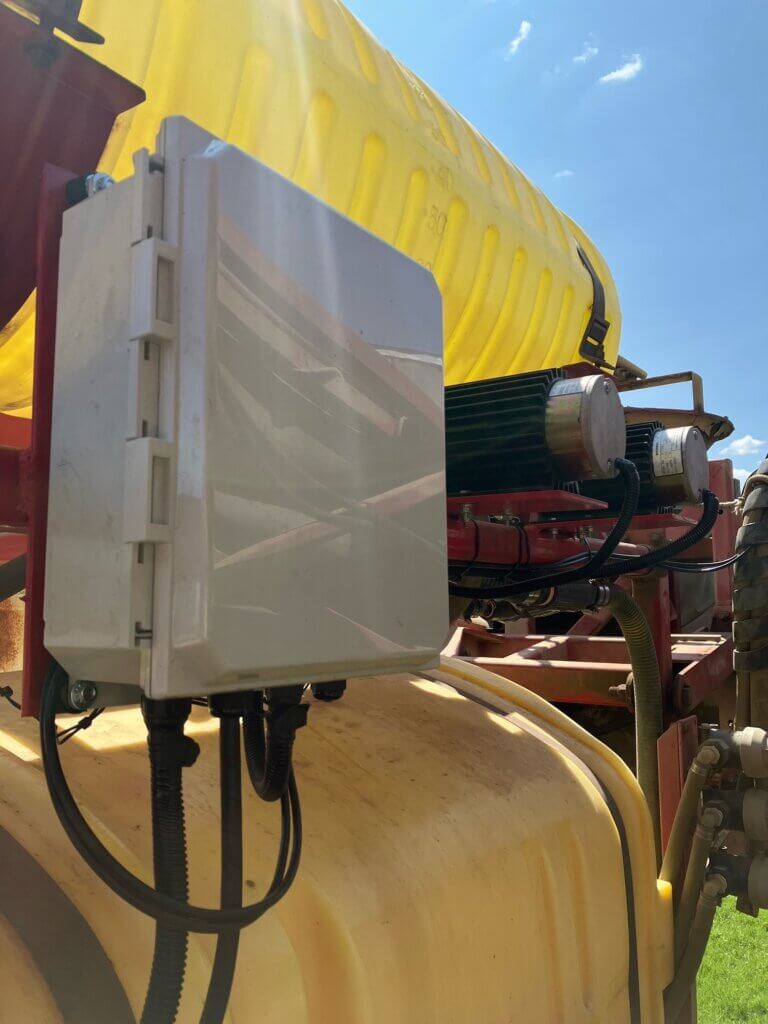
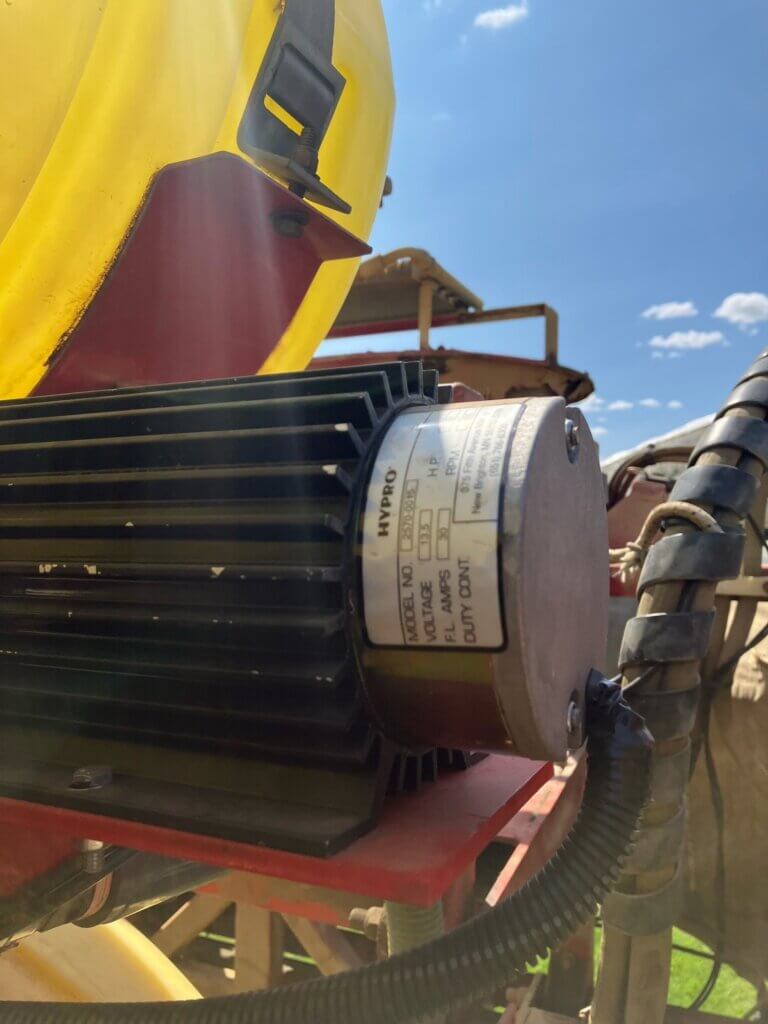
Gregson Trailed (Electrical)
Continuous Rinse isn’t only for grains and beans. Matthew Droogendyk installed two 12v pumps on his trailed vegetable sprayer that matched the flow of the main pump. They had an electrician install a box for switching the the pumps and two solenoid valves on at the same time.
They noted an issue when trying to prime the main pump after emptying the tank. If the tank was sprayed completely empty, the main pump took time to get primed again. This affected rinsing time as well as the balance between supply and demand. Through trial and error they determined that running the rinse pumps for 1 minute (~15 gal) gave enough time to rid the main pump of air. Then the flows matched at about 15 gpa. Re-priming took about 5 minutes, and then an additional 2 or 3 to rinse using about 45 gallons of clean water. They found there was no need to replace their original tank rinse nozzles.
TANK RINSE NOZZLES
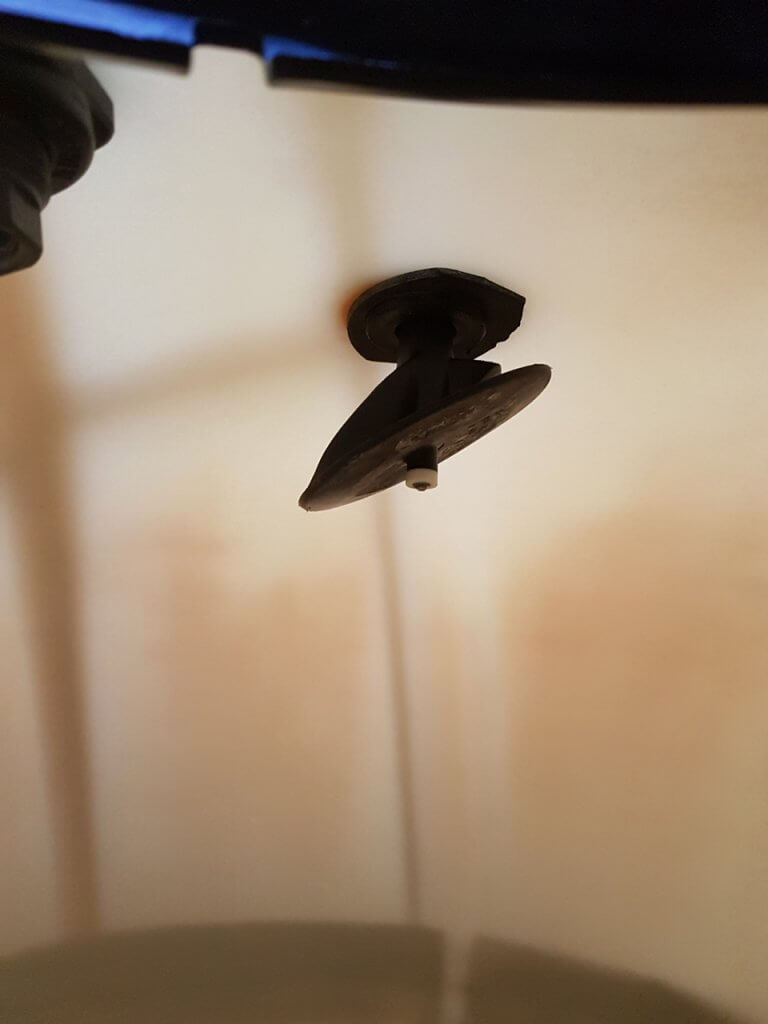
One of the challenges of installing continuous rinse is ensuring the tank rinse nozzles are capable of rinsing the entire solution tank interior at potentially low pressure and low flow. In 2019, Lechler released the ContiCleaner range of rinse nozzle. Four ISO colour-coded nozzles capable of operating from 2-5 bar (29-72.5 psi), with flows from 6.5-32.3 L/min. (1.7-8.5 gpm). This will enable operators to better match the rinse nozzle(s) to the clean water pump. Be aware they are very difficult to source in North America. We tried and weren’t able to get them.
PARTS/PRICE LISTS
The following two parts/price lists are in Canadian Dollars. They do not include tax or labour and prices change depending on where and when parts are purchased. As you have read from the operators that installed their own Continuous Rinse systems, there are many possible solutions, so these lists are provided only for reference. Click the link to download a PDF.
TO LEARN MORE
So far we’re aware of two Ontario companies and one Belgian company with experience installing the system. We will expand this list over time.
Before contacting them, have the following information on hand:
- Sprayer tank volume (both product and rinse, if applicable)
- Boom length
- Nozzle spacing
- Largest nozzles mounted/used on the sprayer (excluding fertilizer nozzles)
- Power available on sprayer (e.g. 12V available? Max amp? Hydraulic capacity?)
Thanks to Russ Enns, David Kucher and Matthew Droogendyk for sharing their install stories. Thanks to Adam Beaumont and Ehrin Frid for the Case IH and RoGator installations, and to Mike Cowbrough (@cowbrough) of OMAFRA and the Ontario Soil and Crop Improvement Association for collaborative support.