It was Saturday morning in April, 2016 when I received an email from Steven Bierlink, an orchardist in Washington State. He was curious about the impact of air induction nozzles on lime-sulphur applications (intended to thin apple blossoms). Work-life balance notwithstanding, I happily grabbed a hot cup of coffee and we got on the phone. It was a great conversation.

It turned out Steve, like many growers, also had a knack for metal working. Displeased with his Rears sprayer’s performance, he told me he’d replaced his classic radial air outlet and curved boom with a ducted tower assembly, very much like the H.S.S. sprayer had just been introduced to North America.
I asked if he would share his story and a few photos of how he did it and he didn’t disappoint! What follows is a photo journal of how he designed and built his new sprayer. He writes:
“Sorry it’s taken me so long to get back to you. Spring is like a tornado and there’s just no time to get things done! Here’s a quick/not so quick rundown of the process:
1 – I started by cutting the horizontal supports that attach the fan box to the front deflector wall. I plugged all the old holes with nuts and bolts to keep the air going where I wanted it.
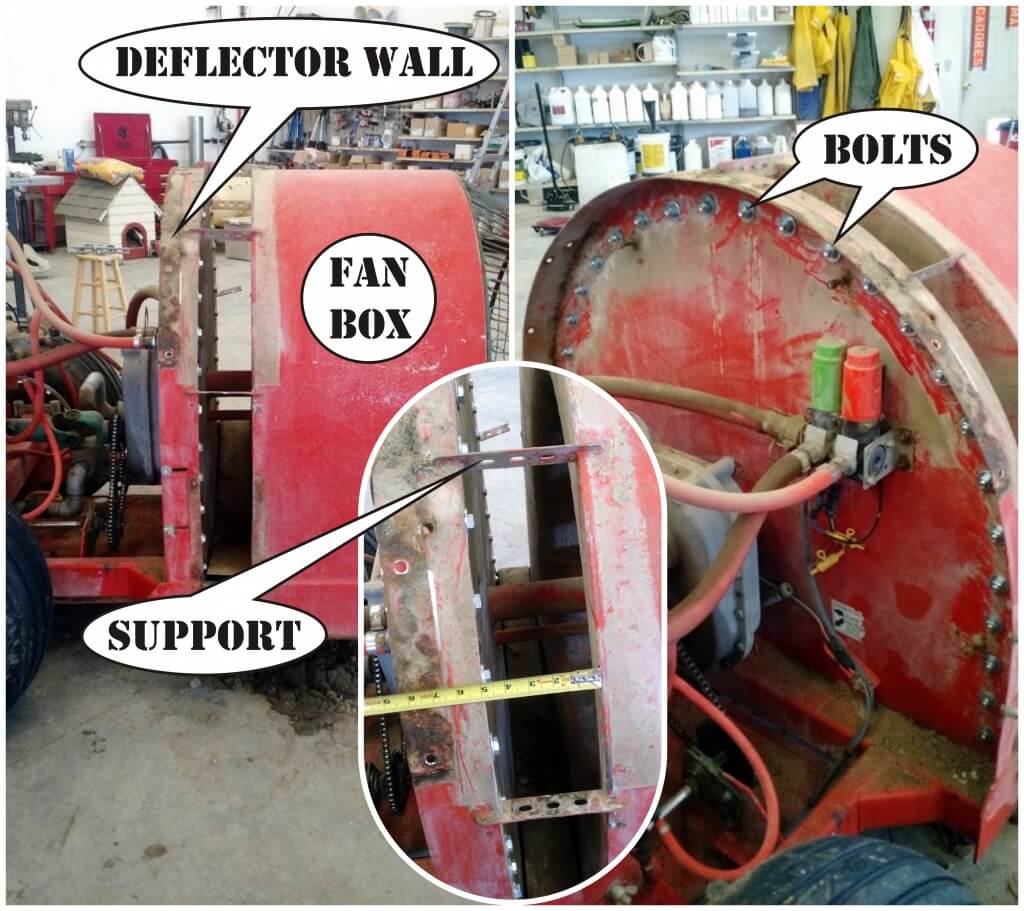
2- I then got a 10″ wide sheet of 16 ga cold-rolled steel from a local HVAC guy. I marked out where I wanted to attach it, drilled and tapped the holes, and attached using only stainless hardware. I marked out for a total of 8 holes per side evenly spaced, and drilled them out with a 4” hole saw. I then cut 3″ long sections of 4″ diameter thin-wall pipe (about 0.125” thick) and welded them flush with the inside.

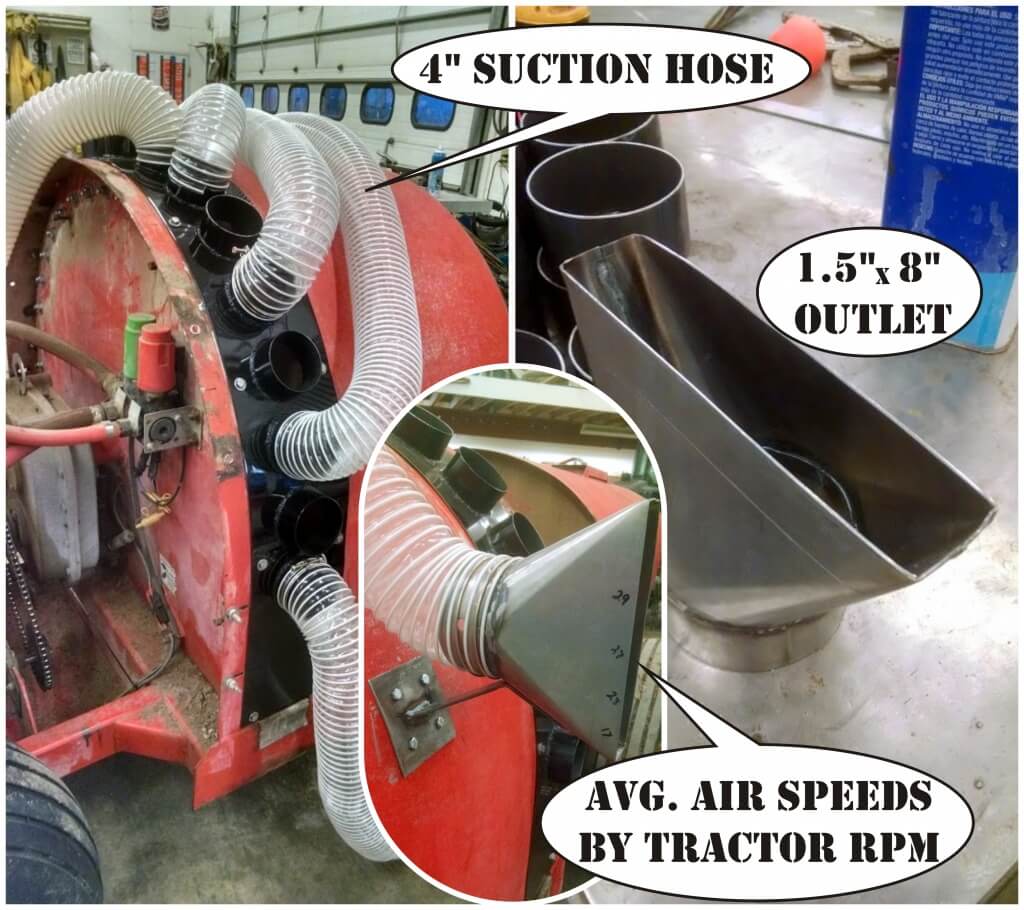
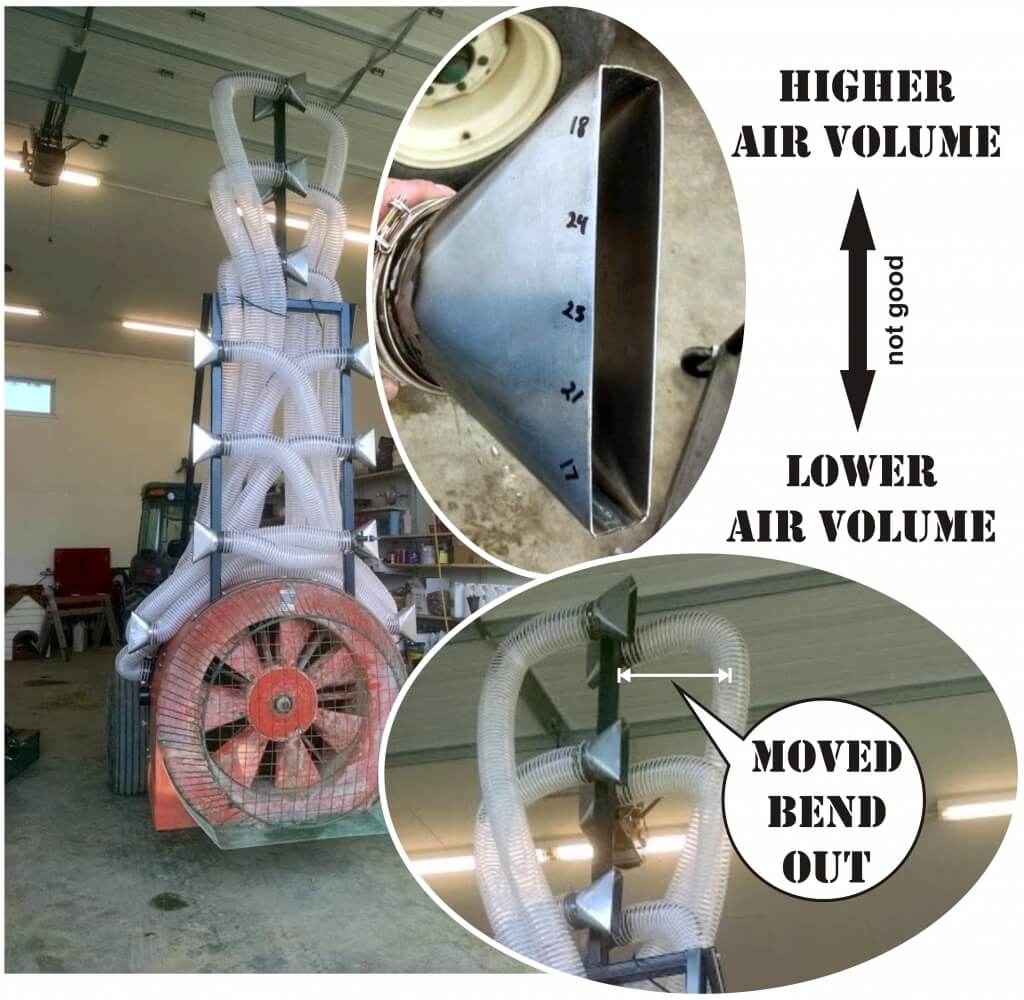
3 – I had several conversations with the local HVAC guy about turning vanes, nozzles, cubic feet/min. and wind speeds. The reason I decided to use hose after all these conversations is because there are no 90° angle turns. Those turns during testing severely decreased wind speeds because of the turbulence it caused. The hose is standard 4″ suction hose for woodworking chip/dust collection. Together, we came up with a 1.5” x 8” outlet to use. The numbers written on the outlet are average wind speed with 10 feet of hose attached at the desired tractor rpm’s.
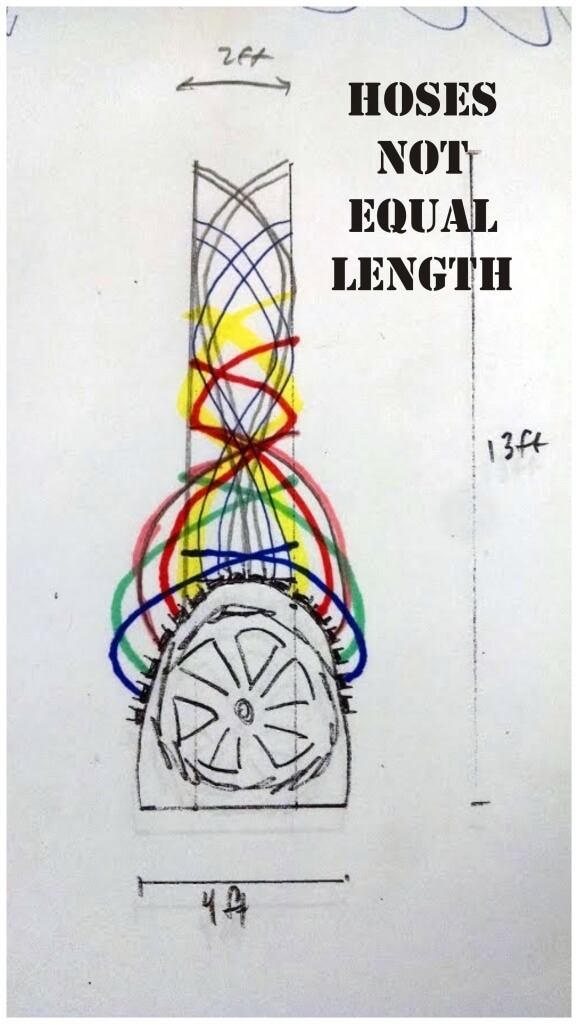
4 – Initially I was set on having the same distance of hose for each outlet, like headers for an internal combustion engine. I let that go since volume matters so much more in this situation and there is no “real” back pressure pressure to be concerned about. This was the initial drawing:
5 – My measured dimensions showed the rectangular tower frame would fit through my tightest V-trellis, but only if I drove 0.5 mph and who is going to do that!? So, I needed to rethink it, break it down, and redo it. I decided on a partial, center-mast design.

6 – After putting everything together I realized the air volume wasn’t always balanced across the each outlet. This was because the bend in the hose was too sharp and too close to the outlet. This REALLY MATTERS because if the air volume is too “heavy” on one side of the outlet, it doesn’t capture and carry the spray consistently. I corrected it by attaching support rods to increase distance between bends and outlets to about 18”.
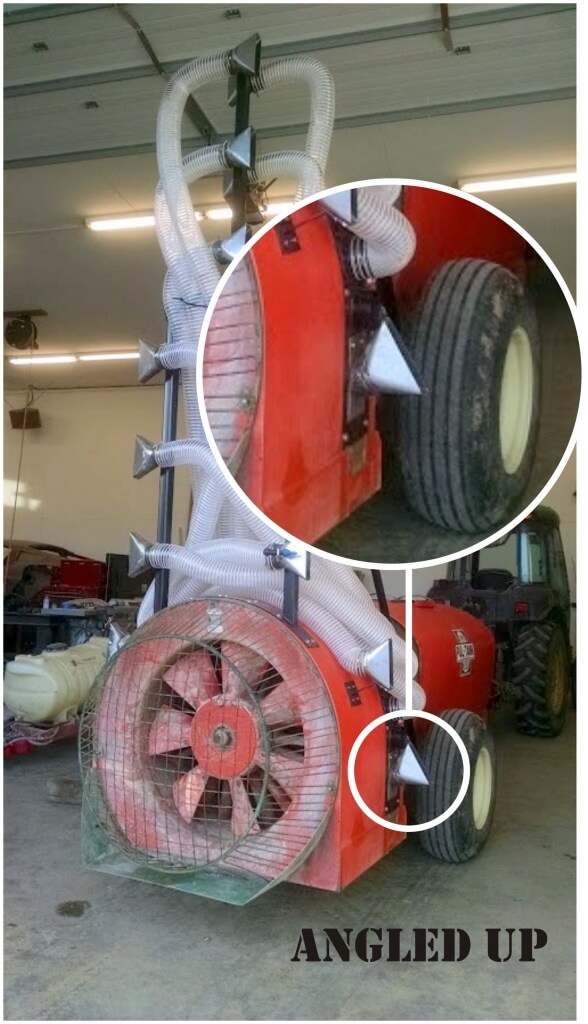
7 – On the painted, final design, you might notice lowest nozzle is angled. This is because I’ve noticed that foliar applications don’t often hit the lowest branches. I angled one outlet upwards to correct this. I notice in your article on the H.S.S. sprayer that the Woolly Apple Aphid nozzle does the same thing. I feel like I need to meet these people; we have incredibly similar ideas!
8 – I used TeeJet’s ¼ turn AIC air-induction flat fan nozzles. They’re molded into the cap, so they are always oriented the right way. I set the nozzle bodies outside the air outlets to reduce turbulence in the airflow. It also makes servicing cleaner and easier. I also ended up adding some shielding around the lower nozzles just in case someone loses focus and runs into something.

I asked Steve to stay in touch and let me know how his spraying season goes with the new sprayer. I’ll add to this article as he checks in and lets us know how the sprayer holds up and what changes, if any, he wants to make in the future.
July 2016 Update:
As promised, I checked in with Steve to see how the sprayer was holding up. Here’s what he had to say:
It’s awesome. Works fantastic. Very effective in windy weather without having to worry about drift. Also, it works perfectly for sunburn protectants because of how directed the application can be. It has held up well considering how many acres its gone through this year.
Of course, there are always a few hiccups. I’ll interject here to suggest that what Steve is about to note about thinning is not a reflection of his design. I believe many orchardists experience the same difficulties with their conventional towers, too.
A few downsides I’ve noticed throughout the season: For blossom thinning (lime sulfur), gallonage is critical to get the stamen of the flower burned sufficiently to prevent fertilization. Even when spraying ~100 gallons per acre with this sprayer, it wasn’t enough to effectively blossom-thin the fruit. Part of this may be because I’m now distributing the spray evenly through the entire canopy, rather than spraying up through the canopy below. Another downside is the droplets’ tendency to accumulate in the lower portions of the tree (since every droplet doesn’t hit foliage), and over-apply in those areas. My Sevin/NAA application this year definitely prove this theory as my lower branches were over-thinned.
So, what’s the final word on this cool sprayer mod?
Overall its great, and with a few tweaks this winter will be even better.