There’s a call that I’ve been getting for 20 years now. It came again this week. Someone has a twincap with two small air-induced tips, and they’re applying herbicides and fungicides with low water volumes, often 5 gpa, sometimes less. They call because they want to know how much wind they can spray in. Is 30 km/h OK? They want my blessing.
I don’t need to hear much more. Some nozzles are sold entirely on the premise that they provide superior coverage – more droplets per square inch – and that this improved coverage permits the reduction of water volumes. Furthermore, the claim goes, when water is reduced, the spray concentration increases and the whole darn package just works a lot faster and better.
This line of thinking is as old as spraying itself. Applicators seek pesticide performance as well as productivity, and this approach gives them both. The proponents are well aware of their customers’ desires, and sell into it. “Use these tips and cut back on water. Any more than this just runs off anyways. You’ll get better coverage and better performance, get more spraying done.” It’s a convincing argument. Get an edge on your neighbour, the person who’s not in on the secret and is wasting time and water.
Why don’t I embrace it? There are a few reasons.
First, it doesn’t tell the whole story. Invariably it involves a twin nozzle setup. Use two nozzles, get more droplets, right? If that were true, believe me, I’d be advocating for quintuples.
Fact is that the only factors that change droplet numbers are droplet size (spray quality) and water volume. Want more droplets at the same water volume? Make the spray finer. Want to keep spray quality and add droplets? Add water (not nozzles).
The easiest way to improve coverage at the same volume is to use a finer nozzle, or to increase spray pressure. Depending on how far you go, you could make the spray finer and cut water, and still have more droplets per square inch.
The hardest way to improve coverage is to purchase a twincap and buy two nozzles, each of them half the size. True, within any given nozzle type, smaller sized tips usually generate finer sprays. But why bother with two tips? They’re more expensive and plug more.
If someone asks me how to improve coverage without changing water volume, I usually tell them to speed up a few mph. The rate controller will increase pressure and the spray gets finer. If speeding up is not possible, get one size smaller nozzle and run at higher pressure, same speed. Or keep nozzle and speed, and add some gpa, pressure will go up. It’s that easy. No twins necessary.
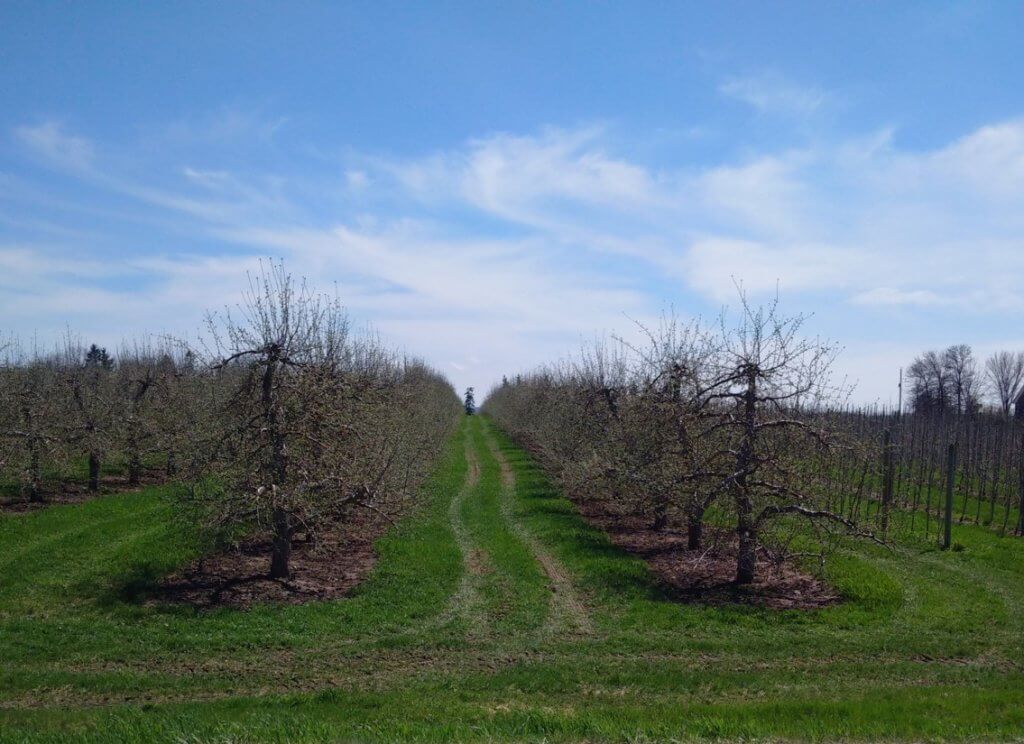
Second, the twin nozzle/low volume approach exaggerates the value of the twin nozzle for herbicides. With small plants and relatively open canopies in the early season, plus our high booms and travel speeds, the twin tips are not adding a lot, if anything at all, to coverage. It remains a sum of droplet size and water volume, the angle is not important at this stage. Deposit is by turbulence and wind, most of the time.
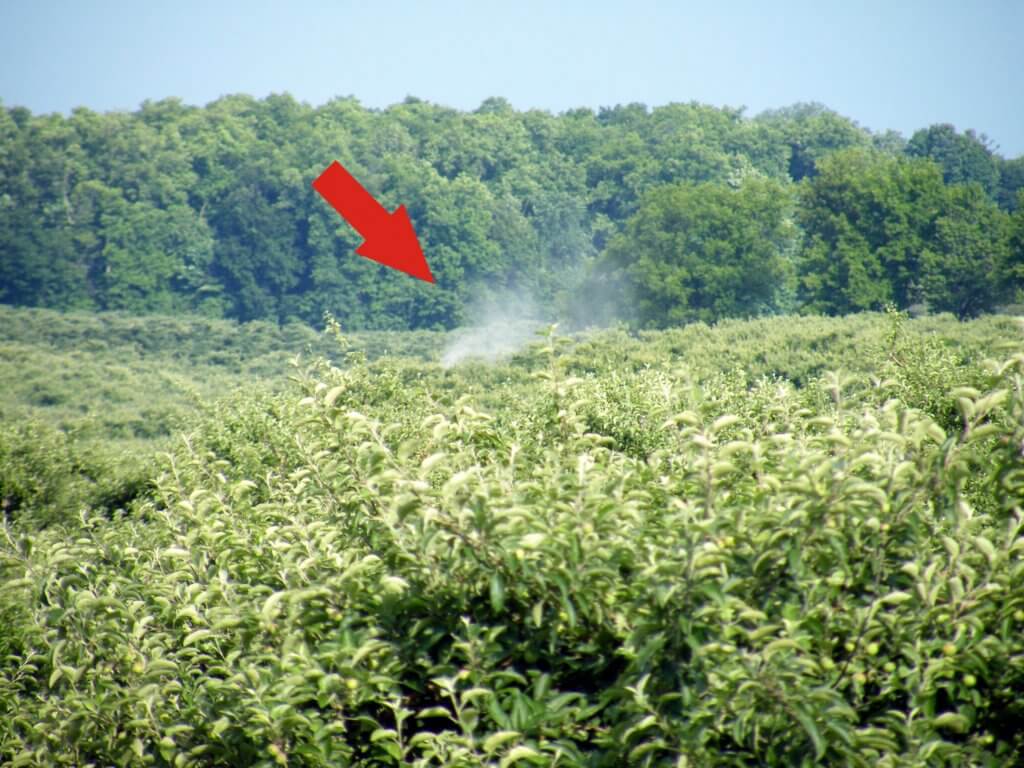
Third, low volume believers ignore a few potential problems. Drift is a big one. Low volume, fine spray operators are surrounded by nervous neighbours. They have fewer hours per day during which drift is acceptably low. And they definitely should not be on the field when wind is at 30 km/h. Basically, they’re a bit uncomfortable (at least they should be) and get less done per day.
Another potential problem is evaporation. Most sprays, even when applied at lower volumes, are still 90% or more water. The same volume of water evaporates much quicker when atomized into smaller droplets. This has two main downsides: On their way to the canopy, small droplets evaporate and become even more drift prone, and may not impact at all. Those that impact evaporate shortly thereafter. Research has shown that pesticide uptake is better from wet than dry deposits.
When Delta T (dry bulb minus wet bulb temperature) is high, evaporation can be so strong that it reduces pesticide performance or causes solvent burn. Fine sprays make it worse.
I also hear about the use of oily adjuvants to control evaporation from small droplets. This could be even more dangerous. Small droplets drift, and evaporation to dryness is actually helpful in reducing the impact of that drift. How? It makes the small droplets disappear, with their remnants dispersing into the turbulent atmosphere. With oily adjuvants, the small droplets stick around and stay potent and their drift damage is much worse.
Lastly, the practice is possibly off label. Water volume and spray quality label statements are designed to offer good performance and acceptable drift risk. While that part of the label is often a bit dated, it does provide better support from the manufacturer should something go wrong.
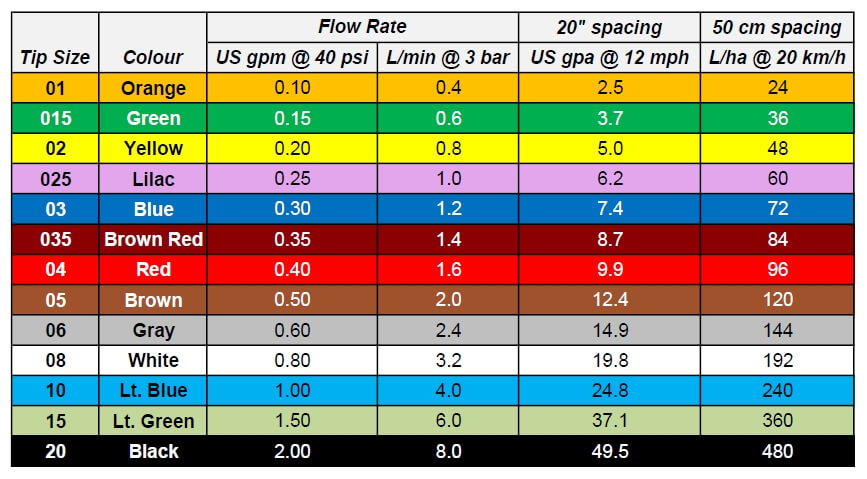
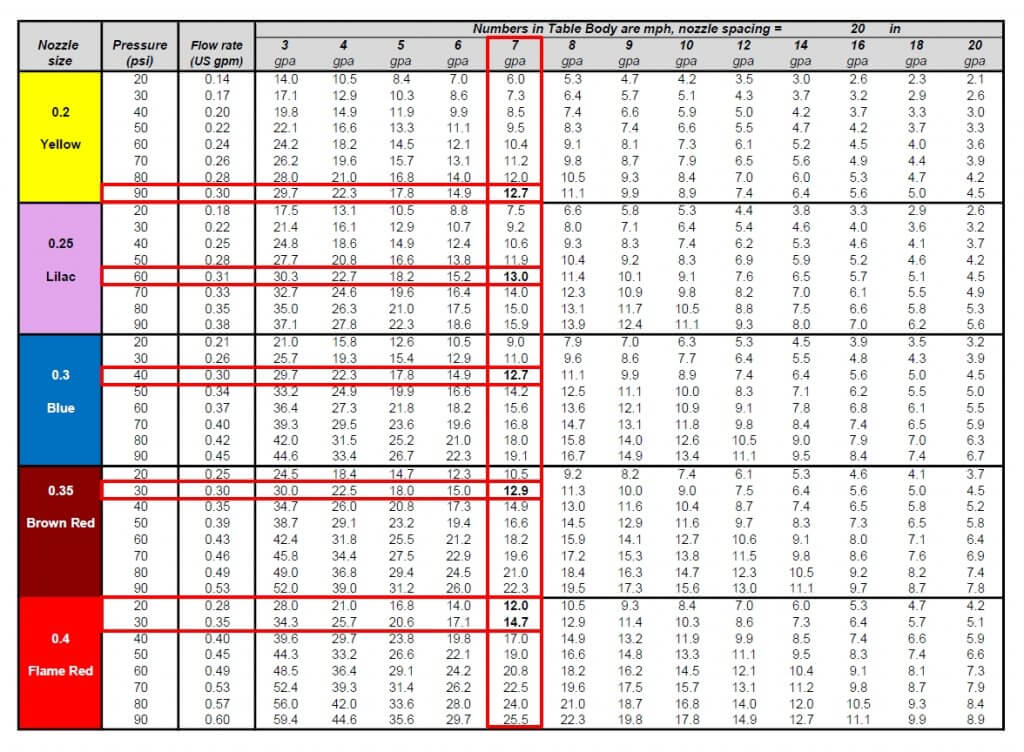
If you’re spraying under hot, dry and windy conditions, the low volume, fine spray approach is irresponsible. Use sufficient water (7 to 12 gpa) to allow low-drift sprays, at least Coarse to Very Coarse, in some case, even coarser.
Agronomists provide the best possible information for their clients, based on scientific evidence and experience and in accordance with their professional code of ethics. Sometimes the news we deliver aren’t what the customer wants to hear. But we have to represent the interests of all of us, collectively. I find that pretty important.