Category: Featured Article

Articles that are featured on the homepage

  • Comparing Fluorescent Dyes for Spray Coverage Evaluation

    Comparing Fluorescent Dyes for Spray Coverage Evaluation

    I work in agricultural extension and I’m always on the lookout for new methods to help me achieve my goals. A big part of my job is to research and teach efficient, effective and safe crop protection practices, so it follows that I have to be able to evaluate the quality of a spray application. Fundamentally, there are two ways to do it:

    1. Wait to see if the pesticide did its job and protected the crop from weeds / bugs / disease.
    2. Don’t wait. Confirm your spray is depositing where you want it before committing to the application.

    Three guesses which approach I advocate. So, how do you check spray coverage in a way that’s quick, cheap, easy and informative? Again, there are choices, but rather than simply list them I’ll add a little insight in the form of pros and cons.

    MethodProsCons
    Water sensitive paperRelatively cheap, available, clean, easy, repeatable, supports a photographic record, simple to analyze.Does not accurately reflect coverage on plant surface, slow to place and retrieve, can be spoiled by dew, humidity and physical contact.
    Inspecting for residue / wetnessCheap and fast.Not proactive, too subjective, not repeatable, pesticide many not leave visible residue, requires re-entry soon after spraying.
    Inspecting spray pattern (e.g. shoulder check)Cheap and fast.Not proactive, not indicative of coverage, not repeatable.
    Watching for run-offJust don’t.Just don’t.
    Fluorescent dyesReflects actual, whole-canopy coverage and off-target coverage at same time.Expensive, hard to find, messy, time-consuming, hard to photograph, not repeatable, leaves unwanted residues (or can’t be used on edibles), may have to take place at night, may fade quickly… or is any of this actually true?

    I’ve never been a proponent of spraying dyes because of the reasons I listed in the table. If I already have difficulty convincing a grower to leave the sprayer or tractor cab to place and retrieve water sensitive papers, what are the odds of them mixing a messy and expensive tank of dye and waiting until twilight to see the results?

    On the other hand, dyes are compelling. Particularly if we change the perspective a little. What if we consider the use of dyes, not as a tool for a grower, but as a tool for agricultural extension or consultation (really, anyone that wants to research or teach the safe and effective use of crop inputs)? Several of the cons are minimized or even eliminated. Additionally, this new lens reveals several uses for dyes beyond spray coverage. This is not an exhaustive list:

    • Off-target (primarily drift) evaluation
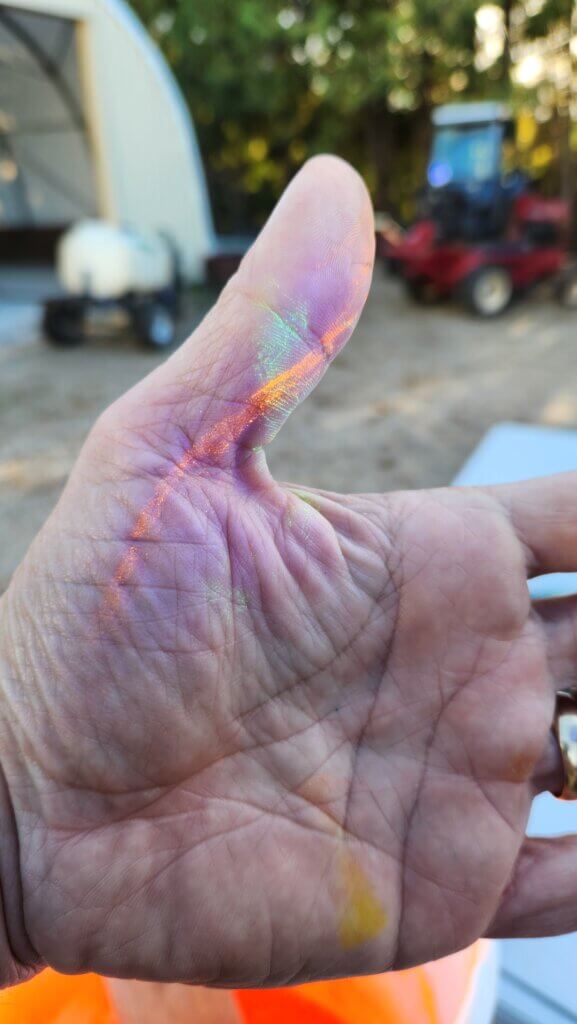
    • Dermal exposure / PPE evaluation
    • Rinsate / sprayer cleanout evaluation
    • Sprayer loading / point source contamination evaluation

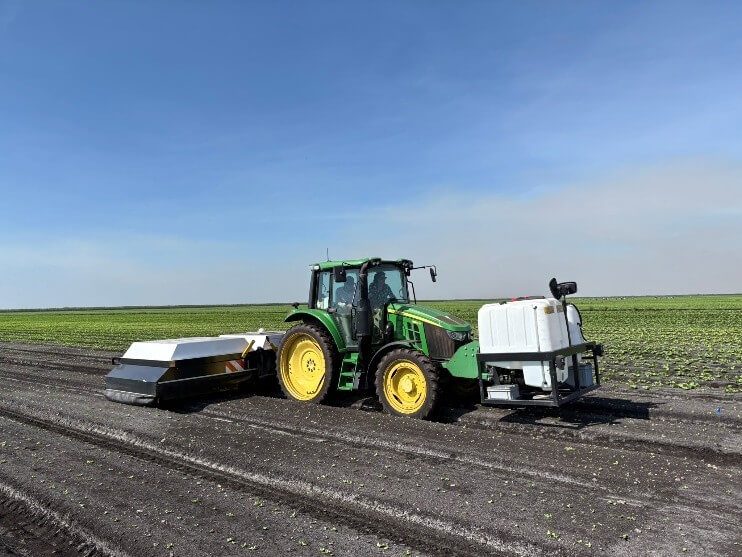
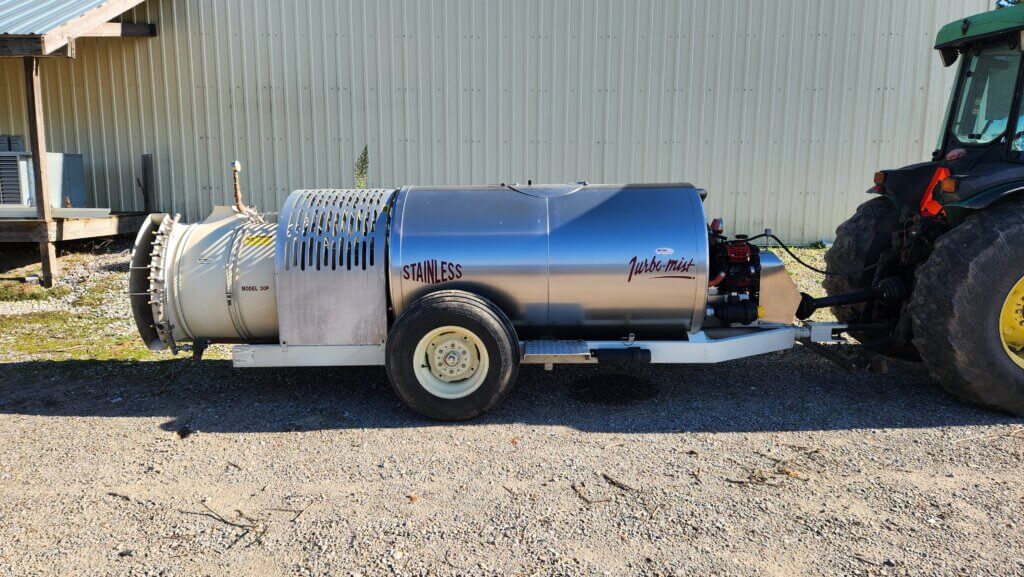
    I decided to compare a few of these dyes. I enlisted the help of a local blueberry operation. Being October, all the berries have been picked so we could spray the bushes without any risk to the fruit. Plus the sprayer was clean and the growers were curious to evaluate their spray coverage.

    Blueberry in Ontario in October.

    Having secured a location, spray equipment, and operator, I needed dyes and some criteria for choosing them. First and foremost, I chose fluorescent dyes that glowed under UV (aka black lights). My thinking was that they would be more interesting in demos, and given that we might be spraying horticultural operations, I didn’t want obvious and persistent stains on the produce. At least not something easily seen in daylight before it broke down and/or was washed away.

    My UV dye candidates had to be:

    • Moderately inexpensive.
    • Non-toxic (i.e. had an SDS that clearly permitted human exposure, were environmentally friendly and could be sprayed on edible crops).
    • Readily available in Ontario (e.g. quickly and cheaply shipped from within Canada or perhaps the US).
    • Available in formats that facilitated small volume batches (anywhere from 50 mL squirt bottles for indoor demos, up to 50 L volumes for field demos).
    • Clearly visible on plant tissue.

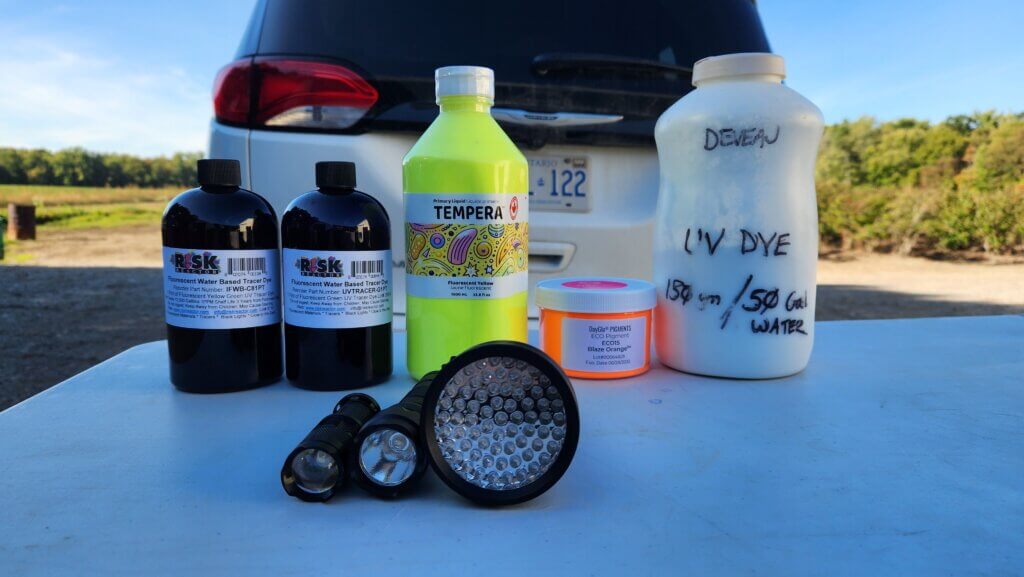
    I found five likely prospects for the study. I won’t list prices, but none of them were over $100.00 CAD. Number 3 was a free sample and number 5 was gifted to me by a colleague more than 15 years ago. I looked up the SDS for that last one and was surprised that it was relatively inert. So, I used it.

    Dye numberName of dyeCommercial sizeManufacturerLocation
    1IFWB-C81PT1 pintRisk ReactorCalifornia, USA
    2UVTRACER-G1PT1 pintRisk Reactor
    California, USA
    3Eco Pigment Blaze Orange SPL15JXSample size – 100 gramsDayGloCleveland, Ohio, USA
    4Fluorescent Yellow Tempura Paint1 literTri-Art ManufacturingKingston, Ontario, CA
    5Phosphor Powder (Zinc Orthosilicate: Manganese CAS#11-47-2)1 kgGlobal Tungsten and Powders Corp.Pennsylvania, USA

    I also purchased UV lights. When I was bequeathed the phosphor powder it came with heavy, ancient, black lights. They made an unsettling humming noise and required a power source, making them unwieldly for field work. I opted to try three battery powered versions instead. Again, I won’t list prices, but they weren’t unreasonable.

    UV flashlight numberName of lightManufacturerWavelength / wattageBatteries
    1Super TacRisk Reactor395 NM / 850 µW/cm2 at 5 inchesRechargeable battery provided
    2Mini ZoomRisk Reactor395 NM / 1 watt1 AAA
    3V3 UV Flashlight with 68 LEDsAmazon.ca395 NM / 10 watts3 AA

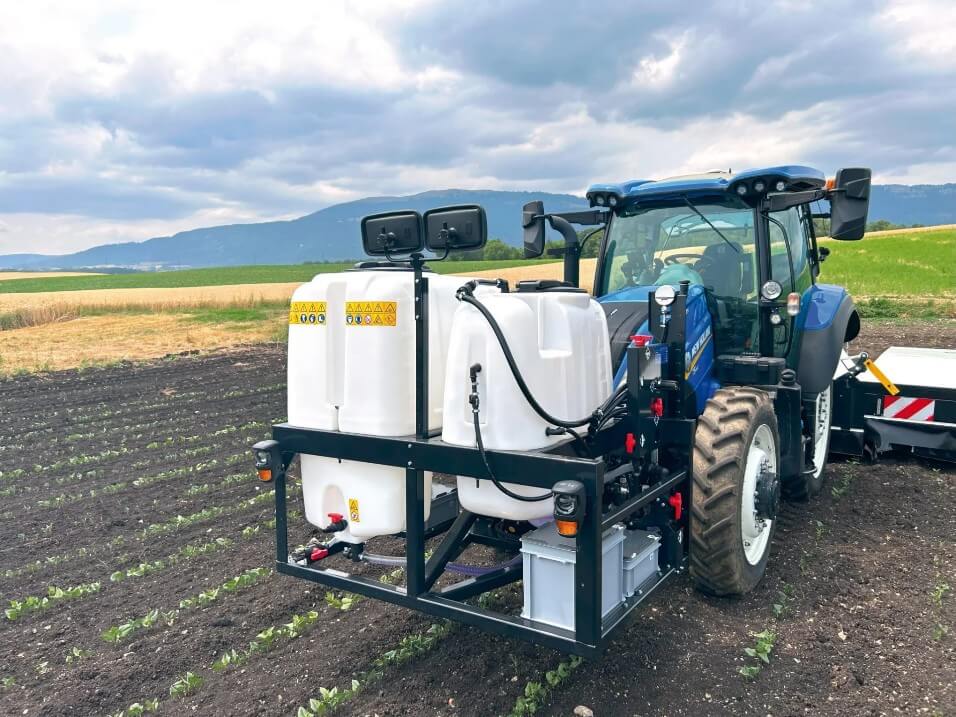
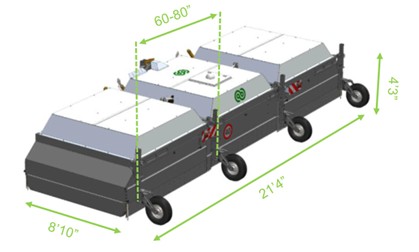
    Regarding the recipes, one of my criteria was that the dyes could be mixed in relatively small batches. I chose 50 L as the high end because the airblast sprayer we were using (Turbo-Mist 30P) could still prime when only 50 L was added to the tank. This allowed us to mix as small a batch as possible, while still having enough to spray a row of berries from both sides. We left three rows between treatments to serve as buffers.

    Turbo-Mist Model 30P before the dye-job.

    I also had to consider the nature of the dyes. The Eco Pigment (Dye 3) is a hydrophobic powder and two colleagues warned me that it was notorious for plugging filters. So, it had to be mixed with a non-ionic surfactant (NIS) to help “wet” the powder prior to adding it to the tank. In fact, NIS seemed like a good idea for all my dye candidates, so I included Activate Plus (Sollio Agriculture, Winfield Solutions) in each recipe.

    The candidates.

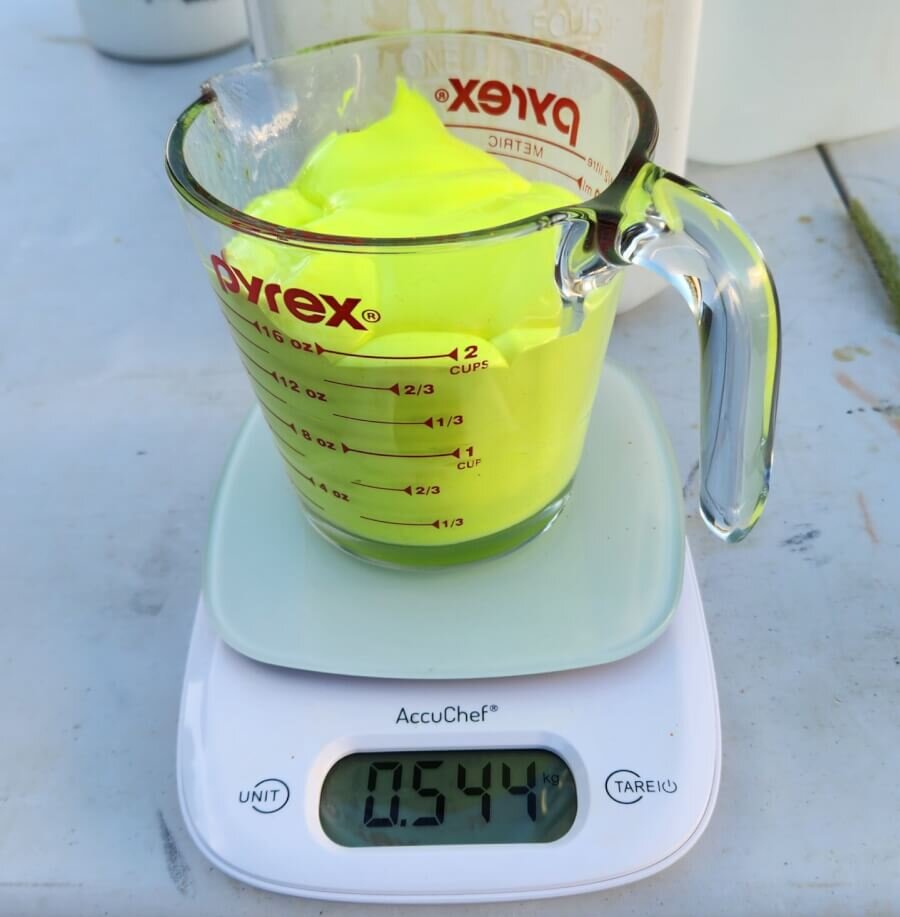
    I added the dye, NIS, and a small amount of water to a Pyrex measuring cup on a digital scale, then rinsed the cup into a final volume of 50 L while filling the tank. I didn’t always follow the advice I received, so I’ll show you the ratios I was told and (right or wrong) what I ultimately did.

    Dye numberManufacturer- or colleague-suggested ratio Amount of dyeAmount of NISAmount of water
    11 part dye : 10,000 parts water125 mL65 mL310 mL
    21 part dye : 10,000 parts water125 mL65 mL310 mL
    31 gram dye : 1 mL NIS : 200 L water65 grams65 mL425 mL
    41 part paint : 100 parts water500 mL65 mL0 mL
    51 gram dye : 1.25 L water65 grams65 mL425 mL

    It took roughly 15 minutes to fill, prime, spray, and rinse out each dye. We started at 5:00 p.m., were done at 6:15, and then waited for sunset at 7:30.

    50 L tank mixes going through circulation and paddle agitation.
    Draining the remains and rinsing the tank. It looks terrible, but these dyes are intended for environmental projects like tracing water courses.

    We used a smartphone (Google Pixel 9a – 48 megapixel camera) to photograph each combination of dye and flashlight. It was tricky to find an angle where the black light illuminated the residue, but didn’t wash out the photo. In those cases where the dye was evident, it was always far more vibrant in person than through the lens of a camera. As for the results?

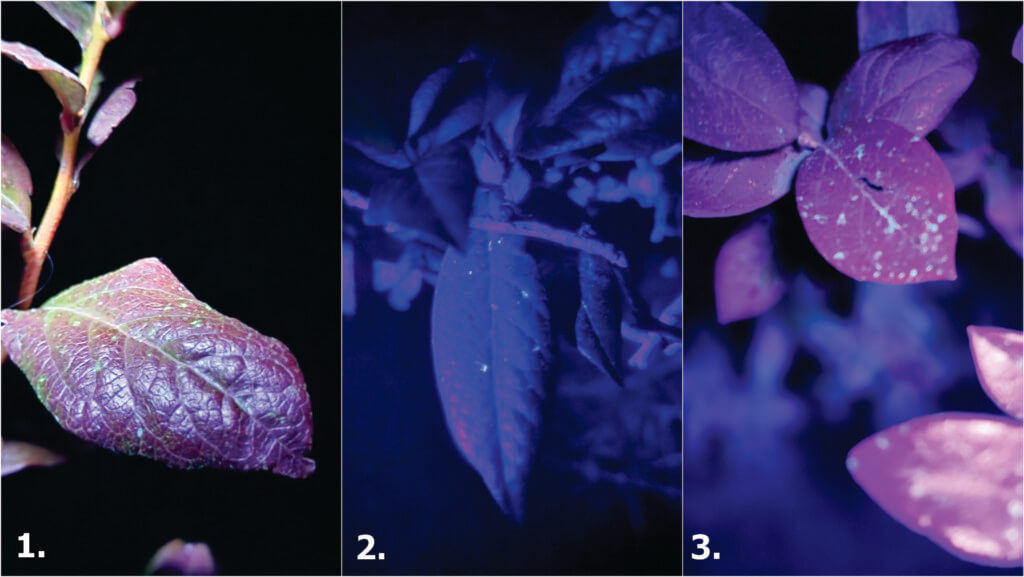
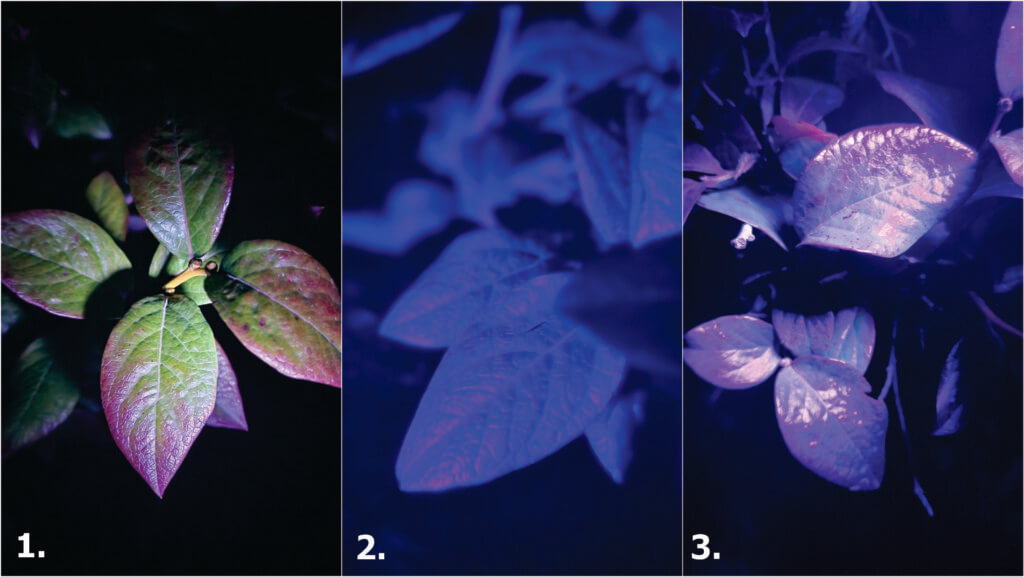
    Lets start with the lights. We found that the high wattage of Light 3 showed dye more easily. This also happened to be the cheapest light, which was a pleasant surprise.

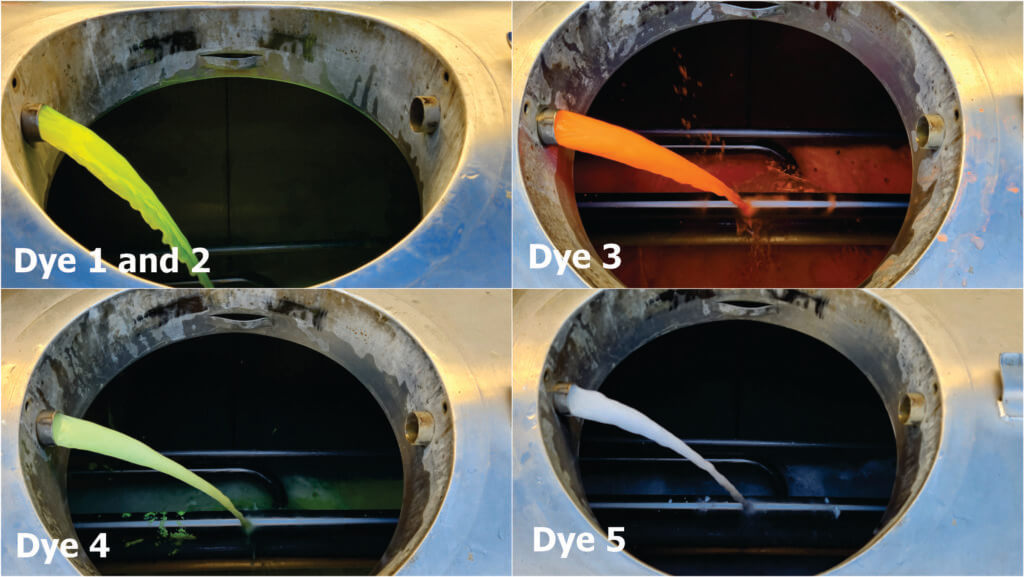
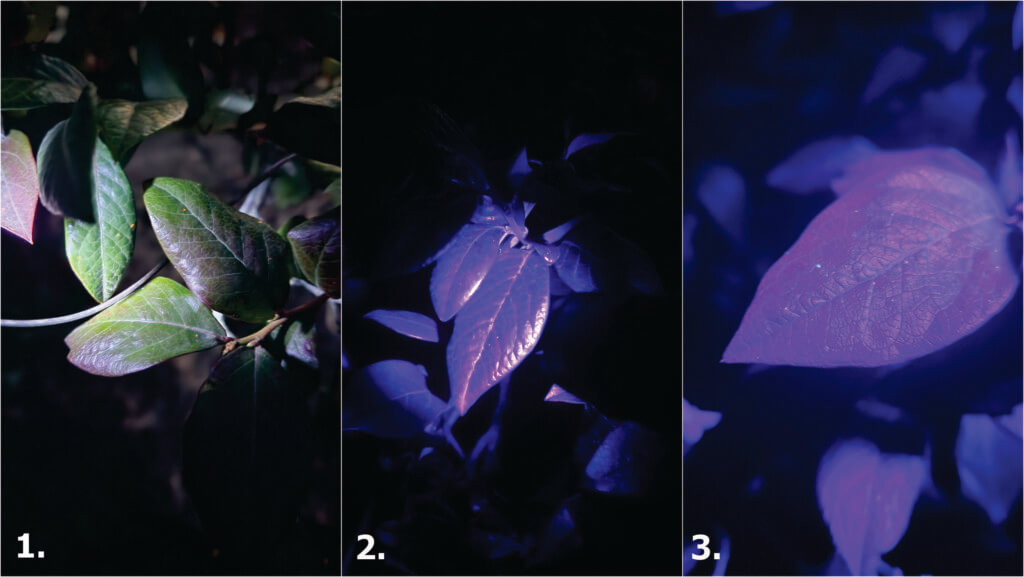
    Dye 1 and 2 were disappointing. We couldn’t see anything on the plants. This dye is intended for monitoring plumbing and water courses, and the manufacturer states that the colour will disappear if the solution is mixed with chlorine. Perhaps mixing it with city water caused it to fade, but that’s likely to happen, so these dyes failed.

    Dye 1 – Light 1, 2 and 3. A sad, single drop showed up for Light 3.
    Dye 2 – Light 1, 2 and 3. Again, a solitary deposit illuminated under Light 3.

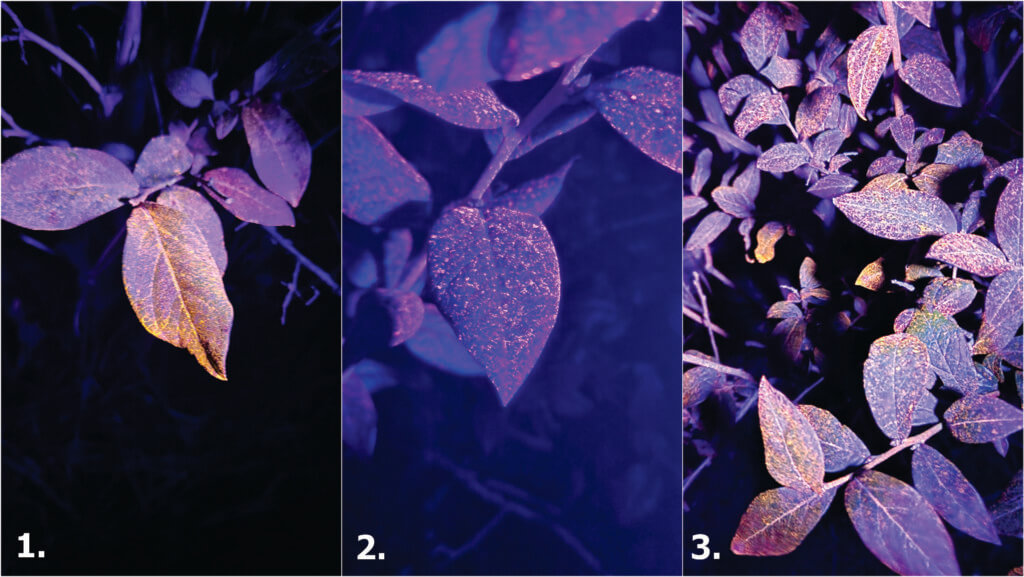
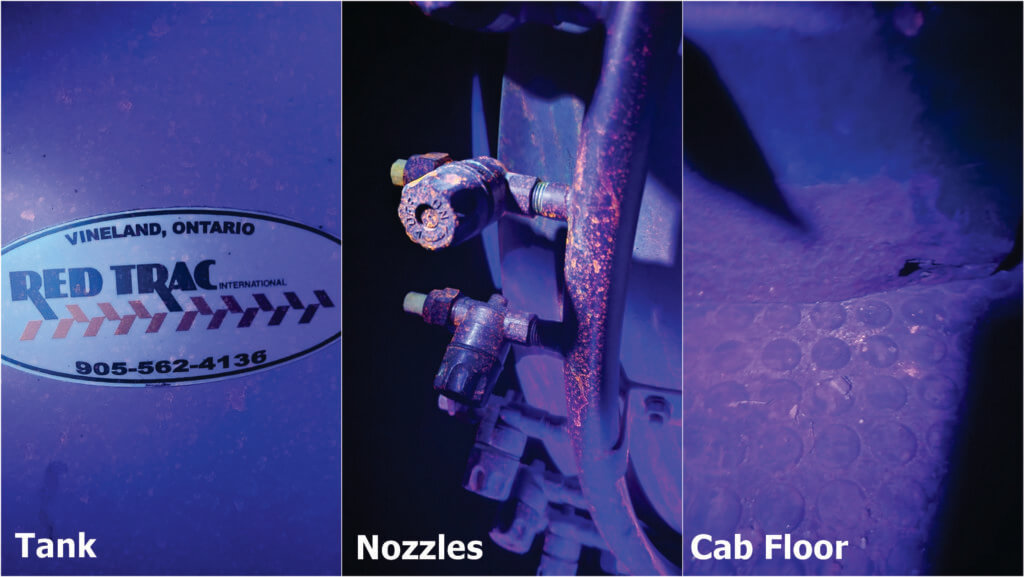
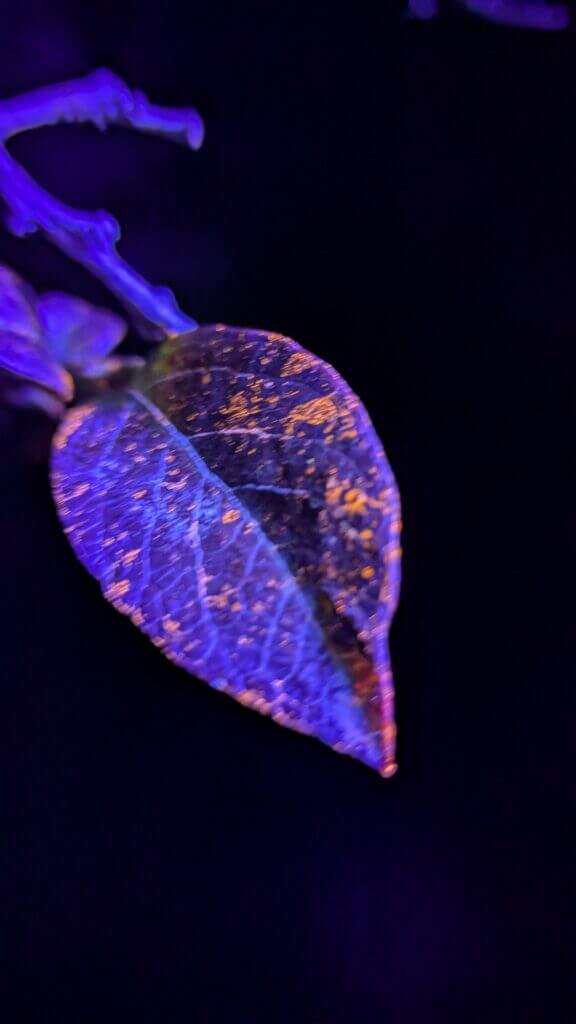
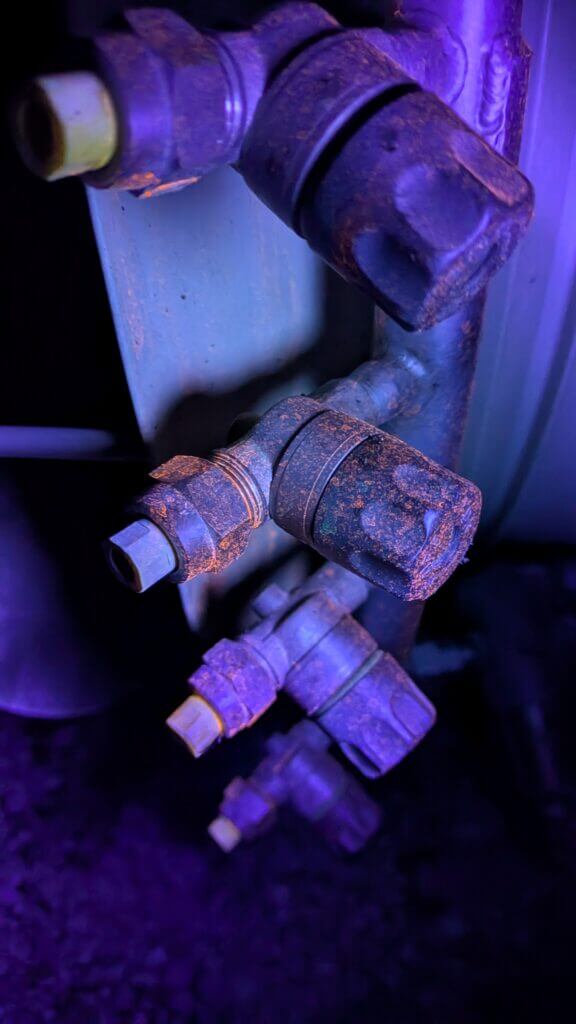
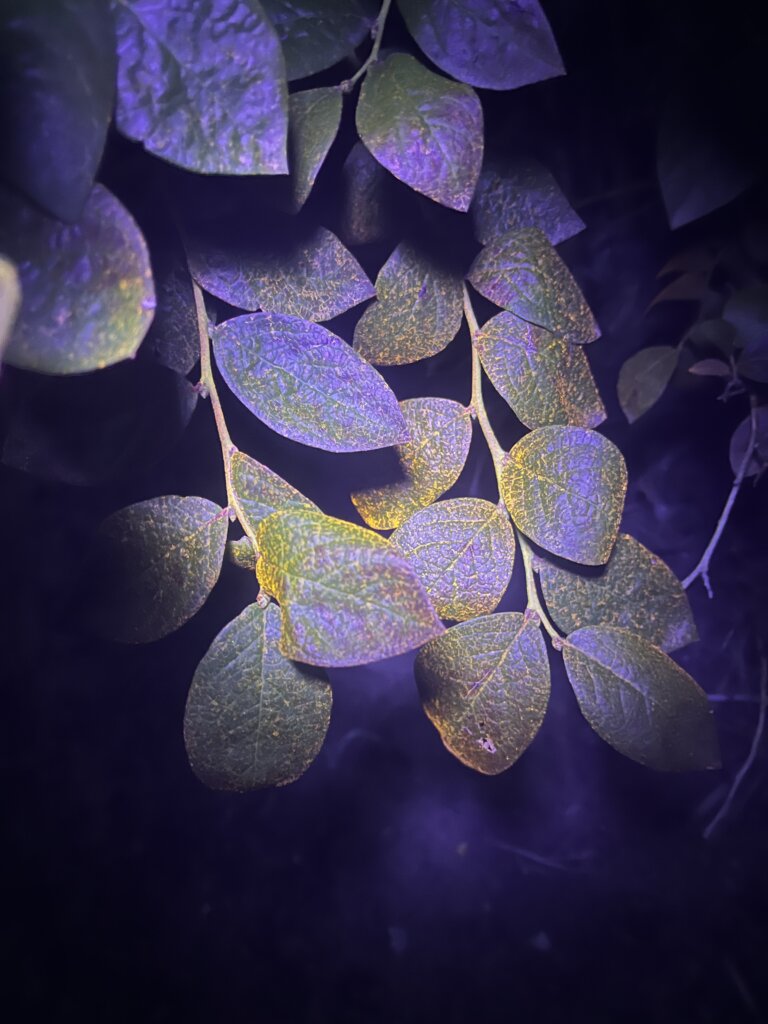
    Dye 3 was spectacular. Not only was it evident with every light source (including day light to some extent), but we were able to find it several rows downwind, on the sprayer nozzles, all over the tires and on the floor of the cab (which surprised the operator). I may have mixed this one too strong; It seemed to clump on the leaves, but perhaps that’s because they were exceptionally waxy.

    Dye 3 – Light 1, 2 and 3.
    Dye 3 showed up everywhere… whether we wanted it there or not.
    A nice close up of Dye 3 on a leaf.
    A close up of Dye 3 on the boom.

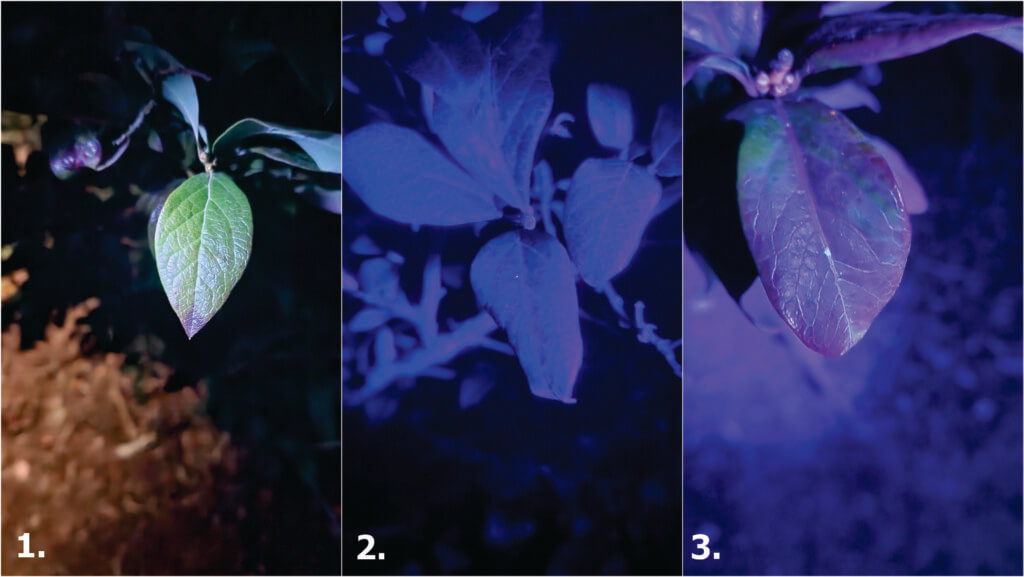
    Dye 4 came in second place. It wasn’t amazing, but it was visible. This is children’s tempera paint, used in daycares for finger painting and at universities for raves. I’ve used it in the past with mixed results, not only to spray canopies, but in classroom demos on cabbage leaves and as a surrogate tracer to hunt down where pesticide hides in sprayer plumbing. It’s OK in a pinch if you mix it at least 2x more concentrated than I did here.

    Dye 4 – Light 1, 2 and 3.
    A nice close up of Dye 4 on a leaf.

    Dye 5, like dyes 1 and 2, was a disappointment. I’ve seen it used in powder-form to demonstrate how dermal exposure can spread as you touch clothing, doorknobs, your face, and places where the occasional adjustment is required. But in a liquid solution, it wasn’t any good at all.

    Dye 5 – Light 1, 2 and 3

    Persistence

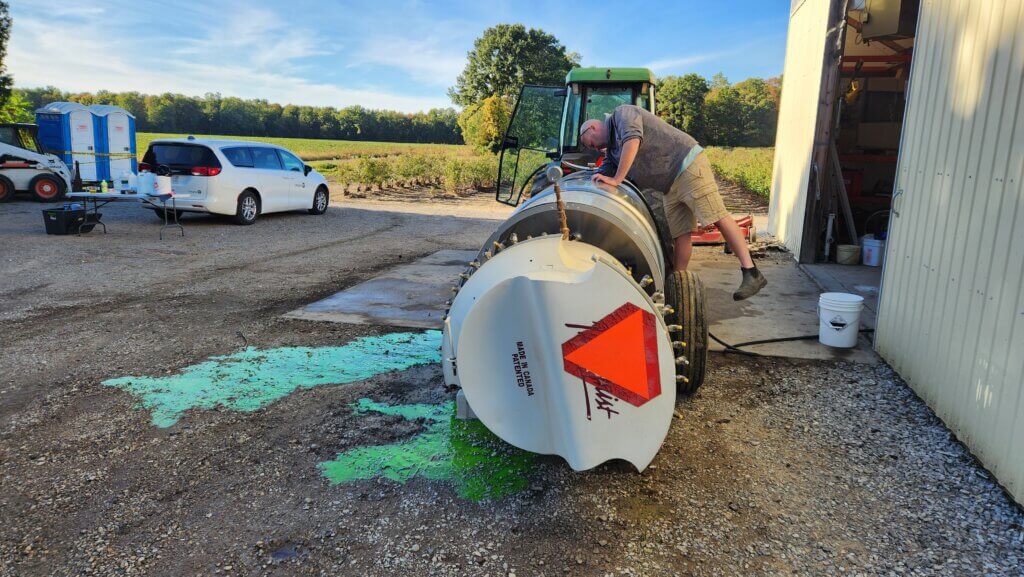
    We followed up after the application to see if the dyes would persist. Twenty four hours after application, Dye 4 (our runner-up) was gone. This was no surprise given it was a water soluble paint and wasn’t terribly showy to begin with. However, Dye 3 (our winner) was still clearly in evidence. This is a hydrophobic, micro ground powder (~0.1 micron). That’s one reason it had to be mixed with a non-ionic surfactant. The following photos shows little or no change after 24 hours and a respectable dew:

    Dye 3 after 24 hours.

    Three days after application (DAA), we had a rain event. Four DAA this (blurry, sorry) image was taken:

    Dye 3 after 96 hours and a heavy rain.

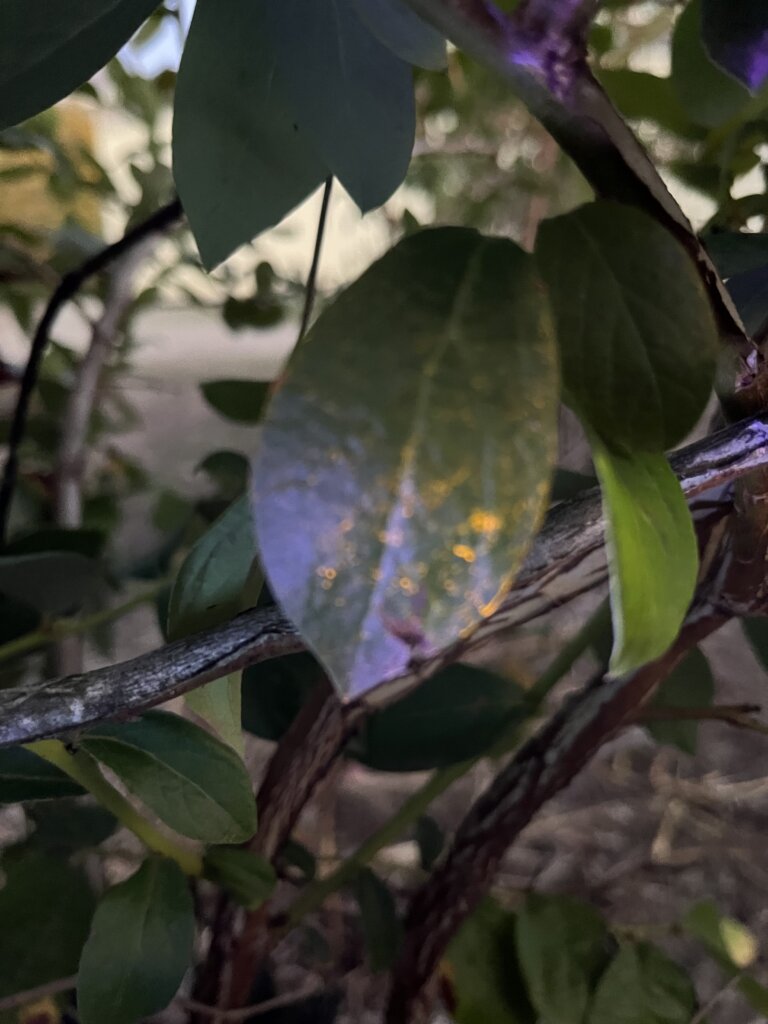
    We see that the deposits did redistribute to drip points and the overall coverage was reduced, but it was still holding on. This means it likely shouldn’t be used on any horticultural crop that isn’t going to be washed. Or at least used long before any fruit, leafy green or vegetable contacted by the powder will be harvested. Not because it is unsafe (see safety data sheet) but because of the optics to buyers.

    Conclusion

    And so, I hope you have been inspired by this process. I’ve learned that the use of dyes for education and research is potentially powerful, relatively cheap, and more accessible than I originally thought. Certainly the growers were impressed by what they could suddenly see and it’s led them to reassess some of their practices. Just bear in mind the possible persistence, and remember to wear gloves when mixing.

    Wear gloves. Trust me.

    Thanks to Mark Ledebuhr, Helmut Spieser, David Manktelow, and Ben Werling for the helpful advice. Thanks to Brandon and Jordan Falcon for use of their spray equipment and their blueberry operation.

  • Ecorobotix’s ARA Sprayer: A targeted sprayer that’s finding its place in Ontario vegetable fields

    Ecorobotix’s ARA Sprayer: A targeted sprayer that’s finding its place in Ontario vegetable fields

    Targeted spraying is a technology that enables the site-specific application of plant protection products and liquid fertilizers based on sensor readings. Some of the latest machines incorporate computer vision and processing capabilities that can distinguish between different types of weeds and crops based on multiple adjustable criteria.

    The Swiss-made ARA Sprayer by Ecorobotix, has recently generated significant interest among Ontario growers. This article provides a technical overview of the machine, including a detailed explanation of its main features and capabilities.

    The Sprayer

    The sprayer is a two-component system, mounted directly onto the front and back of a tractor. The front unit consists of two separate tanks: one dedicated to the chemical solution and the other to fresh water, which can be used for rinsing or refilling the chemical mixture tank. The front component also includes the pump and processing unit (Figure 1).

    Figure 1- Front-mounted unit.

    The boom section is mounted via three-point hitch to the rear of the tractor (Figure 2). The shrouded boom folds for transport and storage and features 156 individually controlled nozzles (Figure 3).

    Figure 2- Rear unit deployed.
    Figure 3- Closeup of the boom.

    The unit can be controlled and monitored from a tablet or smartphone connected through the machines’ own Wi-Fi. External data connection through internet is only required for occasional maintenance and updates but not for regular field operations. Regardless of the complexity embedded in the smart operating system, the interface is intuitive and easy to manage. Most of the parameters are automatically optimized by the software (Figure 4).

    Figure 4- Tablet interface.

    Capabilities

    Since the intelligent vision system acts as the central controller for each individual nozzle, it enables a wide range of operating modes and potential applications. Depending on user needs, the system can process information and respond in various ways. The following list outlines the currently available and tested features, which may be expanded in the future.

    Banded Spraying

    In this mode, parallel bands of variable width are sprayed, which might include or exclude the crop (Figure 5), depending on the objective. The lines are defined based on AI detecting a planting pattern, which will lead to the automatic definition of the spraying swaths.

    Figure 5- Banded application options: in-row or inter-row.

    Size-Exclusive Spraying

    This option allows targeting the spray based on the plant size. It can either be used to:

    • Detect and spray weeds larger than a small emerging crop.
    • Detect smaller emerging weeds in an advanced-stage crop. Weeds similar in size or larger than the crop will be missed in this case. (see figure 6 – left).
    • Spray only the crop with fertilizers or pesticides when no-specific algorithm has been developed to differentiate it from the weeds. The crop must be significantly larger or smaller than the weeds for this mode to work efficiently. (see figure 6 – right)
    Figure 6- Only plants smaller (left) or larger (right) than a specified target are sprayed.

    Green on Brown Spraying

    The machine will spray all detected green material (Figure 7). This is particularly useful for improving chemical use efficiency in stale seedbed and insecticide applications. It also offers an interesting option to reduce the risk of herbicide carryover in pre-plant, post-weed-emergence control, especially when weed cover is low and the product may persist in the soil long enough to affect the crop.

    Figure 7- Green on brown spray.

    Green on Green Spraying (Six Scenarios)

    The vision system and processing capabilities can identify the crop, distinguish it from weeds, and selectively target either, regardless of plant size. Additionally, a variable safety buffer can be defined to determine how close a spray can be applied to the nearest crop leaf. If this feature is inactive, any overlapping weeds will be sprayed, even if the herbicide contacts the crop. If active, the sprayer will avoid targeting weeds that are closer than the defined safety buffer distance, which can be set up to 16 cm (6.3”).

    The parameters can be configured to cover six difference scenarios:

    1. Selective herbicides when no safety buffer is required

    All weeds will be sprayed, regardless of their proximity to the crop. If they’re very close, the crop might receive part of the spray (Figure 8). This mode is suitable for selective herbicide applications.

    Figure 8- Herbicide application with zero safety buffer.

    2. Non-selective herbicides when the contact with crop canopy should be minimized

    In this case, depending on the potential damage caused by the chemical contacting the crop, a variable buffer can be programmed. Only weeds that can be sprayed while maintaining the defined buffer distance from the crop will be targeted (Figure 9). Inevitably, weeds in very close proximity or overlapping with the crop will be missed.

    Figure 9- Weed target spray with a safety buffer.

    3. Crop-targeted spray

    The machine will detect the crop and will not spray anything else (Figure 10). This can be useful for insecticide or foliar fertilizer applications.

    Figure 10- Crop-targeted spray.

    4. Application of weed pre-emergence herbicides post-crop-emergence

    In this case the entire surface, except the crop canopy is sprayed (Figure 11). It can be utilized to spray herbicides with soil residual activity post crop emergence.

    Figure 11- Pre-emergent herbicide application excluding the crop/

    5. Monocots vs dicots weeds differentiation

    This mode is limited only to onion fields for now. It can be configured to spray only monocots weeds (grasses, sedges) or only dicots weeds (broadleaf). This can be useful to increase the efficiency of post-emergence broadleaf or grass selective herbicide applications.

    6. Specific weeds targeted

    In this mode only the target weeds will be sprayed. As of now, it’s only available for thistles, docks, and common ragwort. It can be used when a specific herbicide is used to target hard-to-control species.

    Speed and Accuracy

    For all applications, the company claims to have a spray accuracy of 6 cm by 6 cm (2.4”x2.4”). The speed of operation will be dependent on the weed size. The larger the weed size, the lower the recommended speed to allow for an optimal spray coverage of the weeds, increasing the treatment efficacy. The speed operating range is 0 to 7.2 km/h (0-4.5 mph).

    Weed coverage or density does not affect the maximum recommended speed, as the machine can process images at such high rates that it is capable of scanning and spraying 100% of the area when moving at full speed. In other words, the processing unit does not need to slow down to detect, differentiate, and target weeds, even when they are present at very high densities.

    Ecorobotix claims the machine can cover 2.8-3.2 ha (7-8 acres) per hour under typical conditions and can run 24/7 independent of light conditions.

    Crop Portfolio

    As of August 2025, the company has developed the following algorithms for specific crop recognition:

    Vegetable Crops:

    • onion
    • carrot
    • lettuce
    • endive/chicory
    • beans
    • spinach
    • broccoli (beta)
    • cauliflower (beta)
    • leek (beta)
    • other cabbages (beta)
    • potatoes
    • sweet corn

    Field Crops:

    • sugar beet
    • rapeseed (canola)
    • corn
    • soy (beta)
    • cotton (beta)
    • wheat (beta).

    For the crops not listed, the equipment can still be used but not with the features that required crop identification for targeted sprays.

    Technical Specifications

    • Minimum weed size required for weed detection: 4 x 4 mm.
    • Maximum plant height: 40 cm.
    • Minimum crop size for proper identification: at least two true leaves.
    • Minimum tractor power: 90 HP
    • PTO: 540 RPM, 4 HP (3 kW) max
    • Three-point hitch: cat 2 front and back.
    • Weight:
      • Front unit: 705 lb or 320 kg (empty), 2,645 lb or 1,202 kg (full)
      • Rear unit: 2,257 lb or 1025 kg
    • Dimensions (Figure 12):
      • Front unit: 5’7” x 4’7” x 5’7” (W x D x H)
      • Rear unit: 21’4” x 8’10” x 4’3” (W x D x H)
    Figure 12- Dimensions.

    Cost of Purchase and Operation

    At the time of writing, the purchase cost for a complete unit is around $300,000 USD, depending on the algorithms purchased and shipping fees. In the following years, there is an annual fee associated with the operating system maintenance and development. The basic subscription includes algorithms for three crops, as well as access to all beta-stage models currently in development. Additional crop algorithms can be purchased. For accurate pricing, contact their Canadian partner, Univerco.

    According to the manufacturer, the equipment does not require regular replacement of expensive components beyond standard sprayer preventative maintenance. While some components are standard and readily available, the company also keeps a regular stock of specialized parts at its warehouse in Pasco, WA, available for immediate shipping. Comprehensive service and maintenance support is provided locally by Univerco.

    Testimonial

    Wendy Zhang is the head agronomist for Keejay farms. She oversees more than 5,000 acres of diverse vegetable crops, predominantly carrot and onions. In her own words, the machine is “easy to operate, very accurate, and fast enough for a large-scale farm.” She also highlighted substantial savings on chemicals and the significant advantage of being able to safely spray close to the crop using products that cannot be broadcasted due to the risk of unacceptable crop damage.

    The most important benefit, she says, is the ability to apply treatments very close to the crop canopy, using effective rates and chemistry without compromising crop safety. No other practical tool offers this capability. A clear demonstration of its effectiveness is that no other spray equipment is currently being used for their large onion operation.

    The Grower Magazine published an excellent article about this machine, featuring other grower testimonials.

    Thanks to Olivia Soares de Camargo, Business Development Manager at Ecorobotix, for providing much of the information used in this article.