Overview
This article expands on an earlier article: here.
Before we dive into the details, let’s start with a quick video summary filmed by RealAgriculture at Canada’s Outdoor Farm Show in September, 2016.
When the pressure drops and the nozzles begin to sputter, the sprayer is considered empty. However, it can still retain a lot of spray solution. Repeated rinses or tank dumps in the same location can lead to accumulation and cause point source contamination.
In response to unacceptably high levels of environmental pesticide contamination, the European Union published an amendment to their directive regarding machinery for pesticide application (2009/127/EC). Their intention was to raise the standard of equipment design to reduce the standing volume of spray solution, and to improve cleaning practices. In order to comply, sprayer technology and operator practices would have to change. But the the amendment didn’t specify how, or to what level.
France (2006) and Denmark (2009) legislated that a rinsed sprayer must not have more than 1% or 2%, respectively, of the original tank mix concentration, as sampled at the nozzle. In response, P G Anderson et al. suggested that residual concentrations should be sampled from at least three places on the sprayer. They conducted research (download here) that showed that both field and airblast sprayers can retain 10-15% of the original concentration in the empty/fill valves, boom ends and filters, while rinsate measured 1-2% at the nozzle. They also stated that in order for sprayer designers, operators and authorities to comply with these new rules, someone had to develop a simple but robust method for cleaning sprayers.
Continuous cleaning
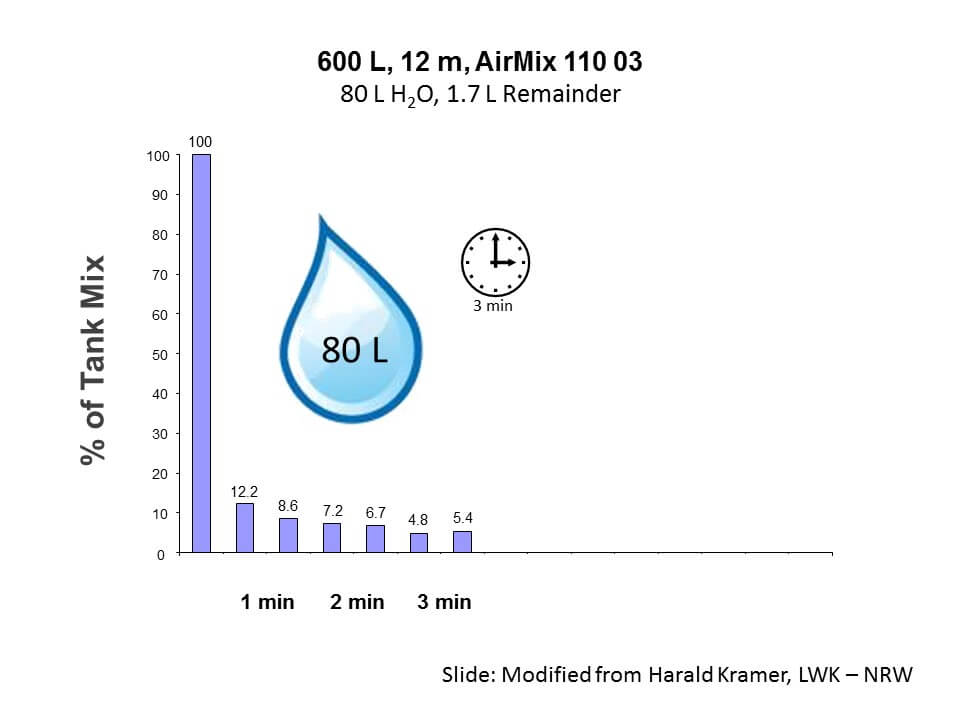
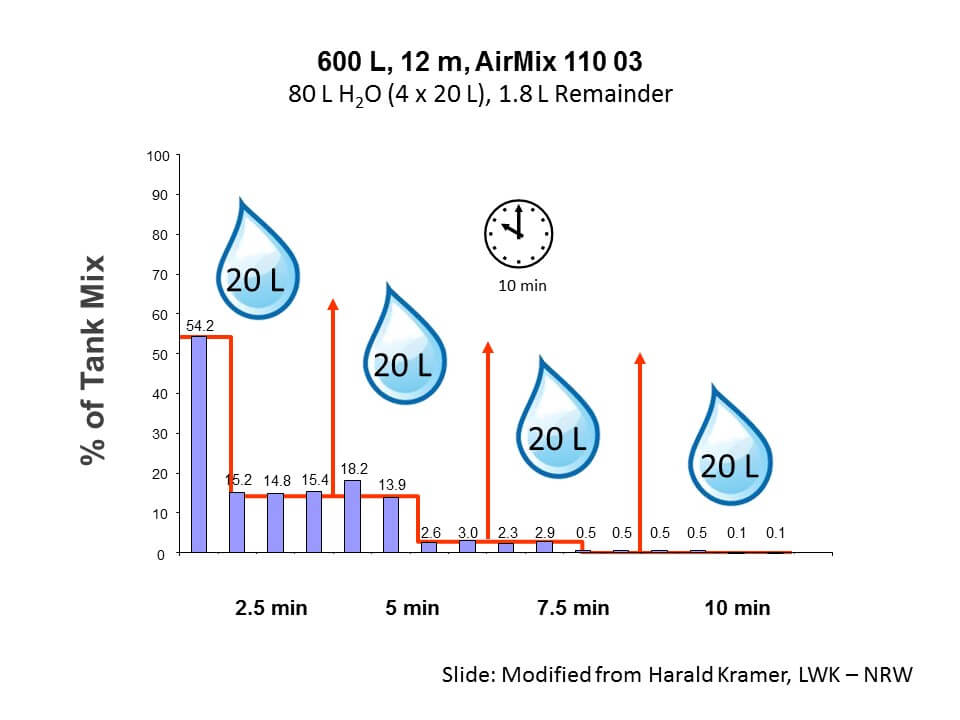
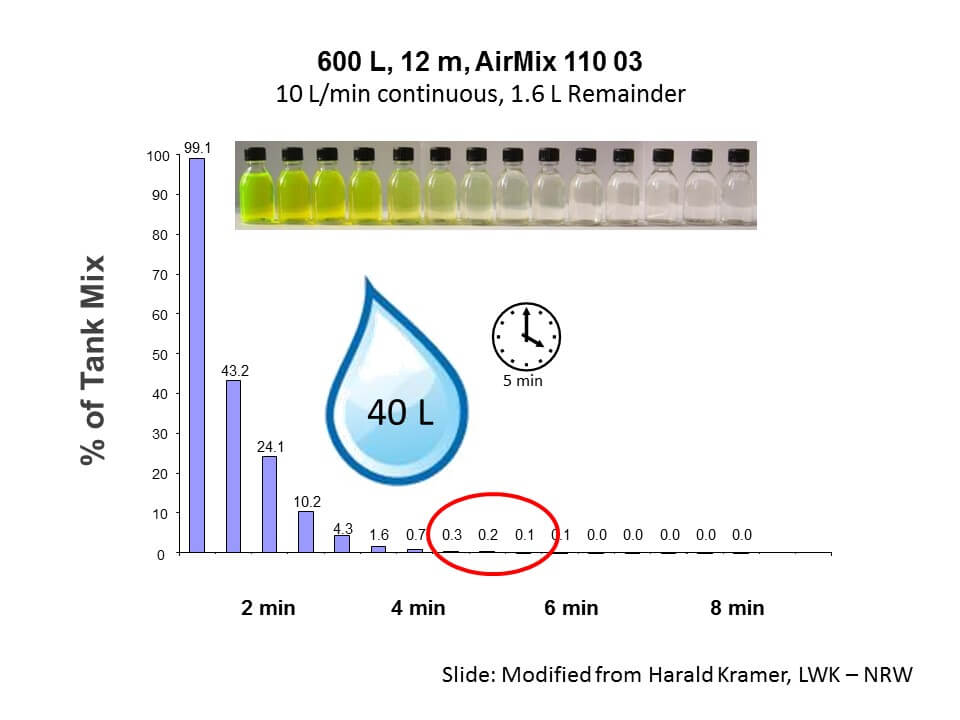
In a later paper, the author and his team proposed a method called “Continuous cleaning” (download here), which employs a dedicated clean water pump to push spray solution from the tank and out the boom in the field. For comparison, the traditional triple rinse method employs the main pump to dilute the remaining spray solution with clean water in a series of rinses and sprays. You can learn more about point source contamination and rinsing methods in this clear and informative presentation by P. Balsari and P. Marucco (download here) given in 2015 at the University of Turin in Italy.
The continuous cleaning method isn’t new. In the 1970s some farmers cleaned their sprayers by plumbing a water supply hose into the suction line while spraying out the rinsate. They were on to something, because formal testing in the late 1990s showed that continuous cleaning was more efficient than triple rinsing. Then, from 2005 onward, research by groups such as betterspraying aps, TOPPS, the Julius Kuhn-Institut and AAMS further refined the process for both field and airblast sprayers.
Anderson et al. made compelling claims about the continuous cleaning method. They stated that a 4,000 L sprayer with a 400 L clean water reservoir would require only 100 L to clean the plumbing as effectively as triple rinsing, which would require the entire 400 L. The remaining 300 L could be used to rinse the exterior and the entire process could take place in the field, in rotating locations. Perhaps most intriguing of all was that it would only take five minutes.
But, it is important to note that their rinsate samples came from the nozzles, as required by France and Denmark. The issue of higher concentrations in dead-end plumbing is not addressed.
European adoption
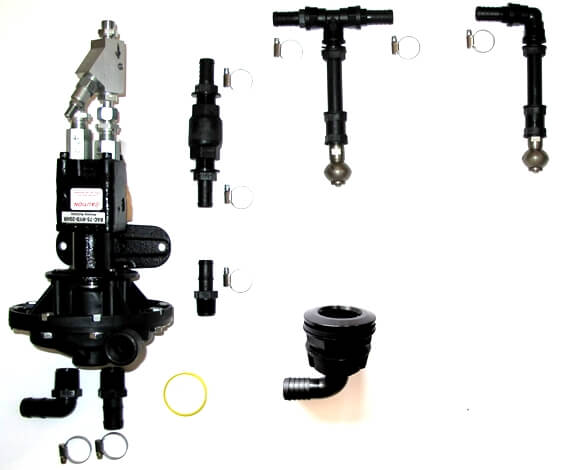
In anticipation of the regulations, some manufacturers were already developing continuous cleaning kits to upgrade sprayers of all makes, models and ages. In Denmark (and to a lesser extent in France and Germany) these kits were used at workshops to upgrade sprayers. But, the installation process was not always straight-forward.
Some kits performed better than others and expertise was needed to match the flow rate, tank rinse nozzles and the pump’s power requirements to the sprayers. Depending on the sprayer’s design, it sometimes required trial and error to establish a process of opening and closing valves during rinsing. Independent testing showed that many sprayers were greatly improved,(download here) but others proved incompatible due to the volume or inaccessibility of residual spray mix remaining in the plumbing. Specific cases include dead-ends on boom sections, or exceptionally long return lines on circulating booms
Defining a fit for North America
In early 2016, we wrote a preliminary article describing what we knew of the method and it created a lot of interest. We decided to test it our for ourselves in a demo at the Canadian Outdoor Farm Show. But before we describe what we did, let’s clarify a few terms. You may have noted that in Europe the process is called “Continuous cleaning” but moving forward we will refer to the method as “Continuous rinsing”. This is because we feel cleaning a sprayer and rinsing a sprayer are different processes with different objectives.
“Cleaning” a sprayer is a total decontamination that should be performed when changing chemicals and at the end of every spray day. It requires the use of a detergent and any label-required additive (such as ammonia following the new dicamba products). Perhaps most importantly, it requires the operator to address the dead-end plumbing areas. There is no universally-accepted process, but we describe fairly common protocols for field sprayers here and for airblast sprayers here.
“Rinsing” is a less intensive process intended to reduce the amount of residue that can build up on, or soak into, sprayer surfaces. Water is brought into contact with most of the plumbing to dilute any solution left in the sprayer, and is then sprayed out in the field. This process should be performed every few loads, or when moving an empty sprayer between fields, or if the operator has (perhaps unwisely) decided not to clean the sprayer at the end of the day because they are spraying the same chemical tomorrow. Often, this is accomplished using the triple rinse process, which we describe here:
Triple Rinse Process
- The pressure drops and nozzles sputter (i.e. spray tank is empty).
- If the sprayer has an inductor bowl or loading bypass, and if the operator doesn’t already rinse these systems following filling, the operator will exit the cab, open the valve to clean water reservoir, and use a portion of the clean water to clean these circuits. In some cases, the rinse process can be performed without the operator having to leave the cab.
- Sprayers with dead end plumbing on boom section ends warrant special consideration. Spray mix can be harboured in the dead ends and is a significant source of contamination, no matter how much rinsing is performed (see video). Therefore, the first rinse (step 5) should be interrupted before it is complete to allow boom ends to be opened, flushed and closed.
- The operator then introduces 1/3 of the clean water reservoir to the spray tank through the rinsing nozzle(s) and circulates for 5 minutes (including the agitation line).
- The operator returns to cab, and drives to spray the volume out in the field until the nozzles sputter.
- Operator exits the cab and introduces 1/3 of the clean water reservoir to the spray tank through the rinsing nozzle(s) and circulates for 5 minutes (including the agitation line).
- The operator returns to cab, and drives to spray the volume out in the field until the nozzles sputter.
- Operator exits the cab and introduces 1/3 of the clean water reservoir to the spray tank through the rinsing nozzle(s) and circulates for 5 minutes (including the agitation line).
- The operator returns to cab, and drives to spray the volume out in the field until the nozzles sputter.
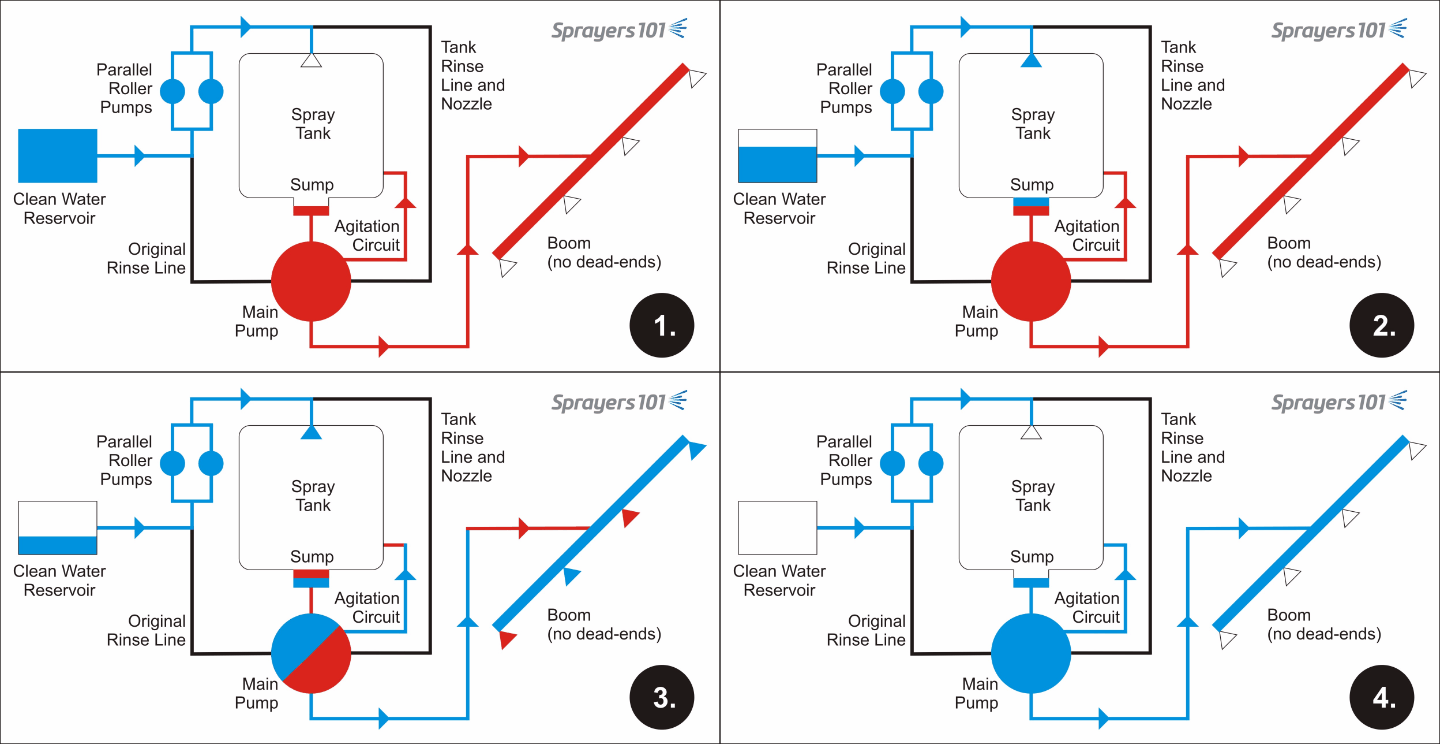
The process, illustrated in this field sprayer plumbing animation, takes about 40 minutes and may require the operator to leave the cab multiple times.
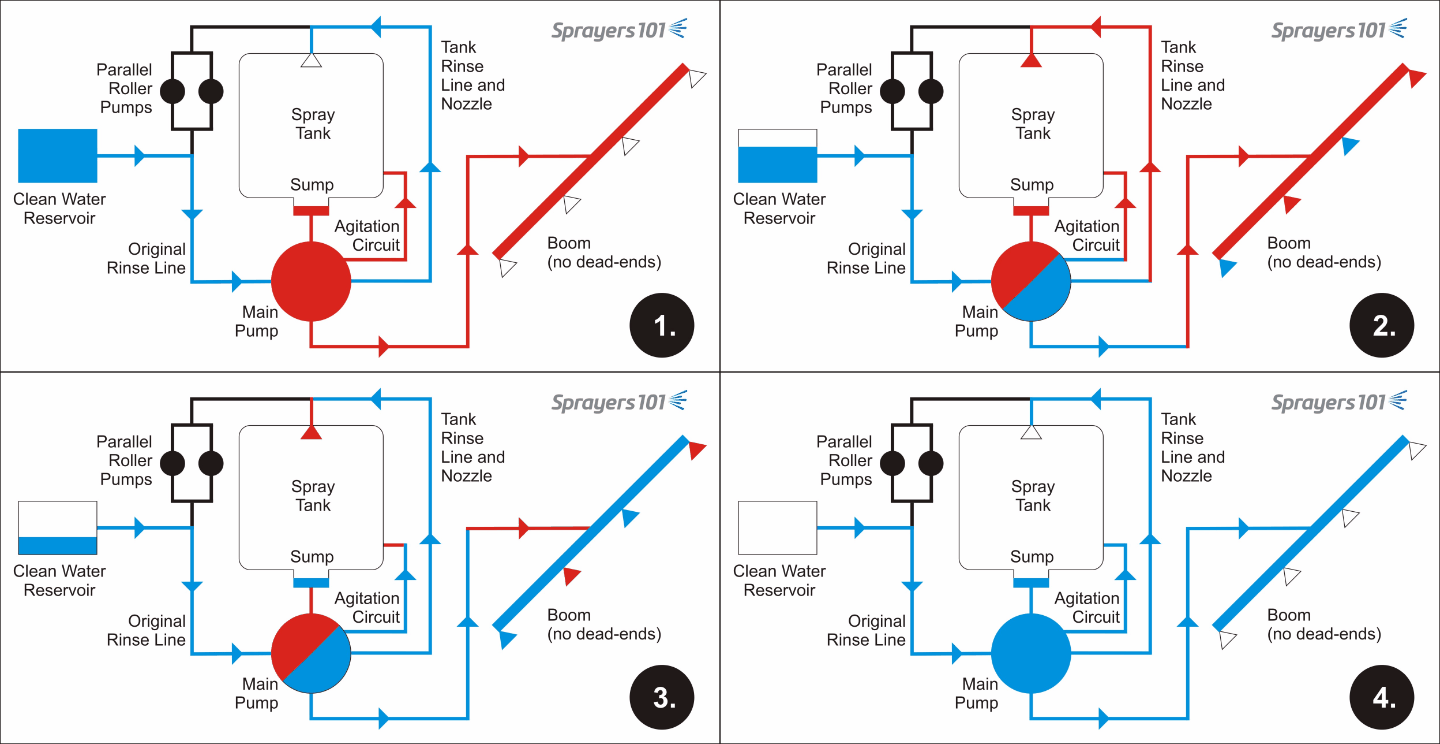
Continuous rinsing requires a second pump to be installed in the system. Rather than performing a serial dilution in three batches, this rinsing essentially pushes spray solution out of the sprayer using clean water. The agitation line creates some dilution since it loops back to the tank, but that small volume is quickly diluted by the process, as below:
Continuous Rinse Process
- Pressure drops and nozzles sputter (i.e. spray tank is empty).
- If the sprayer has an inductor bowl or loading bypass, and if the operator doesn’t already rinse these systems following filling, the operator will exit the cab, open the valve to clean water reservoir, and use a portion of the clean water to clean these circuits.
- There can be no dead-end plumbing at the end of boom sections for this process to work (e.g. sections terminate with air-aspirating end caps).
- The operator returns to cab (if they left), and begins introducing clean water to the tank through the rinsing nozzle(s).
- When a small volume has been introduced, the operator engages the agitation line with reduced flow to tank and begins driving and spraying at a rate slightly higher than the clean water pump’s flow rate.
- Operator continues to spray until the nozzles sputter.
The process, illustrated in this field sprayer plumbing animation, takes about 10 minutes and requires the operator to leave the cab once at most.
Building a demo system and model
We worked with HJV Equipment in Alliston, Ontario to build a bench-top model representing a simple, scaled-down sprayer rinse system. Using the model, we planned to compare the effectiveness and the efficiency of triple rinsing to continuous rinsing – and we would do so in front of an audience. HJV felt that to make an appropriate model, we should base it on an installed system. So, they plumbed a working system into a RoGator 700.
They used two Hypro electric roller pumps (model 4101 N-H) in parallel, plumbed into the clean water reservoir. Anti-backflow valves led the water to the tank rinse nozzles. The system could be engaged from the cab and could be isolated from the existing rinse system, leaving the sprayer’s original system intact and available for when full cleanings were required. The designer/mechanic points out key features in the following video.
The RoGator 700 has a 700 US gallon tank and a 50 US gallon clean water reservoir. By tapping into an existing compressor, HJV created a means for blowing out the boom with air, greatly reducing the amount of spray solution left in the empty sprayer. Still, the “empty” sprayer would retain about 15 US gallons in the pump, sump and remaining lines. Based on those parameters, we designed and constructed our scaled model. We used 10 L in the main tank and 4.5 L in the clean water reservoir. The lines and sump held about 1.25 L so we felt breaking the 4.5 L of clean water into three 1.5 L volumes was fair.
In the images that follow you can see the components. Basically we have a spray tank, clean water reservoir, main pump, dedicated clean water pump, the sprayer boom, and some clever anti-backflow and valves to switch the “sprayer” from one method of rinsing to the next.
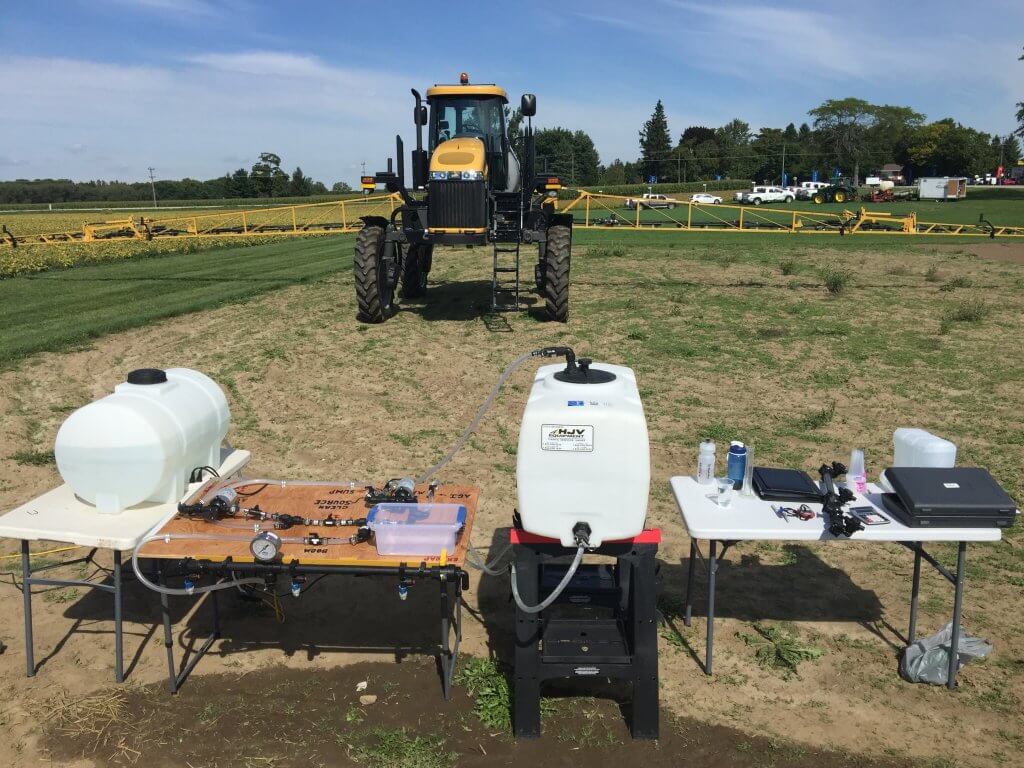
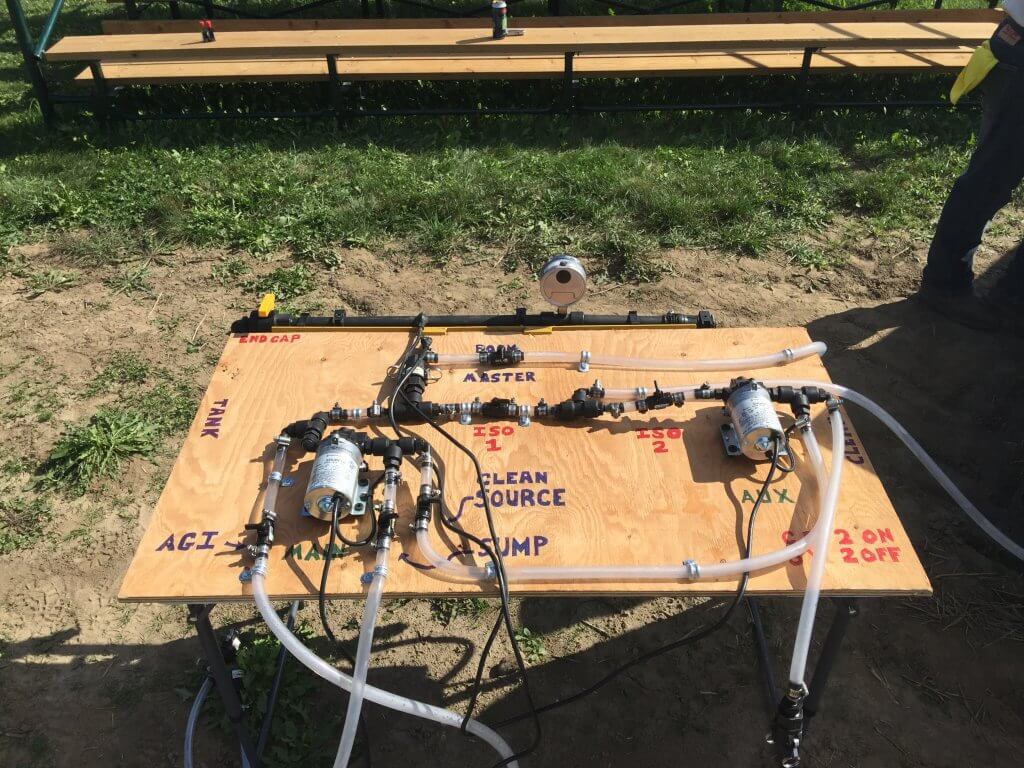
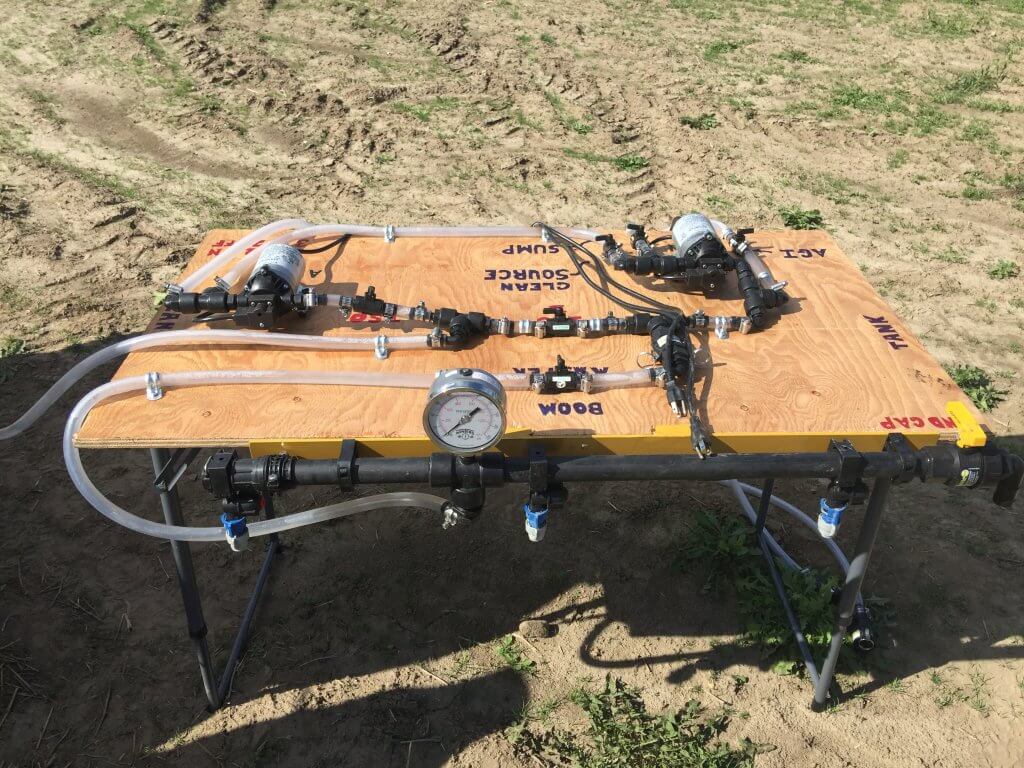
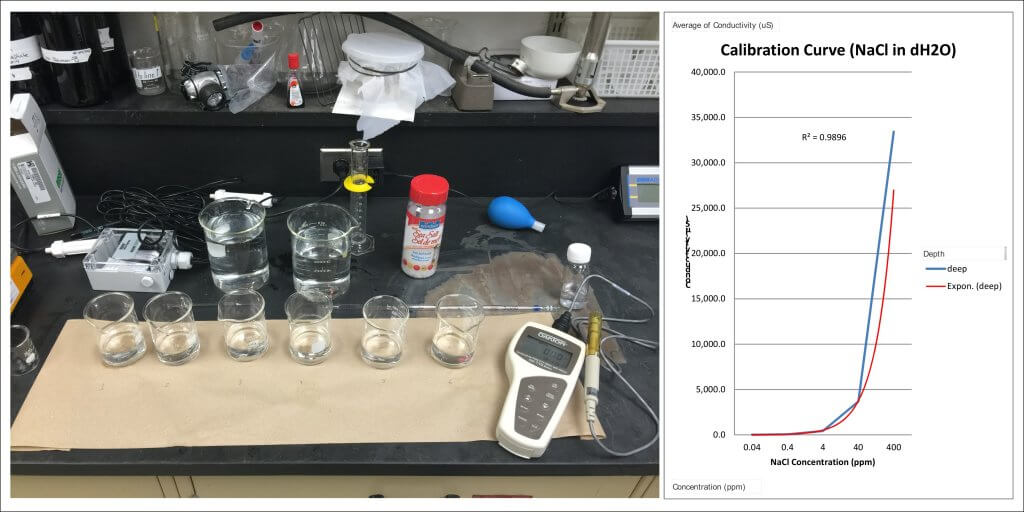
But, we still had to devise a means to measure the effectiveness of the two rinsing systems. UV dye would be difficult to use with a live audience in real time, and food colouring would be too subjective. We decided to use a conductivity meter, which quickly measures the electrical conductivity of a liquid. Using NaCl (table salt) as a readily-dissolved conductor, we calibrated the unit and found we could reliably register table salt in parts per million.
The demo process
We ran the demo six times over three days and recorded how long each rinse took and how effective each rinse was in reducing the original concentration. Here’s how we did it:
Triple Rinse (~4.5 minutes)
- Fill the main tank to 10 L.
- Introduce 10 cc of salt (and coloured with green food dye) to create our spray mix.
- Circulate the solution through the main pump and agitation line to ensure it was completely homogeneous.
- Start the system spraying out of the boom.
- Draw a sample of the spray mix to serve as our baseline concentration.
- When the nozzles began to sputter, the tank was “empty” (duration: 150 seconds).
- We drained the boom via valve on the boom-end to simulate “blowing out” the boom. (duration: 5 seconds)
- We introduced 1.5 L of clean water through the tank rinse nozzle (duration: 15 seconds).
- We circulated the solution through the agitation line. (duration: 30 seconds).
- We sprayed the solution out of the boom, drawing a sample of rinsate before the nozzles sputtered (duration: 30 seconds)
- Repeat steps 8-10 two more times to represent the other two rinses.
Continuous Rinse (~1.5 minutes)
- Fill the main tank to 10 L.
- Introduce 10 cc of salt (and coloured with green food dye) to create our spray mix.
- Circulate the solution through the main pump and agitation line to ensure it was completely homogeneous.
- Start the system spraying out of the boom.
- Draw a sample of the spray mix to serve as our baseline concentration.
- When the nozzles began to sputter , the tank was “empty” (duration: 150 seconds).
- We drained the boom via valve on the boom-end to simulate “blowing out” the boom. (duration: 5 seconds)
- We reduced the agitation flow to a low rate and introduced 1.5 L of clean water through the rinse nozzle using our dedicated pump (duration: 5 seconds)
- At the 5 second mark, we started spraying while still introducing clean water.
- Samples of rinsate were drawn at regular intervals, with particular attention to collect the last volume fraction as the nozzles were sputtering (duration: 100 seconds)
Results
Triple Rinse
The average starting conductivity for the triple rinse demo was 2,520 µS (n=6). The final sample of rinsate registered a conductivity of 490 µS (n=6) representing a final concentration that was 19.4% of the original. Average time: 4.5 minutes.
Continuous Rinse
The average starting conductivity for the continuous rinse demo was 2,145 µS (n=6). The final sample of rinsate registered a conductivity of 342 µS (n=6) representing a final concentration that was 16% of the original. Average time 1.5 minutes.
We were surprised the model could not reduce the concentration of salt to an acceptable 1-2% level. The Agrimetrix Dilution Calculator App suggests it should have been much better. We suspect the standing volume of the system is higher than we predicted, and we weren’t using enough clean water to dilute it. We may have had better results if we’d used a lower concentration of salt to begin with, and/or a higher volume of clean water. We will continue to tweak the demo model and will update this article as we collect more information. The more stringent research in Europe showed that continuous rinsing is a effective as triple rinsing.
The most interesting result is that continuous rinsing took 1/3 of the time triple rinsing required (1.5 minutes versus 4.5 minutes). Research in Europe suggested 1/4 of the time as triple rinsing. The difference is likely accounted for by the time the operator used leaving and entering the cab.
You can see the effectiveness of the process in this AAMS demonstration video. Sure, their demo unit is nicer than the one we built, but our rustic version has charm 🙂 Note the sequence of opening and closing valves to ensure all circuits are rinsed clear of dye.
Conclusion
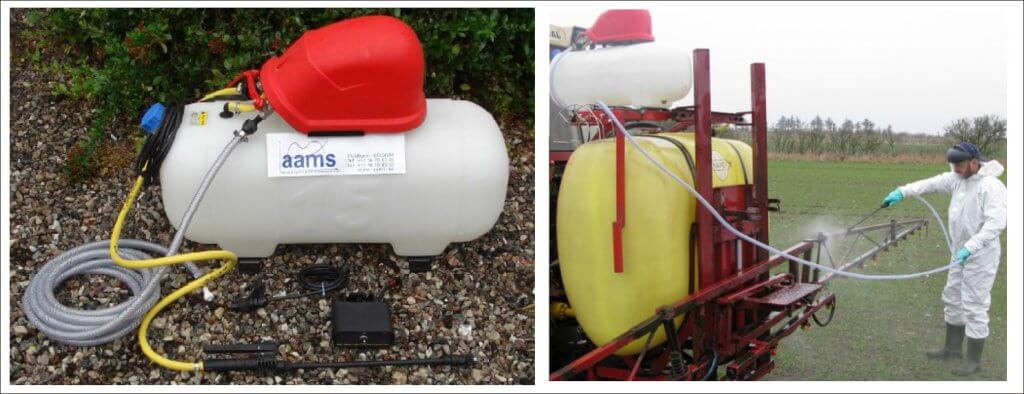
If continuous rinsing is as effective as triple rinsing and can be performed in a fraction of the time with less operator exposure, then we should be modifying our sprayers to support the method. Airblast sprayers and small field sprayers are relatively easy to modify, and can be even be equipped with a spray wand so excess clean can be employed to rinse down the exterior.
Larger field sprayers, however, may be more challenging as they do not all lend themselves to the conversion:
- The clean water pump (hydraulic or electric) must have sufficient power.
- Matching the pump capacity to the sprayer can be problematic; The clean water pump flow rate must be 30-50% of the boom flow rate.
- Sprayers with dead-end boom sections or circulating-flow return lines may not be compatible, and those with pneumatic systems to clear the boom of solution are preferred.
- More sophisticated electronic rate controller systems (e.g. on the larger self-propelled sprayers) may not be compatible.
And, of course, we must remember that neither triple or continuous rinsing should be seen as a replacement for the sprayer cleaning process. Any drain-able part of the sprayer will still harbour high concentrations of residues (e.g. filters, valves, inductors, bypass lines – any dead-end plumbing). With new stacked chemistries being introduced in North America (some still active when residues register as little as a few parts per million), diligent sprayer sanitation is more important than ever.
Thanks to Jan Langenakens of aams for his help researching and informing this article.