This work was performed with Mike Cowbrough, Weed Management Specialist (Field Crops) with OMAFA.
The unprecedented number of dicamba drift complaints in the United States has proven to be a polarizing issue in the agriculture community. The debate continues as to the relative influence of contributing factors.
The sensitivity of soybeans to trace amounts of dicamba has been known for more than 50 years (Wax et al. 1969). Research has shown that less than 0.2% of the highest recommended use rate can cause a 10% yield loss in non dicamba-tolerant soybean (Robinson et al., 2013). Many horticulture and ornamental crops are equally sensitive to low doses of dicamba.

The inherent volatility of the active, and its subsequent potential for off-target movement, is also well known. Research has shown that XtendiMax, Engenia and FeXapan are far less volatile than their predecessors. However, research has also shown that there is some degree of volatilization for 36 hours following application, peaking 6-12 hours after treatment (Mueler, 2017). Studies by Jacobson et al. (2014) showed dicamba present in the air 60-72 hours after treatment.
While sensitivity and volatility are suspected of being the primary culprits, there are other factors that contributed to the estimated 3.6 million acres of soybean reported damaged in the United States in 2017 (Bradley, 2017):
- inappropriate sprayer set-up,
- physical drift,
- the use of older dicamba chemistries, and
- contamination of filling or spray equipment (aka carry-over)
The Experiment
In 2017, we decided to learn more about sprayer contamination. The following is a summary of the labelled cleaning protocol. It’s noted that rinsate disposal must comply with local regulations:
- Drain sprayer immediately after use.
- Flush all inner surfaces with water.
- Fill sprayer with an ammonia-based solution and soak overnight.
- Concurrently, remove and soak strainers, screens and nozzles.
- Circulate solution for 15 minutes and flush through the boom for one minute.
- Drain sprayer, replace strainers, screens and nozzles, and flush once more with water.
This thorough protocol is not unique to dicamba, and historically has not been followed by sprayer operators. Instead, operators choose cleaning methods that reflect the risk of damage and the time and effort required to clean the sprayer. The majority flush with water, may or may not perform serial rinses and may or may not address dead end plumbing. Where possible, operators schedule sprays that present the least potential for carry-over damage (e.g. moving into corn following soybean). There is no way to know for certain that the sprayer is sufficiently cleaned.
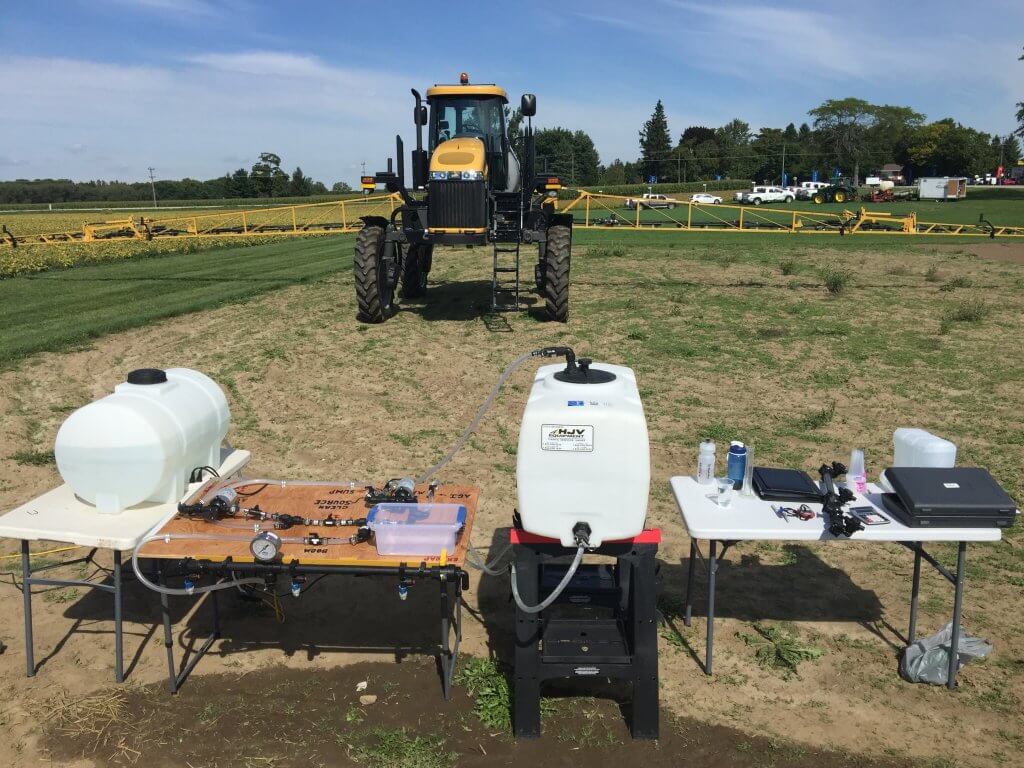
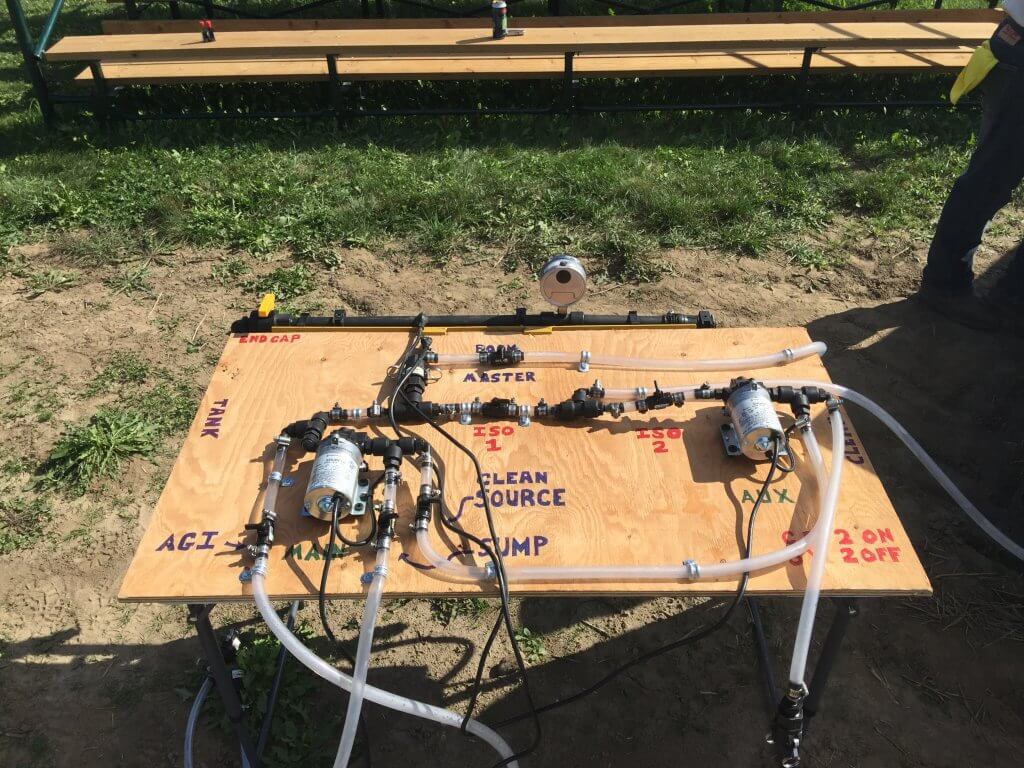
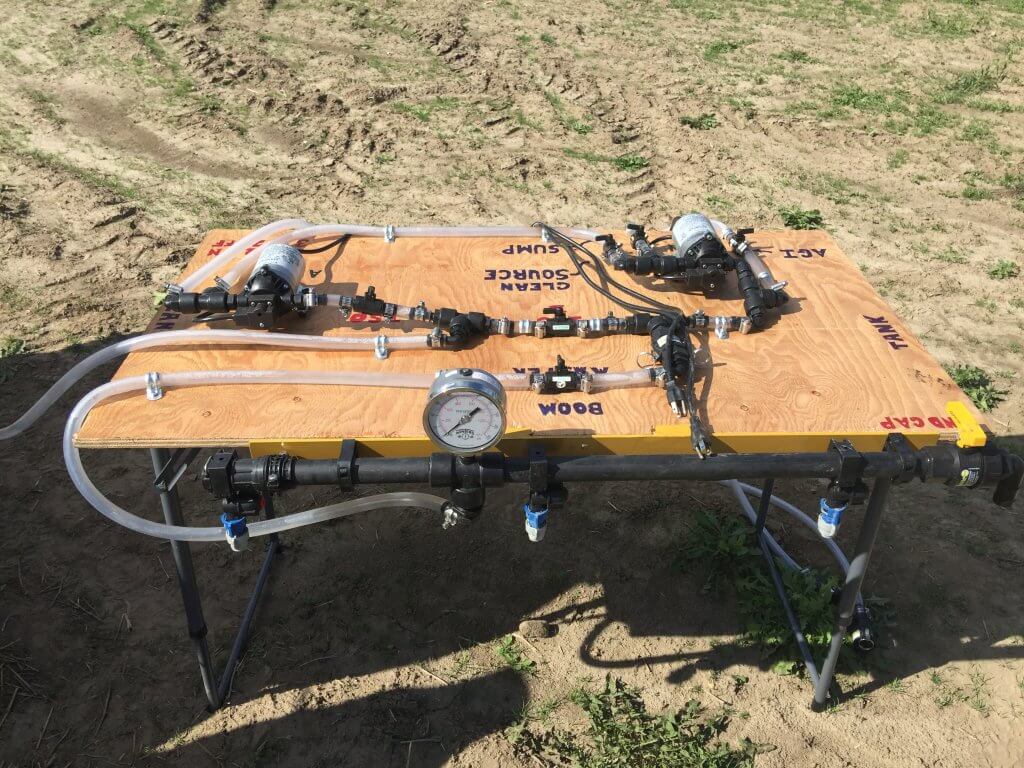
Sprayer
Our research sprayer had a tank capacity of 60 L and was calibrated to deliver a spray volume of 15 gallons per acre. RoundUp Xtend was added at the highest labeled rate of 2 L/acre (consisting of glyphosate at 1,200 gae/ha and dicamba at 600 gae/ha). We reserved the solution for reuse by collecting spray in jugs.

Rinses
Serial rinse
On a typical sprayer, the capacity of the clean water tank is ~10% that of the product tank. To perform a triple rinse, the operator introduces 1/3 of that volume to the product tank through a washdown nozzle, circulates for 10 minutes, and then sprays the product tank empty. This is repeated two more times to empty the clean water tank.
Our intent was to scale the process in the same ratio using the research sprayer. That would mean using a 6 L volume of clean water to represent 10% of the 60 L product tank. It follows that we would have to perform three, 2 L rinses.
However, that was insufficient volume to engage the pump and still provide enough rinsate to spray in our trials. We calculated the minimum required volume to be 8 L per rinse. We circulated for 5 minutes through a washdown nozzle. Following our third rinse, we noted that the rinsate still smelled of dicamba, and elected to run a fourth 8 L rinse. Rinsate was collected from multiple nozzles spaced evenly along the boom.
We then opened the suction filter and the two line filters and poured the remaining solution into a bucket. We topped the volume up to 8 L with clean water and scrubbed the filters with a brush.
Continuous rinse
The continuous rinse process continually introduces clean water via the washdown nozzle via a dedicated pump. Concurrently, the product pump sprays from the nozzles and circulates via the agitation/bypass line. We used 32 L of clean water (a volume equivalent to that used in the serial rinse) and collected rinsate in four, 8 L volumes.
Rinsate was collected from multiple nozzles spaced evenly along the boom. We then opened the suction filter and the two line filters and poured the remaining solution into a bucket. We topped the volume up to 8 L with clean water and scrubbed the filters with a brush.
Continuous rinse using 1% ammonia solution
We followed the continuous rinse process, as previously described, in order to collect the filter residue.

Possible artifacts
The limitations involved in scaling down introduce two potential artifacts to this experiment. First, the ratio of clean water to product volume is high compared to typical practices for both rinses. We estimate the volume remaining in the sprayer when “empty” did not exceed 4 L.
Second, continuous rinsing was sampled in batches, which means the fourth and final volume collected represents an average of the active remaining in the system rather than the final concentration. As such, it would likely be more concentrated than what truly remained in the sprayer.
Application
Rinsate was applied to glyphosate tolerant soybean on 30” rows. Rinsate was applied at 20 gpa using a handboom with AIXR 11002 nozzles. Ontario locations were Ridgetown, Elora, Winchester and Woodstock.

Results
Crop Injury
Regardless of rinse procedure, crop injury was greatest after the first rinse cycle and diminished after each subsequent cycle (Table 1). The first half of the continuous rinse procedure caused greater injury than the serial rinse, but injury was equivalent for the final half. Crop injury was less when rinsate was applied to soybeans at an early vegetative stage (V2) compared to when rinsate was applied to soybeans at later vegetative stages (V5-V6) or the early reproductive stage (R1).
Table 1: Visual Injury (%) of soybean 14 days after the application of rinsate that was collected from two different sprayer cleanout procedures.
| Treatment | Elora | Ridgetown | Winchester | Woodstock |
| % Visual Injury at 14 days after application | ||||
| Crop stage at application | V5 | V2 | V6 | R1 |
| Weed-Free Control | 0 | 0 | 0 | 0 |
| RU Xtend | 100 | 100 | 100 | 100 |
| Serial Rinse # 1 | 100 | 75 | 100 | 100 |
| Continuous Rinse # 1 (25% water) | 100 | 95 | 100 | 100 |
| Serial Rinse # 2 | 75 | 65 | 90 | 90 |
| Continuous Rinse # 2 (50% water) | 85 | 70 | 95 | 95 |
| Serial Rinse # 3 | 55 | 50 | 60 | 75 |
| Continuous Rinse # 3 (75% water) | 55 | 50 | 60 | 75 |
| Serial Rinse # 4 | 25 | 10 | 25 | 35 |
| Continuous Rinse # 4 (100% water) | 25 | 10 | 25 | 35 |
| Filters – Serial Rinse | 15 | 30 | 10 | 25 |
| Filters – Continuous Rinse | 15 | 30 | 10 | 25 |
| Filters – Continuous with 1% ammonia | 25 | 45 | 20 | 35 |
We were surprised to observe dicamba injury even in the final stages of both rinse procedures. This reinforces how sensitive soybeans are to low doses of dicamba and demonstrates the importance of following the labelled water – ammonia – water sequence.
When comparing damage from filter residue (following a continuous rinse) the rinsate extracted using a 1% ammonia solution was more injurious than rinsate from plain water. Cundiff et al. (2017) found no difference between the use of water or water-and-ammonia when cleaning out a sprayer. We speculate that the ammonia was more effective at removing dicamba from the sprayer, or it increased the residue’s potency.
Soybean yield
Yield losses appeared to mirror visual injury; as dicamba injury decreased, so did soybean yield loss. Yield losses were observed following application of all rinsate treatments, which is understandable given that dicamba injury also occurred following the application of all rinsate treatments.

Yield losses were greater in the first half of the continuous rinse protocol, but were par with the serial rinse for the second half (Table 2). Yield losses were observed following the application of rinsate collected from filters, demonstrating the importance of following a thorough sprayer decontamination that addresses dead-end plumbing, filters and nozzles.
Table 2: Yield (% of weed-free control) of soybean following the application of rinsate that was collected from two different sprayer cleanout procedures.
| Treatment | Elora | Ridgetown | Winchester | Average |
| Yield (% of weed-free control) | ||||
| Crop Stage at application | V5 | V2 | V6 | V2-V6 |
| Weed-Free Control | 100 | 100 | 100 | 100 |
| RU Xtend | 0 | 0 | 0 | 0 |
| Serial Rinse # 1 | 0 | 44 | 1 | 15 |
| Continuous Rinse # 1 (25% water) | 0 | 13 | 0 | 4 |
| Serial Rinse # 2 | 33 | 65 | 10 | 36 |
| Continuous Rinse # 2 (50% water) | 22 | 61 | 3 | 28 |
| Serial Rinse # 3 | 74 | 89 | 66 | 76 |
| Continuous Rinse # 3 (75% water) | 72 | 89 | 57 | 76 |
| Serial Rinse # 4 | 86 | 96 | 86 | 89 |
| Continuous Rinse # 4 (100% water) | 86 | 97 | 82 | 89 |
| Filters – Serial Rinse | 93 | 96 | 100 | 96 |
| Filters – Continuous Rinse | 87 | 97 | 95 | 93 |
| Filters – Continuous with 1% ammonia | 79 | 85 | 92 | 85 |
Other observations
1- Dicamba injury delayed soybean maturity and date of harvest by over 14 days at the Elora site. Delayed maturity was observed at the Winchester locations as well.

2- Heavy rainfall shortly after the application of rinsate at the Winchester location caused water ponding. Since dicamba is very water soluble, crop injury and yield loss was higher in areas in the trial where water ponded after application.

3- Dicamba injury appeared to accentuate other stress symptoms at the Elora site, specifically potash deficiency. In the absence of dicamba injury, soybean plants did not exhibit potash deficiency symptoms.

Take Home
- Continuous rinsing was as effective as four low-volume rinses.
- Plots sprayed with the cleanest water rinsate (both protocols) averaged 11% lower yields than unsprayed plots.
- Filter rinsate (following continuous rinse with water) resulted in an average 7% yield loss.
- Filter rinsate (following continuous rinse with 1% ammonia) resulted in an average 15% yield loss.
Citations
- Bradley, K. 2017. “A Final Report on Dicamba-injured Soybean Acres”. University of Missouri Integrated Pest Management online. https://ipm.missouri.edu/IPCM/2017/10/final_report_dicamba_injured_soybean/
- Cundiff, G.T., Reynolds, D.B. and T.C. Mueller. 2017. Evaluation of dicamba persistence among various agricultural hose types and cleanout procedures using soybean (Glycine max) as a bio-indicator. Weed Science. 65(2), pp. 305-316.
- Jacobson, B., Urbanczyk-Wochniak, E., Mueth., M.G., Riter, L.S., Sall, J.H., South, S. and Carver, L. 2014. “Field Volatility of Dicamba Formulation MON 119096 Following a Post-Emerge Applciation Under Field Conditions in Texas”. Monsanto Report Number MSL0027193.
- Mueller, T. 2017. “Effect of adding Roundup PowerMax to Engenia on vapor losses under field conditions” (Presentation).
- Robinson, A.P., Simpson, D.M. and W.G. Johnson. 2013. Response of glyphosate-tolerant soybean yield components to dicamba. Weed Science. 61(4), pp. 526-536.
- Wax, L.M., Knuth L.A., and Slife F.W. 1969. Response of soybean to 2,4-D, dicamba, and picloram. Weed Sci 17, pp. 388-393.