NOTE: This article has proved very popular, and subsequently we received emails with additional information. The article has now been expanded to include work performed by Dr. Bob Wolf et al.
Part 1:
Boomless nozzles are used for vegetative management activities where it’s not practical, or sometimes even impossible, to use a horizontal boom. Consider highway easements and ditches, railways, and infrastructure like buildings, powerline poles or fence posts. In these cases, the booms would hit uneven ground, trees and other obstacles. Enter the boomless nozzle.
Unlike a typical flat fan nozzle, these nozzles direct spray laterally in one or two directions, creating a very wide spray pattern. Some field sprayers use a smaller version such as an off-centre or uneven fan to either extend the booms’ coverage (e.g. to get around fence posts) or give the pattern a discrete edge and not spray beyond the booms length.
There are many varieties of boomless nozzle available, but they don’t give the same performance.

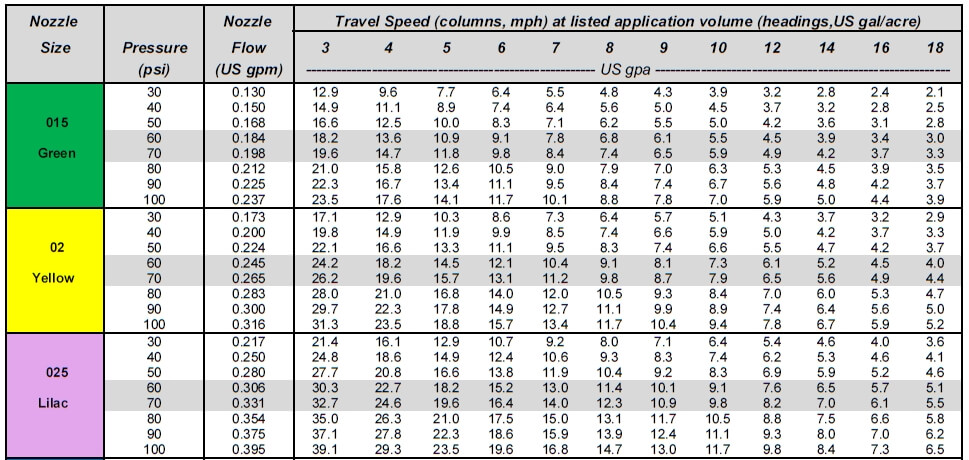
Using a spray pattern table, Helmut Spieser and I compared coverage patterns from three popular tips:
- The Boom X Tender
- The Boom Buster
- XP BoomJet
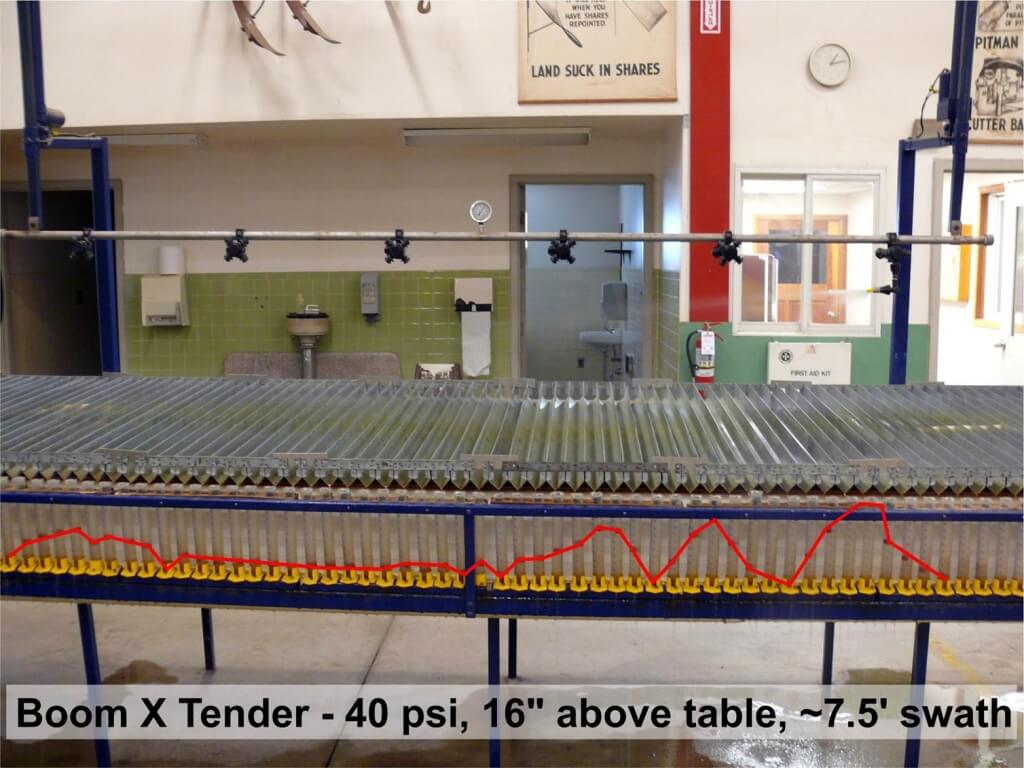
The Boom X Tender
With seven rates to choose from, this nozzle claims up to 13′ throw from tip to the edge of the swath. When we ran the tip at 40 psi we noticed a lot of inconsistency in the pattern, where it clearly had variation in flow along the swath. Note the red arrows in the image.
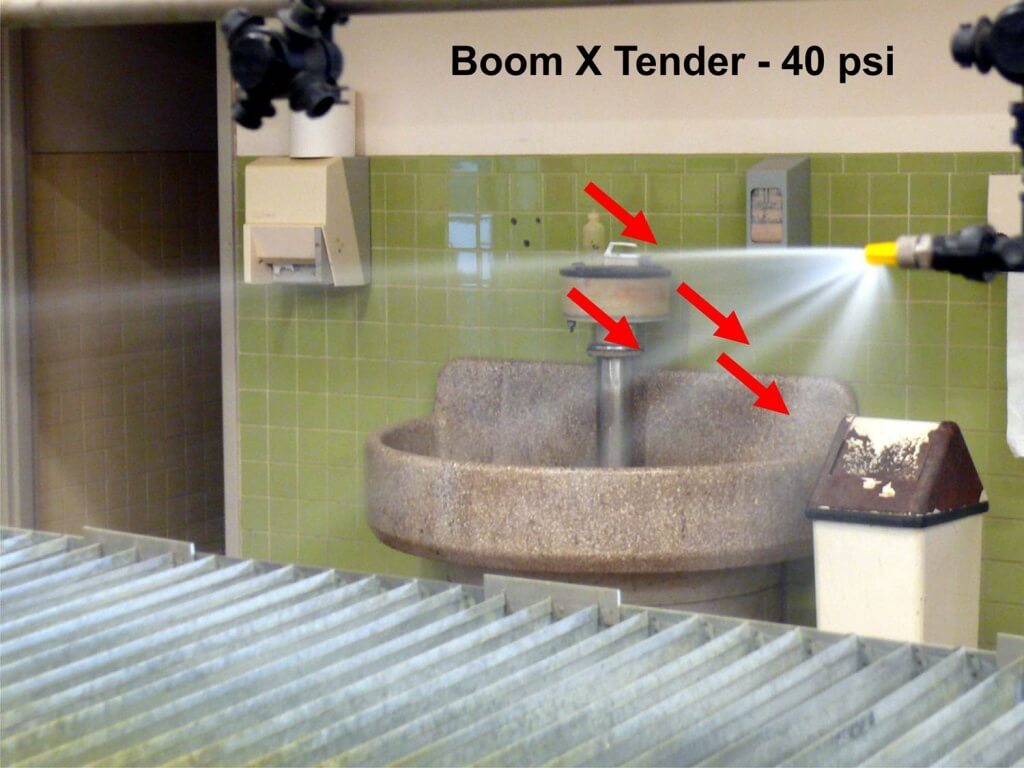
These inconsistencies made themselves known when we observed the pattern produced on the spray table. We achieved a 7.5′ swath at 40 psi, 16″ above the table with the XT024 (yellow) tip. The coverage wasn’t very even.
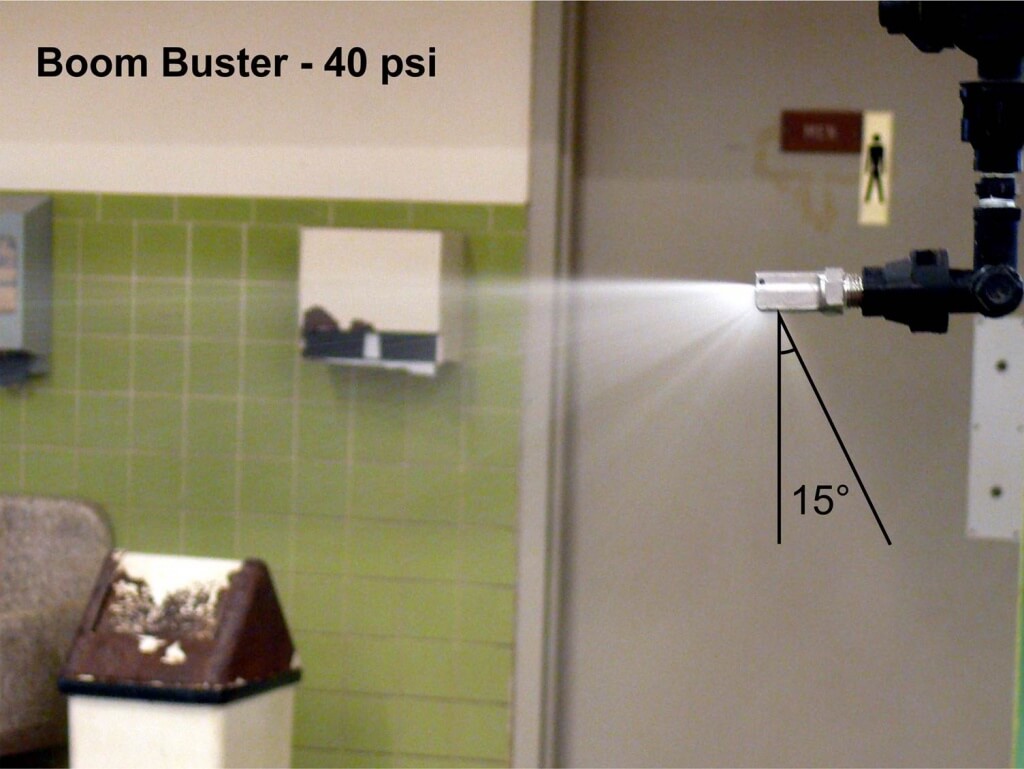
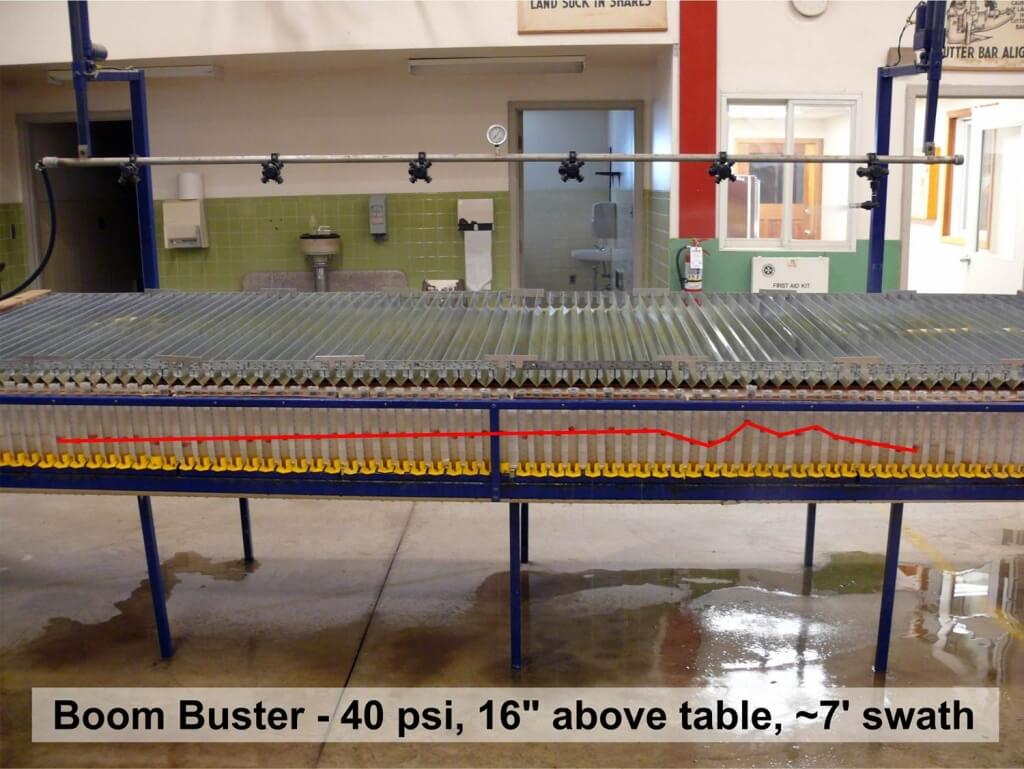
The Boom Buster
There are fourteen nozzles to choose from, each delivering different flows and according to the manufacturer, spanning up to 31′ from the tip to the edge of the swath. An interesting feature when we ran this nozzle was that the fan extended back ~15°, which might eliminate the need for a centre nozzle if two were operated at the same time with sufficient overlap.
We achieved a 7′ swath at 40 psi, 16″ above the table and the coverage described a fairly consistent curve. It did taper at the far end, but did a respectable job. It was obvious some overlap at the 15° end would help level out the response, and when paired with a second tip facing the opposite direction, this would work well.
The XP BoomJet
The BoomJet mounts 90º to the swath, and with five rates to choose from claims a swath up to 18.5′ from tip to edge.
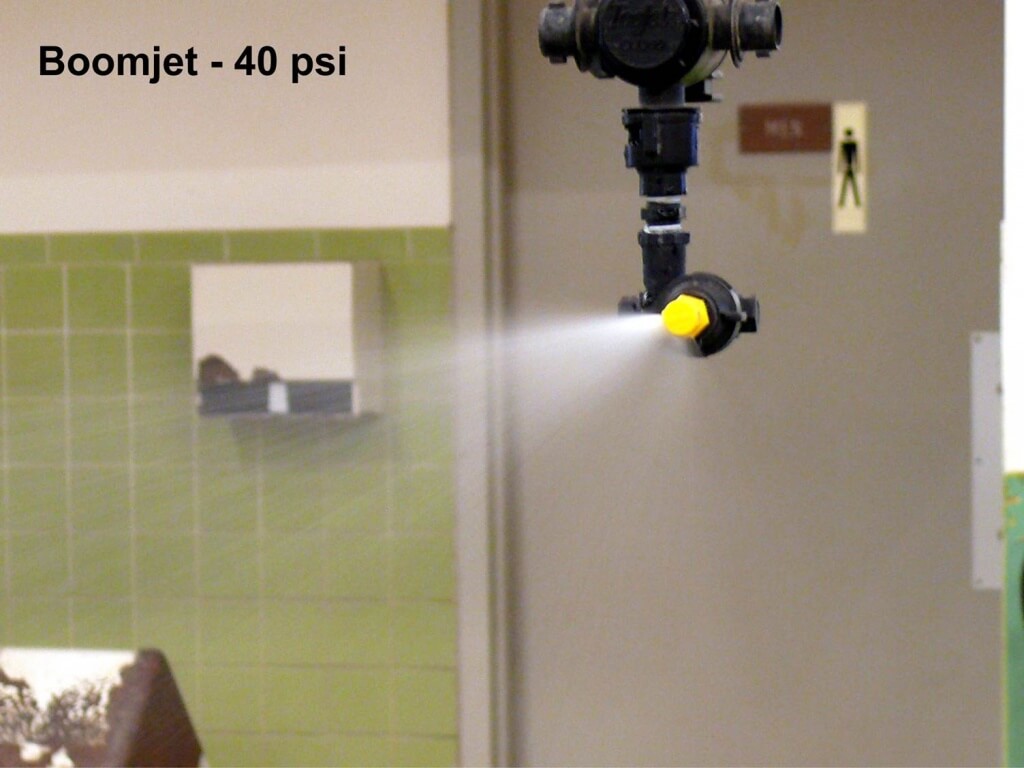
We mounted the (B) 1/4XP20L (You have to specify left or right) 16″ above the table and at 40 psi we achieved a 6′ swath. There was an odd dip in the coverage pattern not far from the tip. We suspected it might be an artifact, but after multiple attempts it persisted. Other than that dip, the pattern was quite consistent. Had we adjusted the angle to reach a 7′ swath, it may have tapered as much as the Boom Buster.

Observations
Given the range of possible rates and swath distances, the overall consistency of the swath, the conventional nozzle mount, and the 15º overlap, Helmut and I chose the Boom Buster. The BoomJet was a close second, with a consistent pattern save the odd dip, but the 90º mount while making it possible to elongate or shorten the swath was a bit finicky and could pose a snagging risk. The Boom X Tender ranked third because of the inconsistent coverage.
Part 2:

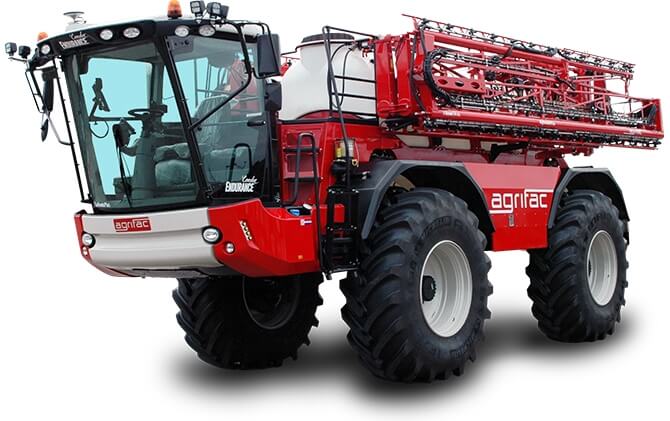
Boomless nozzles are often used on all-terrain vehicles (ATV’s) equipped with small-capacity spray tanks and they’re popular for for eliminating weeds in pastures and rangelands as well as along roadsides. In 2009, Kansas State University published a factsheet evaluating the efficacy of boomless spray nozzles and describing how they can best be used. What follows is a summary of the findings from their field trials.
Considerations for using boomless nozzles
- Pick a nozzle that best fits the mode of action of the herbicide being used.
- Select spray width to achieve uniform distribution.
- Both the height of the vegetation, and the prevailing wind, will interfere with the width of the spray swath.
- As with any hydraulic nozzle, pressure should be optimized to achieve the desired droplet size and swath width while reducing drift potential.
Field Trials
Applications were tested on small (growth stage prior to jointing and 4-5 inches tall) and large (growth stage after jointing and 24-30 inches tall) wheat crops planted in 20 foot wide strips. The nozzles tested were the BoomJet (XP) , Boom X Tender (XT) , Boom Buster (BB) and the Combo-Jet (WCJ). Glyphosate and paraquat were applied a typical ATV-mounted set-up. The treatments were replicated three times and water sensitive paper was used to analyze droplet size.

Results
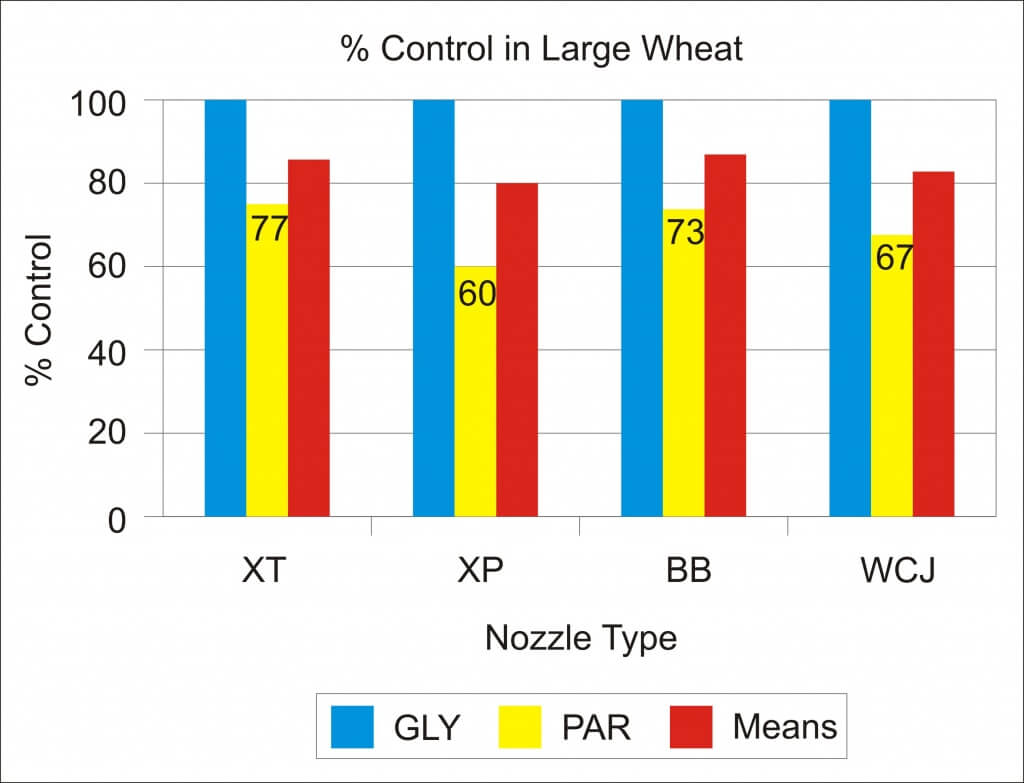
The mode of action, coverage and droplet size affected the results in both short and tall wheat. As expected, glyphosate served as the 100% control and paraquat efficacy ranged depending on the nozzle (see Graph 1). The XT gave the best performance with paraquat.
Spray (control) uniformity was about equal with glyphosate, but with paraquat, on a scale of 1-10 with 10 being the highest level of control, the XT and BB tied for best (Graph 2).

Swath width was considerably less than manufacturers claimed in the tall wheat (Graph 3). Based on width of control, the WCJ had the widest swath.

Swath width was somewhat less than manufacturers claimed in the short wheat (Graph 4). Based on width of control, the XT had the widest swath.

Median droplet size ranged from 684 to 799 microns (Graph 5). If we assume the preferred range for coverage/weed control is 300-500 microns, all nozzles were on the high end. It should be noted that this does reduce drift potential.

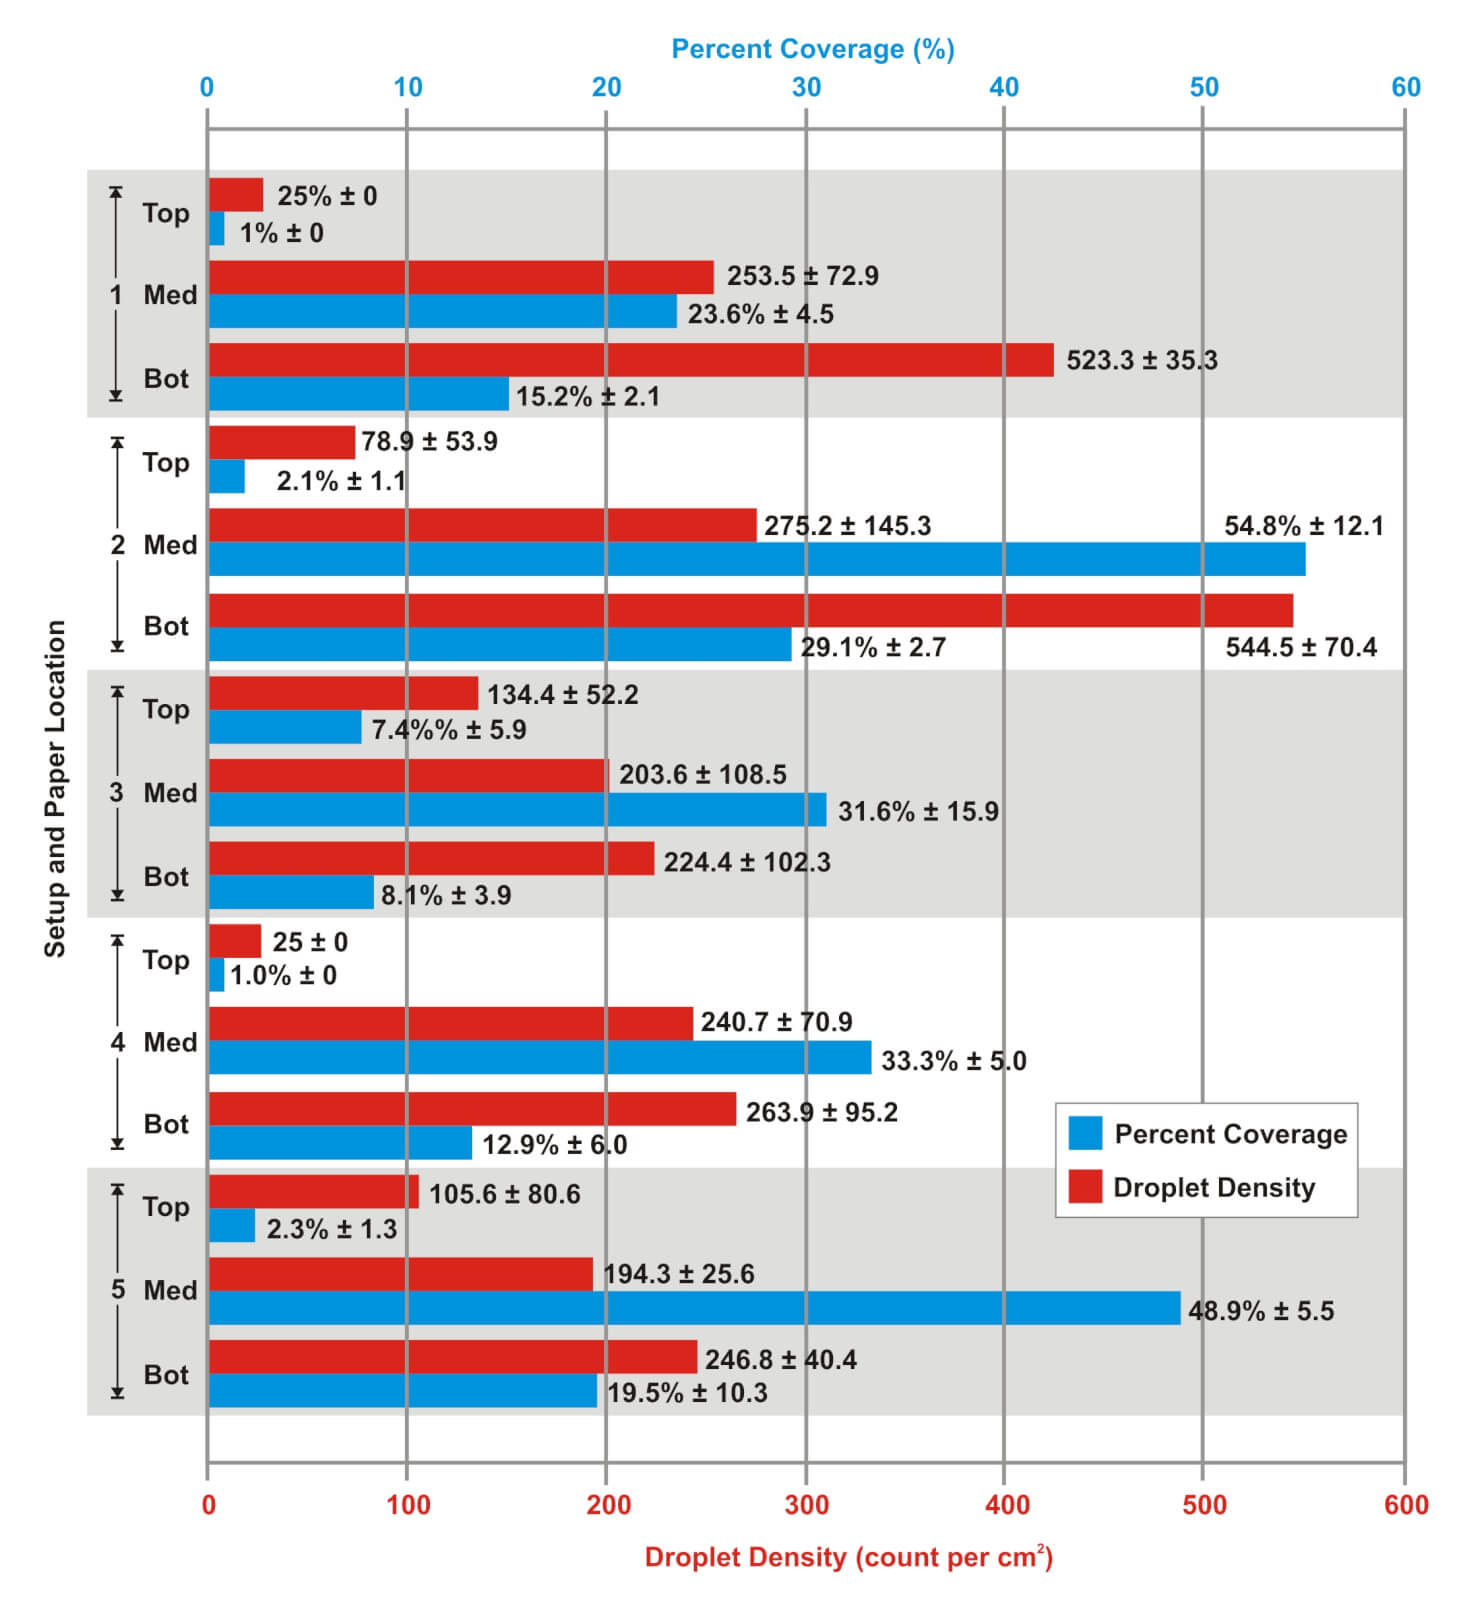
Percent coverage ranged from 37.5 to 27.0 for paraquat and 28 to 21.3 for glyphostate (Graph 6).

Observations
The wind direction and height of the spray stream likely affected the results. To achieve the manufacturer-rated swath width, nozzles would have to be mounted higher on the ATV than is practical, and this would lead to increased drift potential. It was noted that the large orifices common to boomless nozzles made it difficult to pressurize with pumps typically used on ATV’s and a more powerful pump (e.g. a roller pump) might provide better swath width.
While there are many parameters to consider, and counter to the lab trials performed in Part 1, the results from Part 2 suggest the Boom X Tender and Boom Buster gave better overall performance.

Overall Conclusions from Part 1 and Part 2
It can be frustrating testing nozzles. What works wonderfully one day might not be worth the materials they’re made of the next. Obviously there was no clear “winner” at the end of this article, but that’s just as well, because perhaps that’s the wrong take home message.
Instead, remember that any nozzle can be used incorrectly. Mind the pressure, swath width and environmental conditions to get the most out of whichever nozzle you choose to use. Take time to confirm that everything is working optimally, and go back to ground-proof the results so you know what worked and what didn’t.