Category: Nozzles & Droplets

Articles helping with field sprayer nozzle selection

  • Selecting a Field Sprayer Nozzle

    Selecting a Field Sprayer Nozzle

    nozzles

    This article is reproduced, with permission, from Ohio State University Extension’s factsheet FABE-528.

    Although nozzles are some of the least expensive components of a sprayer, they hold a high value in their ability to influence sprayer performance.

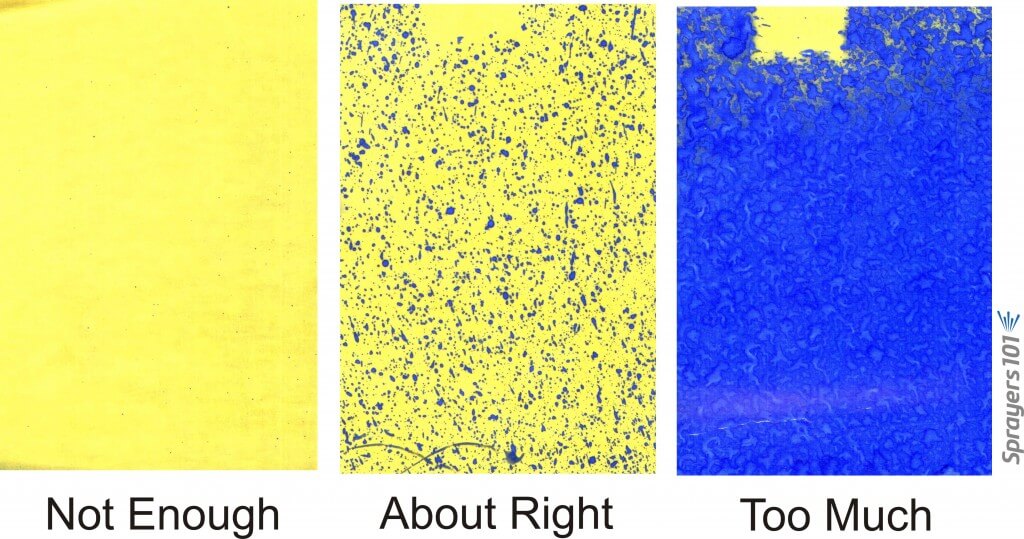
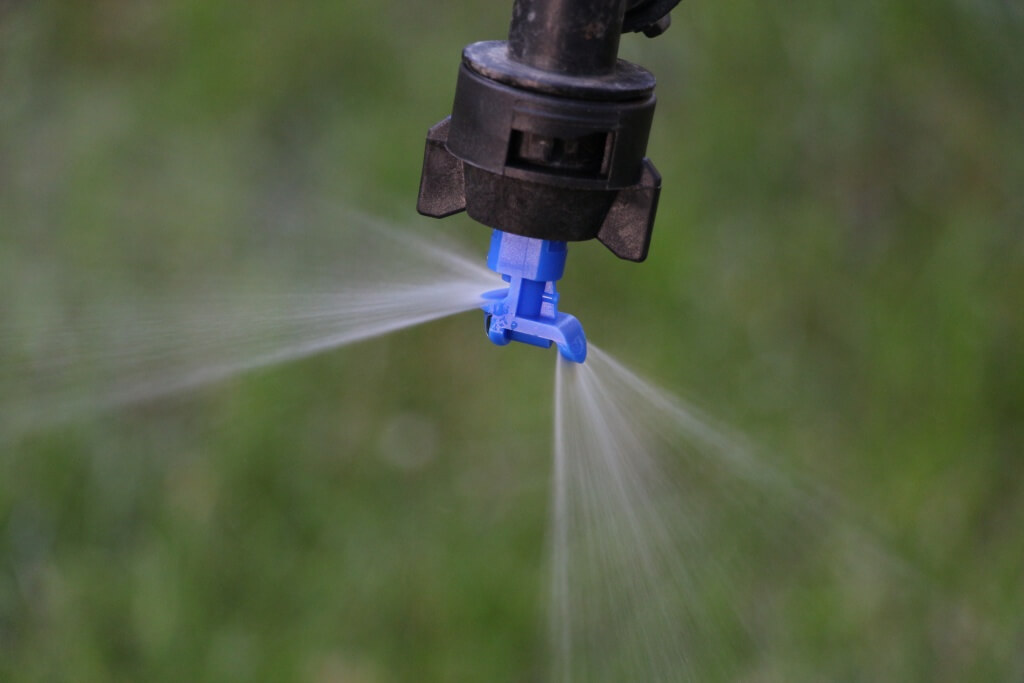
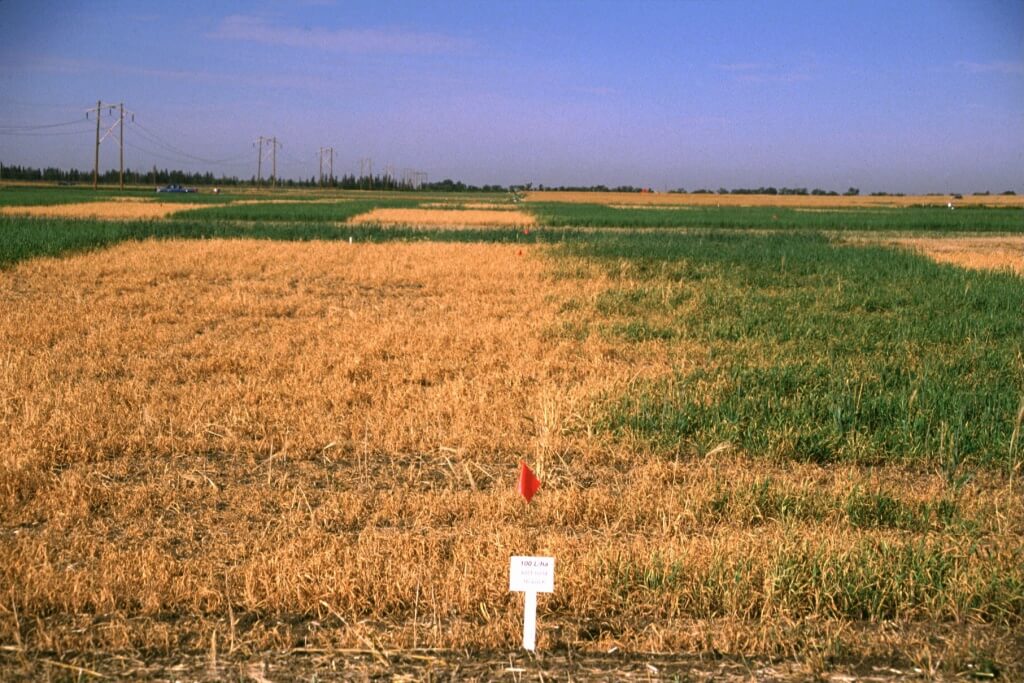
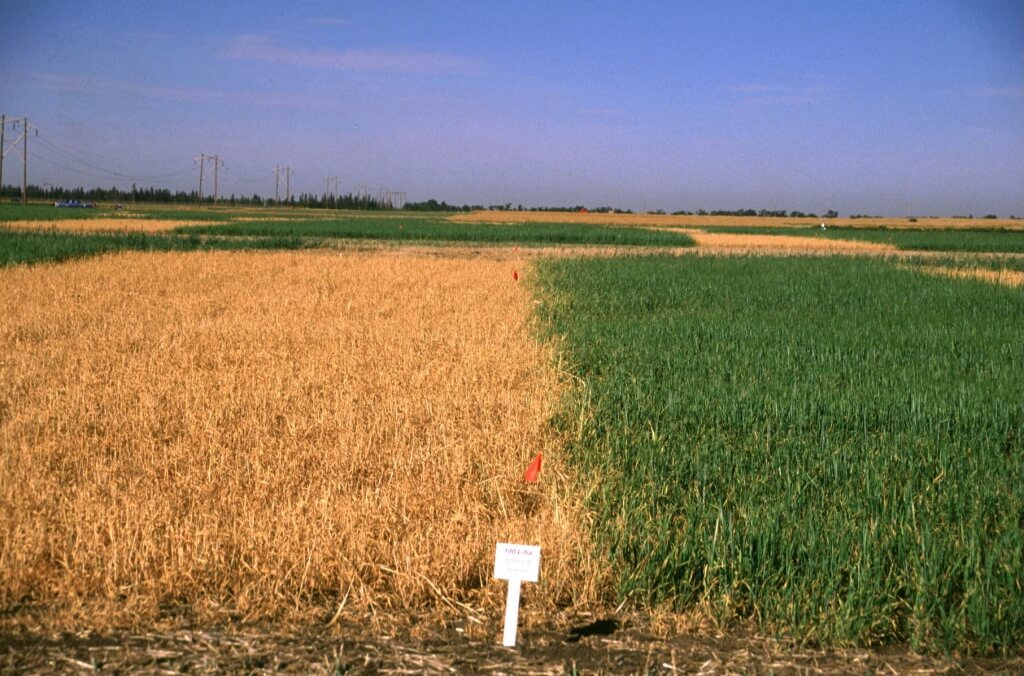
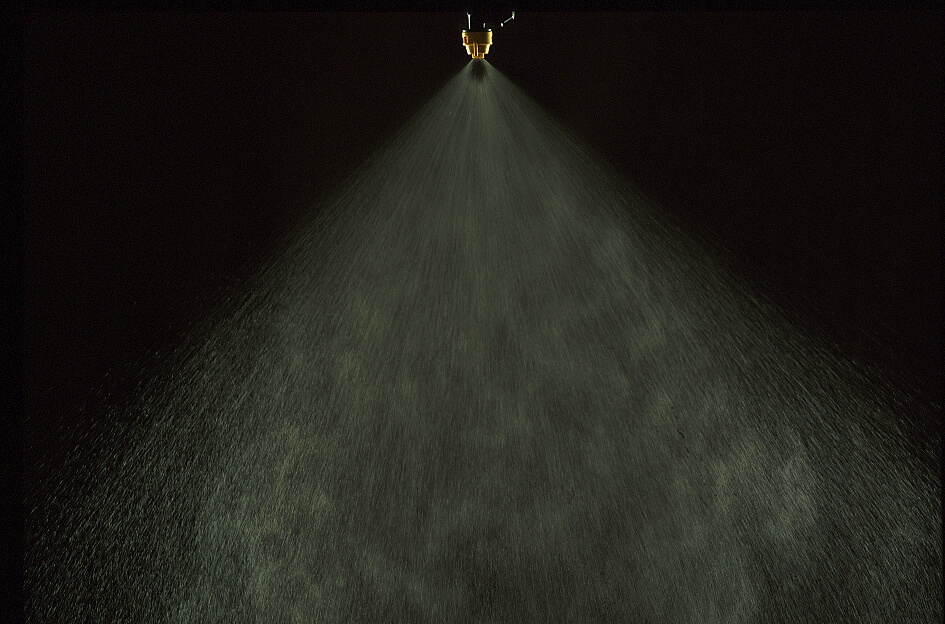
    Nozzles meter the amount of liquid sprayed per unit area, controlling application rate, as well as variability of spray over the width of the sprayer boom. Nozzles also influence droplet size, affecting both target coverage and spray drift risk.

    Nozzles come in a wide variety of types and sizes. The best nozzle for a given application will maximize efficacy, minimize spray drift, and allow compliance with label requirements such as application rate (gallons per acre) and spray droplet size. Selecting the best nozzle requires careful consideration of all the factors listed below:

    Nozzle Type

    • Sprayer operation parameters
      • Application rate, spray pressure, travel speed
    • Type of chemical sprayed
      • Herbicides (soil incorporation, pre/post emergence)
      • Insecticides
      • Fungicides
      • Fertilizers and growth regulators
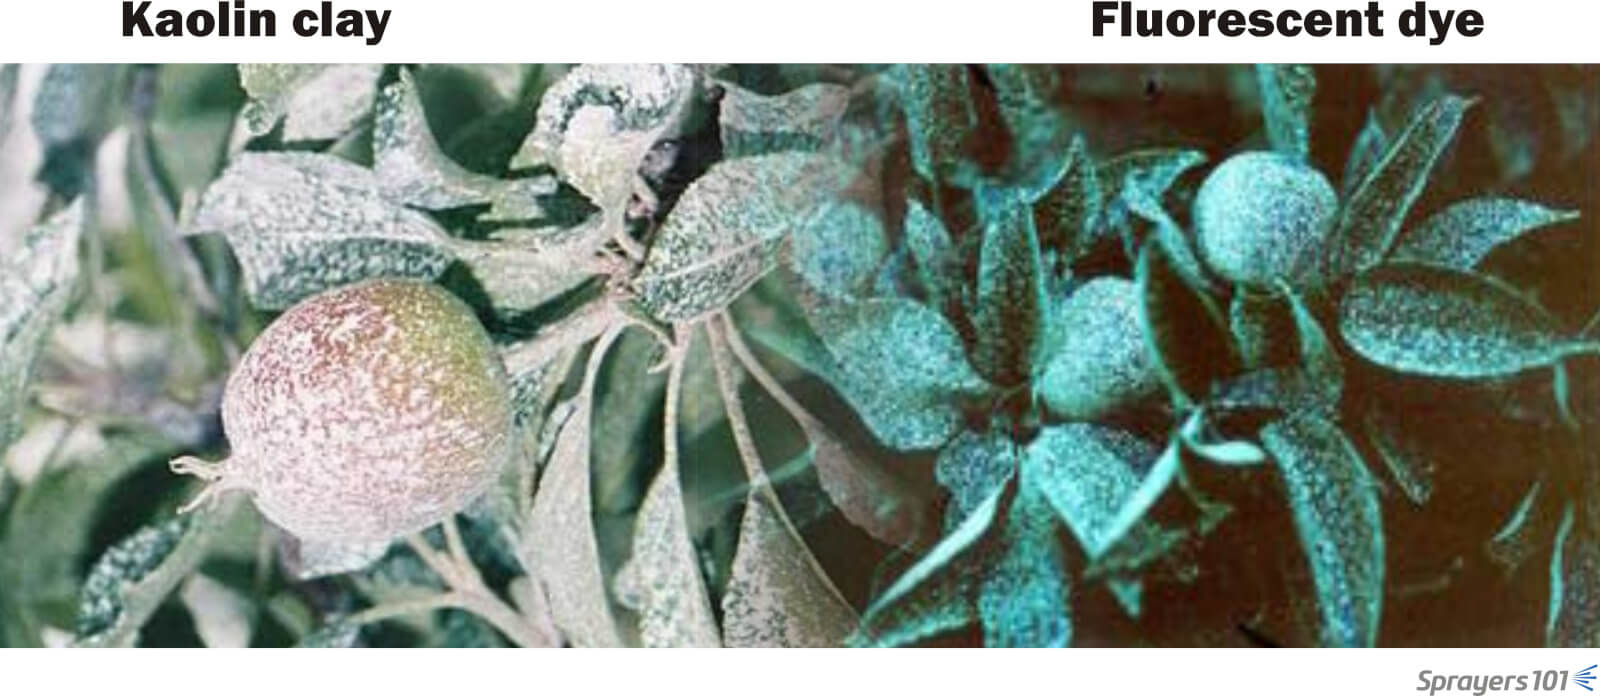
    • Mode of action of chemical (spray coverage requirement)
      • Systemic
      • Contact
    • Application type (broadcast, band, directed, air assisted)
    • Target crop (field crops, vegetables, vineyard, shrubs and trees, etc.)
    • Spray drift risk

    Nozzle Size

    Each nozzle type is designed for a specific type of target and application. For example, a nozzle designed for broadcast spraying is not good for spraying pesticides over a narrow band. Luckily, most nozzle manufacturers’ catalogues have charts showing which nozzle type will be best for a specific job. Check the websites of nozzle manufacturers to reach their catalogues. For more information, contact your county Extension office.

    Nozzle manufacturers’ catalogs provide tables and charts showing application rates (gallons per acre or gpa), given a nozzle’s flow rate (gallons per minute or gpm) delivered at various pressures (psi) and travel speeds (mph). These tables are useful tools for selecting the appropriate nozzles, pressure and speed to spray chemicals at application rates prescribed by product labels. However, the charts are only for a limited number of travel speed and nozzle spacing situations. There may be situations where the charts will not provide information associated with your sprayer setup (nozzle spacing) and operating conditions (travel speed and spray pressure). The Apps developed by most of the major nozzle manufacturers can provide you the exact nozzle flow rate required for any given set of application parameters, and identify a specific set of nozzle recommendations for the given application parameters.

    To find these Apps, simply visit the App Store in your smart phone or tablet and do a search under “Spray Nozzle Calculator”, or some other key words related to nozzle size selection. You may also want to do a search under the name of the nozzle company from which you are interested in buying the nozzles. However, some Apps are not user friendly and sometimes they do not take into account the droplet size requirements when recommending nozzles. Although the Apps and tables in catalogues may expedite the nozzle size selection process, it is best to understand the procedure and the maths nozzle manufacturers use to generate the values listed in tables and to recommend nozzles in their Apps. The procedure used by the nozzle manufacturers to generate numbers in tables and in their Apps is explained below. By following the steps mentioned below, you should be able to determine the exact nozzle flow rate (gpm) required for your spray application parameters.

    Once the exact nozzle flow rate is determined, you can then look at the catalogue to select the nozzle that will provide you the flow rate at a practical pressure setting.

    Steps to select the proper nozzle size:

    The following steps must be taken to determine the nozzle flow rate (gpm):

    1. Select the application rate in gallons per acre (gpa). This is a management decision you will have to make based on pesticide label recommendations, field conditions and water supply.
    2. Select a practical and safe ground speed in miles per hour (mph).
    3. Determine the spray width per nozzle (W). For broadcast applications, W = nozzle spacing (distance between two nozzles on the boom) in inches. For band spraying, W = band width in inches. For directed spraying, W = row spacing in inches (or band width) divided by the number of nozzles per row (or band).
    4. Determine the flow rate (gpm) required from each nozzle by using the following equation: gpm = (gpa x mph x W) / 5,940 (5,940 is a constant to convert gpa, mph and inches to gpm).
    5. Select a nozzle size from the manufacturer’s catalogue that will give the flow rate (gpm) determined in Step 4 when the nozzle is operated within the recommended pressure range. If a nozzle of this size is not available, change the travel speed in the equation above and determine the new flow rate required.

    An Example

    For example: You want to spray a pre-emergence herbicide at 15 gpa, at a speed of 8 mph. The distance between the nozzles on the boom is 20 inches. The herbicide label requires a spray quality of “Medium.” What should be the flow rate of the nozzle you will choose? 

    gpm = (gpa × mph × W) ÷ 5,940

    Since this is a broadcast application (pre-emergence), W is the distance between nozzles (W = 20″). Filling in the variables yields the following calculation:

    gpm = (15 gpa × 8 mph × 20 in) ÷ 5,940 = 0.4 gpm

    This means, to apply 15 gpa at a speed of 8 mph with this sprayer setup, we need to select a nozzle with a flow rate of 0.4 gpm.

    Now, we go to the nozzle catalogue, and find a nozzle that will give us a flow rate of 0.4 gpm, while operating the sprayer at an applicable pressure and travelling at 8 mph. Catalogues have charts for each nozzle, similar to the one shown on the next page. The first column gives the color code of the nozzle (which indicates flow rate), nozzle ID number, and the appropriate filter type for the nozzle. Column 2 gives the pressure range at which the nozzle should be operated. Column 3 gives the spray quality, a measure of spray droplet size (fine, medium, coarse, etc.) produced at different pressure settings. Columns 4 and 5 give the flow rate of nozzles in gallons per minute and ounces per minute, respectively, at different pressure settings. Column 6 gives gallons per acre application rate at different travel speed settings.

    First, we need to find the best type of nozzle for our application. In their catalog, the nozzle manufacturer recommends a flat-fan pattern type nozzle for broadcast application of pre-emergence herbicides. Then we find a chart associated with the nozzle type recommended.

    The chart shown happens to be for that type of a nozzle. Now we proceed with the process to determine the appropriate size of the nozzle.

    Example of a typical nozzle rate table.

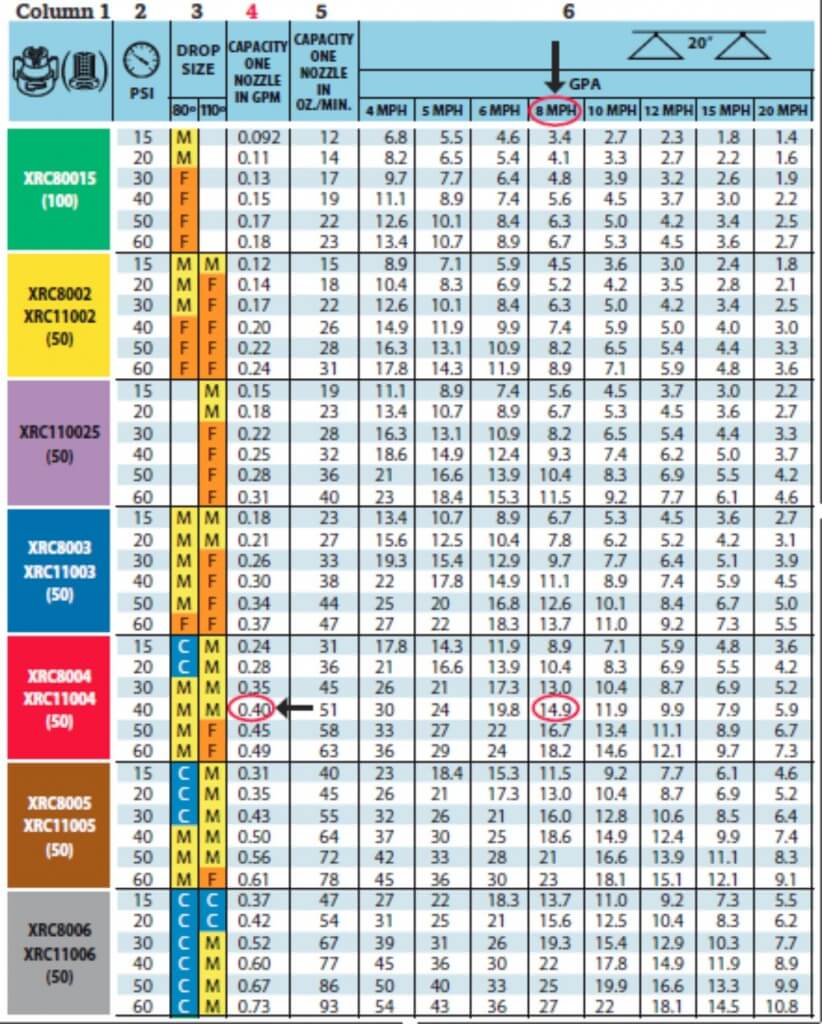
    In our example above, the equation in Step 4 resulted with a flow rate of 0.4 gpm. Now, we look at Column 4 (gpm per nozzle) to determine the nozzle that provides us 0.4 gpm. Using the chart, we see that the nozzles XRC8004 or XRC11004 (shown in red) provide 0.4 gpm flow rate at 40 psi operating pressure. This nozzle also happens to provide Medium (designated with “M”) spray quality as recommended on the herbicide label. Under these operating conditions, this sprayer should apply 15 gpa at 8 mph as we expected. The validation of this is also evident on the chart. If you look at Column 6, choose 8 mph ground speed, the nozzle we selected will spray approximately 15 gallons per acre (14.9 gpa shown on the chart) at 8 mph travel speed and 40 psi spray pressure.

    There may be multiple numbers of nozzles that can satisfy the 0.4 gpm flow rate requirements. However, they may not satisfy the desired spray quality and/or desired travel speed. It may be necessary to adjust pressure and/or travel speed according to nozzle selection. For example, the Brown XRC8005 nozzle is capable of producing 0.4 gpm, and achieving 15 gpa at 8 mph, if the spray pressure is reduced to about 25 psi. Similar calculations can be made using the equation below to come up with other GPM (flow rate) and PSI (pressure) combinations to satisfy the required 15 gpa application rate:

    (GPM₁ ÷ GPM₂) = (√PSI₁ ÷  √PSI₂)

    In this example, reducing the pressure to 25 psi alters the spray quality to “Coarse,” violating the label recommendation. When changing pressure is not an appropriate choice, the only other practical option is to change the travel speed. There is an inverse linear relationship between the travel speed (mph) and the application rate (gpa). The relationship is expressed by the equation:

    (GPA₁ ÷ GPA₂) = (MPH₁ ÷ MPH₂)
    or
    (GPA₁  ×  MPH₁) = (GPA₂  ×  MPH₂)

    Using the relationship above, we can determine that increasing the travel speed to 9.9 mph and keeping the sprayer operating at 40 psi will yield 15 gpa, as described below. The chart shown earlier indicates when using XRC11005, GPA₁ = 18.6 at 8 mph (MPH₁) at 40 psi. We want to find out what the new travel speed (MPH₂) should be to achieve 15 gpa (GPA₂). Using the equation above:

    (18.6 GPA  ×  8 MPH) = (15 GPA  ×  MPH₂)
    so
    MPH₂ = (18.6 GPA  ×  8 MPH) ÷  15 GPA = 9.9 MPH

    However, increasing travel speed to 9.9 mph may not be practical or safe. When changes to pressure or travel speed as dictated by the equations above are neither practical nor safe, it may be necessary to select a different nozzle.

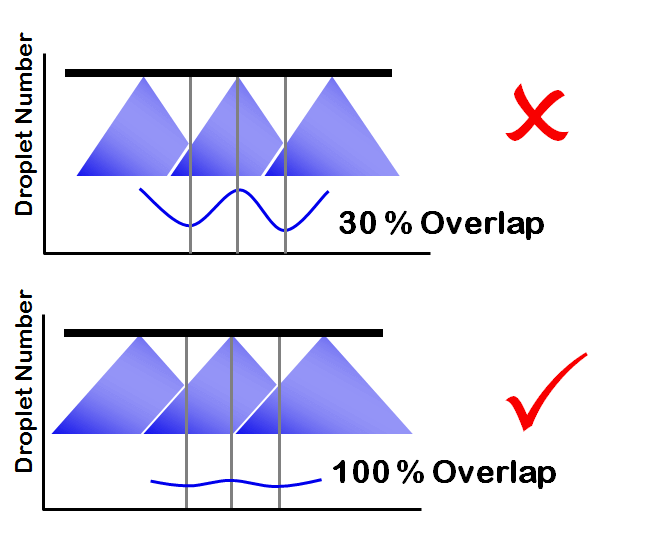
    In this example, it looks like the best nozzles to use for our application situation are XRC8004 or XRC11004, both providing 0.4 gpm at 40 psi. The only difference between these two nozzles is in the angle of spray pattern: one produces an 80 degree fan pattern (XRC8004), while the other one (XRC11004) produces a 110 degree fan pattern. Due to the difference in the angle of the spray pattern, each of these nozzles require different boom heights to obtain proper overlap between two adjacent nozzles.

    Calibrate the sprayer

    Selecting the right type and size of a nozzle is not sufficient to end up with accurate, effective and efficient application of chemicals sprayed. Changes in ground conditions (tilled, un-tilled, grass, wet, dry), and the topography of the field sprayed (flat, sloped) will affect the ground speed which is one of the variables used in determining the correct nozzle size. Nozzle orifices wear out with time causing larger flow rates and distorted spray patterns than when they were new. The gpm flow rate values given in catalogues or in Apps are based on spraying water only. Spraying solutions with higher densities than water (most spray solutions are) will affect the flow rates of nozzles at the same spray pressure. For the reasons mentioned above, sprayers should be calibrated frequently, especially when the field conditions change, to determine the actual application rate.

    Calibration is easy, and there are many ways to do it. regardless of the method chose, three measurements will be taken:

    • actual ground speed,
    • the distance between nozzles, and
    • nozzle flow rate for a given length of time.

    One easy method is explained in an OSU Extension Publication (AEX 520) listed in the references at the end of this article.

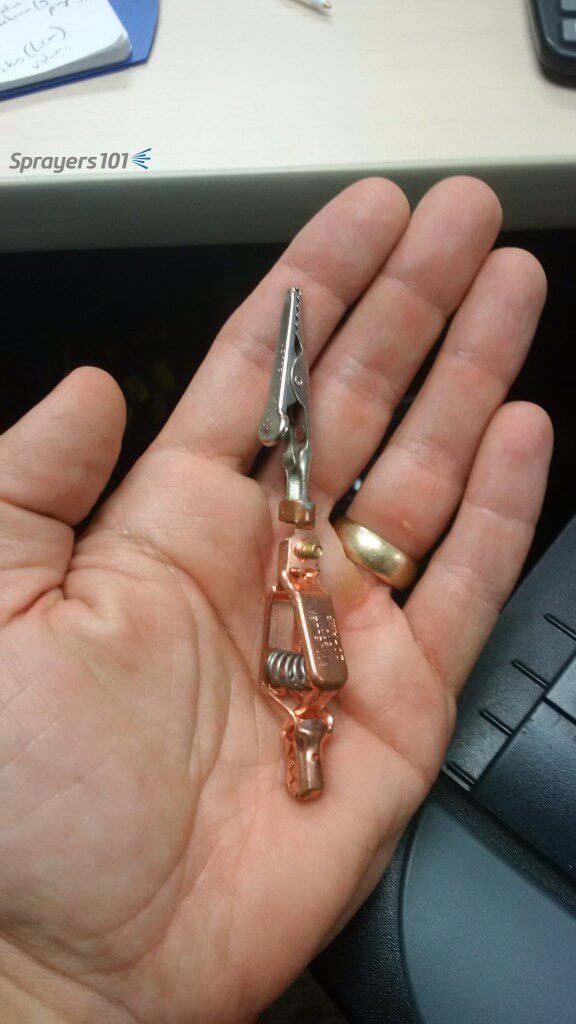
    Keep several types of nozzles on the boom

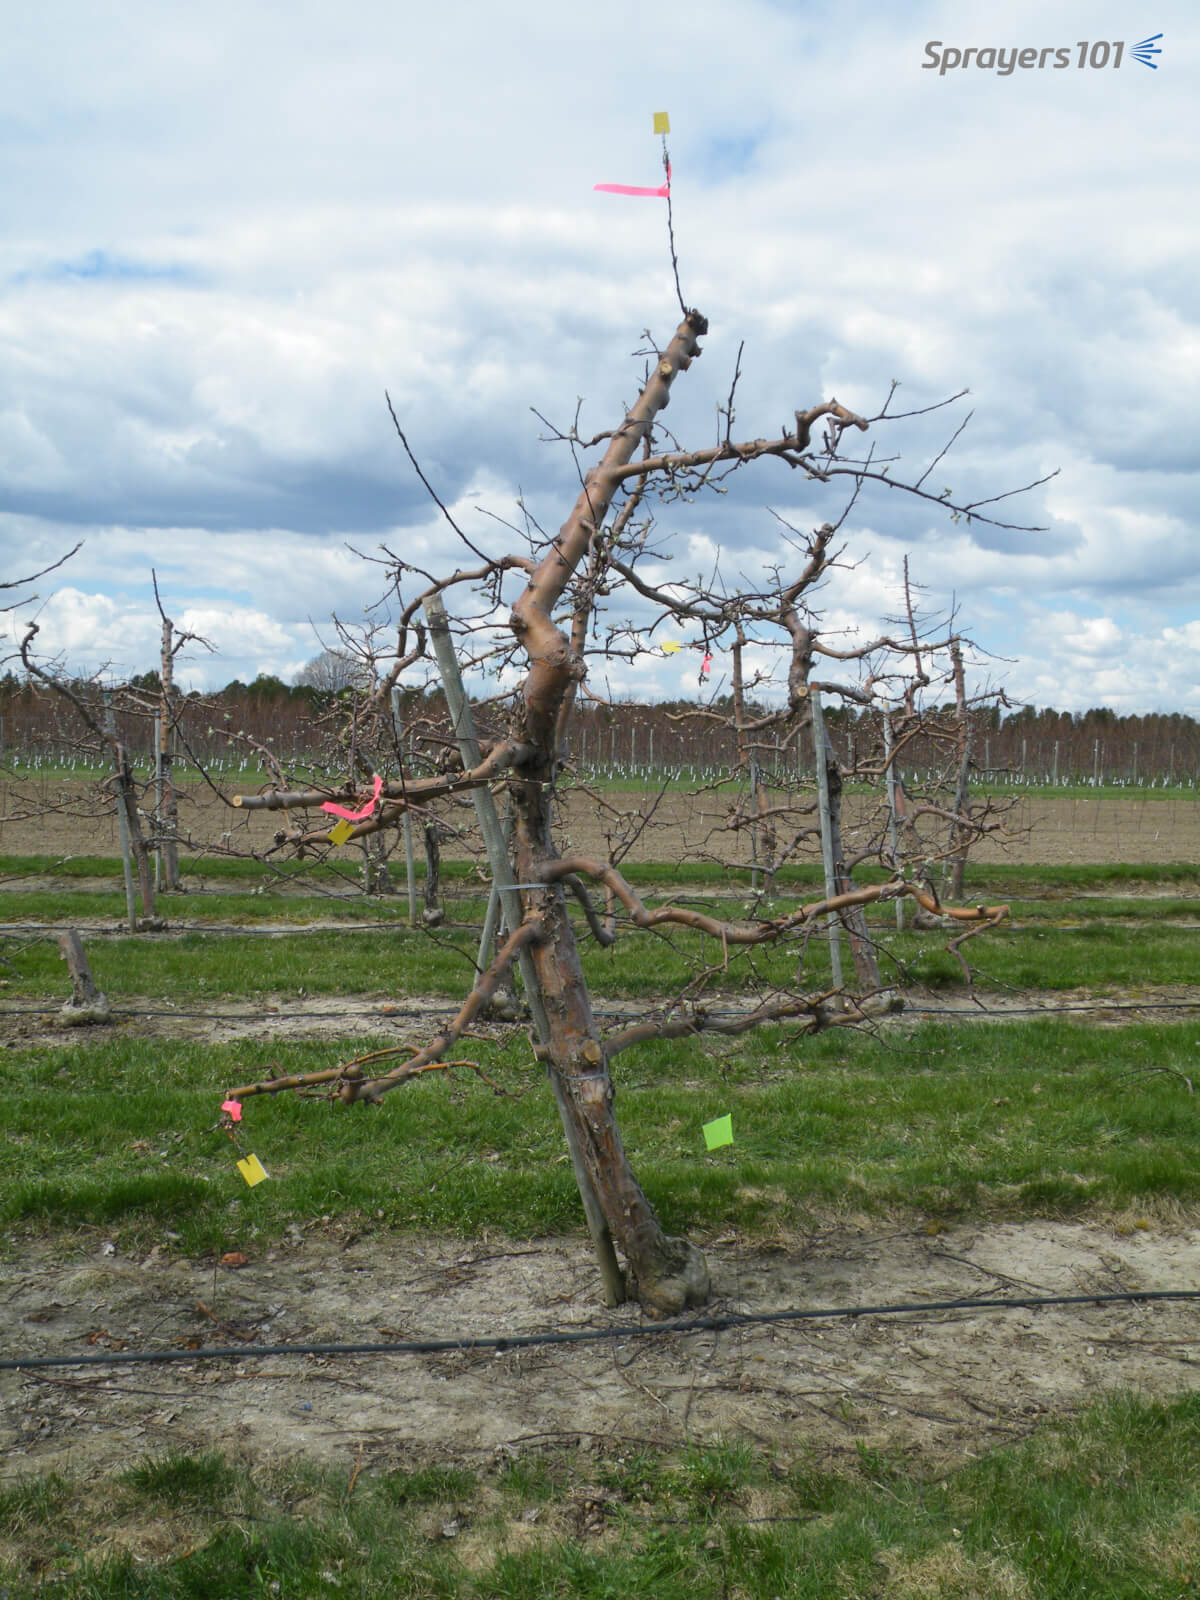
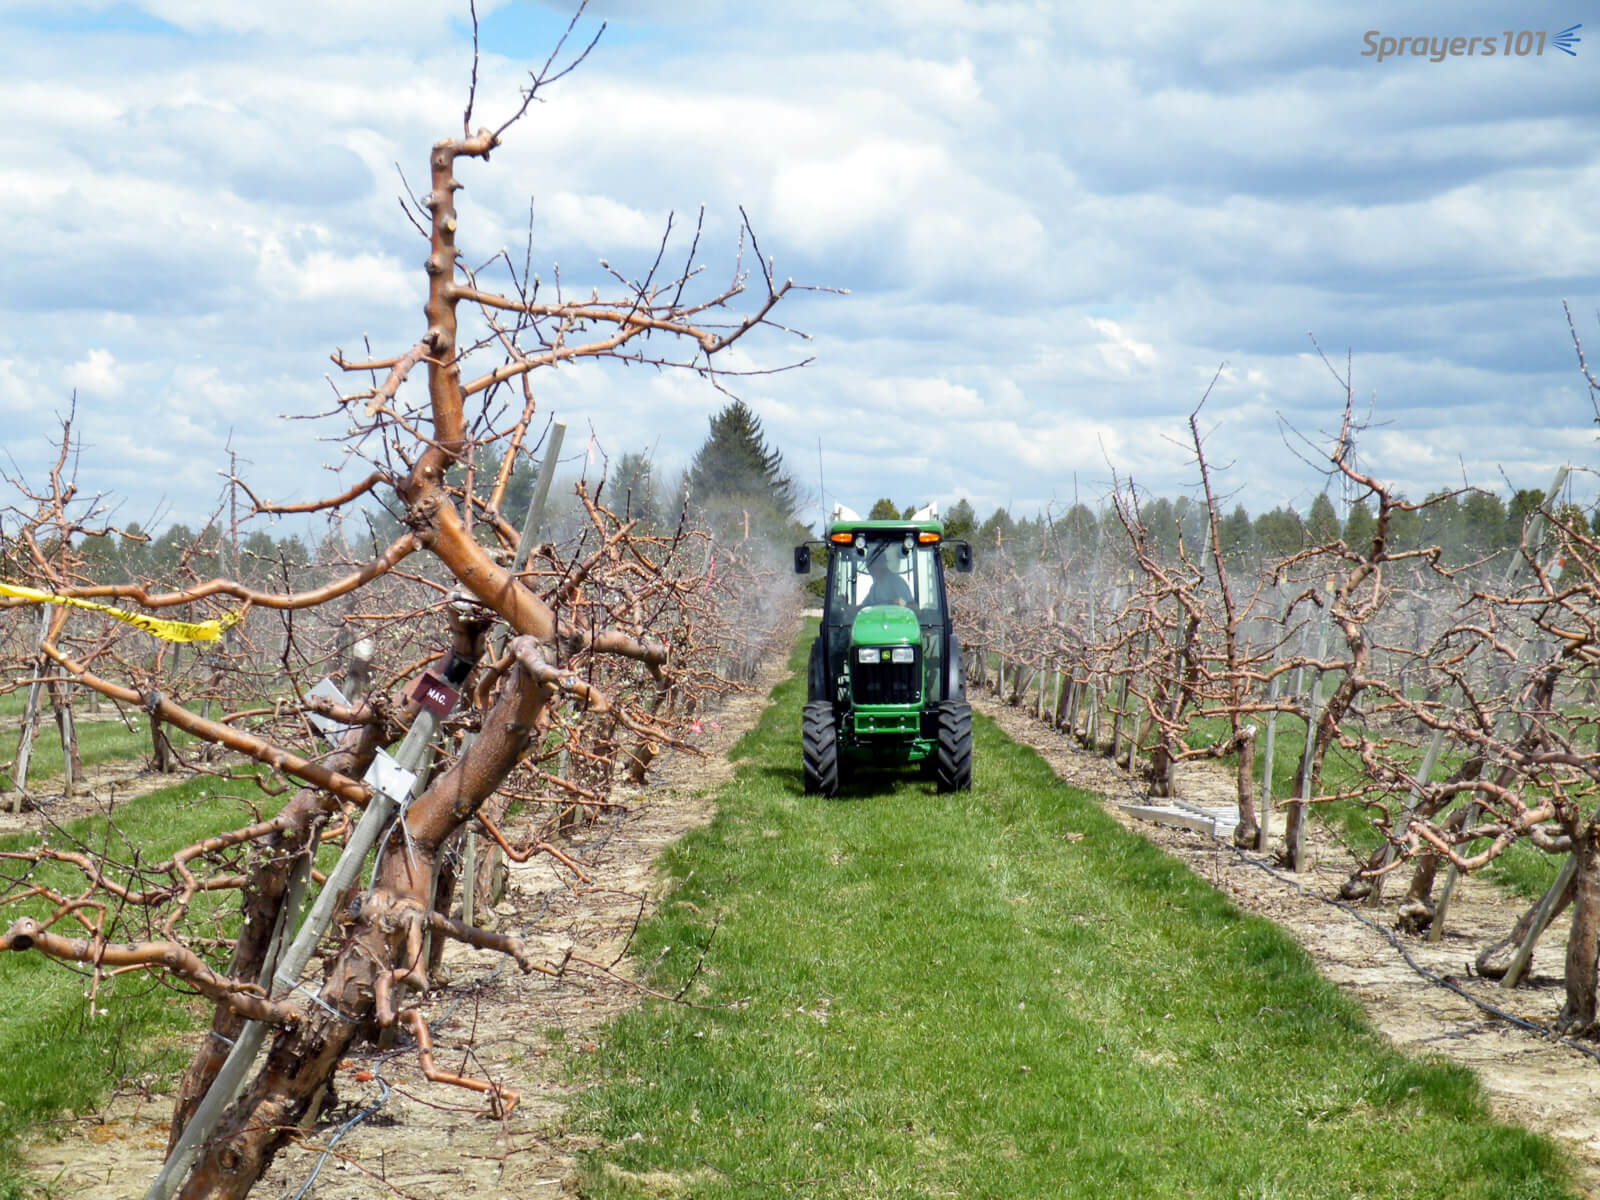
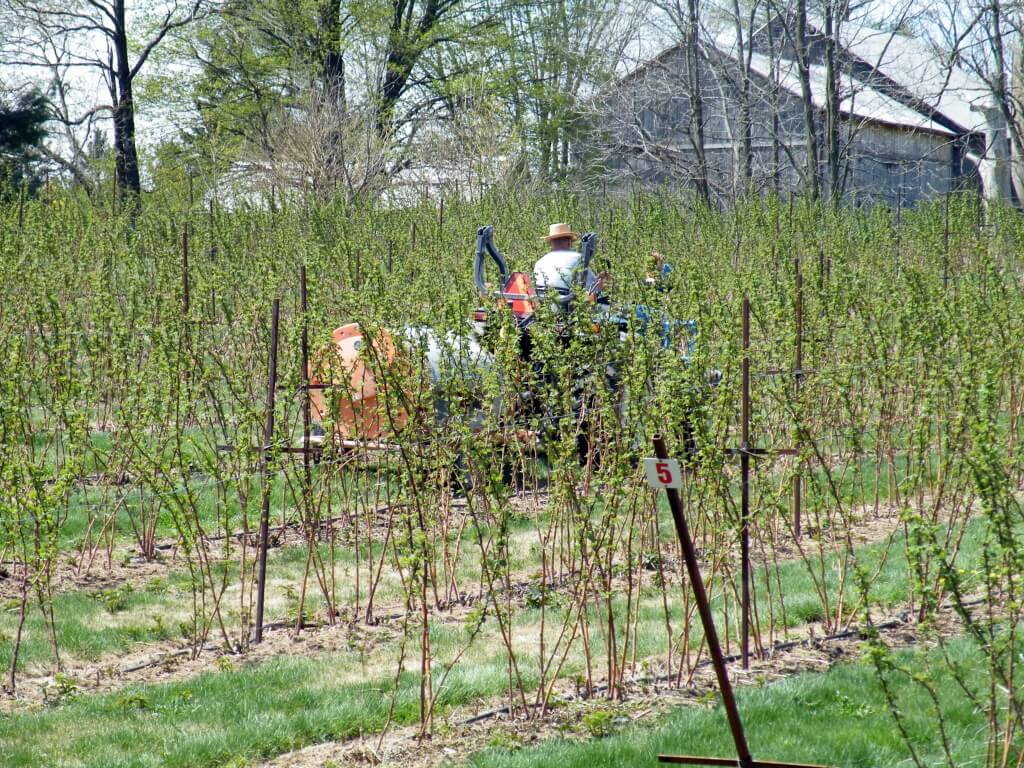
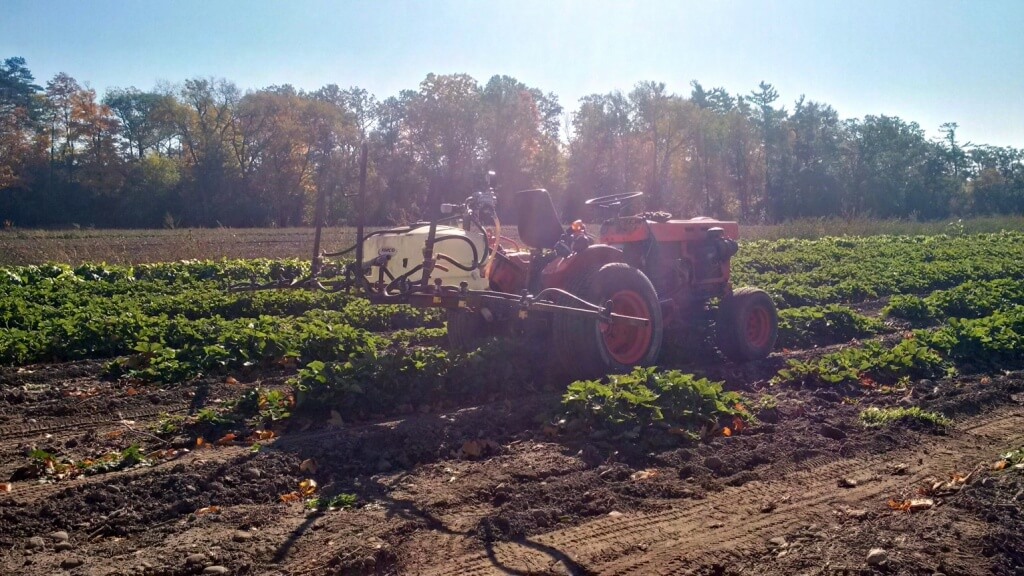
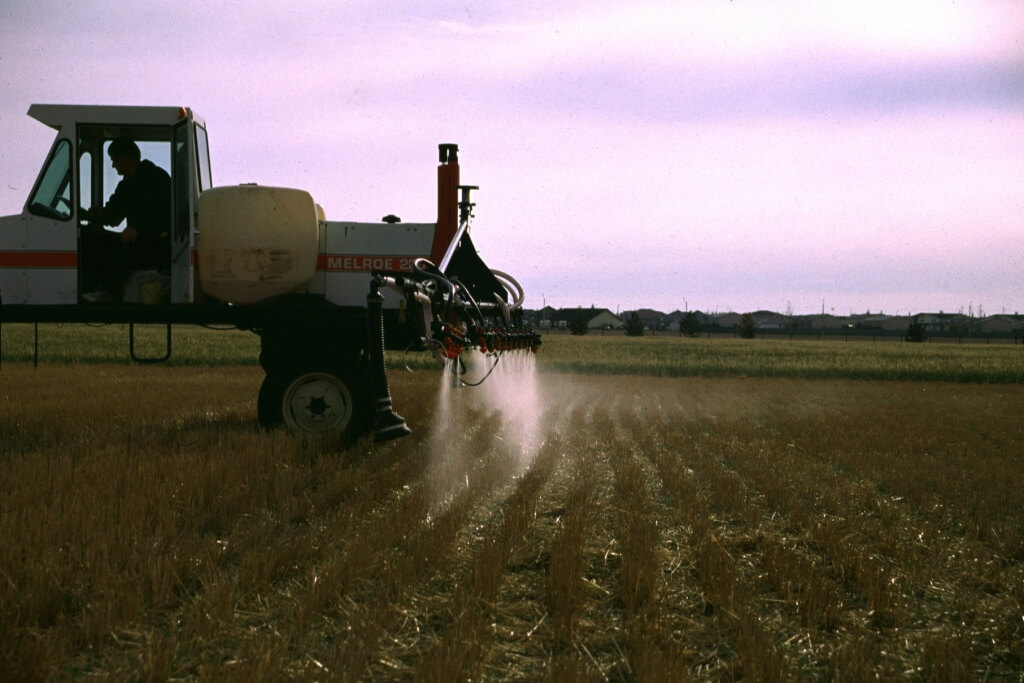
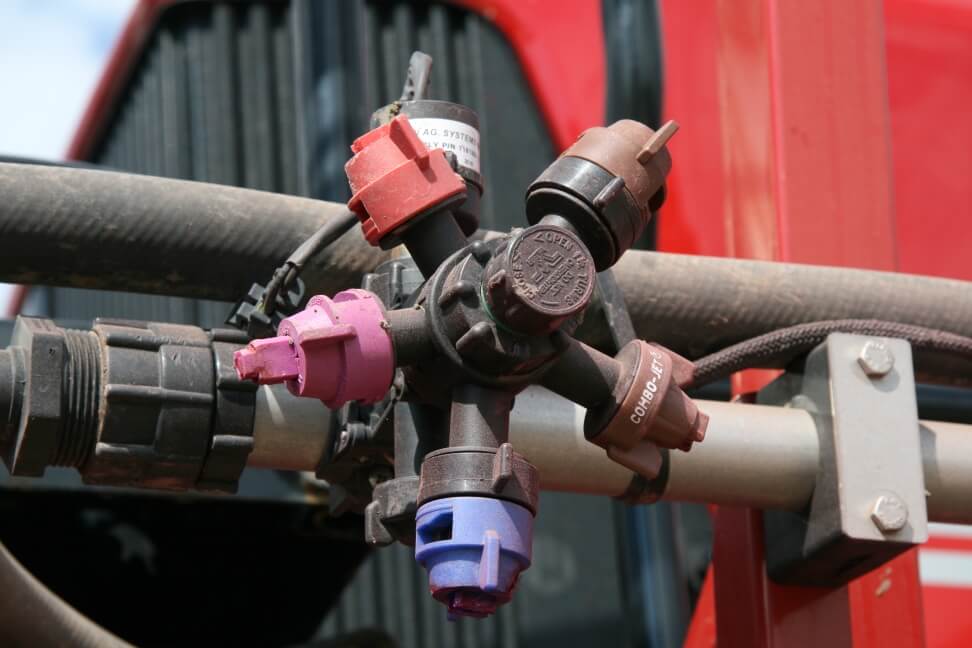
    Remember that one specific type of nozzle will not be best for all applications. For this reason, it is best to have several types and sizes of nozzles on the boom so that you can switch to the “best” nozzle choice for a given spraying job. As shown in the pictures below, there are various types of sprayer components and setups you can buy to configure your boom so the new set up allows you to easily switch from one nozzle to another instantly.

    Nozzle Turret

    Keep spray drift in mind when selecting nozzles

    One of the major problems challenging pesticide applicators is spray drift, which is defined as movement of pesticides by wind from the application site to an off target site. Drift is influenced by many factors which are discussed in detail in two OSU Extension publications (Bulletin 816 and AEX-525) listed in the references at the end of this article. Equipment, especially the nozzles, used to spray pesticides play a significant role in generating as well as reducing spray drift. In nozzle catalogues, you can see a number of different nozzles of the same type, in terms of spray pattern. For example, one can find nozzles within the same “flat-fan” category classified as “low-drift.” Research conducted at Ohio State and elsewhere clearly indicate that nozzles labelled as “low-drift” significantly reduce spray drift as discussed in OSU Extension publication AEX-523 (listed in the references below). If drift is, or becomes a concern, it may be best to switch from a conventional flat-fan nozzle to a “low-drift” flat-fan nozzle with the same flow rate. Therefore, it is best to have more than one type of a “flat-fan” pattern nozzle on the boom.

    Summary and conclusions

    Nozzles are typically the least costly items on a sprayer, but they play a key role in the final outcome from a spraying job: achieving maximum efficacy from the pesticide applied while reducing the off-target (drift) movement of pesticides to minimum. Pesticides work well if the rates on labels are achieved during application. This can be achieved only if the right nozzle type and the proper size of the nozzles are on the sprayer, and the sprayer is operated properly.

    Although the Apps and tables in catalogs may expedite the nozzle size selection process, it is best to understand the process and the math nozzle manufacturers use to generate the values listed in tables, and to generate nozzle recommendations in their Apps. This procedure, explained in this publication, hopefully will help you to determine the exact nozzle flow rate (gpm) required for your spray application parameters, while highlighting some other important parameters such as spray pressure, droplet size, spray coverage on the target, and drift, all of which should be given serious consideration when selecting the best nozzle for a spraying job.

    Acknowledgments

    The author thanks Mary Griffith, Agriculture and Natural Resources Extension Educator, OSU Extension; Dr. Larry C. Brown, Professor and Extension Specialist, Department of Food, Agricultural and Biological Engineering, The Ohio State University; and Dr. Robert “Bobby” Grisso, Professor and Associate Director, Virginia Cooperative Extension, Virginia Tech University, Department of Biological Systems Engineering; for reviewing this publication and for their editorial contributions.

    References

    1. Ozkan, E. Calibrating boom sprayers. Ohio State University Extension publication AEX-520, Columbus, Ohio.
    2. Ozkan, E. New nozzles for spray drift reduction. Ohio State University Extension publication AEX-523, Columbus, Ohio.
    3. Ozkan, E. and R.C. Derksen. Effectiveness of Turbodrop® and Turbo Teejet® nozzles in drift reduction. Ohio State University Extension publication AEX-524, Columbus, Ohio.
    4. Ozkan, E. and H. Zhu. Effect of Major Variables on Drift Distances of Spray Droplets. Ohio State University Extension publication AEX-525, Columbus, Ohio.
  • How to evaluate airblast coverage

    How to evaluate airblast coverage

    Note: While there’s nothing wrong with this article, a more recent article on this subject can be found here.

    It’s nearing the end of a long morning of spraying and you just want to get it done. As the tank empties and you watch the last of the spray cloud waft through the row, you’re thinking about rinsing out and moving on… but did the spray land where you wanted?

    How do you really know if you hit the target?

    Maybe you’re content with the occasional “shoulder checks” you made from the cab while spraying. Perhaps you stop at the end of the row and get out of the tractor to look for wet foliage during.
    Maybe you plan to return once the product is dry and look for white residue.

    Taken with the sprayer operator’s smart phone, here’s the over-the-shoulder view of an early-morning spray application from the cab. You can’t see coverage, but gaps in the spray will show if nozzles are plugged. You can also check to see if you are overshooting or blowing through the target. Photo Credit – C. Hedges, ON.
    This early morning “shoulder check” was photographed by the operator using his smartphone.  You can’t see coverage, but gaps in the spray will show if nozzles are plugged. You can also check to see if you are overshooting or blowing through the target. Photo Credit – C. Hedges, ON.

    These are all good feedback practices, but a more accurate method is the use of water-sensitive paper, which turns from yellow to blue wherever spray touches it. You can easily see the distribution of the spray and the overall area covered, and it can be quantified so you can compare one sprayer set-up to another, or see the impact of weather, or even the effects of nozzle choice, pressure and  water volume.

    Water- (and oil-) sensitive paper: Cheap, simple and available on-line or in person from your favourite sprayer equipment store.
    Water- (and oil-) sensitive paper: Cheap, simple and available on-line or in person from your favourite sprayer equipment store.

    Draw a map

    Begin by creating a simple drawing of the tree, cane, bush,vine, etc. you wish to spray. Label the drawing with unique numbers that correspond to where you are going to place the papers. Write the numbers on the back of each paper so you can see where they came from after they are collected. You should also note the pass number, so you can differentiate between each sprayer setup and corresponding pass. You might make a change and want to see how it affects coverage, and it’s very easy to mix up the papers if you haven’t record everything clearly. Plan to do this for at least two plants upwind from the sprayer to ensure you will get an accurate representation of average coverage. Be sure to wear disposable gloves and avoid dew so the papers don’t react prematurely.

    Create a simple drawing of the target. Number positions on the drawing that correspond to where you plan to place the papers.
    Create a simple drawing of the target. Number positions on the drawing that correspond to where you plan to place the papers.

    Distribute the papers

    It is critical to distribute the papers evenly throughout each target canopy. They should be placed in key locations where pest damage has been an issue in the past (e.g. scab at the top of a tree, or spotted-wing drosophila at the bottom-centre of highbush blueberry), or anywhere coverage is notoriously difficult. Our preference is to place them at the top, centre and bottom of a tree canopy as well as laterally from the outer edge of the canopy beside the sprayer moving in towards the trunk.

    Number positions on the drawing that correspond to where you plan to place the papers. Label the papers as well so you know where they came from. Consider writing the pass number and the position (e.g. 1-1 would be Pass 1, Position 1) so you can evaluate the changes to the sprayer settings from pass to pass. (Figure 60) Later, all the information from the calibration can be entered into your spray records, like in this example.
    Number positions on the drawing that correspond to where you plan to place the papers. Label the papers as well so you know where they came from. Consider writing the pass number and the position (e.g. 1-1 would be Pass 1, Position 1) so you can evaluate the changes to the sprayer settings from pass to pass. Later, all the information from the calibration can be entered into your spray records, like in this mock-up.

    We use spring-back paper clips attached to alligator clips at 90 degrees to attach the papers to small branches. You can also staple them to the upper or lower face of the leaves (as long as they don’t cause leaf to droop). You can wrap them around stems for panoramic coverage or to monitor drenches. They can be stapled the trunk to show if spray is aimed into the canopy or being wasted. You can even skewer to the ground using wire flags to to illustrate poor lower-nozzle positioning and/or canopy run-off. Put them wherever you want to know about spray coverage!

    This home-made double-ended alligator clip holds papers at right angles. One end for the paper, the other end to a twig or wire flag.
    This home-made double-ended alligator clip holds papers at right angles. One end for the paper, the other end to a twig or wire flag.

    We typically orient them facing the alleys so their sensitive faces are square to the sprayer as it passes. We often use two in each location, oriented back-to-back facing each alley so you can resolve coverage from both sides. The important part is to ensure you are consistent. Mark the location in the canopy with some colourful flagging tape so you can find the papers after you spray, and if you wish to replace them with fresh papers to evaluate another pass, orient them the same way to make the comparison fair.

    Water-sensitive papers located in five positions in an Empire apple tree. Two papers were pinned back-to-back in each position, distributed evenly throughout the canopy, facing the alleys. One paper was located at the lowest branch to determine if the lowest nozzle position needed to be on. Another paper was pinned to the ground face-up under the tree to show any excessive waste. Be creative, but be consistent from pass to pass.
    Water-sensitive papers located in five positions in an Empire apple tree. Two papers were pinned back-to-back in each position, distributed evenly throughout the canopy, facing the alleys. One paper was located at the lowest branch to determine if the lowest nozzle position needed to be on. Another paper was pinned to the ground face-up under the tree to show any excessive waste. Be consistent from pass to pass.

    Spray, check and spray again

    Once the papers are in place, pass by on one side with both booms open (as you would normally spray). Be sure to start spraying well before passing the target, and keep spraying afterwards to ensure the resultant coverage represents an actual application. It is very informative to get out of the cab and examine the papers before passing by on the other side. You can learn a lot about how the wind is affecting the spay.

    Once papers are in place, pass by spraying with both booms open to emulate a typical spray day. Be sure to start spraying well before passing the target, and keep spraying afterwards to ensure the resultant coverage represents an actual application. It can be very informative to examine coverage at this point to see how wind is affecting the spray. Then, pass by on the other side to complete the application.
    Once papers are in place, pass by spraying with both booms open to emulate a typical spray day. Be sure to start spraying well before passing the target, and keep spraying afterwards to ensure the resultant coverage represents an actual application. It can be very informative to examine coverage at this point to see how wind is affecting the spray. Then, pass by on the other side to complete the application.
    An example of the coverage obtained on water-sensitive papers placed throughout an apple tree canopy, and on the ground beneath it.
    An example of the coverage obtained on water-sensitive papers placed throughout an apple tree canopy, and on the ground beneath it.

    Interpret the patterns

    You might notice the outer portions of larger canopies receive more spray than the inside. This is hardly surprising given that spray must pass through the outside to get to the inside. As a result, inner papers often receive proportionally less spray and should be the basis for determining if you have sufficient spray coverage. This is also why the label recommendation of “spraying to the point of runoff” is unhelpful: the outer portion of wide, dense canopies often begin to drip before the inner portion receives sufficient coverage. Further, how do you spray to the point of runoff? How do you know when to stop before it’s too late? Label language can be frustrating…

    When water-sensitive paper is sprayed to the point of run-off, the blue dye will drip. This is fine for a drench (dilute) application, but excessive for a typical concentrated application like foliar fungicides and insecticides.
    When water-sensitive paper is sprayed to the point of run-off, the blue dye will drip. This is fine for a drench (dilute) application, but excessive for a typical concentrated application like foliar fungicides and insecticides.

    When assessing coverage, don’t follow the droplet counts in the small guide that comes with the paper sensitive paper kit – they haven’t been updated for a very long time and are more appropriate for field crop applications – not airblast applications. Research and experience suggest that 85 discrete fine/medium-sized droplets per square centimetre and a total coverage of 10-15% should be sufficient for most foliar insecticides and fungicides. Remember, this is only a suggested threshold and in the case of coarser sprays, focus more on even distribution and the 10-15% coverage.

    It’s debatable, but 85 fine/medium-sized drops per square centimetre and about 10-15% total surface covered represents adequate airblast spray coverage for most foliar applications. It is less applicable for applications made with very coarse droplets, because there are fewer of them and they generally cover more area. In this case, focus more on the even distribution of spray and the 10-15% coverage. The extreme example of this is a drench (dilute) application of oil where total saturation is the goal.
    It’s debatable, but 85 Fine/Medium-sized drops per square centimetre and about 15% total surface covered on a minimum 80% of all papers represents adequate airblast spray coverage for most foliar applications. It is less applicable for applications made with Coarse/Very Coarse droplets, because there are fewer of them and they generally cover more area. In this case, focus more on the even distribution of spray and the 15% coverage. An extreme example of this is a drench (dilute) application of oil where total saturation is the goal. Conversely, ultra-low volume applications employ Very Fine droplets and a better metric is uniform, high droplet density rather than area covered.

    Make a change and try again

    There’s no easy way to define a threshold between sufficient and insufficient spray coverage. When you retrieve and examine the papers, think about how the product is intended to work: “Is it a contact, trans-laminar or locally systemic pesticide? What are the odds that an insect or spore will come in contact with residue? Will I be spraying again soon (e.g. fungicide) and will the spray already on the leaves have residual activity?” Regarding that last thought, protectant fungicide applications are often layered, so what one spray misses, the next will catch. Quite often, “sufficient coverage” is less than most sprayer operators think.

    If you are content with the coverage, record your sprayer settings to use them again in that block (in similar weather, and assuming the crop canopy doesn’t change significantly before the next spray day). If you are not content, make a change to the sprayer to improve matters, reset the papers, and go again. It can take time and some effort to get it right, but improved coverage and reduced waste are ample financial reward for your efforts.

    Other methods of evaluating coverage

    It should be noted that while water-sensitive paper is versatile, cheap and easy to use, it has its shortcomings. Placement and orientation of the paper is very important; it’s easy to hit papers on the outside of the canopy with the sensitive-side facing the sprayer. It’s considerably harder when they are at the very centre of the canopy, or hiding behind fruit. When the thin edge of the paper is oriented to the spray (i.e. oriented facing the ground), it presents very little surface and can be difficult to hit.

    Use enough air to only just ruffle the leaves. This exposes all surfaces, however briefly, to the spray. Too much air will align leaves with the spray, exposing only their thin edge and making coverage difficult. Too much air may also cause leaves to shingle (overlap), and create shadows like on the grape leaves shown here.
    Use enough air to only just ruffle the leaves. This exposes all surfaces, however briefly, to the spray. Too much air will align leaves with the spray, exposing only their thin edge and making coverage difficult. Too much air may also cause leaves to shingle (overlap), and create shadows like on the grape leaves shown here.

    Further, the papers won’t show the finest droplets (<50 µm), so there may be spray even though you can’t see it. Taken collectively with the product’s mode of action (i.e. contact or locally systemic), and any possible re-distribution by rain or dew, spray coverage becomes a good indicator for protection, but it isn’t definitive. While coverage is a good indicator, improved coverage does not always mean improved efficacy.

    Some sprayer operators use other methods to confirm their coverage. Kaolin clay is an inert compound that leaves white residue when dry. Red, yellow or green water-soluble, food-grade dyes will also indicate coverage. Even fluorescent dyes such as phosphorus can be sprayed at night and illuminated under black lights.

    Kaolin clay and fluorescent dies sprayed into fruit canopies give a lot of information about sprayer coverage, but are relatively inconvenient compared to water-sensitive paper.
    Kaolin clay and fluorescent dies sprayed into fruit canopies give a lot of information about sprayer coverage, but are relatively inconvenient compared to water-sensitive paper.
    Red food-grade dye sprayed from a horizontal boom to demonstrate downwind drift onto a white target. This was a messy experiment and my hands, and the sprayer, were pink for a long time afterwards. Photo Credit – J. McDougall, Ontario.
    Red food-grade dye sprayed from a horizontal boom to demonstrate downwind drift onto a white target. This was a messy experiment and my hands, and the sprayer, were pink for a long time afterwards. Photo Credit – J. McDougall, Ontario.

    Take home

    These methods give the sprayer operator a lot of information because they land on the actual target, not a piece of paper hung in the canopy. But, they require a lot of time and effort and are typically out of reach for most operators. Further, they do not allow multiple applications on the same canopy to compare the effect of sprayer settings on coverage – once the target is sprayed, it’s sprayed.

    No matter which method you choose to use, understanding how changes to you sprayer, or the impact of weather, affect coverage is a critical piece of information. Operators should make an effort to evaluate spray coverage. Here are a few videos describing the process:

    Using water-sensitive paper for airblast coverage diagnostics – thanks to Penn State, Univ. New Hampshire and Chazzbo Media (2014).

    Checking water-sensitive paper in an orchard. Tower is spraying only water during a calibration run (2013).

  • Disease Control in Berry Crops

    Disease Control in Berry Crops

    In the spring of 2016, the Ontario Berry Growers Association (OBGA) conducted a survey of its membership to poll how fungicides were being applied. The results were very interesting.

    Fungicide basics

    Generally, fungicides registered for berry crops are contact products, so coverage and timing are very important. The fungicide has to be distributed evenly on the target before disease has a chance to infect the crop. That means the sprayer operator must be aware of the susceptibility of the crop to the level of disease pressure to ensure timing is appropriate. While kickback and post-application distribution of pesticide residue is sometimes possible, sprayer operators should not rely on it. The following table outlines application recommendations for a fungicide commonly used in Ontario. It combines labelled information and provincial recommendations and is representative of most fungicides.

    Summer-fruiting and Fall-bearing Raspberry / Blackberry Highbush Blueberry Day-neutral and June-bearing Strawberry
    Labelled rate 2.5 kg/ha 2.25 kg in 1,000 L/ha2.75-4.25 kg in 1,000 L/ha
    Diseases (Labelled and Ontario provincial recommendations) Anthracnose fruit rot, Spur blight, Leaf spot, Botrytis grey mouldAnthracnose fruit rot, Shoot blight (Mummy berry), Botrytis twig and/or blossom blightCommon leaf spot, Botrytis grey mold
    Crop staging Bloom, Pre-harvest, HarvestFirst bloom, Fruit ripeningFlower bud, First bloom, 7-10 days after bloom, Pre-harvest, Through to fall
    As of 2016

    The spray target

    The applicator reading the recommendations should be considering the best way to get the fungicide to the target. But, what is the target, and what is the best way to apply it? It seems the recommendations raise as many questions as they answer:

    • With the possible exception of blueberry, this fungicide can be applied through much of the growing season (especially when it’s been a wet season). That means the crop staging is highly variable.
    • The primary target is blossoms, but depending on the disease, leaves and stems are also important.
    • The label states a volume of carrier (i.e. 1,000 L/ha) for strawberry and blueberry, but not the cane fruit. It does not specify highbush blueberry versus the sessile, ground cover variety.

    So, this means is the sprayer operator has to spray crops with highly variable physiology (e.g. bush, cane or sessile row crops), onto very different targets (e.g. leaves, canes, stems, flowers) throughout much of the season as the crop canopies grow and fill. This is a very challenging spray application. It would be wrong to suggest a single spray quality, water volume or sprayer set-up to efficiently accomplish all these goals (more on that later). The first consideration is the application equipment itself.

    The application equipment

    Berry growers employ a variety of sprayers to protect berries. Without considering models or optional features, there are three fundamentally different styles: Airblast, backpack and boom. According to the survey, the following table shows which sprayers are used in which berry crop in Ontario. Approximately 60 growers responded, and many grow more than one variety of berry and use more than one style of sprayer.

    Jacto airblast in raspberry
    Jacto airblast in raspberry
    Airblast SprayerBackpack or Wand SprayerVert. or Hor. Boom SprayerTotal
    Highbush blueberry 8109
    Day-neutral Strawberry 302124
    June-bearing Strawberry503237
    Raspberries & Blackberries211729
    Total37260

    So, generally, cane and bush berries are sprayed using airblast sprayers and strawberries using horizontal booms. The survey didn’t specify features such as air-assist on booms, or whether or not those booms are trailed or self-propelled. The type of, and features on, any given sprayer dictate the limits of what an operator can adjust to improve coverage.

    Water volume

    Respondents also reported on how much carrier (i.e. water) they used to spray fungicide on their crops. Given Canada’s propensity to report volumes in many different forms, I have converted all values into the most common units: L/ha, US g/ac and the dreaded L/ac:

    nL/ha ± std (max./min.) US g/ac ± std (max./min.) L/ac ± std (max./min.)
    Highbush Blueberries7534.2 ± 340.1 (1,000/150)57.1 ± 36.4  (106.9/16)216.2 ± 138 (404.7/60.7)
    Day-neutral Strawberries22418.5 ± 192.2 (1,000/224.5)44.7 ± 20.6 (106.9/24)169.4 ± 77.8 (404.7/90.8)
    June-bearing Strawberries33403.1 ± 235.1 (1,000/50)43.1 ± 25.1 (106.9/5.3)163.1 ± 95.1 (404.7/20.2)
    Raspberries & Blackberries27450.1 ± 279.4 (1,200/50)48.1 ± 29.9 (128.3/5.3)182.1 ± 113.1 (485.6/20.2)
    Trailed horizontal boom in strawberry
    Trailed horizontal boom in strawberry

    There appears to be a lot of variability in the volumes applied, but on the whole, very few are using the 1,000 l/ha indicated in the fungicide recommendations. The ~430 l/ha overall average is no surprise; labelled volumes are quite often higher than what sprayer operators use. In some cases, high label volumes are warranted because the product requires a “drench” application to totally saturate the target, or to penetrate very dense canopies. Conversely, a high label volume might reflect outdated practices if that label hasn’t kept up with current cropping methods or application technology. Sometimes label volumes are suspiciously large, round numbers that suggest they are intended to encompass a worst-case scenario (e.g. a large, unmanaged crop with high disease pressure and a less-than-accurate spray application). In the particular case of crops sprayed with an airblast sprayer, it is very difficult for a label to accurately predict an appropriate volume due to the variability in crop size, density and plant spacing. This has led to methods to interpret labels, such as crop-adapted spraying.

    The disparity between label language and grower practices is not entirely the fault of the label. Most sprayer operators don’t want to carry a lot of water because more refills prolong the spray day. In situations where the crop has reached a critical disease threshold, or bad weather has compressed the spray window, sprayer operators sometimes reduce the volumes in the belief that “getting something on” trumps “good coverage”. Perhaps that’s true, but insufficient volumes greatly reduce coverage. This can be further exacerbated when operators do not account for the increase in crop size and density over the season, or the impact of hot dry weather on droplet evaporation.

    Improving coverage

    So, is there an ideal sprayer set up and volume? As previously alluded, the variability in crop staging, crop morphology, target location and spray equipment make a single recommendation impossible. But that doesn’t mean there aren’t diagnostic tools and a few simple rules to help a sprayer operator determine a volume to suit their particular needs. Much can be accomplished with these three things:

    • Water-sensitive paper
    • A modest selection of nozzles and a nozzle catalogue
    • An open-minded sprayer operator willing to spend a little time and reconsider traditional practices
    Rule-of-thumb fungicide coverage on water-sensitive paper.
    Rule-of-thumb fungicide coverage on water-sensitive paper.

    Water-sensitive paper is placed in the canopy, oriented to represent the target (e.g. leaf, bloom, etc.). It is important to put multiple papers in at least three plants to ensure the coverage reflects a typical application. The paper changes colour when it’s sprayed and this provides valuable and immediate feedback. Did the spray go where it was supposed to go and did it distribute throughout the target? If so, then the operator now knows that they can safely focus on timing rather than targeting. If not, a little diagnosis is required:

    1. Were targets completely drenched? If so, there is too much coverage. Operators can drive faster (if possible, and as long as it doesn’t create drift), reduce operating pressure (if possible, and as long as the nozzle is still operating in the middle of its registered range), or change nozzles to lower rates (as long as spray quality is constant).

    2 .Were targets only partially covered, as if a leaf obstructed part of the target and created a shadow? This mutual-shading is the bane of spraying dense canopies. One possible solution lies in understanding droplet behaviour: Coarser sprays generally mean fewer droplets and they move in straight lines. Therefore, when they hit a target, they might splatter or run-off, but typically their journey is over. If the spray is too Coarse, a slightly Finer spray quality increases droplet counts and may help droplets navigate around obstacles and adhere to more surfaces. Sprays that are too Fine will not penetrate dense canopies without some form of air assist. They slow very quickly and tend to drift and evaporate before they get deep enough into a canopy to do any good. A Medium droplet size is a good compromise because it produces some Fines and some Coarser drops – the best of both worlds.

    Increasing volumes and reconsidering spray quality often helps, but there might be other options. If using air assist, there are tests that can confirm the air volume and direction are appropriate. Another solution might lie in canopy management (where pruning bushes and canes can help spray penetration immensely). Still another might lie in the use of adjuvants to improve droplet spread on the target.

    3. Were targets missed entirely, or coverage is consistent but sparse? The operator is likely not using enough water, and/or the spray quality is too fine. It has been demonstrated time and again that higher volumes improve coverage, but operators can try any of the options listed previously for partially-obstructed coverage. All the reasoning is the same.

    Conclusion

    Spraying fungicides effectively requires an attentive sprayer operator. Timing and product choice are very important, but when it is time to spray the sprayer operator should diagnose coverage with water-sensitive paper, and be willing to make changes to the sprayer set-up to reflect changing conditions. Thanks to the OBGA for sharing the survey data.

  • Fungicide Application in Cereal, Pulse, and Oilseed Crops

    Fungicide Application in Cereal, Pulse, and Oilseed Crops

    Get ready for a busy fungicide season. If your growing conditions have been good, your crop is dense and vigorous, and soil moisture is adequate, you have yield potential to protect.  A bit of moisture and warm temperatures at a critical time, and disease is likely to develop.

    Before we delve into how to apply fungicides, let’s review the basics.

    1. There is no substitute for an informed decision about whether to spray or not. Seek the advice of a professional to make sure you understand your crop’s genetic susceptibility to disease, the conditions conducive to its development, and the parts of the plant canopy that are affected and therefore need protection. How much yield or seed quality is actually at risk? What do the disease forecasts say for your area?
    2. Identify the best fungicide product for your disease situation. Consider inherent efficacy, but also the longevity of the protection and the fungicide’s off-target toxicity (less toxic products can be sprayed in windier conditions without harming susceptible ecosystems). Remember that most fungicides are not curative and must be present on the plant foliage before infection takes place. Also remember that most fungicides are not easily translocated and are at best “locally systemic”. This means that fungicide deposit must cover the plant part that requires protection with an adequate droplet density. If the fungicide is systemic, these deposits must be absorbed through the plant cuticle and will only migrate a small distance within the plant tissue, usually in the transpiration stream, from the point of application.
    3. Make proper timing the priority. Disease control is usually only effective if the fungicide is applied in a narrow time frame in which the crop or disease is at a certain developmental stage. A great application at the wrong time is less valuable than mediocre application at the right time. The use of low-drift nozzles should be considered an agronomic tool that permits the correct staging even under marginal wind conditions.

    Let’s now review the major highlights of fungicide application in the major cereal and oilseed crops.

    Wheat

    In wheat, the early growth stagings for foliar fungicides are usually done to protect from leaf spot diseases such as tanspot, septoria nodorum blotch and septoria tritici blotch. Because these diseases are trash-borne, they tend to migrate up from the bottom to the top and good canopy penetration of the spray is important.

    IMG_20160621_170305406

    Better canopy penetration can be achieved the following ways:

    • Higher water volumes. This is probably the most powerful tool in an applicator’s arsenal. More water usually delivers higher doses of active ingredient deeper into the canopy, and whatever dose does get deposited will be present in higher droplet densities. So in short, for any given spray quality (droplet size), more water provides better coverage. We all intuitively know this.
    • Slower travel speeds. Moving slower imparts less of a forward velocity on the spray cloud, particularly in the larger droplets. As a result, these droplets move more vertically.  In the case of a cereal canopy, more of the spray will reach the lower leaves. The finer droplets in the cloud tend to deposit with the wind direction regardless of travel speed.
    • Backward pointed nozzles. If a droplet moves backwards at the same speed as the spray boom moves forwards, then it is basically standing still relative to the crop. It will have a greater chance of moving down towards the lower canopy than a droplet that’s moving forwards. The latter droplet will likely be intercepted by something vertical, like a wheat head or stem.

    A single nozzle oriented back, applying a water volume that is at least 10 to 15 US gpa, will be sufficient to get good canopy coverage for leaf spot and rust protection.

    Fusarium Headblight (FHB), caused by Fusarium graminearum, is a special case. It infects the wheat head at anthesis, and fungicide must be present on the head, at the glumes where the anthers emerge, at the time of infection. So we have a relatively large vertical target that is at the very top of the canopy.  Initial work at North Dakota State University, followed up by work at AAFC in Saskatoon and the University of Guleph at Ridgetown, found the following:

    • Angled sprays are essential. Field and lab studies showed that angled sprays were much more effective at depositing the fungicide on heads than vertical sprays. Backward pointed angled sprays provided additional help at targetting the other side of the wheat head. Twin nozzles are available from most manufacturers.
    IMG_9079
    • Use Coarse sprays when angling.  Angled and twin sprays have their challenges.  The angle at which the spray is released dissipates quickly, particularly for smaller droplets. As a result, more aggressive angles and coarser droplets were found to be more effective. Larger droplets were able to maintain their initial trajectory for a longer distance, increasing the chance that the droplet hit the head from the side rather than passing it by vertically.
    •  Maintain low boom heights. Even coarse sprays are deflected by air resistance and will eventually stop moving in the direction they were first emitted. In fact, this happens within a short distance.  Low booms, less than 25″ if possible, help.
    • Watch wind speed and direction. Field observations show that even a moderate wind can over-ride the application practices described above, resulting in most of the spray deposited on the windward side of a target regardless of its initial release.
    • Awns intercept small droplets. Many of our modern wheat cultivars are awned, and these fine structures are excellent collectors of small droplets. In early studies with durum, we found a large proportion of the spray volume on awns, where it served no useful purpose. The best way to minimize this awn interception is to ensure coarse sprays and sufficient water, no less than 10 gpa.
    wheat with water droplets credit David McClenaghan

    It’s important to maintain realistic expectations with FHB. Fungicide chemistry is improving but still offers only suppression. Crop staging is variable. Excellent application practices place the odds more in favour of disease control, but can’t change these facts.

    Pulse Crops

    Lentils and peas are increasingly important crops. They appear spindly in their early stages of development and are poor weed competitors. But under the right conditions, lentils soon form an impressive set of leaflets that creates one of the most impenetrable barriers in our cropping systems.

    Here are some pointers for fungicide application in pulse crops:

    • Understand the disease in your crop. Do you need to protect stems (anthracnose), leaves and stems (ascochyta complex, mycosphaerella), or senescing leaves or flowers (sclerotinia)? This is where the spray needs to go.
    • Understand the time of disease development.
      • Trash-borne diseases like anthracnose and ascochyta will start at the bottom of a lentil canopy, and early treatment before canopy closure will be important to arrest or at least delay disease development as long as possible.
      • Late season diseases like sclerotinia and botrytis push the application timing towards a closing or closed canopy. Success of such sprays is more elusive because of the rapid development of new biomass.
    • Take a bird’s eye view of the canopy.
      • If you can see the target you need to spray, the job is pretty straightforward and conventional water volumes and nozzles will work.
      • If the targets are hidden from view, it will take more water and slower travel speeds to get the required coverage. Consider the higher end of the recommended water volumes (15 gpa in most cases), slower travel speeds (10 mph).
    • IMG_20160620_082718907
      • When a canopy has many layers of cascading leaves, it is very difficult for a spray to get past these “umbrellas”. We’ve observed many times that a leaf is a very effective shield for anything below it.  Large droplets have a hard time changing direction because of their mass and resulting momentum.  But small droplets, especially those below 100 microns, can move with slight changes in air movement and get around these obstacles. Use higher pressures (to generate the finer sprays) or select finer nozzles to improve canopy penetration.
    • Look at the size of the plant part you need to target. Large targets like leaves can capture almost any droplet size, but small targets like petioles or vertical targets such as stems may benefit from finer sprays, especially if they’re hidden in the canopy.

    Generally speaking, dense pulse canopies will require higher water volumes and finer sprays than their cereal counterparts. Although twin fan nozzles have not been shown to provide an advantage in our studies on chickpeas, higher water volumes proved very effective at improving deposition and disease control.

    Canola

    Canola has two main diseases for which foliar sprays are used. A small number of producers choose herbicide timing for control of blackleg. Because the crop canopy is small and the spray targets are exposed, general herbicide application guidelines (Coarse sprays from a venturi nozzle, 7 – 10 US gpa) will provide good targeting and adequate coverage.

    461635974_1bce7d1eaa_z

    Sclerotinia control requires that the spray reaches buds and petals of canola that is between 20 and 50% flowering. Work at AAFC in Melfort compared conventional and low-drift sprays at two pressures, and showed that droplet size had no effect on disease control. In fact, the Fine spray produced by hollow cone nozzles at high pressure did not significantly improve sclerotinia control compared to a venturi nozzle at its recommended pressure of about 60 psi.

    Subsequent lab work showed that the proportion of the applied spray that was retained by petals and buds was statistically identical for all tested sprays.

    Water volumes may need to be increased for modern canola hybrids that have significant biomass at flowering. Such cultivars may grow over 1.5 m tall and present a large range of canopy positions in which buds and petals appear. As with the other crops, when a spray needs to cover more area, and especially when this area presents itself in layers, more water volume is appropriate.

    Fine Sprays for Coverage

    Conventional wisdom says that fungicides require finer sprays for coverage and best effect. This is certainly true in some cases, particularly where the leaf area index is high and leaves are arranged in cascading layers. But it’s time to retire this notion as general advice and adhere to research results for guidance. For FHB, the recommended angled sprays benefit from being applied in coarser, not finer sprays. And in pulses and canola, research showed that there was no benefit from finer sprays. In fact, finer sprays can impair proper timing because of their propensity for drift and rapid evaporation under dry conditions.

    Modern coarse sprays produced by air-induced nozzles are less susceptible to these environmental conditions and therefore offer an important advantage: they allow for better timing accuracy. For this reason, I view them not so much as drift control tools, but rather as agronomic tools.

    There is a downside to the coarser sprays – they do require more water. Volumes should always be above 10 US gpa, and many recommendations go to 15 gpa if the canopy is dense.  In some cases, 20 gpa may be beneficial. These higher volumes are a reasonable price to pay to protect a valuable crop, and we certainly have the equipment to make this price bearable.

    Aerial Application

    Aerial application is an important way to apply fungicides.  An aircraft’s chief advantage is to cover large areas with no crop trampling, and can do so even in wet conditions. As a result, they offer the timing advantage we so often mentioned in this article.

    Aerial Rotary atomizer

    A producer hiring an aircraft for spraying ought to have a conversation with the pilot and discuss water volume and droplet size. Aircraft, out of practical necessity, apply less water and distribute it in finer sprays to offer the required coverage. Although this has been shown to be effective, it creates drift and evaporation potential. It is worthwhile to ask for higher water volumes if it means that the spray can be applied somewhat coarser, creating less drift.

    _MG_4778

    The rotary atomizers on many aircraft produce fairly uniform droplet sizes and do a good job of eliminating the larger droplets. This makes even more droplets available for coverage. However, even with this technology spray drift still matters and all steps to prevent it should be taken. This means using larger average droplet sizes and increasing water volumes accordingly to their label recommendations.

  • The Case for Low-Drift Sprays

    The Case for Low-Drift Sprays

    This article was written by Tom Wolf for “PEI Potato News Magazine”, a publication of the Prince Edward Island Potato Board (http://peipotato.org/). It is reprinted with permission.

    PEI Potato News Magazine

    “Should I be using low-drift nozzles?” It seems like a simple question with an obvious answer. We all want to reduce spray drift, and this easy-to-use technology is the fastest way to get there.

    And yet, the question is more complicated than it first appears. Yes, all applicators want to reduce drift, but many worry about the coarse sprays produced by low-drift nozzles. As a spray volume is divided into coarser (i.e. larger) droplets, there are fewer of them, and that can reduce coverage. It’s a legitimate concern.

    Let’s start with our shared value first – the desire to reduce spray drift.

    Given the economic, environmental and health impacts of spray drift, the importance is hard to over-state.  That’s why spray drift management is a primary concern of our federal regulators whose job is to protect the public interest. It’s also a concern for the neighbours who have a right to keep unwanted products off their property, whether it’s residential or agricultural.

    Fig 1 (XR8004 40 psi)

    Conventional flat fan nozzles (XR8004) operating at 40 psi

    Fig 3 (XR8004 40 psi drift)

    Glyphosate drift with 20 km/h side wind, XR8004 40 psi

    Fig 2 (TD11004 60 psi)

    Low-drift nozzles (TD11004) operating at 60 psi

    Fig 4 (TD11004 60 psi)

    Glyphosate drift with 20 km/h side wind, TD11004 60 psi

    For these reason, managing drift should be a foremost concern for applicators. The technology is vital to the crop production industry, and if we don’t take care of the issue, someone else will take care of it for us. That’s not the best path.

    Much has been written about how to reduce drift. The key points are:

    • choosing days with better weather,
    • lowering booms and travel speeds,
    • watching spray pressure,
    • protecting the spray with shields,
    • using coarser spray qualities on the whole.

    Of these, the most economical and practical is using coarser sprays via low-drift nozzles. Engineered to emit fewer fine droplets, they are proven to reduce drift by anywhere from 50 to 95% compared to a standard flat fan of the same size.  When it comes to reducing drift, they work.

    When these tips first hit the mainstream as “pre-orifice” nozzles in the late 1980s, and later as “venturi” nozzles in the mid 1990s, we were impressed with their ability to reduce drift. And the obvious question was, what about product efficacy? Can fewer, larger droplets do the job? The answer, to our initial surprise, was yes.

    In the late 1990s, the crop protection industry (including governments, universities, and the private sector), participated in studies throughout Europe, Australasia, and North America looking at low-drift spray performance. In Canada alone, we conducted over 100 studies and concluded that pesticide efficacy was not harmed when a properly adjusted low-drift nozzle was used.  A surprising result showed that fungicides did not seem to need finer sprays, contrary to popular opinion, as long as water volumes were sufficient to provide adequate coverage.

    As we did more and more studies, it became apparent which points were critical:

    • When using venturi nozzles, spray pressure had to be increased from the industry standard of 40 psi to about 70 psi. This is because of a venturi nozzle’s two-stage design. The high pressure compensated for an internal pressure drop inside the nozzle. Sprays remained low-drift, but patterns and overall efficacy were better at this higher pressure.
    Fig 5 (XR8002 40 psi)

    Spray pattern of conventional spray (XR8002, 40 psi)

    Fig 6 (ULD 60 psi)

    Spray pattern of low-drift spray (ULD12002, 60 psi)

    Fig 7 (XR8002 40 psi)

    Spray deposit of conventional spray (XR8002, 40 psi. ~10 gpa)

    Fig 8 (ULD 60 psi)

    Spray deposit of low-drift spray (ULD12002, 60 psi, ~10 gpa)

    • Spray pattern overlap needed to be greater with low-drift sprays – a full 100%. In other words, the edge of one nozzle’s spray pattern should reach the middle of the adjacent nozzles’ patterns. The pattern width at target height was now twice the nozzle spacing and this ensured good distribution of not only the spray volume, but droplet numbers, along the boom.
    Pattern Overlap
    • We needed to pay attention to the target plant architecture and leaf surface properties. Plants such as grasses (with vertical surfaces and difficult-to-wet leaves) often had less spray retention with coarser sprays. Low-drift nozzles worked, but we couldn’t go as coarse in these cases. Careful selection of low-drift nozzles as well as more attention paid to operating pressure solved these issues.
    • Our minimum water volumes had to increase slightly to compensate for the fewer drops produced by low-drift sprays. This was especially true for contact modes of action where too few droplets-per-area reduced performance. Using an Extremely Coarse spray at a very low water volume was asking for trouble.

    Much of my efforts in recent years have been to advise applicators just how coarse they can safely go without harming product performance. This involves things we’ve touched on in this article, like water volumes, modes of action in the tank mix, target plant or canopy architecture, growing conditions, and the like. We’ve arrived at a few rules of thumb, like those above, but as always, it’s dangerous to oversimplify and there are always new situations to grapple with.

    While we were learning how to tweak low drift nozzles to get them to perform, we also learned there were significant advantages to using coarser spray qualities.

    1. Foremost, there was an immediate reduction in drift. One applicator told me years ago that switching to a low-drift spray removed a huge burden of worry from him, and that alone was worth it.
    2. Low-drift sprays made it easier to spray on-time, even if weather conditions were marginal for conventional sprays. The result: the timely removal of weeds, or the correct staging of fungicides and insecticides. This has paid large dividends in terms of protected yield.
    3. Coarser sprays can protect product performance from some adverse conditions, such as days with high evaporation rates. On such days, fine sprays evaporate to dryness so quickly that uptake can be limited. Larger drops stay liquid longer, with more uptake the result.
    4. Directed sprays, be they banded sprays or twin fan nozzles for fungicides, make more sense from coarser nozzles. The reason is that these coarser sprays go where they’re pointed, whereas fine sprays lose their path in wind or through travel-induced deflection, very quickly.
    5. We also learned about the air-entrainment that coarser sprays can produce. Large droplets dragged air with them, and smaller droplets could hitch a ride in their wake. This provided a form of air-assistance that reduced drift and carried small droplets into the canopy. Finer sprays had a harder time producing this type of drag, and sustaining it in the canopy.

    When we analyzed the droplet size spectrum of coarse and fine sprays, we confirmed that the total number of droplets produced by any given volume of water had been reduced. Not a surprise. But two things struck us.

    First, even though the average size of droplets in coarse sprays were very large, they still contained a population of small droplets.  In fact, if you counted every single droplet in the spray, the vast majority were small and they were still taking care of coverage.

    Second, the critical amount of coverage (measured as the percent of the surface area covered by spray deposits) that was necessary for a given product to work was lower than what we’d been aiming for. In other words, we didn’t need as much coverage as we thought we did, and any excess didn’t actually add to product performance in most cases.

    We later analyzed the relationship between spray coverage and herbicide performance and found that the uniformity of the deposits was actually more important than the amount of coverage per se. So, if we focussed on proper overlap and spray pressure there was greater benefit than increased coverage alone. Deposit uniformity has become our research focus of late.

    So, should you be using low-drift nozzles? By adopting the changes in pressure, overlap, and water volume outlined above, and paying more attention to the plant architecture and pesticide mode of action, we’ve been very successful in implementing low-drift sprays in all field crops. In my view, we can safely retire Fine sprays for all field crop pesticides. This means conventional flat fan nozzles, hollow cone nozzles, and the like. Get rid of them.  All they do is add drift potential.

    It’s safe to adopt low-drift sprays. Research and experience from the field prove that they work. Low-drift sprays should be viewed as an agronomic tool that improves application timing and accuracy.  And with less drift, we show that agricultural practice can be both efficient and environmentally responsible. That’s going to be a very important story to tell, now and in the future.