Kim Blagborne (formally with Slimline Manufacturing) has long said that the pressure gauge on an airblast sprayer indicates more than just pressure. It can be used to diagnose a number of pump and plumbing issues… if you know what to look for. Here’s Kim’s troubleshooting guide to reading into what your gauge is REALLY telling you:
Scenario One
“As the tank empties, the pressure drops”
First, try adjusting the pressure regulator (assuming a positive displacement pump). If you can maintain the pressure up until the tank empties, your intake line may be loose and it’s sucking the bottom of the tank. Check the fitting between the suction filter and the pump. Apply a light coating of grease to the O-rings on the elbows and filter to ensure a complete seal.
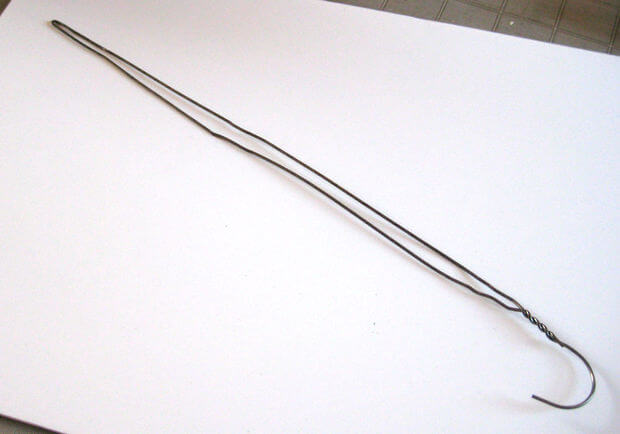
Second, try stopping mid-tank (that is, turn off the tractor PTO and let the sprayer sit for a few minutes). Does the pressure gauge return to the original set pressure? If so, then the intake line inside sprayer has likely come loose entirely. Open the lid, and using a straightened-out coat hanger, hook the intake line and give a few gentle tugs – it should not be able to move. If it does, you’ll have to re-fasten the intake line so it’s not sucking the bottom of the tank.
The humble coat hanger. It opens our cars and now fixes our sprayers. Remarkable!
Scenario Two
“When I first start the sprayer, the pressure drops or fails to maintain constant pressure as the tank empties”
This might indicate improper mixing practices because the filter is probably plugging with product. Alternately, your PTO speed may be too slow to drive sufficient mechanical agitation. Check the suction filter as soon as the problem occurs (don’t finish spraying). If you wait to check when the tank is empty, the evidence of a plugged filter could be washed away before you can confirm it. This problem often happens when spraying nutrients, or when products aren’t compatible.
If that’s not it, it could be a collapsed suction valve. The pump will sound like it’s “missing” (like an misfiring engine). The suction valve might need to be replaced.
Or, perhaps you notice that you can compensate for the pressure drop by adjusting the regulator on the first tank. But it has to be dropped back down again for the second tank. In this case, the regulator might be sticking or jamming. Disassemble it and look for grit in the barrel of the regulator, then lubricate the parts.
Scenario Three
“I lose pressure when I turn my boom(s) on or off”
In this scenario, the pressure is fine as you approach the end of the row. You turn off the outside boom (or both) and finish the turn. But, when you re-engage both booms, the pressure drops. Even when you adjust the pressure regulator to compensate (assuming a positive displacement pump), the unit only gains the lost pressure slowly. In this case, the regulator might be sticking or jamming. Disassemble it and look for grit in the barrel of the regulator, then lubricate the parts.
Scenario Four
“The pressure gauge spikes when I turn off the boom(s)”
If you run a Turbomist, it could be the bypass balance. To solve this issue, head over to this article and pan down to see the step-by-step. If it isn’t the balance, then it’s likely the regulator. The issue of a spiking gauge and how to correct for it is covered thoroughly in this article by Ag mechanic extraordinaire Murray Thiessen.
Scenario Five (a positive displacement pump issue)
“My gauge pulses”
Is it more than a 20 psi range? Have you noticed that the deviation gets less as the PTO speed increases? Well, the pump pressure check-valve may have collapsed. Check the pressure check valves in the pump for broken springs on the suction valve plate.
Does the needle move rapidly through a 5 to 10 psi range? The accumulator pressure might be low. Try adjusting system pressure via the regulator and if that changes how the needle is responding, then set an air compressor to 90 psi (or manufacturer’s recommended pressure) and charge the accumulator.
Perhaps the needle movement is not affected by system pressure changes or the PTO speed. In this case the accumulator may have failed entirely and the diaphragm will need replacement.
Scenario Six
“My calibration is going farther than expected”
Sure, that sounds pretty good at first, but it may be that the gauge is stuck. With the PTO off and the spray boom on, the gauge must read “ZERO”. If it doesn’t, pony up the $50.00 and get a new one.
This article was written by Tom Wolf for “PEI Potato News Magazine”, a publication of the Prince Edward Island Potato Board (http://peipotato.org/). It is reprinted with permission.
PEI Potato News Magazine
“Should I be using low-drift nozzles?” It seems like a simple question with an obvious answer. We all want to reduce spray drift, and this easy-to-use technology is the fastest way to get there.
And yet, the question is more complicated than it first appears. Yes, all applicators want to reduce drift, but many worry about the coarse sprays produced by low-drift nozzles. As a spray volume is divided into coarser (i.e. larger) droplets, there are fewer of them, and that can reduce coverage. It’s a legitimate concern.
Let’s start with our shared value first – the desire to reduce spray drift.
Given the economic, environmental and health impacts of spray drift, the importance is hard to over-state. That’s why spray drift management is a primary concern of our federal regulators whose job is to protect the public interest. It’s also a concern for the neighbours who have a right to keep unwanted products off their property, whether it’s residential or agricultural.
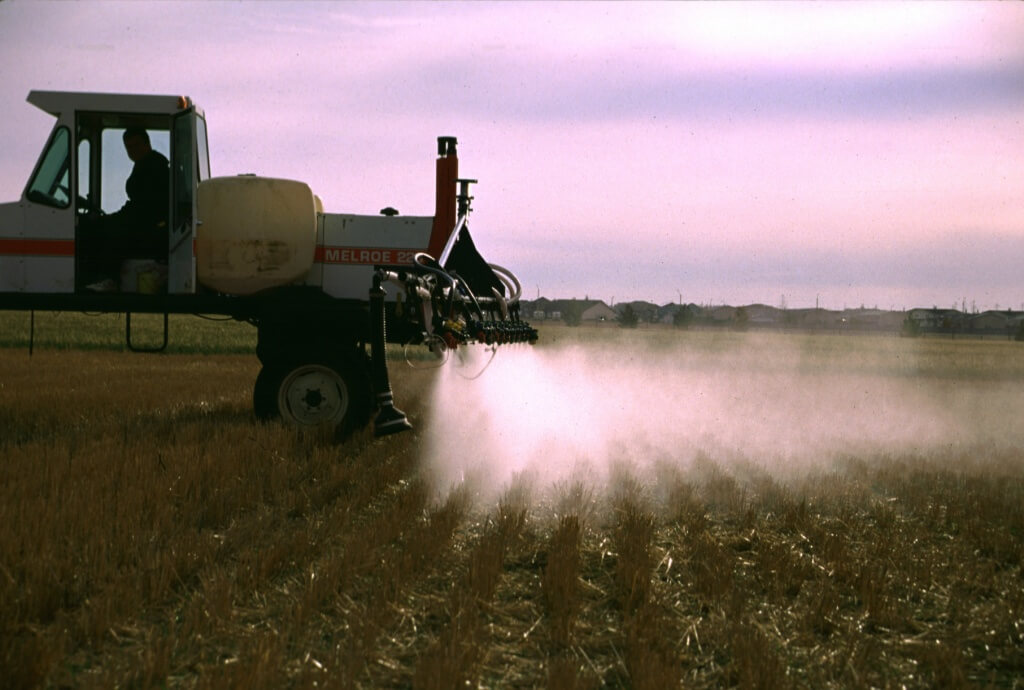
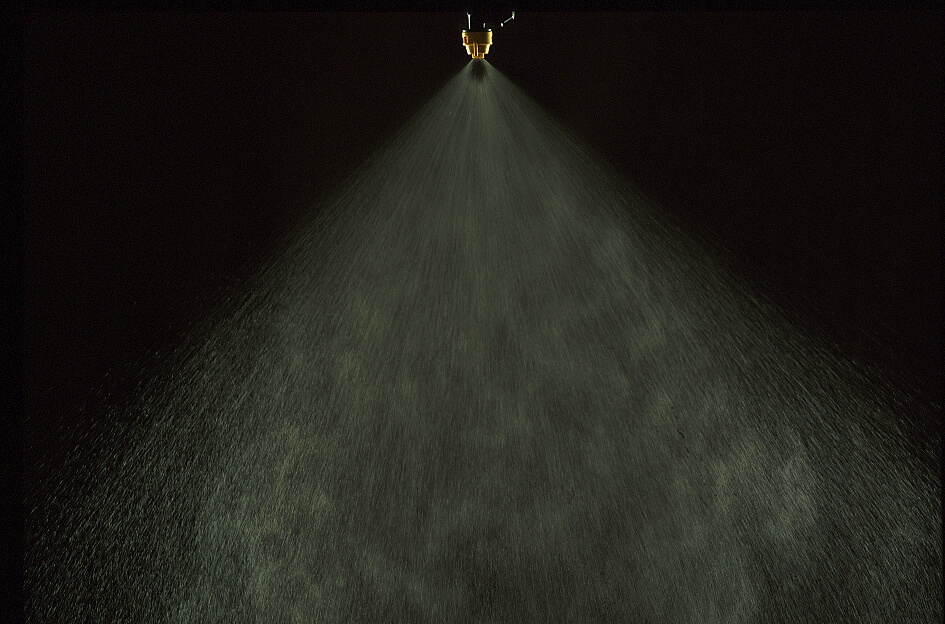
Conventional flat fan nozzles (XR8004) operating at 40 psi
Glyphosate drift with 20 km/h side wind, XR8004 40 psi
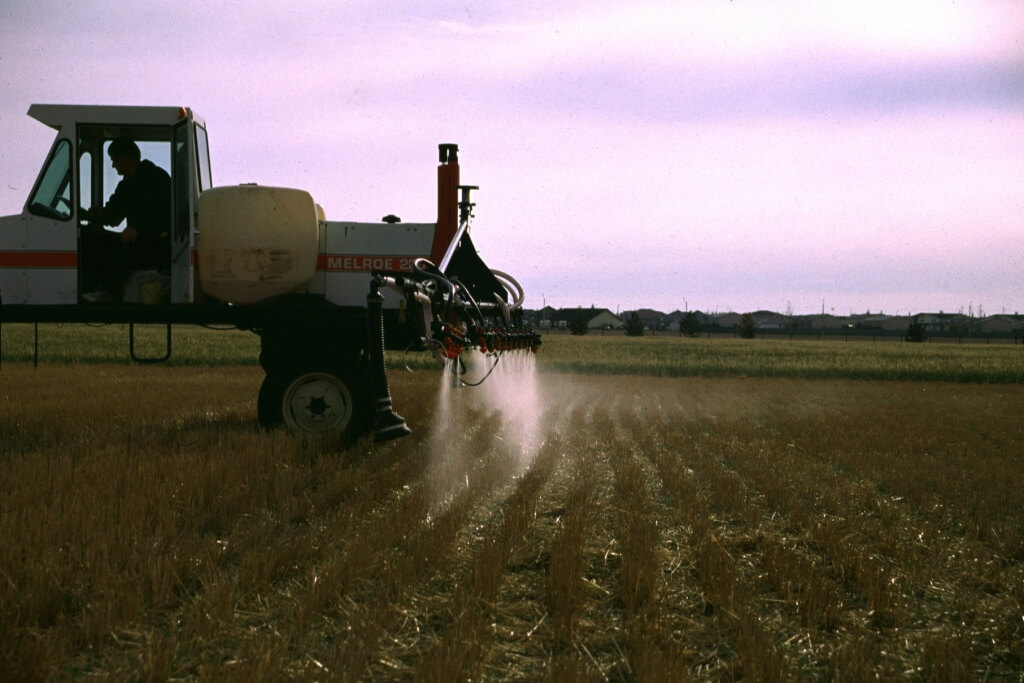
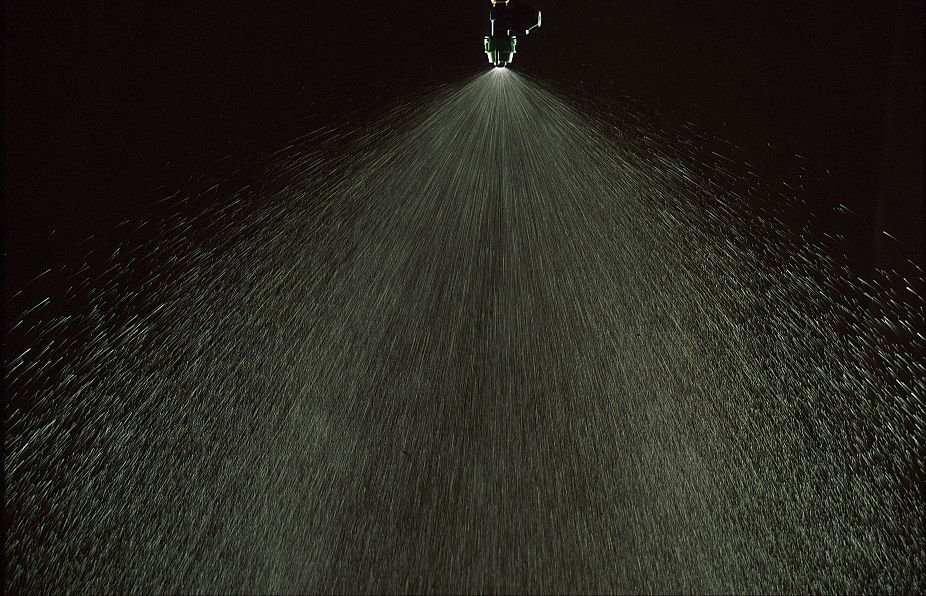
Low-drift nozzles (TD11004) operating at 60 psi
Glyphosate drift with 20 km/h side wind, TD11004 60 psi
For these reason, managing drift should be a foremost concern for applicators. The technology is vital to the crop production industry, and if we don’t take care of the issue, someone else will take care of it for us. That’s not the best path.
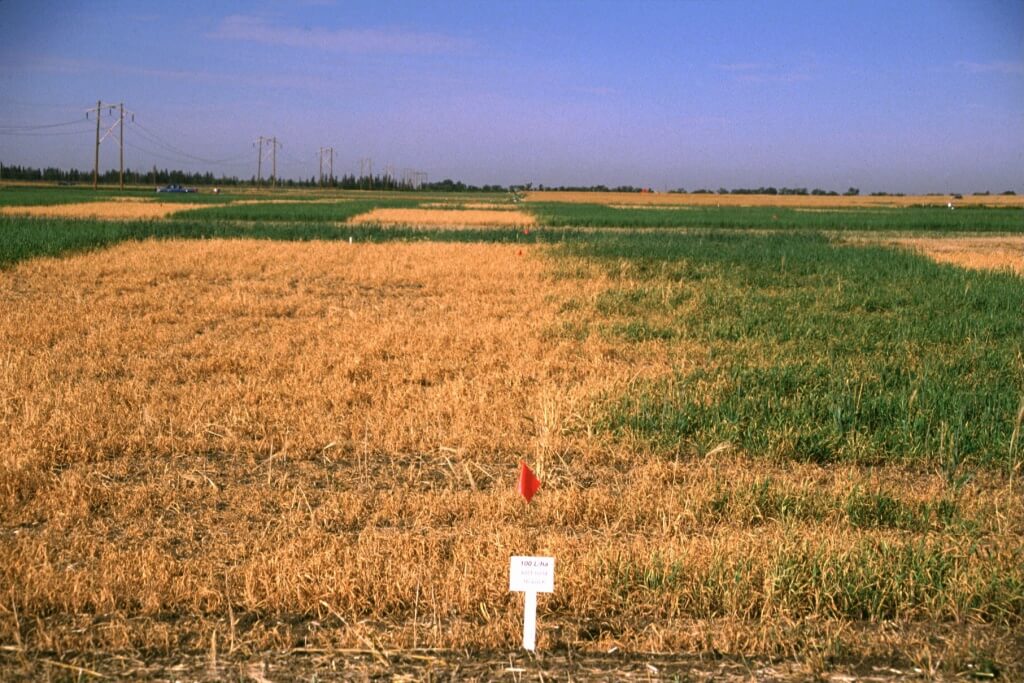
Of these, the most economical and practical is using coarser sprays via low-drift nozzles. Engineered to emit fewer fine droplets, they are proven to reduce drift by anywhere from 50 to 95% compared to a standard flat fan of the same size. When it comes to reducing drift, they work.
When these tips first hit the mainstream as “pre-orifice” nozzles in the late 1980s, and later as “venturi” nozzles in the mid 1990s, we were impressed with their ability to reduce drift. And the obvious question was, what about product efficacy? Can fewer, larger droplets do the job? The answer, to our initial surprise, was yes.
In the late 1990s, the crop protection industry (including governments, universities, and the private sector), participated in studies throughout Europe, Australasia, and North America looking at low-drift spray performance. In Canada alone, we conducted over 100 studies and concluded that pesticide efficacy was not harmed when a properly adjusted low-drift nozzle was used. A surprising result showed that fungicides did not seem to need finer sprays, contrary to popular opinion, as long as water volumes were sufficient to provide adequate coverage.
As we did more and more studies, it became apparent which points were critical:
When using venturi nozzles, spray pressure had to be increased from the industry standard of 40 psi to about 70 psi. This is because of a venturi nozzle’s two-stage design. The high pressure compensated for an internal pressure drop inside the nozzle. Sprays remained low-drift, but patterns and overall efficacy were better at this higher pressure.
Spray pattern of conventional spray (XR8002, 40 psi)
Spray pattern of low-drift spray (ULD12002, 60 psi)
Spray deposit of conventional spray (XR8002, 40 psi. ~10 gpa)
Spray deposit of low-drift spray (ULD12002, 60 psi, ~10 gpa)
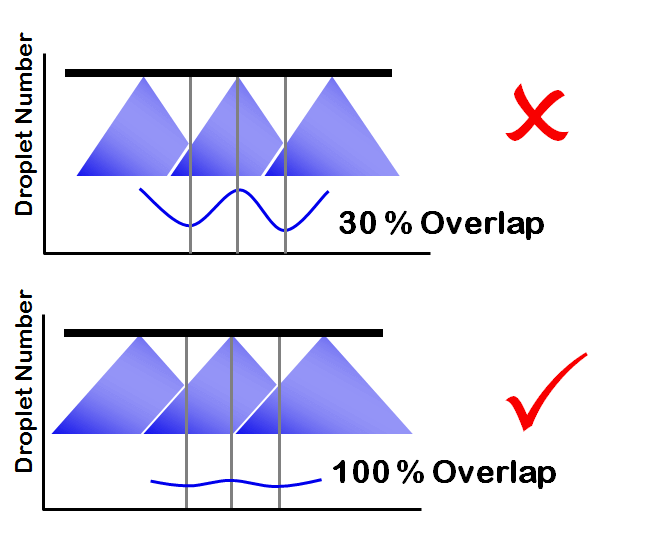
Spray pattern overlap needed to be greater with low-drift sprays – a full 100%. In other words, the edge of one nozzle’s spray pattern should reach the middle of the adjacent nozzles’ patterns. The pattern width at target height was now twice the nozzle spacing and this ensured good distribution of not only the spray volume, but droplet numbers, along the boom.
We needed to pay attention to the target plant architecture and leaf surface properties. Plants such as grasses (with vertical surfaces and difficult-to-wet leaves) often had less spray retention with coarser sprays. Low-drift nozzles worked, but we couldn’t go as coarse in these cases. Careful selection of low-drift nozzles as well as more attention paid to operating pressure solved these issues.
Our minimum water volumes had to increase slightly to compensate for the fewer drops produced by low-drift sprays. This was especially true for contact modes of action where too few droplets-per-area reduced performance. Using an Extremely Coarse spray at a very low water volume was asking for trouble.
Much of my efforts in recent years have been to advise applicators just how coarse they can safely go without harming product performance. This involves things we’ve touched on in this article, like water volumes, modes of action in the tank mix, target plant or canopy architecture, growing conditions, and the like. We’ve arrived at a few rules of thumb, like those above, but as always, it’s dangerous to oversimplify and there are always new situations to grapple with.
While we were learning how to tweak low drift nozzles to get them to perform, we also learned there were significant advantages to using coarser spray qualities.
Foremost, there was an immediate reduction in drift. One applicator told me years ago that switching to a low-drift spray removed a huge burden of worry from him, and that alone was worth it.
Low-drift sprays made it easier to spray on-time, even if weather conditions were marginal for conventional sprays. The result: the timely removal of weeds, or the correct staging of fungicides and insecticides. This has paid large dividends in terms of protected yield.
Coarser sprays can protect product performance from some adverse conditions, such as days with high evaporation rates. On such days, fine sprays evaporate to dryness so quickly that uptake can be limited. Larger drops stay liquid longer, with more uptake the result.
Directed sprays, be they banded sprays or twin fan nozzles for fungicides, make more sense from coarser nozzles. The reason is that these coarser sprays go where they’re pointed, whereas fine sprays lose their path in wind or through travel-induced deflection, very quickly.
We also learned about the air-entrainment that coarser sprays can produce. Large droplets dragged air with them, and smaller droplets could hitch a ride in their wake. This provided a form of air-assistance that reduced drift and carried small droplets into the canopy. Finer sprays had a harder time producing this type of drag, and sustaining it in the canopy.
When we analyzed the droplet size spectrum of coarse and fine sprays, we confirmed that the total number of droplets produced by any given volume of water had been reduced. Not a surprise. But two things struck us.
First, even though the average size of droplets in coarse sprays were very large, they still contained a population of small droplets. In fact, if you counted every single droplet in the spray, the vast majority were small and they were still taking care of coverage.
Second, the critical amount of coverage (measured as the percent of the surface area covered by spray deposits) that was necessary for a given product to work was lower than what we’d been aiming for. In other words, we didn’t need as much coverage as we thought we did, and any excess didn’t actually add to product performance in most cases.
We later analyzed the relationship between spray coverage and herbicide performance and found that the uniformity of the deposits was actually more important than the amount of coverage per se. So, if we focussed on proper overlap and spray pressure there was greater benefit than increased coverage alone. Deposit uniformity has become our research focus of late.
So, should you be using low-drift nozzles? By adopting the changes in pressure, overlap, and water volume outlined above, and paying more attention to the plant architecture and pesticide mode of action, we’ve been very successful in implementing low-drift sprays in all field crops. In my view, we can safely retire Fine sprays for all field crop pesticides. This means conventional flat fan nozzles, hollow cone nozzles, and the like. Get rid of them. All they do is add drift potential.
It’s safe to adopt low-drift sprays. Research and experience from the field prove that they work. Low-drift sprays should be viewed as an agronomic tool that improves application timing and accuracy. And with less drift, we show that agricultural practice can be both efficient and environmentally responsible. That’s going to be a very important story to tell, now and in the future.
We like to keep things simple ’round here and this poka-yoke from Arkansas is both simple and effective. What’s a poka-yoke?
“Poka-Yoke”: a Japanese term that means “mistake-proofing”. It’s a mechanism that helps an equipment operator avoid (yokeru) mistakes (poka) by preventing, correcting, or drawing attention to human errors as they occur. Thanks, Wikipedia.
The problem
An aerial applicator has to spray a lot of fields. They consult their work orders, the plane is loaded, they spray and repeat. However, depending on which herbicide trait was introduced to which crop, accidents can happen. Imagine the mess when you spray a crop with glyphosate… and it isn’t a glyphosate-tolerant crop? This problem promises to become more of an issue as we introduce glyphosate+2,4-D and glyphosate+dicamba-tolerant crops. It may look like the right soybean plant, but you DO NOT want to mess up by spraying the wrong chemistry on the wrong genetics! You think a bit of residue in the lines can cause trouble…
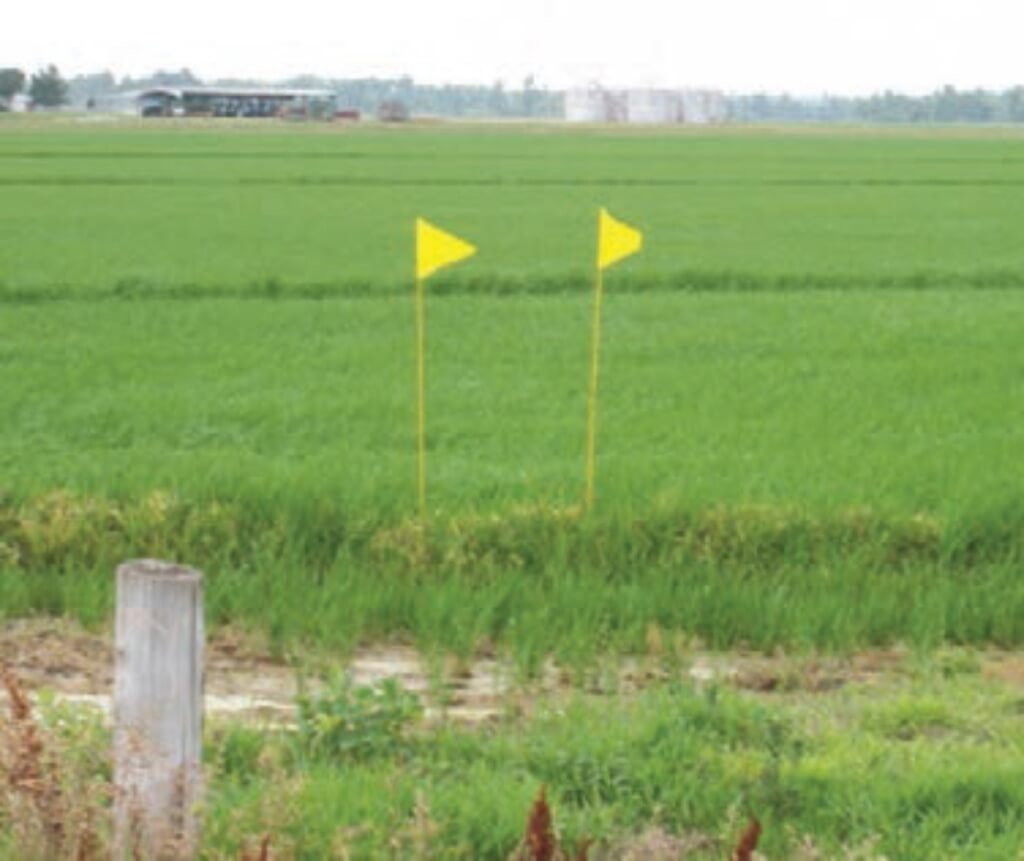
Yellow flags designate this field as a Clearfield rice field (Photo from UofA FSA2162)
The solution
In 2011 the University of Arkansas came up with a “quick and inexpensive” way to prevent this from happening. They used six-foot, colour-coded bicycle flags. Each colour or pattern represented a specific herbicide tolerance, as shown here. Aerial operators were given a copy of this visual key and the growers placed a couple of appropriate flags at the edge of the field on the approach vector at planting.
The result
Aerial applicators got one final check before they started to spray… just in case. In 2014 the innovative people behind this concept reported that it prevented countless acres of accidentally-damaged crops. Several (honest) aerial operators admitted to pulling up just before they started to spray because they realized there was a mismatch between what was in their tank and what the field was supposed to receive.
Corn field with glyphosate (white) and glufosinate (bright green) stacked technology. (Photo from UofA FSA2162)
The challenge
This is the kind of elegant, simple tool that we all should be using for ground rigs as well as aerial sprayers as we begin to plant more crops with stacked traits. Canada, the US, Australia, anyone using these genetics, could benefit. We should consider adopting this method, complying with Arkansas’ existing colour scheme and adding to it as required. Seed companies and agrichemical companies should find a way to bundle the flags with the chemicals and seeds for the buyer.
One of our recent posts highlighted some great producer designed tender systems for the sprayer. We posted four submissions, and are continuing the series with new submissions in this post.
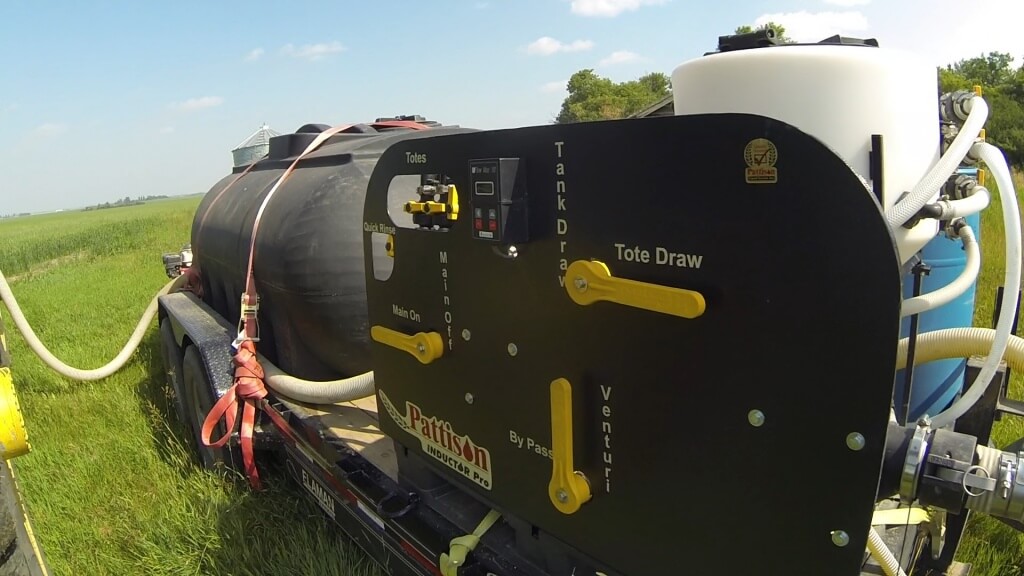
Our fifth submission comes from the folks at Pattison Liquid Systems of Lemberg, Saskatchewan
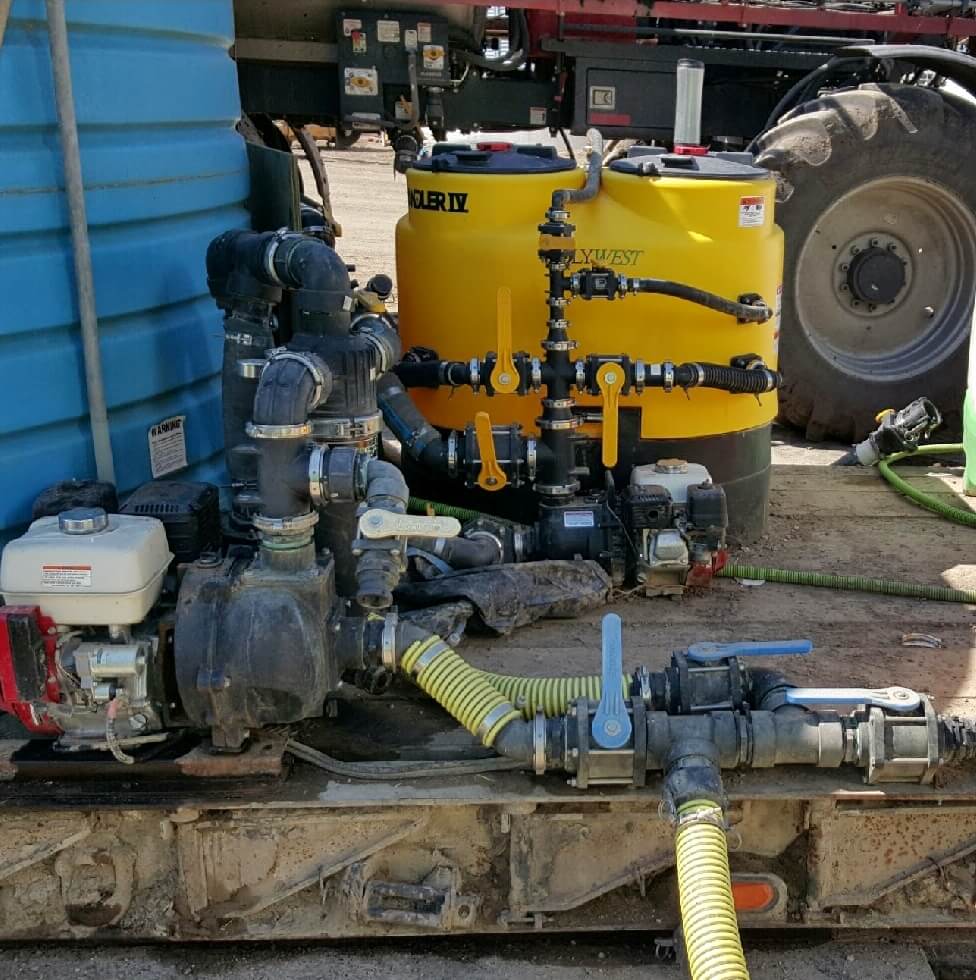
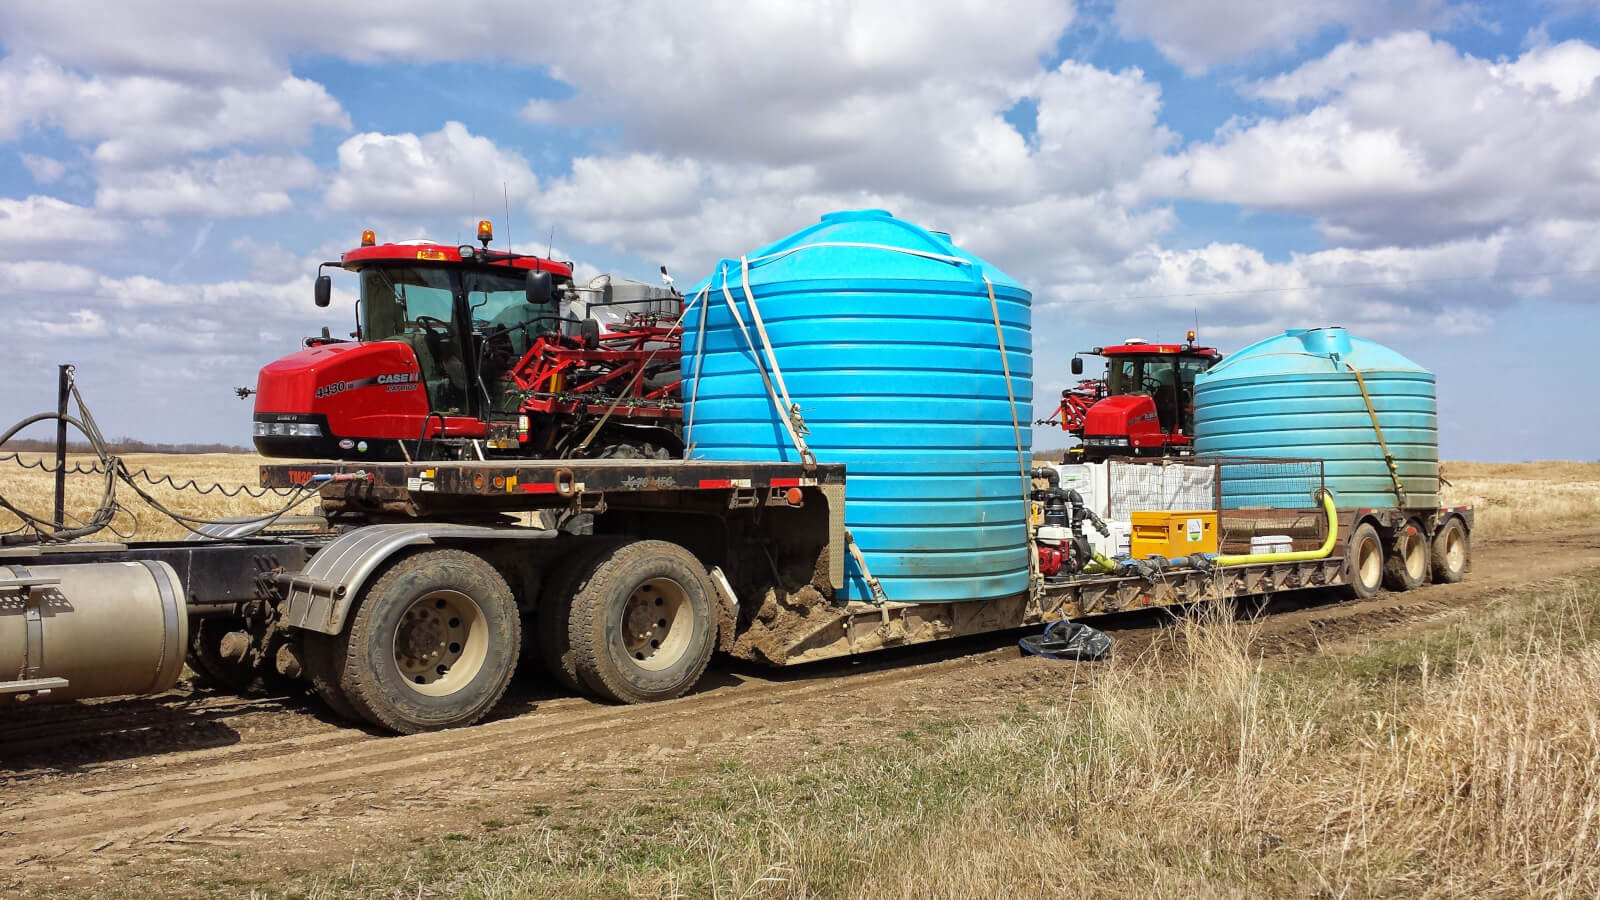
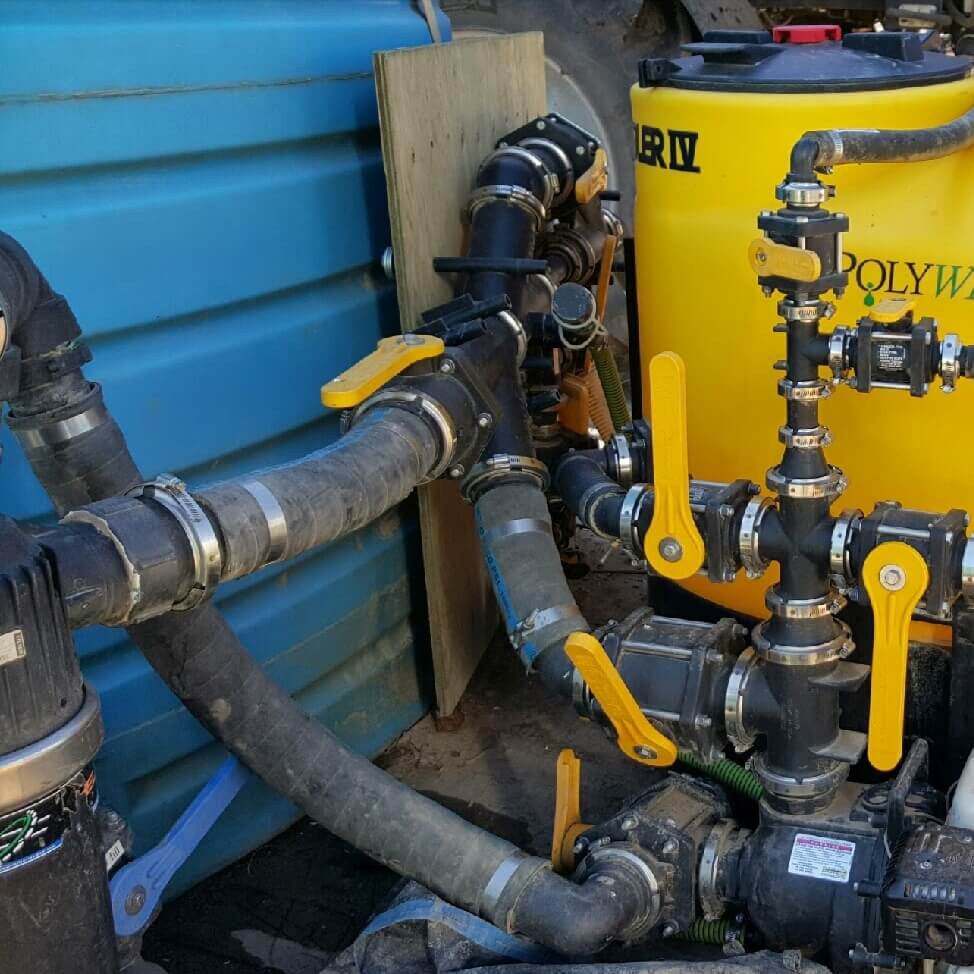
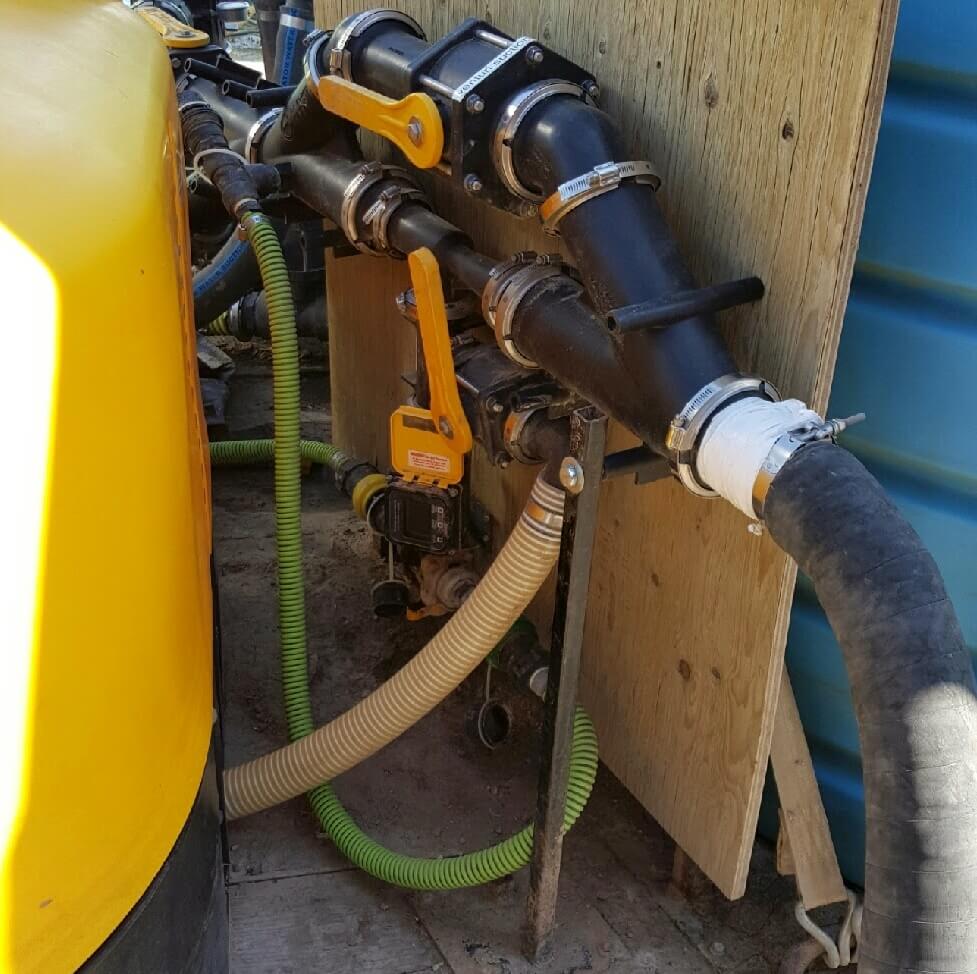
I recently saw Phil Lingelbach of Pattison at a sprayer clinic. Pattison has been designing and building transfer systems for years, and have valuable experience to share.
I asked Phil and John Young these questions about transfer system designs:
Why is filling faster important? How does it reduce your operating cost?
“Idle time costs money. Consider that trade in cost of an average high-clearance sprayer is approximately $185/hr on the meter. So 100 hours of idle time per year is costing nearly $20,000 in reduced trade-in value.
We also need to maximize “best spray condition” time. We know that application timing is critical to success, and need to take advantage of good weather conditions. Spraying under marginal conditions reduces the chance of good pesticide performance.
Efficient filling can also reduce labour costs, this is a “snowball number”. Every unnecessary hour spent spraying could be used to do something more productive, in essence a wasted hour costs you two.”
When designing a transfer system, what are the key considerations that separate a good from a bad system?
“Make sure that the water pumps pushes water to the inductor system. Do not use a water pump to pump chemical. Contamination is a huge issue with this.
Keep your transfer system away from the rear of an open deck to minimize dust exposure.
A good transfer system will be easy to clean and very user friendly, valves separated and clearly marked.
Get the biggest, fastest pump available. Loading water after the chemical is in is key.
Make it simple to operate, there is lots of hired help on the farm.
Design it to keep operator from being exposed to chemical. Keep trip hazards to a minimum.
Include fast product induction. There is no point filling water quickly and having to wait on a slow product pump.”
You mentioned the speed of filling product. What flow meters are most accurate and reliable?
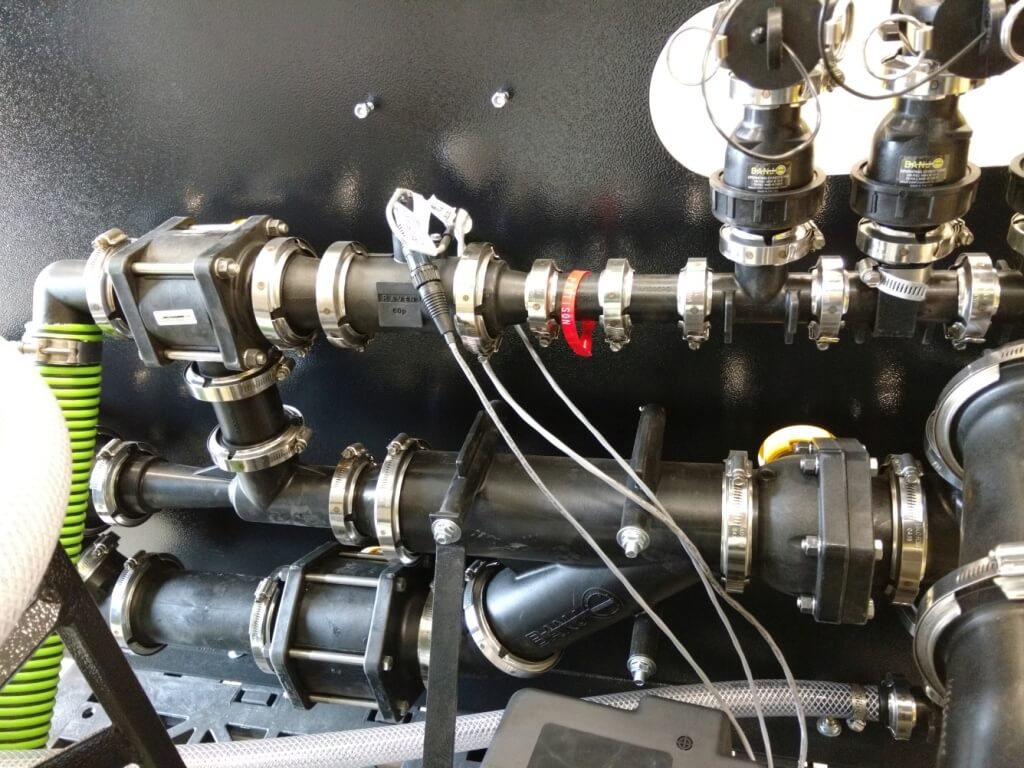
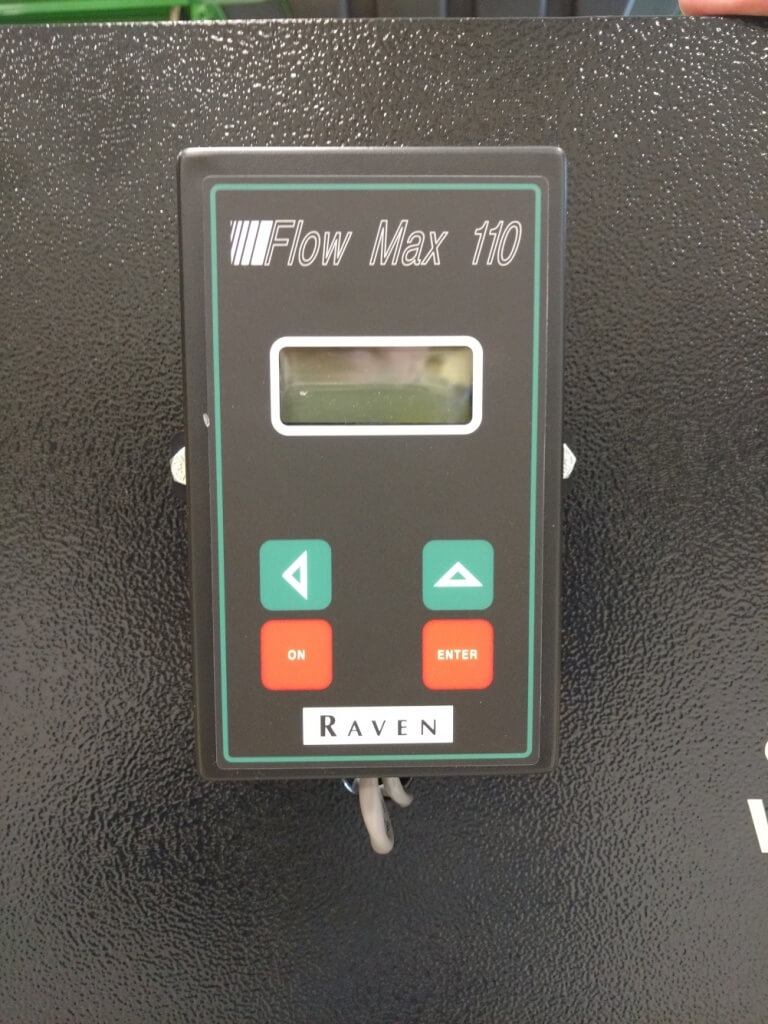
“The Banjo Mag meters and the Raven FloMax 110 (combined with the 60P) and 221 are the most accurate that we have available, the Banjo is limited to non-petroleum based products though.
Both the Raven 60P and Flomax 221 are turbine style meters, to be used with all ag chemicals, – 2” models.
Banjo Mag meters should only be used with water based products – this meter is the best for measuring water when filling, comes in a 3” model.”
What are the best ways to clean a transfer system?
“The best way to clean your jug rinse tank is THOROUGHLY!! There is no such thing as overkill when it comes to cleaning this tank, we use a tank that has no bulkhead (total drain, no bulkhead for product to get hung up on) in the drain, a rinser designed for an 800 gallon tank, and very minimal fittings for chemical to get hung up on.
Use lots of water, when you think it’s clean, rinse it one more time!!
All our inductor systems come with a quick attach clean water rinse system, that allows the operator to flush the complete metering/inductor system.”
What is usually the limiting factor when trying to fill a sprayer faster?
“Hose size, pump size, venturi efficiency, and planning are most critical. Consider your needs – a system should be designed specifically to the needs of the operator.”
Do you need more than one inductor to handle multiple products in time?
“Usually one will be sufficient so long as the suction line is of sufficient size and length.
Our inductor systems are configured to handle more than one bulk product at one time. With just the turn of a valve you can switch from metering one product to another, or quickly change from metering a bulk product to handling jugs.”
We’ve recently been talking about how we can increase sprayer productivity by decreasing downtime. The main productivity robbers are time spent filling and cleaning. Using our productivity calculator, we’re able to show a 30% increase in acres per hour with some relatively simple changes to how we fill the sprayer. It’s important to actually measure the time spent filling, not estimate it.
A few days ago, Jeff Calder of Letellier, Manitoba (@jcalder1983) tweeted a water truck project he’s been working on, and it generated a lot of interest. We decided to follow a suggestion made by Ron Krahn (@RonKrahn) last fall to show various designs so that everyone can learn from each other.
This post will grow over the next few weeks as we gather more submissions. The first four submissions are below, the fifth and subsequent submissions will be here.
Please use our e-mail link on the site to send us your picture and descriptions, and we’ll post them as they arrive.
The first submission came from Landon Friesen (@landon707) who farms near Crystal City, Manitoba.
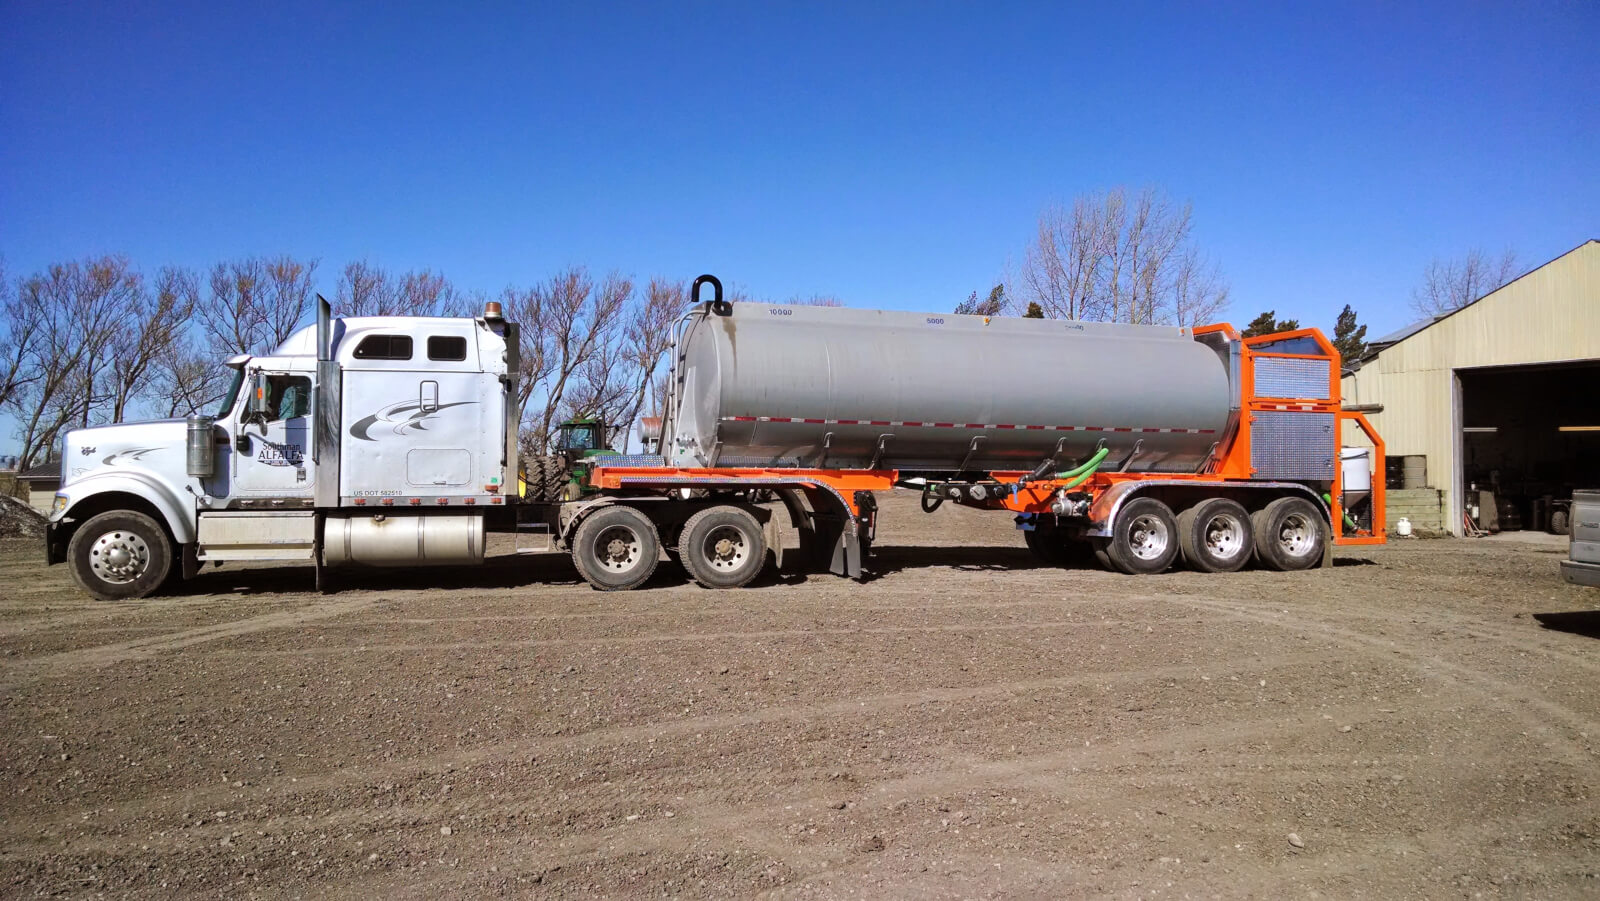
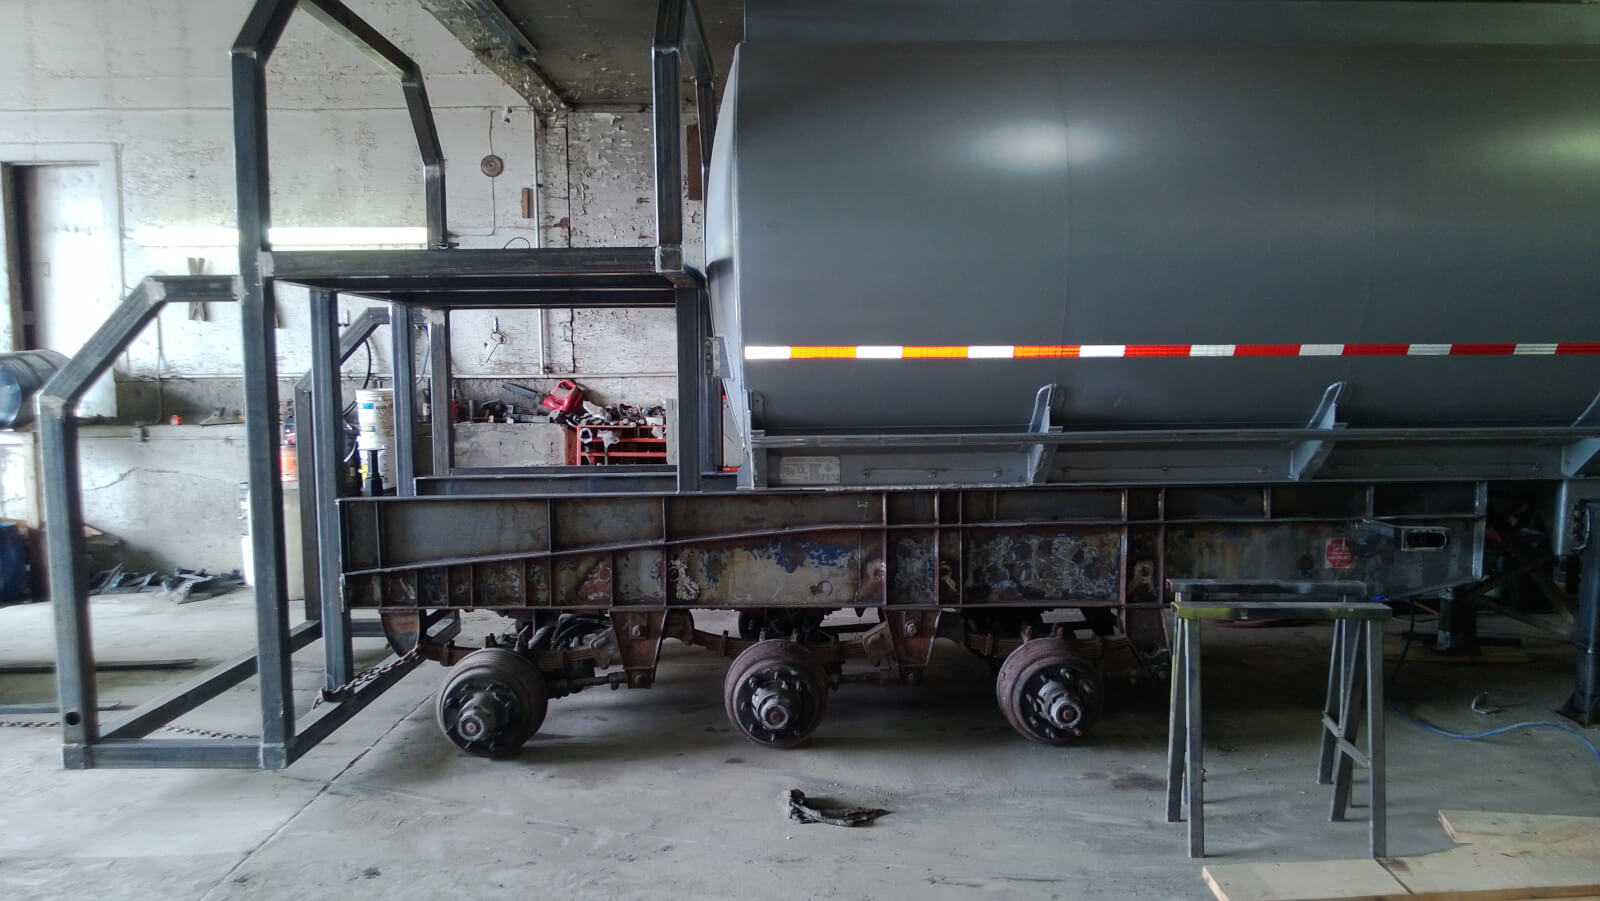
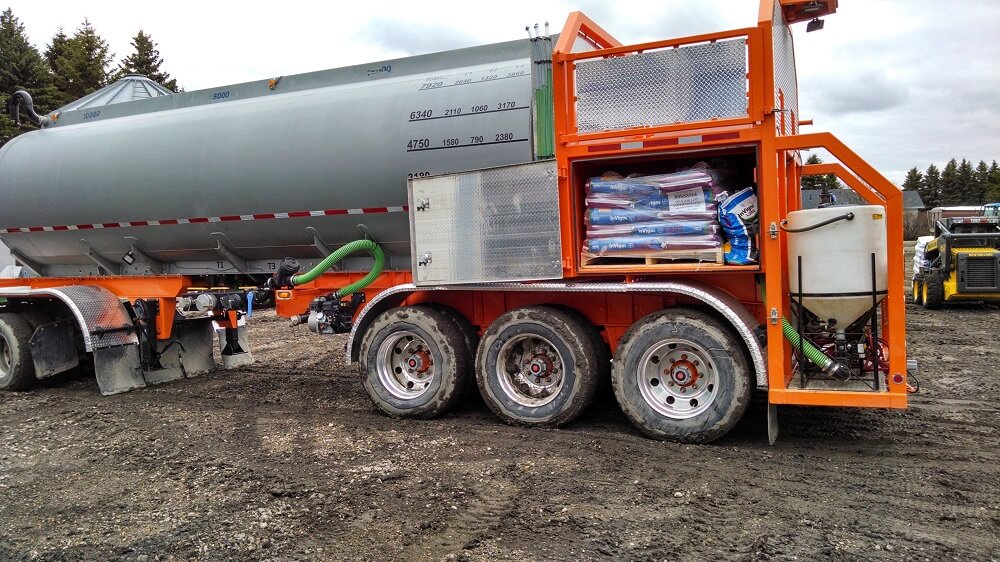
“We bought the front half of a old fuel tanker, stripped it right down to nothing, flipped tank end for end for better weight distribution, and extended the kingpin for bridge length. It’s just shy of 9000 gal to the lids (far from legal). Built the back frame/box etc.
Mix Tanks on rear platform, bulk totes up top, small boxes in the middle. Blast and paint are next. #westcndag
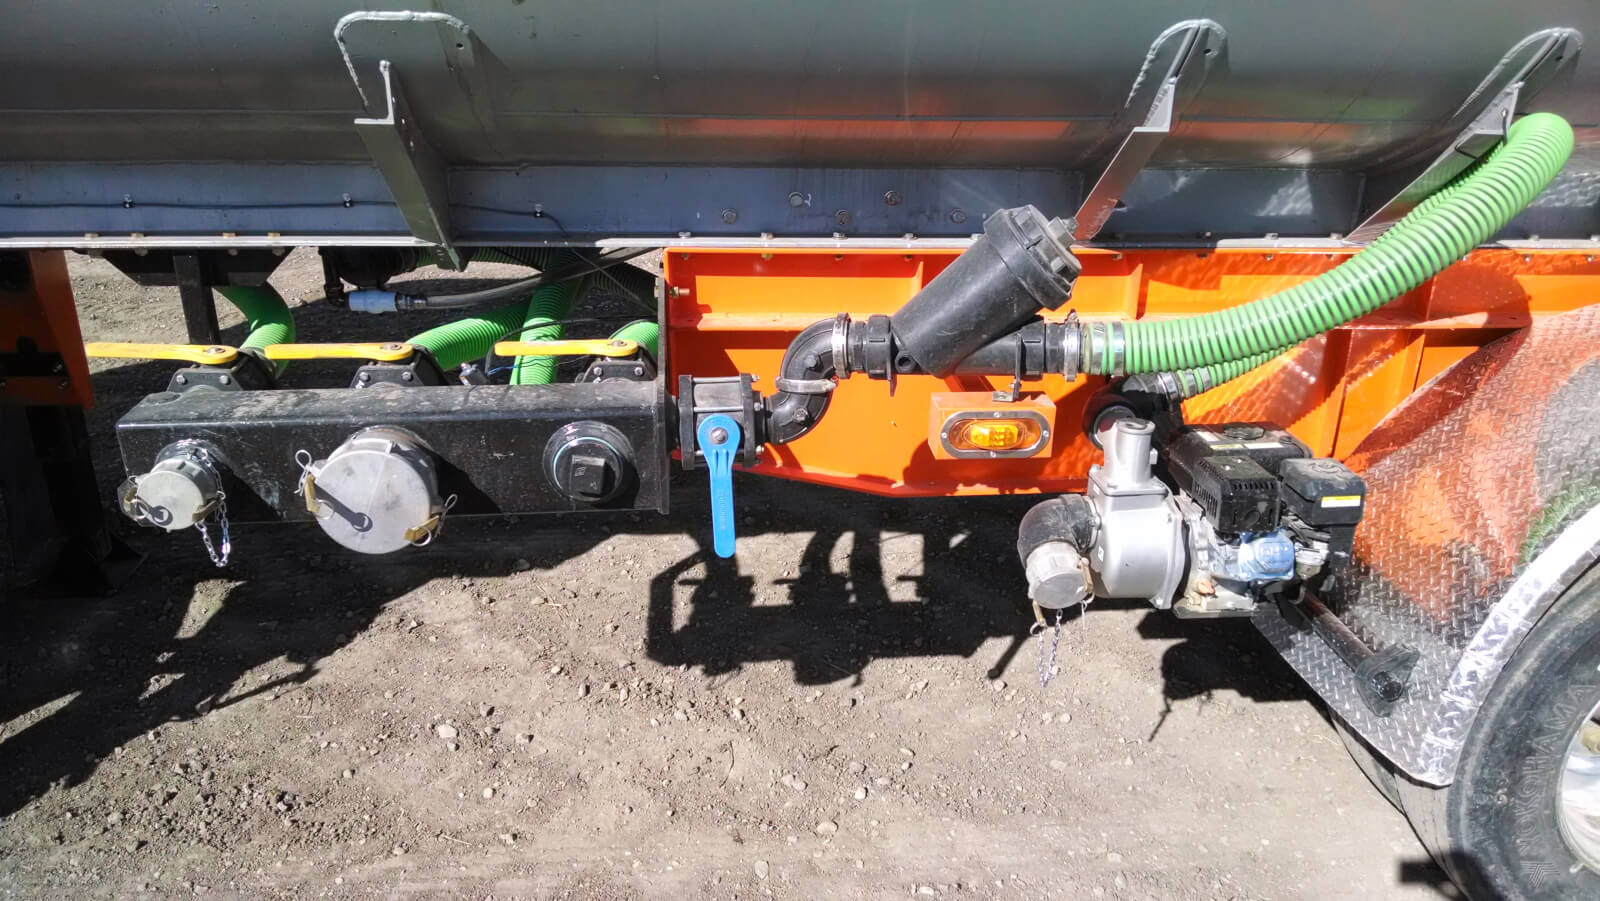
“Starting at the drivers side, all three internal tanks come together in a manifold, you can select which tank you’re drawing from or filling from. You can fill with a 3, 4, and 6 inch pump, connected to the manifold is a stationary pump for only filling ditches or water sources without pumps with a filter on it.
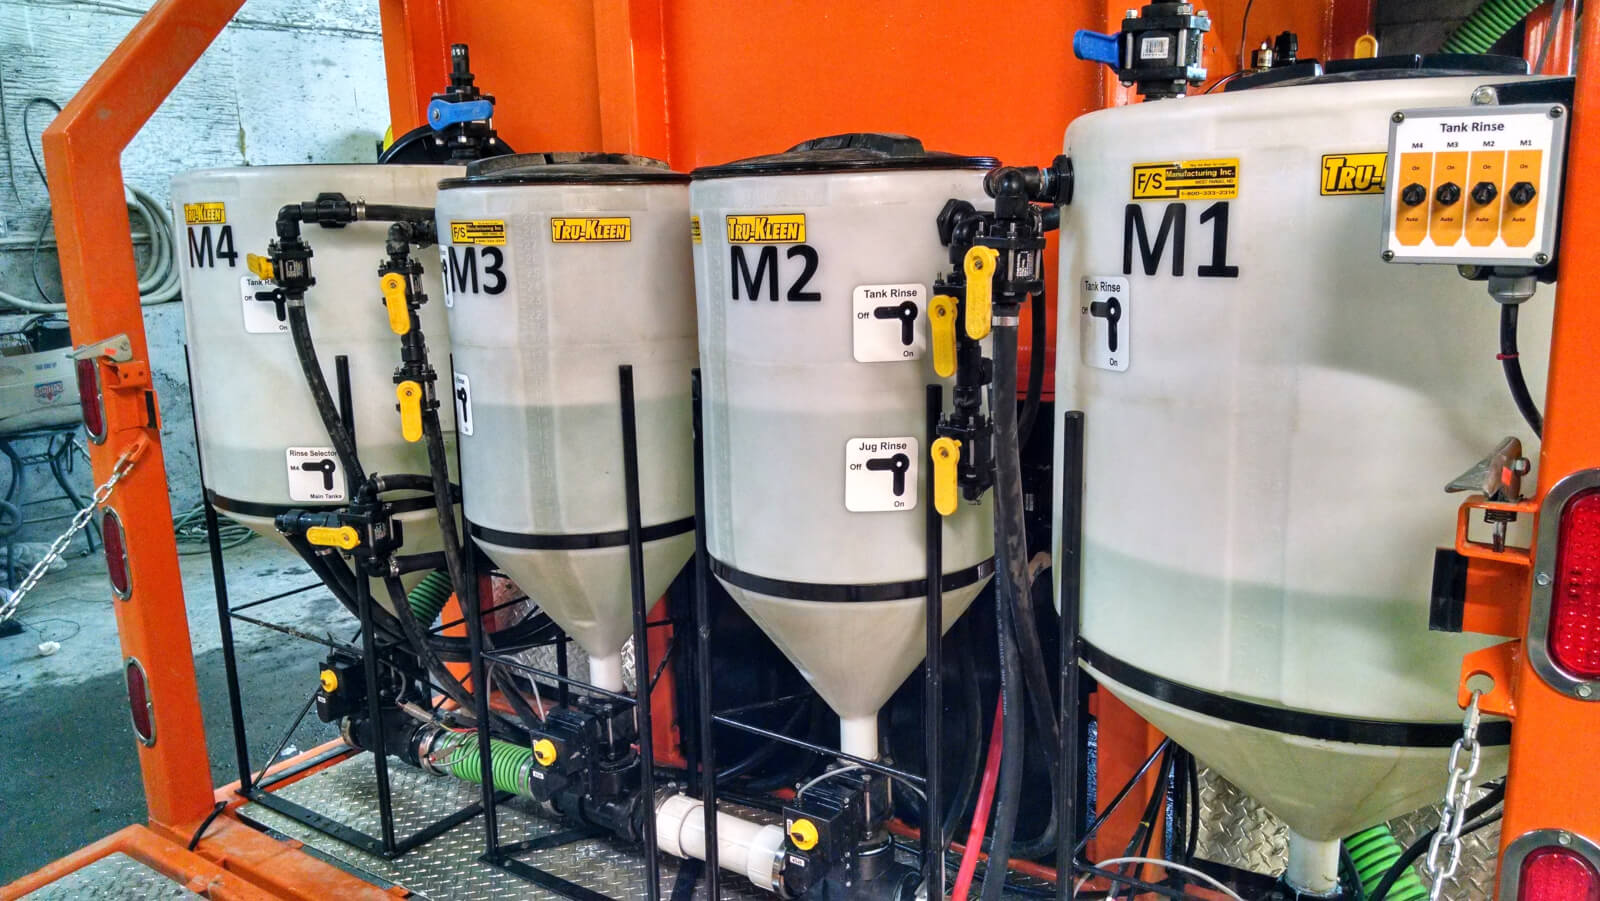
“Water then travels around the backside of the trailer under the 4 induction tanks, a check valve keeps any product from flowing back into the tanks to prevent contamination. Each induction tank has a 1.5 inch electric ball valve that feeds the three inch line.
“Each inductor has a tank rinse and a jug rinse. Tank rinse and jug rinse are powered by 2 12 V water pumps drawing from manifold on the drivers side of tank. All electric solenoids control which induction tank gets rinsed.
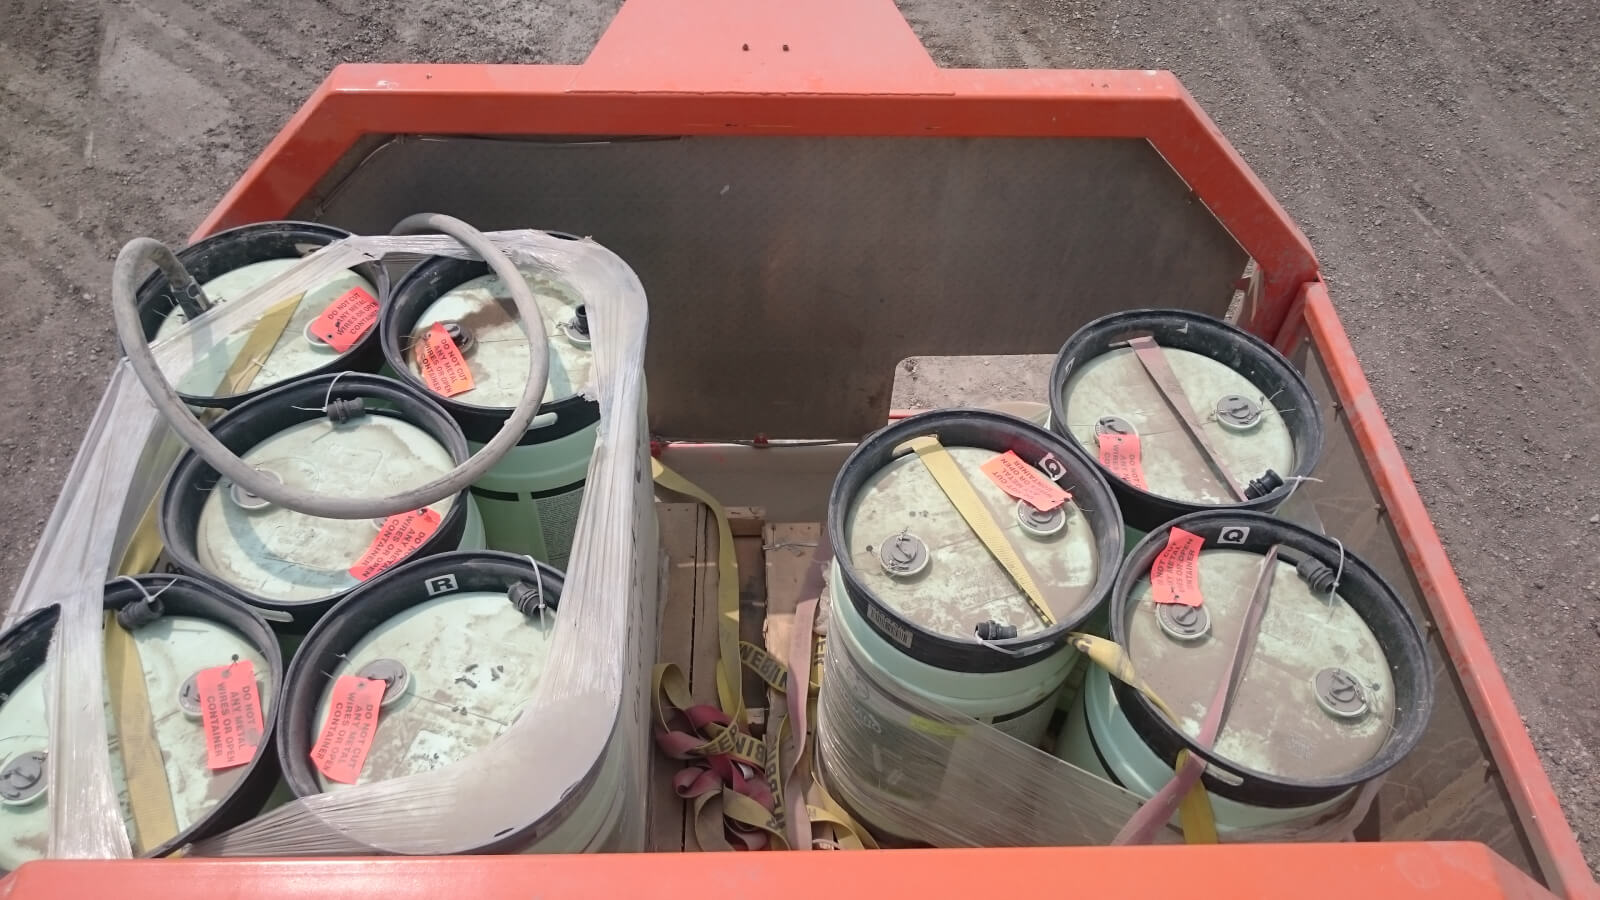
“Jugs are stored inside the large box under the bulk deck, keeps them dry and close by the the rear deck. Bulk containers go on the top deck, 900 L totes are gravity fed into the inductors, accurate measurements on the inductors let us know when to shut off the gravity valve, if barrels are used a chem pump is on the back now too.
“Inductors are handy because it keeps all products “preloaded” and separate for chem safety until you need them.
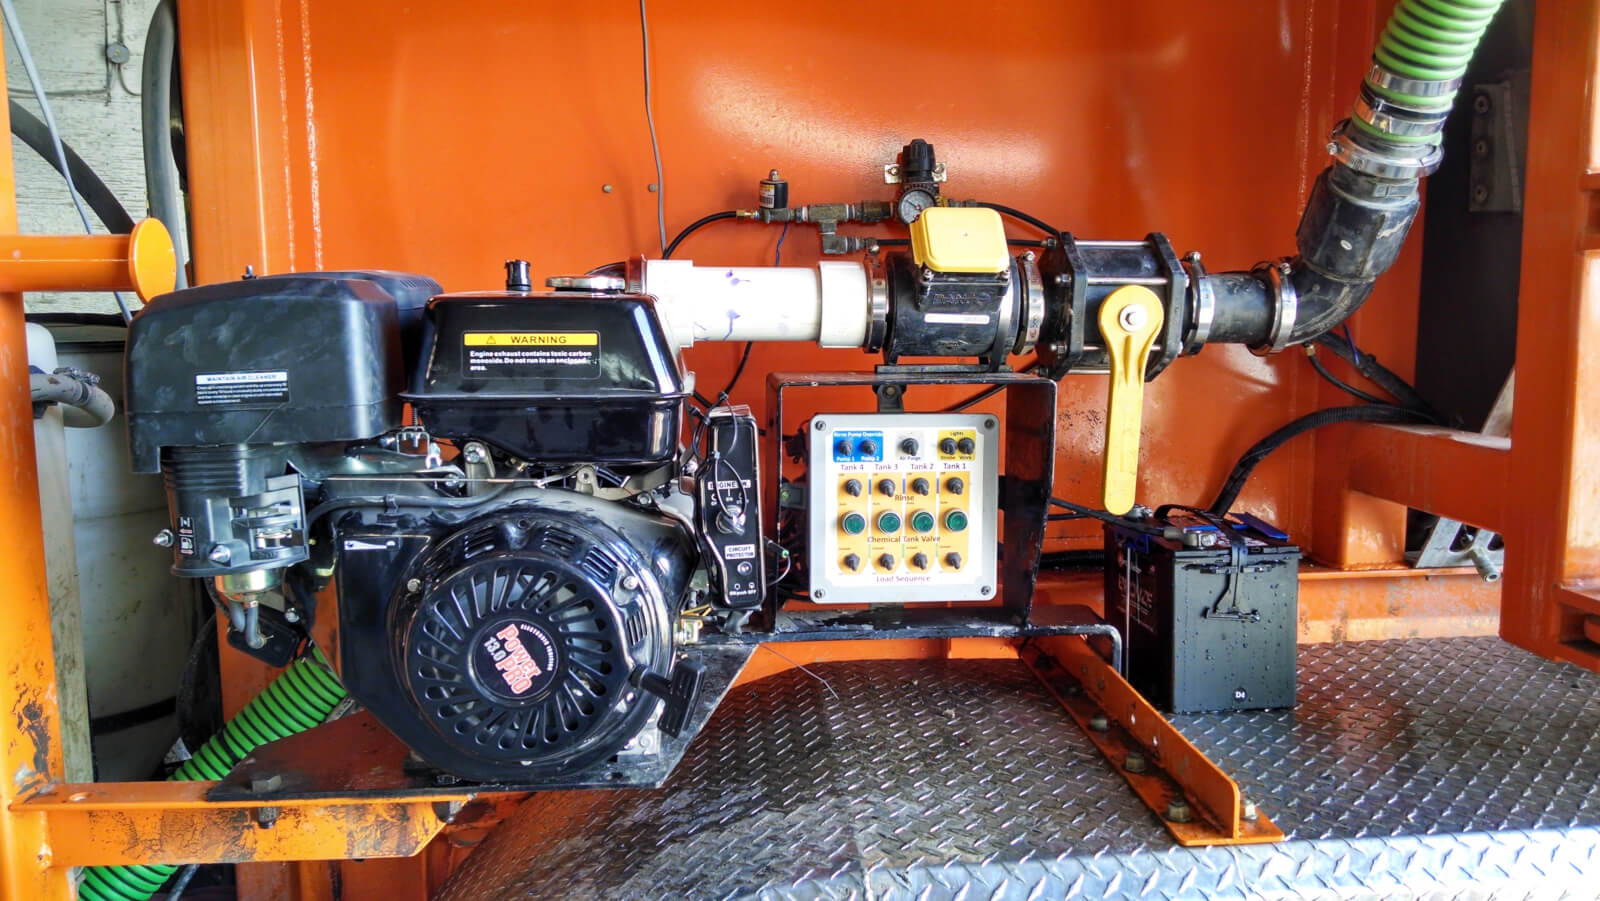
“After the inductors the hose travels to the suction side of the pump, was a 6.5 hp Honda and now replaced by a 13 hp Hypro pump, water or fertilizer then passes through a flow meter and out the 12 ft boom with hose doubled up for 24 ft reach across the ditch.
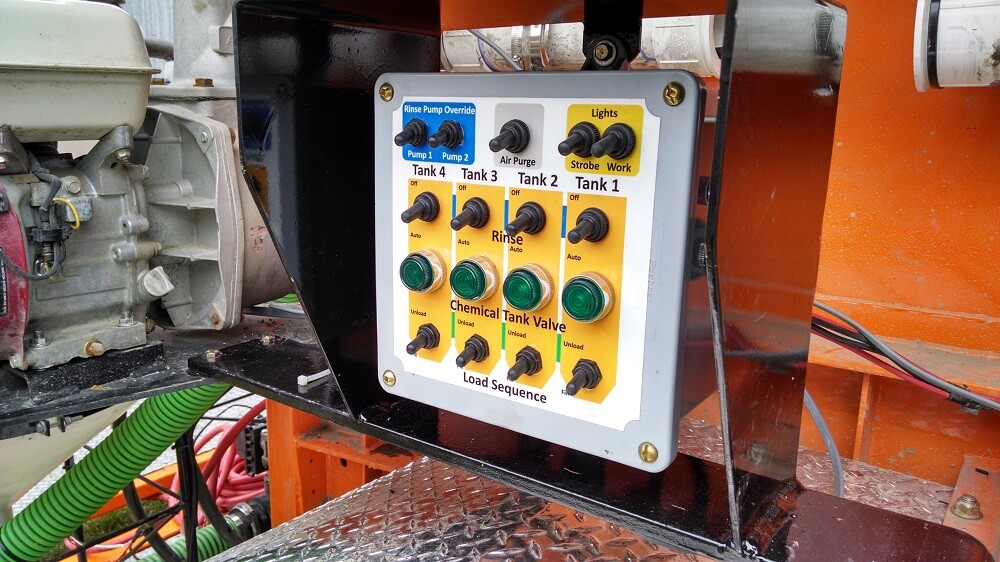
“Our goal was to have the tanker operator stand by the pump and control panel the whole time, no valves to turn, when you engage the “unloading” of a induction tank on the control panel the auto rinse is activated for that inductor, keeping it cleaned out for the next batch.
“We can fill a 1200gal sprayer with all chem in just under 5 min with all chem included, that’s from hose connection to disconnect. Gained many acres/day b/c of this trailer. Took us 2 years to build and I’d do another in a heartbeat!
“We use it for seeding in spring to bring liquid fertilizer to the drill, can keep a skid of seed out of the rain and blend N, S, and liquid P with the flow meter. Next to the sprayer it’s the most widely used piece of equipment on the farm!
The second submission was made by Jay Schultz (@WheatlanderJay) of Rosebud, Alberta
“Spray tender setup is near and dear to my heart and have set up 2-3 systems in the last few years with the help of my BIL Craig. I have the vision he has the know how. I scoured the internet for a few years for ideas and there is lots of great setups on various forums.
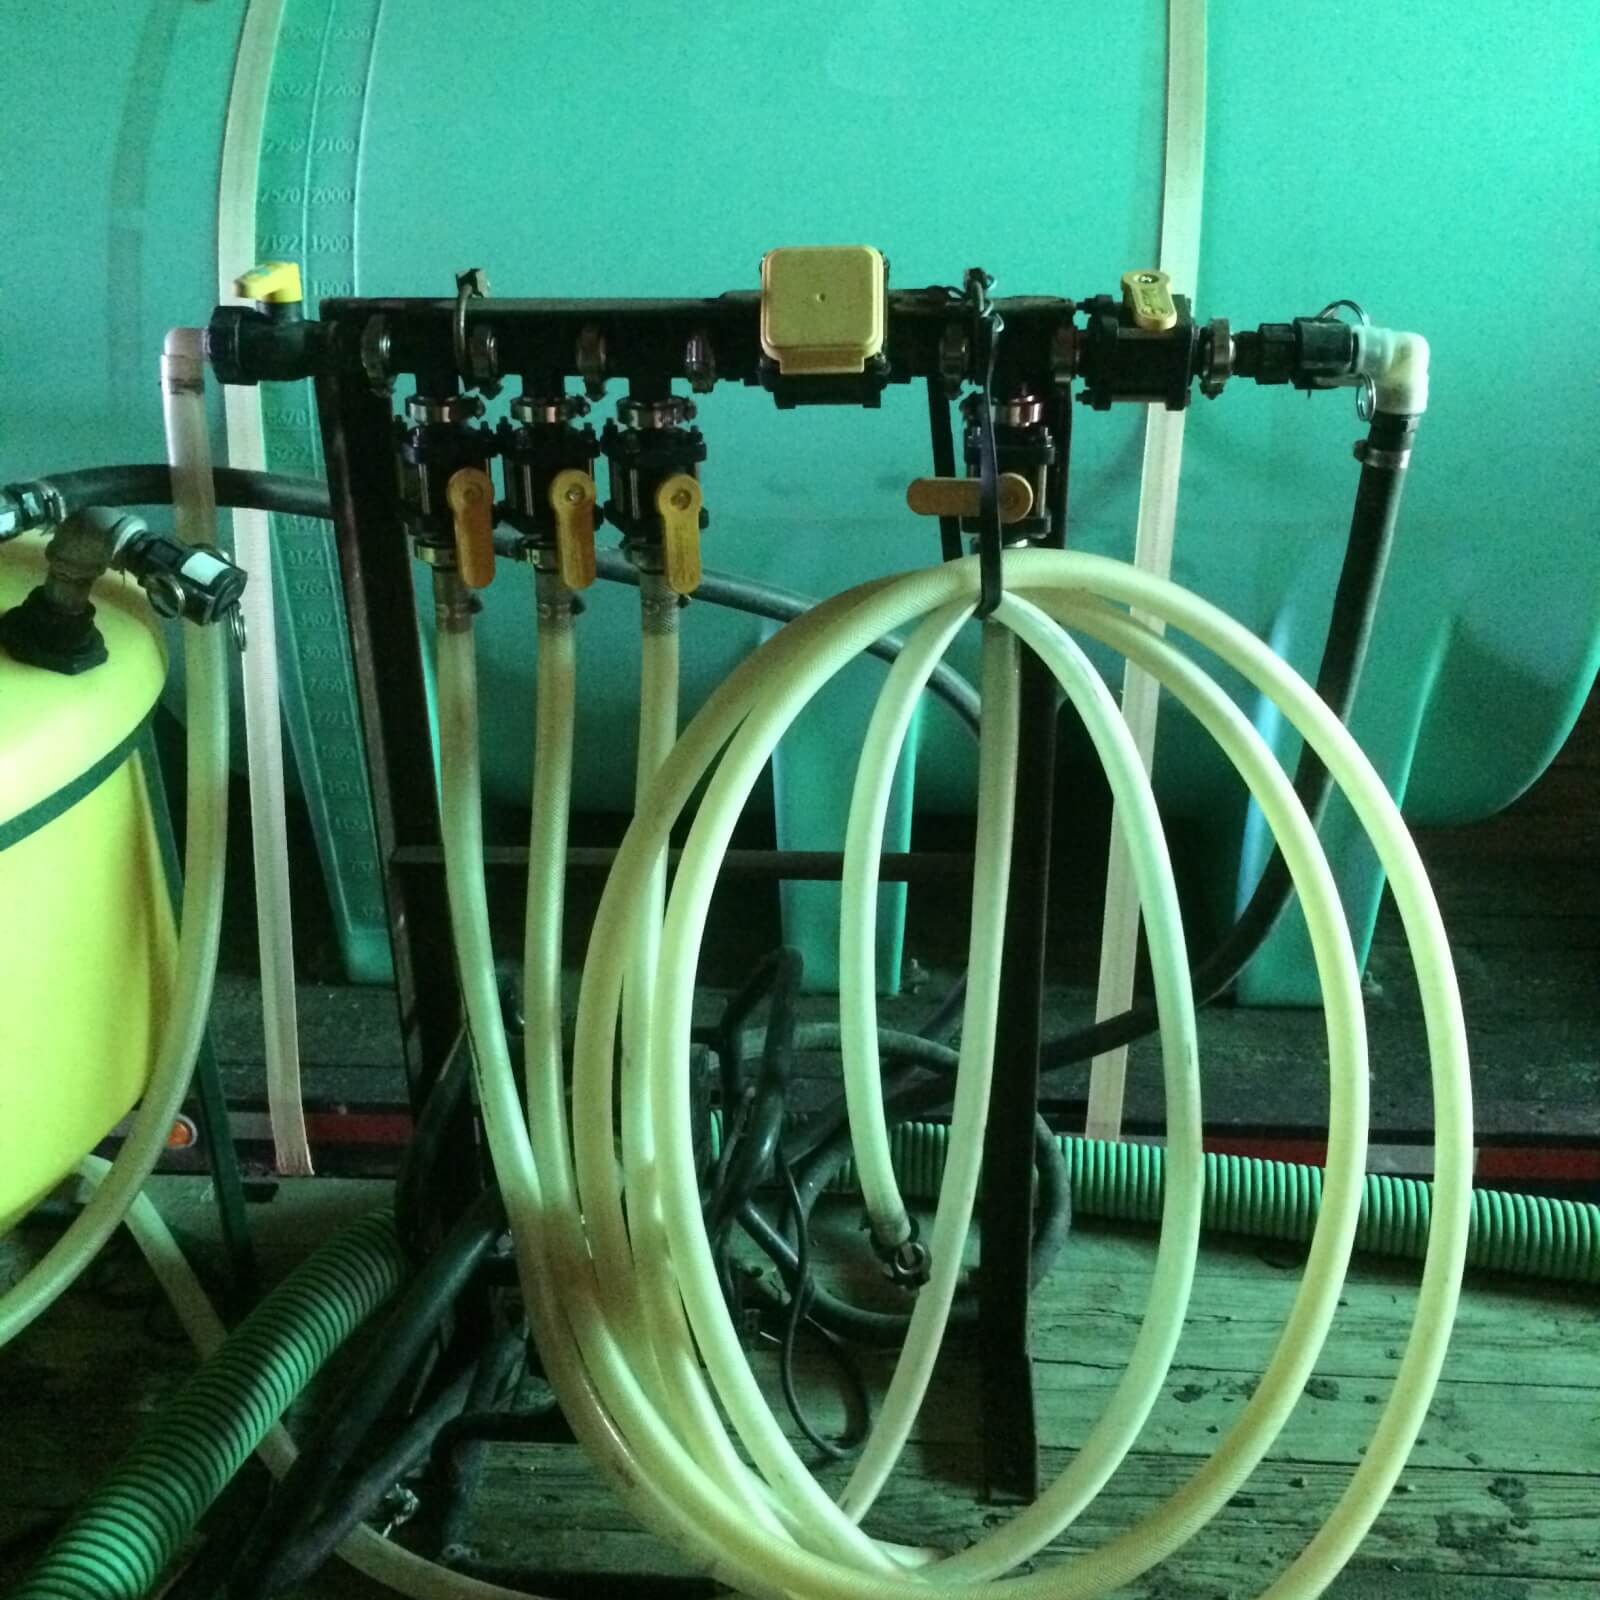
” My bulk chemical hose setup can suck out of three totes or barrels. It can dump into the chem handler using a 1 inch chemp pump or I can use the venturi to suck depending on what we want to do. This system is also plumbed with a fresh water line to be flushed. It also has a banjo flow meter. Banjo last a long time, other brands do not. BUT it measures EC not flow which does not work for all chemicals. Back up is measuring in the chem handler.
“When we use jugs we throw them in an old ICB tote so they don’t blow out down the road.
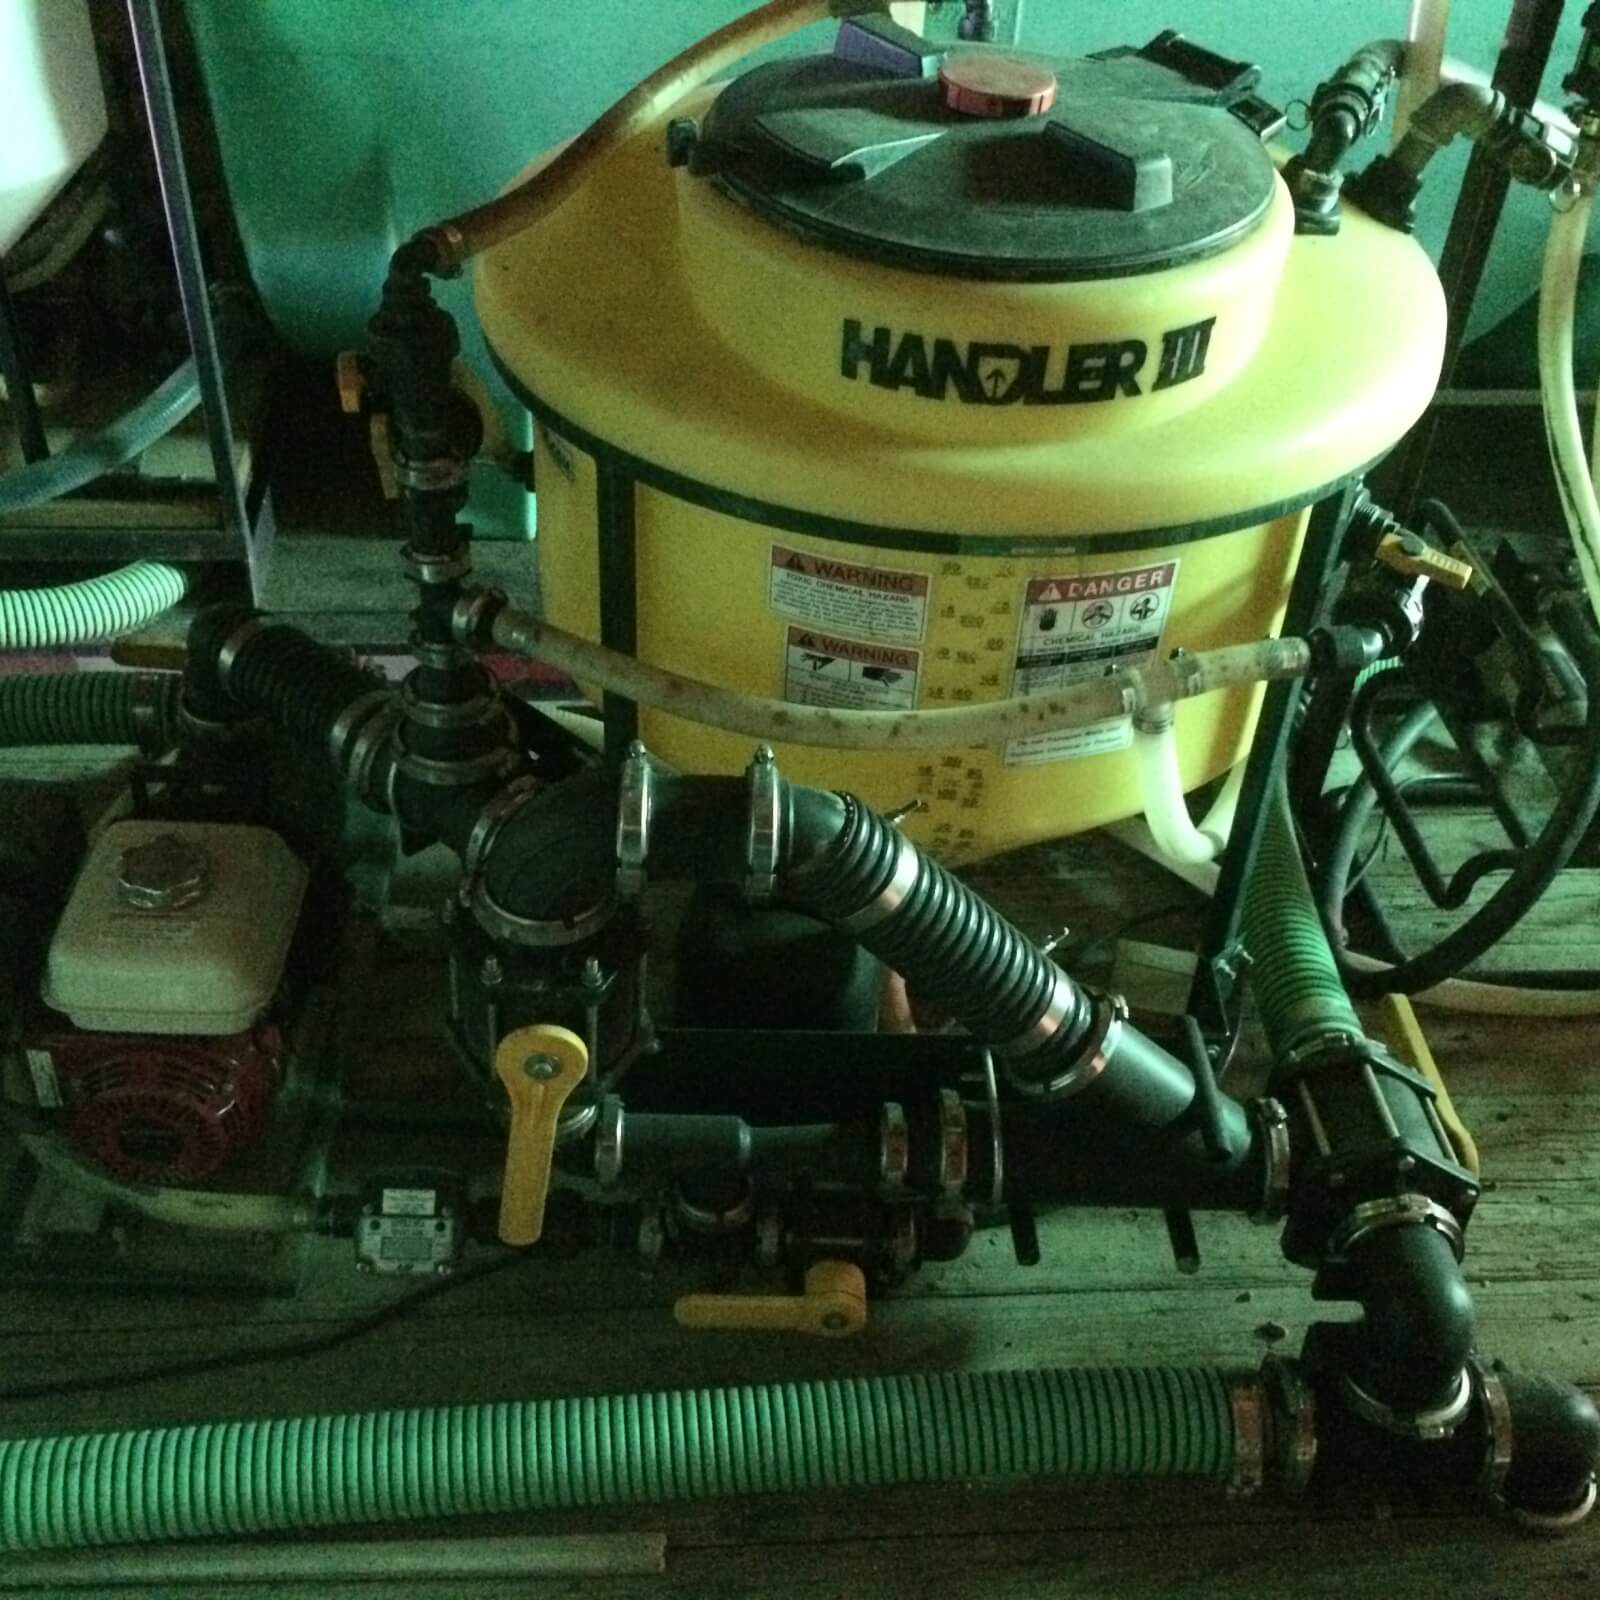
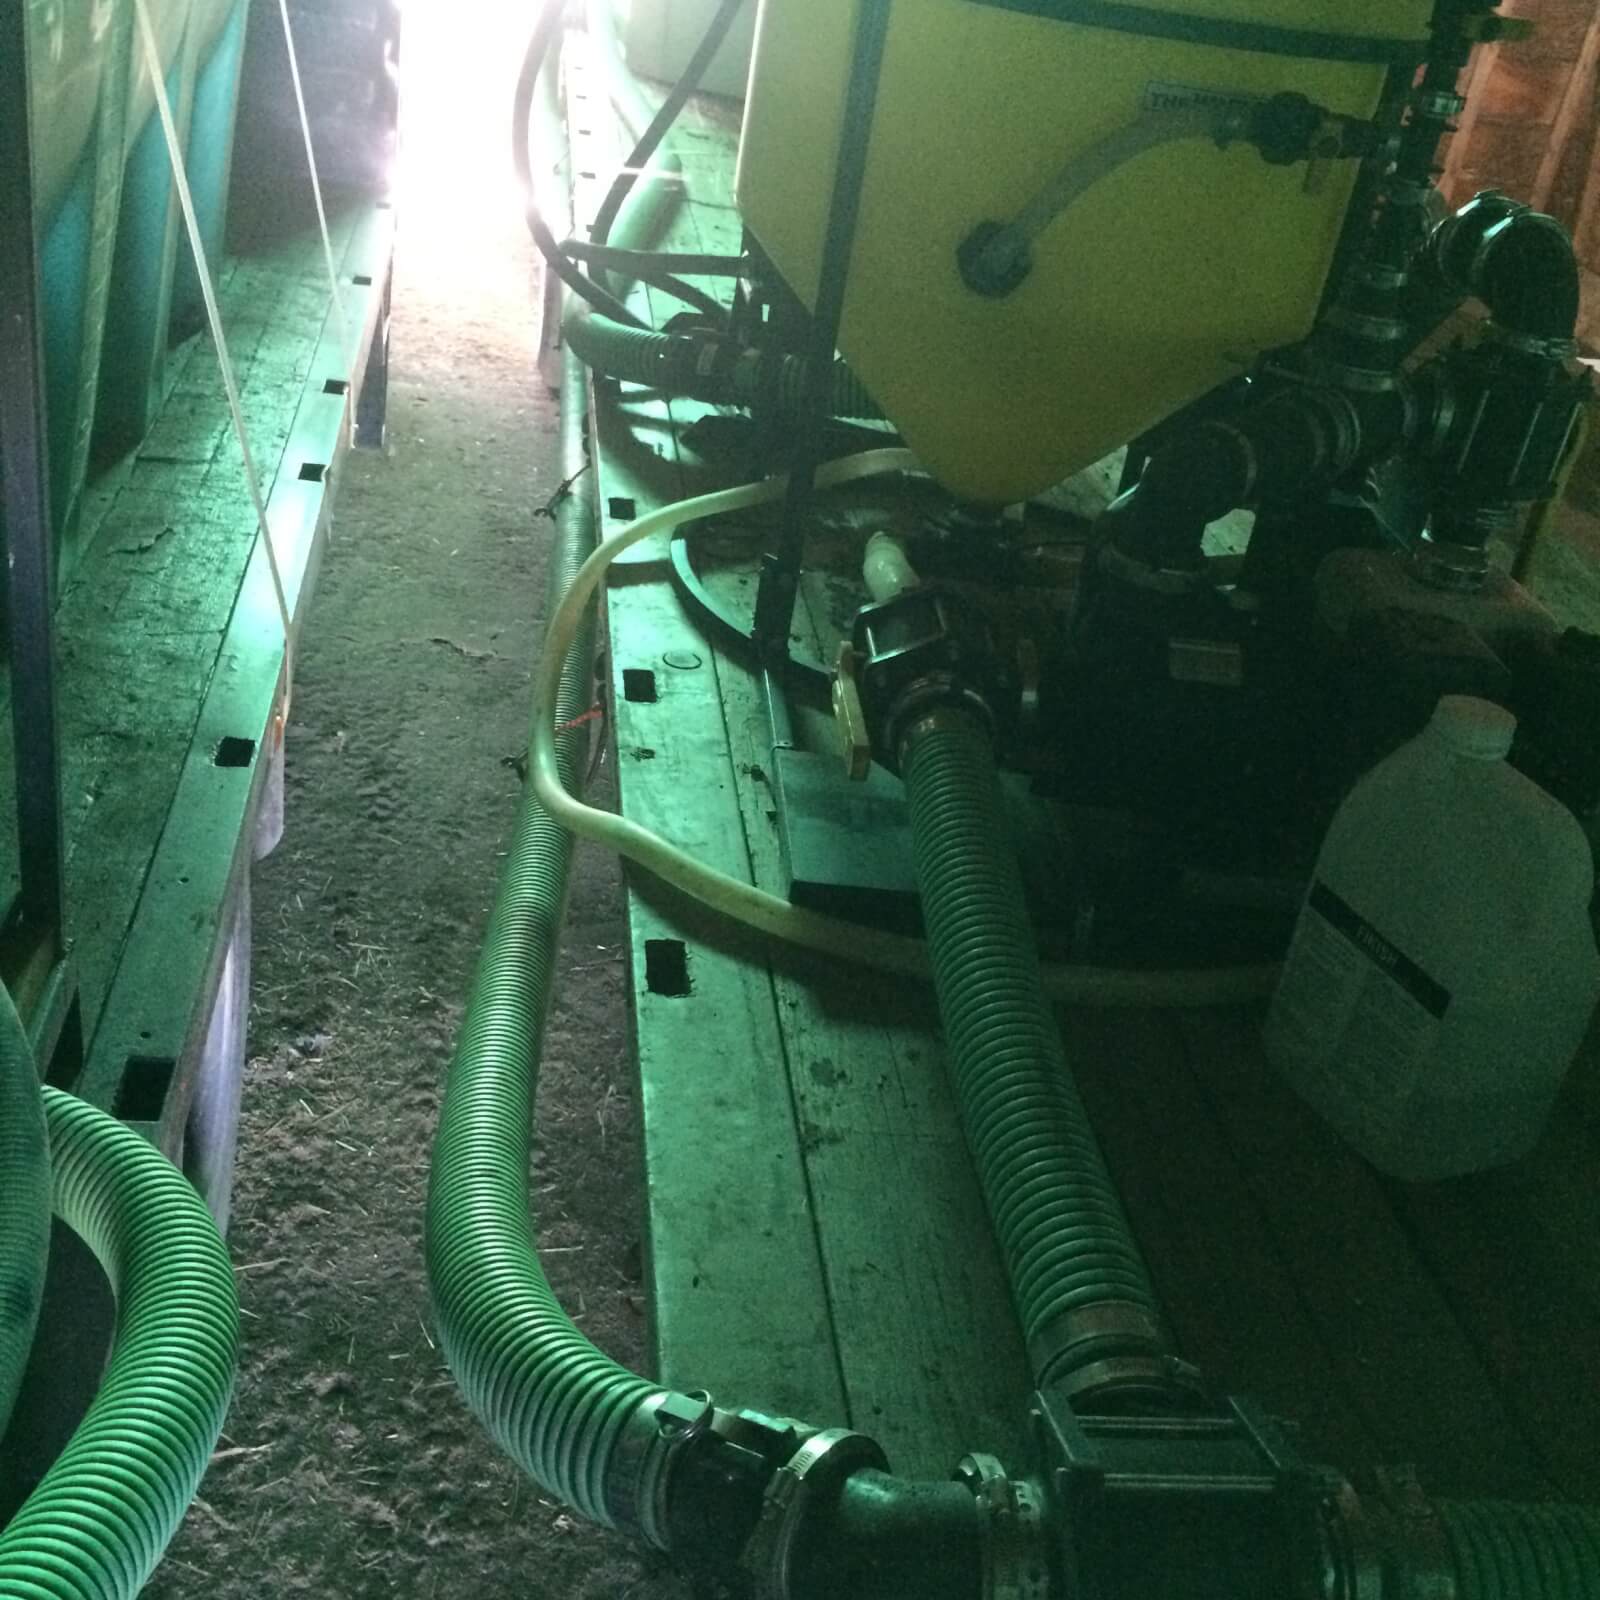
“We are using a chem handler 3 with all three inch hoses.
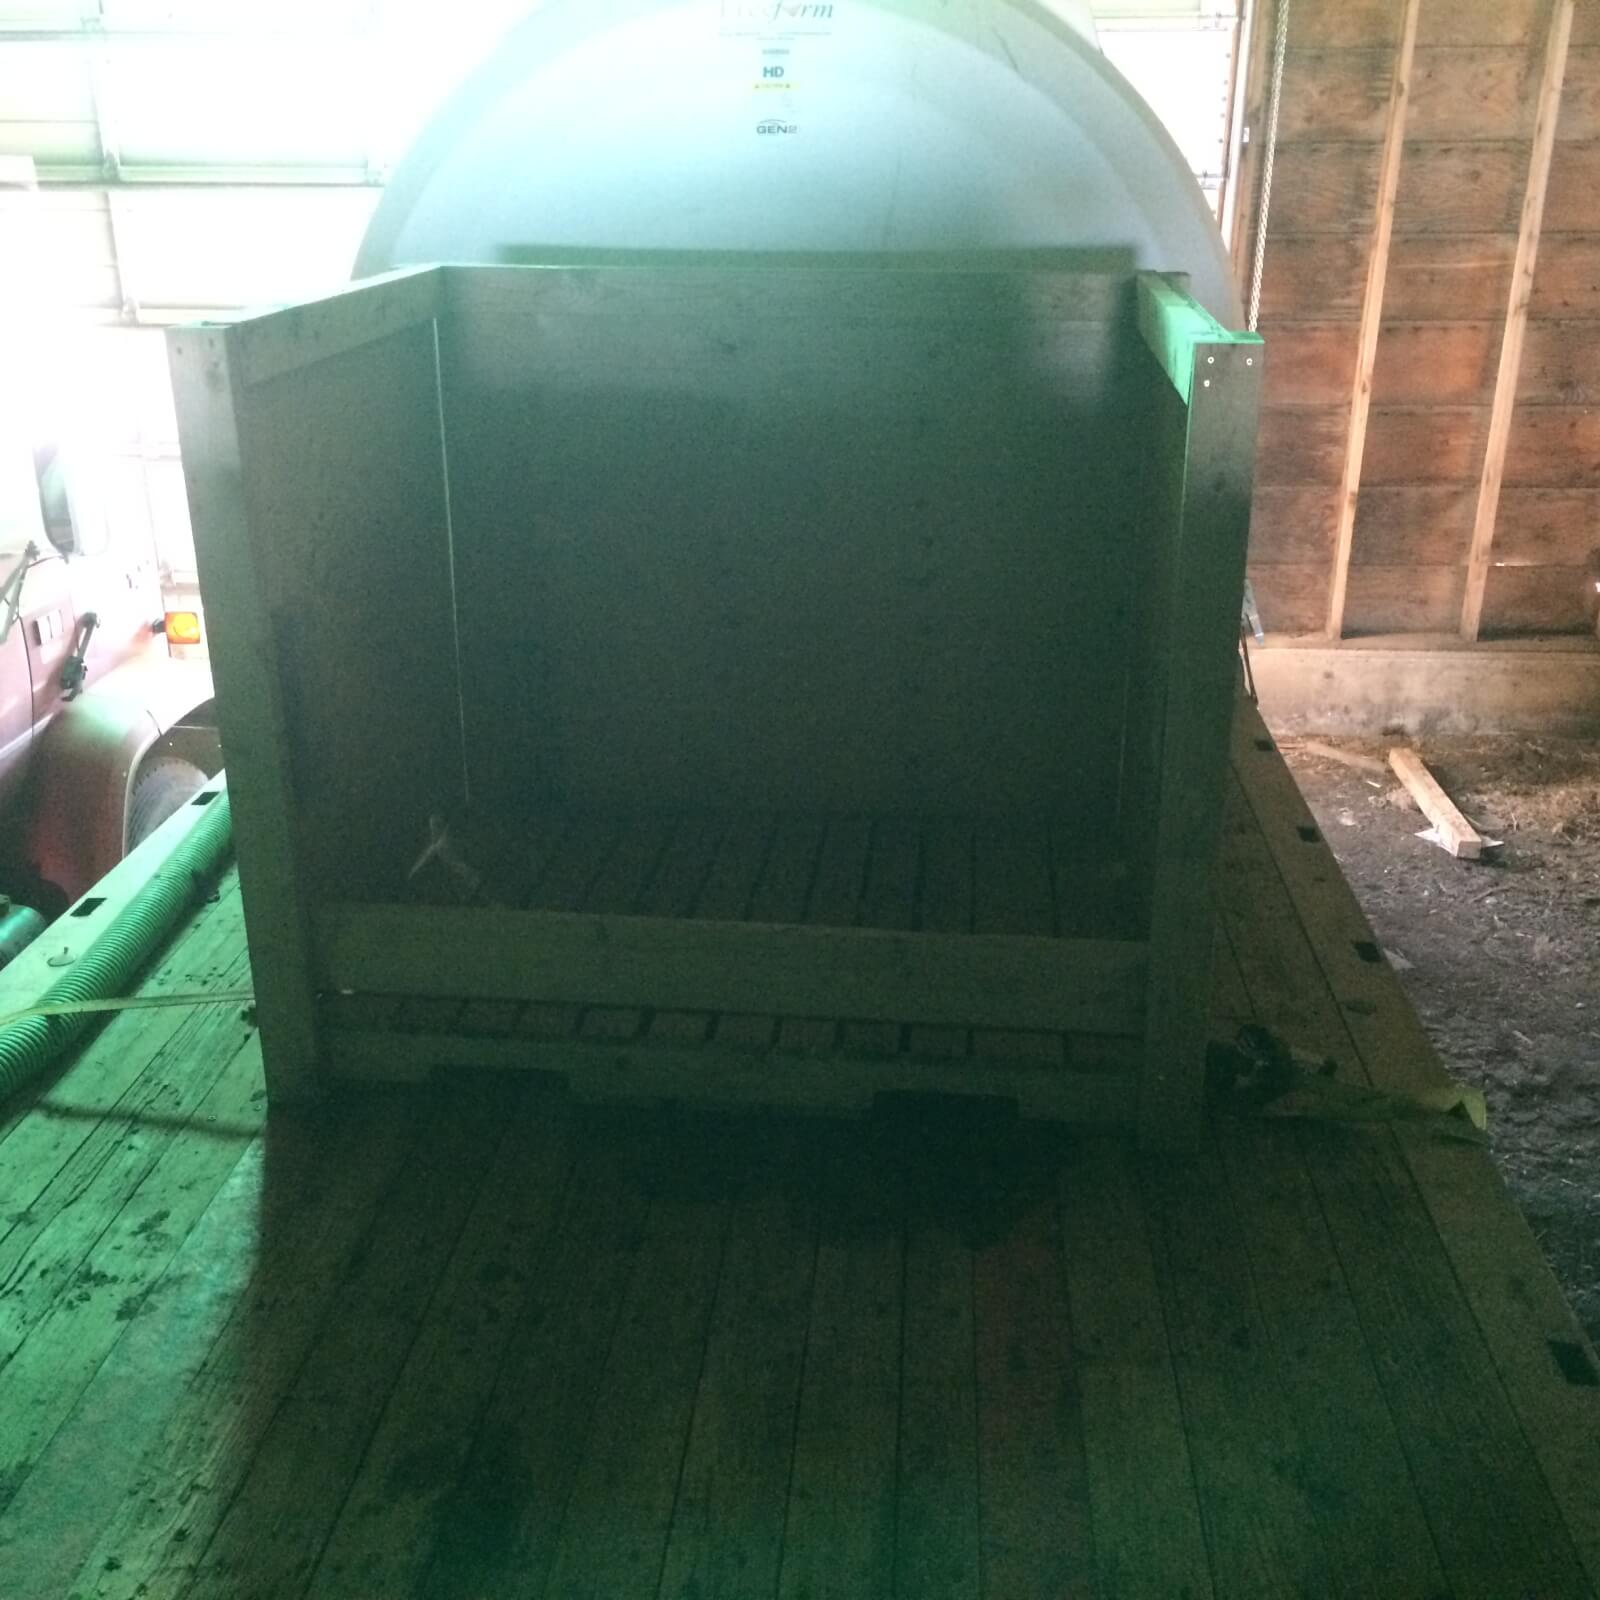
“When we have barrels and or jugs we have a pallet they we built sides for that also has a shelf. We can remove it with one strap and reload or use 4 totes.
“We have a long hose for filling that has hooks and bungy straps to hold it up. We empty the hose every time because its very heavy when full. To drain the water we just open a valve on the handler to let air in the hose. We installed an air assists clean-out on the sprayer side so we can push the hose back into the chem handler if we need. The water is always murky so there must be some chemical in the hose. This is also where we fill the tanks on the truck with a three way valve on the suck side of our pump and a three way valve on the pressure side. We have free form tanks, tank 1 is 2350 gal and tank 2 is 3100 gal I think.
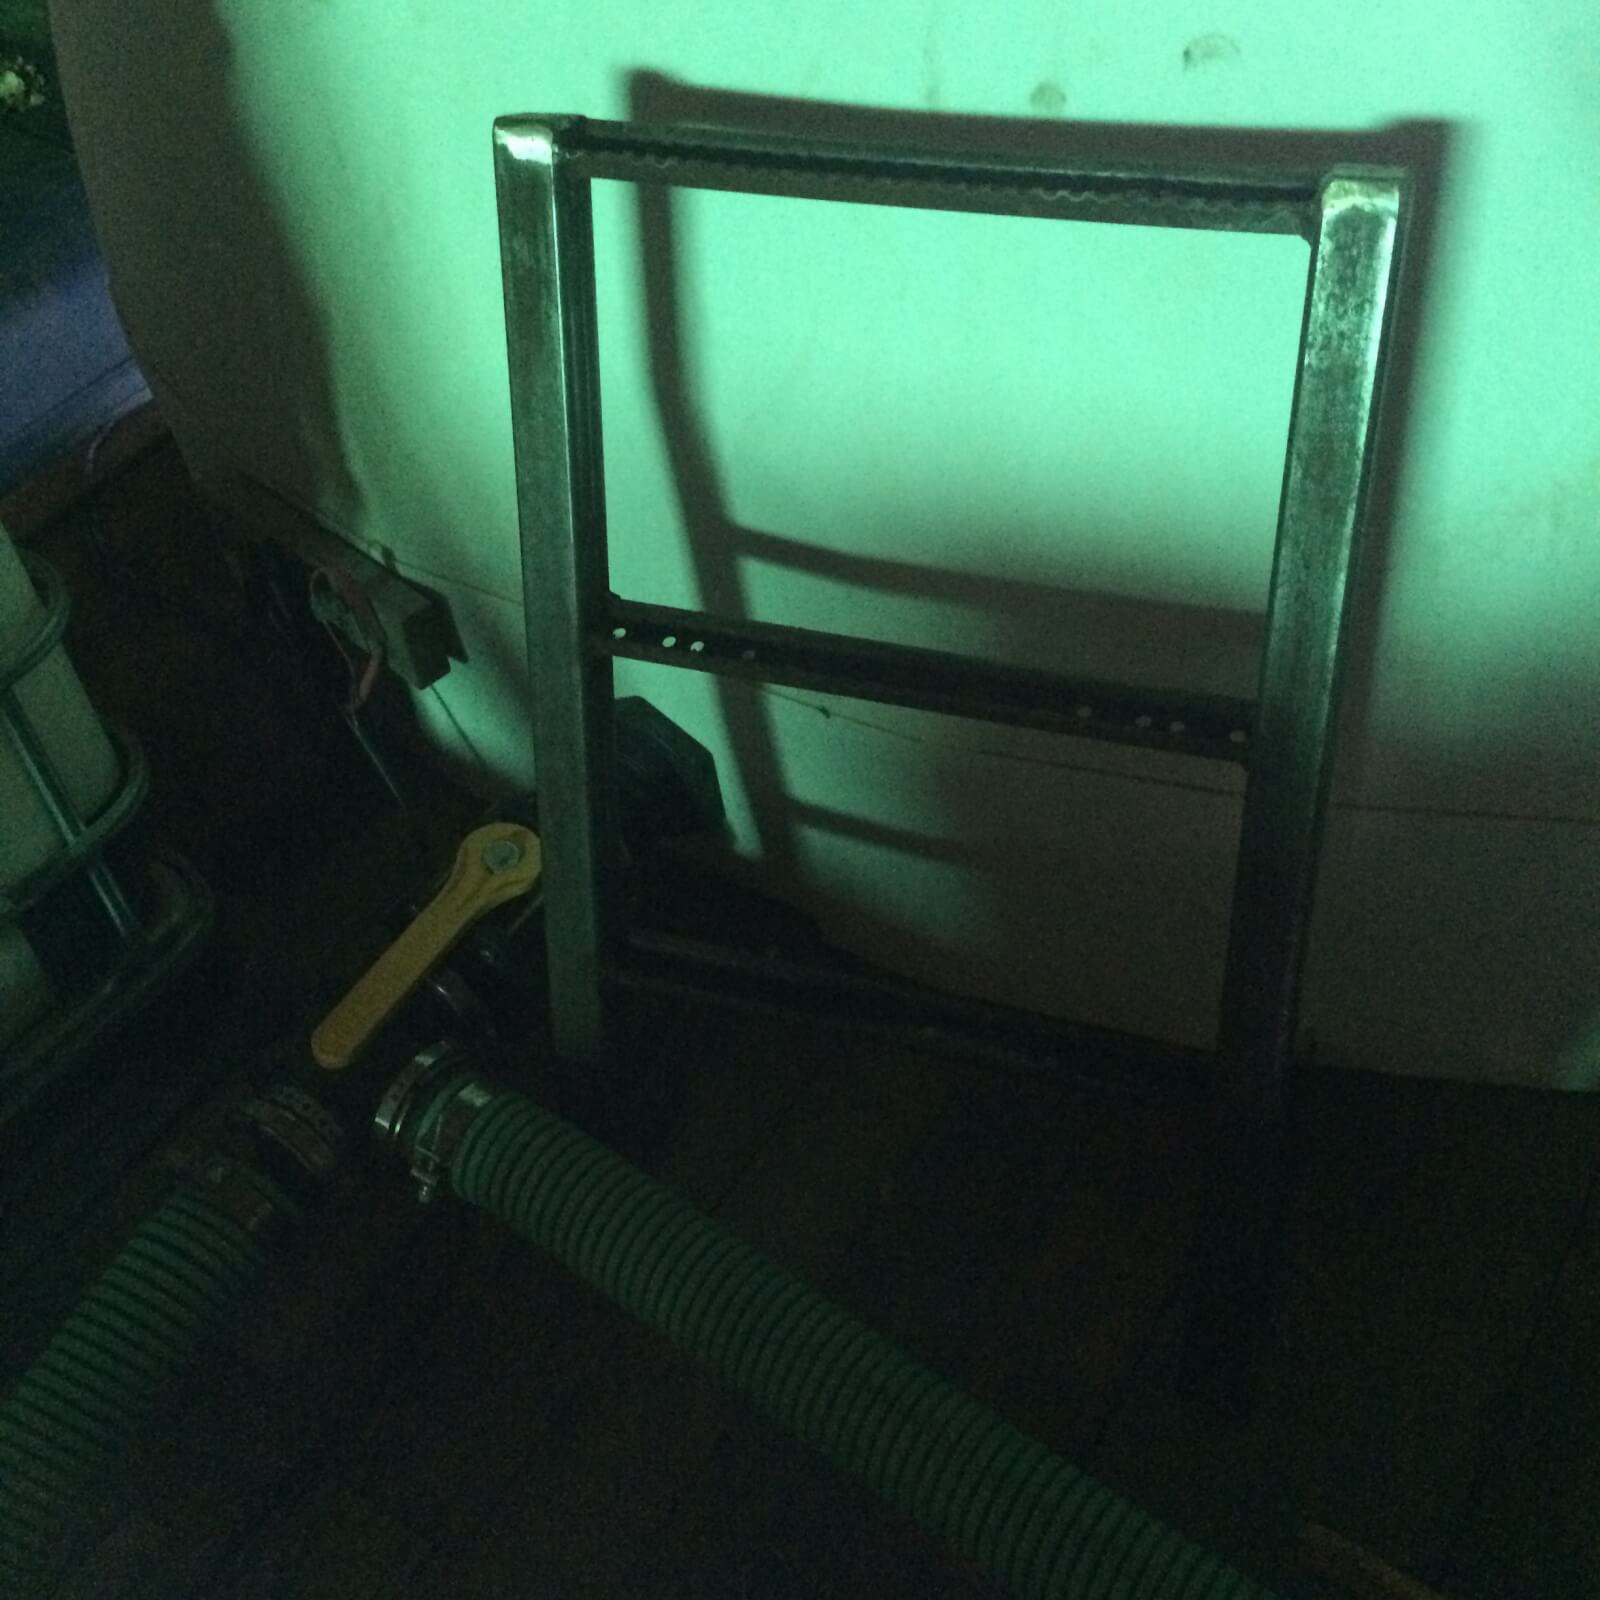
“If you have broken feeder chains lying around, the slats make excellent ladder rungs.
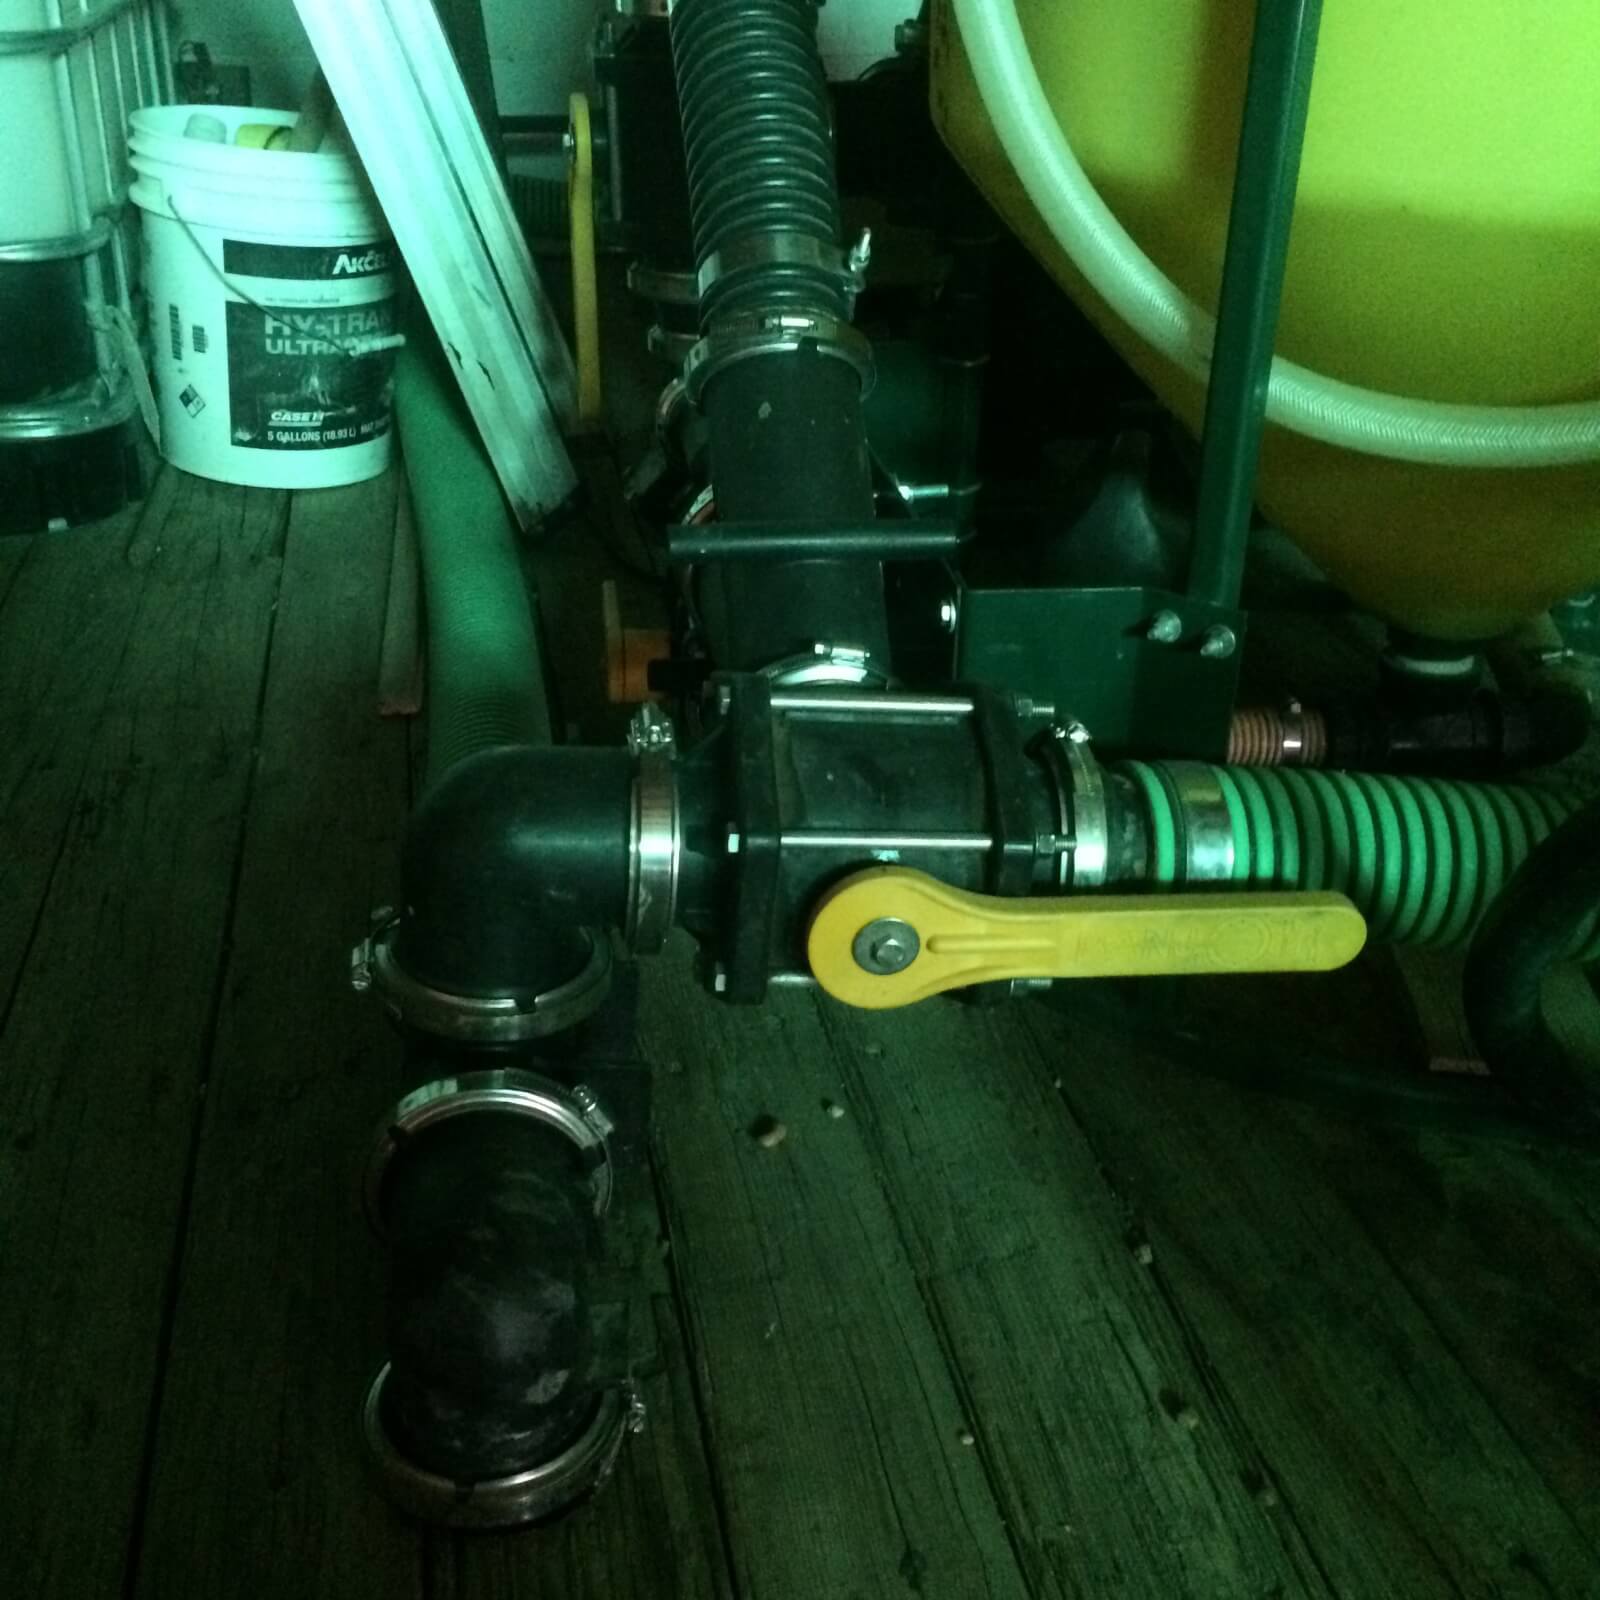
“Showing the 3 way valve on the pressure side. Its positioned to fill the sprayer in the picture.
“They have since modified the chem handlers for this purpose but I teed into the venturi to use this for chem totes. I also had an old flow meter I added. I don’t trust it though.
“Our trailer is 48 ft which we bought used for about $8000. Its a bit on the long side for getting into fields. If we could slide the wheels forward it would help but this trailer we cannot. We can fill in about 20 min and our sprayer is 1135 gal. Some advice, when you buy a Rogator the tank size does not match the number on the machine. We though our rate was out but it was because the tank is 1135 gal not 1100 gal. We can spray 4 tanks out and have room for a sprayer clean. We fill the tender at home with a free form 9000 gal trailer tank that we also use for 10-34 during seeding. We fill with a garden hose but are setting up a 1 inch pump to pump out of our overflow spring water system.
“We also have a tandem flat bed truck with a 2500 gal tank. We use this for 10-34 during seeding and fall desiccation instead of our trailer. Craig and I were much happier with the setup on this unit. We also used an old chem handler we had sitting around. I teed into the Venturi as well so I could suck out of totes. We also put an air clean out that was plumbed from the truck air supply. When we load 10-34 the hose is messy and heavy. We just blow the last of it into the drill and no mess and easy storage.”
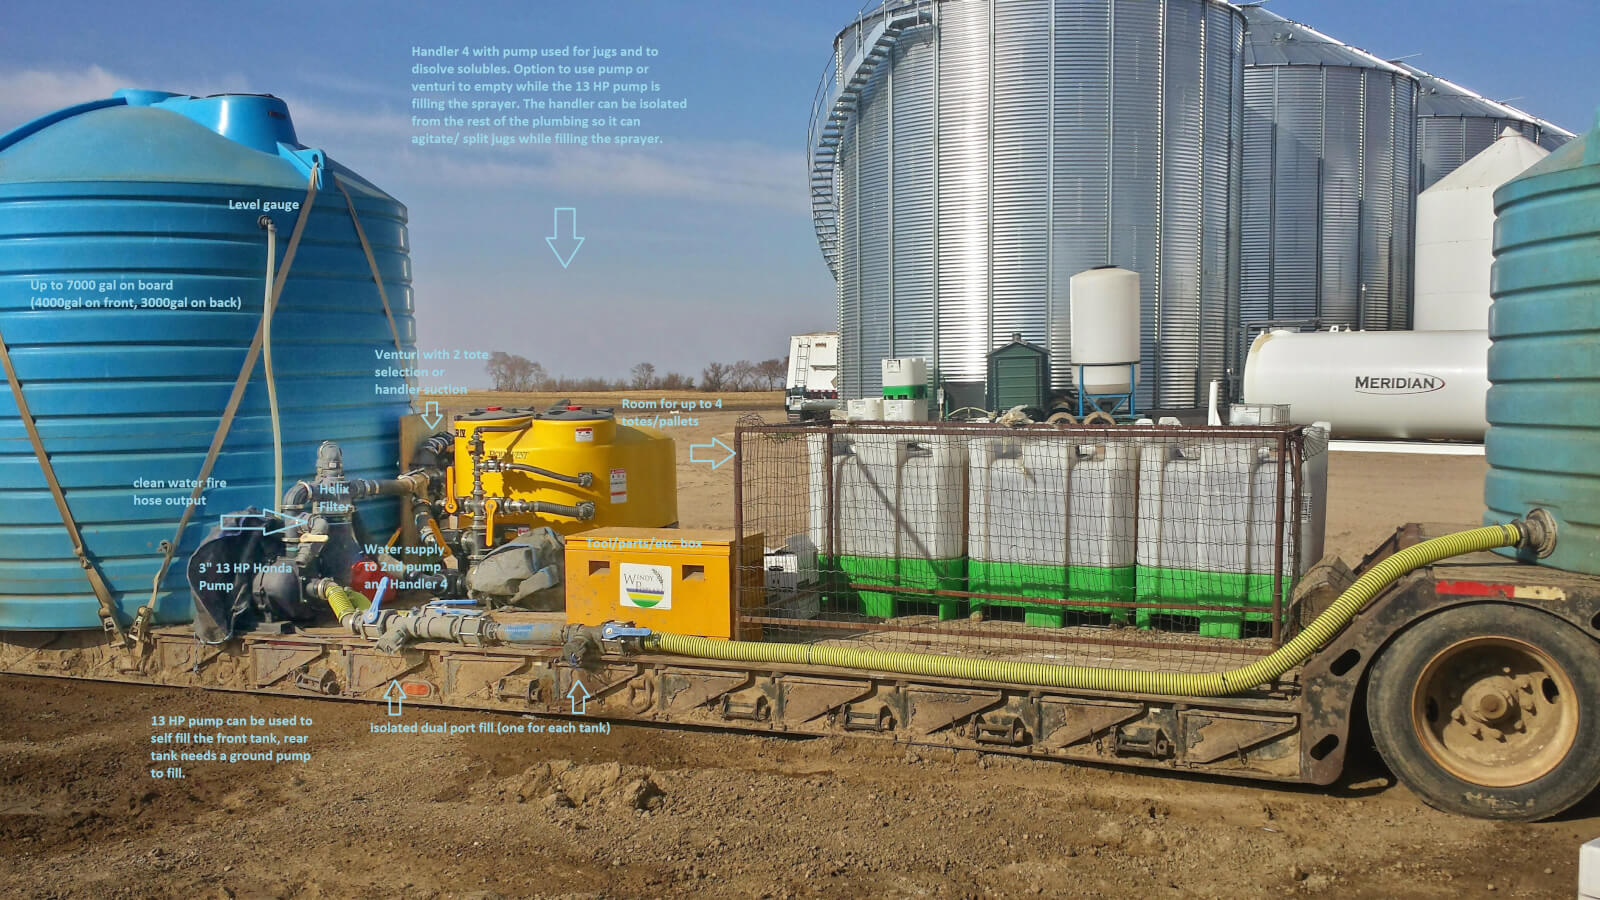
The third submission was made by Tyler Burns (@windypopfarm) of Wynyard, Saskatchewan
Dual 3” fill ports: ability to isolate the two tanks in order to fill each tank with it’s own port, front tank can be filled with on board 3” 13HP pump, back tank requires a ground pump to fill.
Main Pump: Banjo 333 Series Cast Iron Self-Priming Pumpwith 13 hp Honda electric start and pull rope capable of filling a 1200 gal sprayer in under 5 min if you’re only filling water and the filter is clean. Real time fill will range from 8 to 15 min dependant on what chem mix is being used. A future desired upgrade would be a 1200 gal SS tank on the empty upper front deck to pre-mix a complete tank so that every fill would be down to 5 min. This would require a knowledgeable person at the fill site though.
Auxiliary outlet: 2” clean water outlet often used for washing equipment, grain bag slip n slides or fire control.
Filter:3” Helix filter with extra filter elements if you need to swap in the field. Two outlet ports off of the filter. One going straight to the venturi assembly/sprayer fill line, the other going to the Handler 4 or tank #1.
Tank #1: The front 4000 gal tank placed just after the upper deck.
Tank #2: The back 3000 gal tank placed on the upper rear deck over the tridem axles.
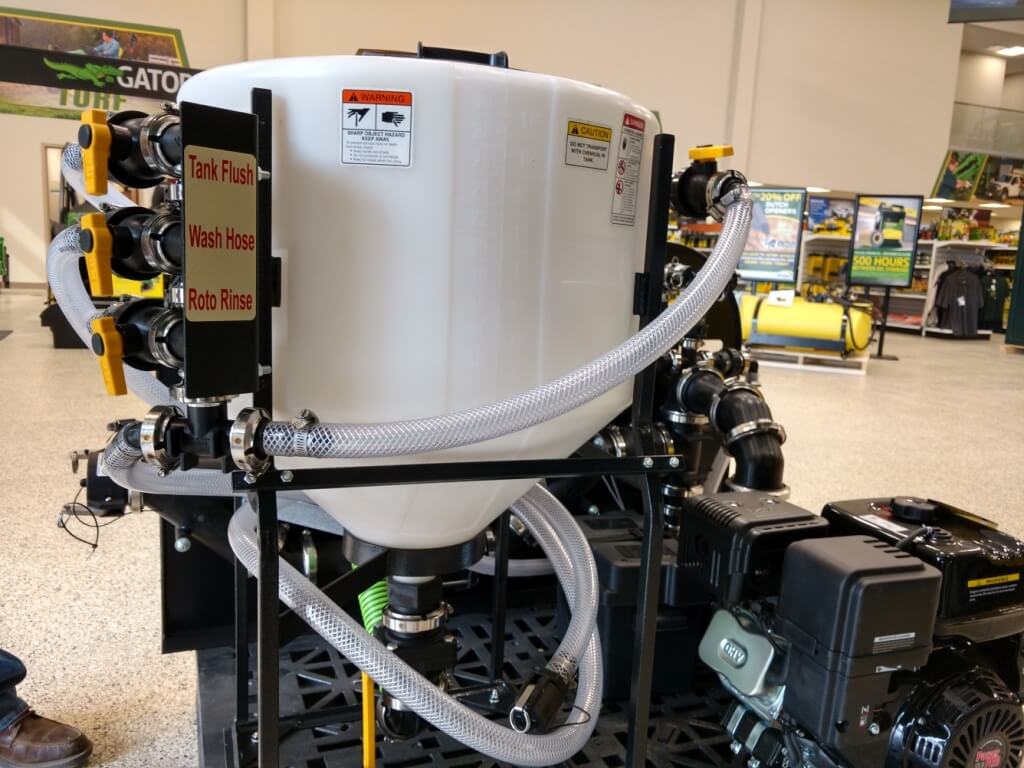
Chem Handler: A Handler IV with attached Honda pump. The secondary pump allows for the ability to agitate a chemical mix or dissolve a dry component. The pump can also quickly empty the handler in stream with the clean water while the 13 hp pump is filling if you don’t want to use the slower venturi option to suction out the product. The secondary pump does not need to be running to get pressure to the Handler rise ports as you can open the valve on the outlet side of it to get a supply of water from the primary pumps flow.
Venturi assembly: full 3” venturi and bypass. Venturi can suction either 2 different chemical barrels or totes and 2” suction of the Handler IV. The chemical induction ports are all dry poppet couplers and the lines 1” induction lines can be swapped if you change products. There’s also a clean dry poppet port to connect to easily flush any of the induction lines.
Flow Meter: There’s a 1” Banjo flow meter to measure the volume of chemical induced. One issue with this meter is that it doesn’t work with all chemicals but I switched to this make because it doesn’t restrict the flow. As nice as it is to use a venturi to transfer chemical is it does significantly increase fill times. (5 min vs 8 to 15 min.)
Level gauge: the level gauge on the front tank helped to minimize overflows and to more accurately fill the tanks to the desired level.
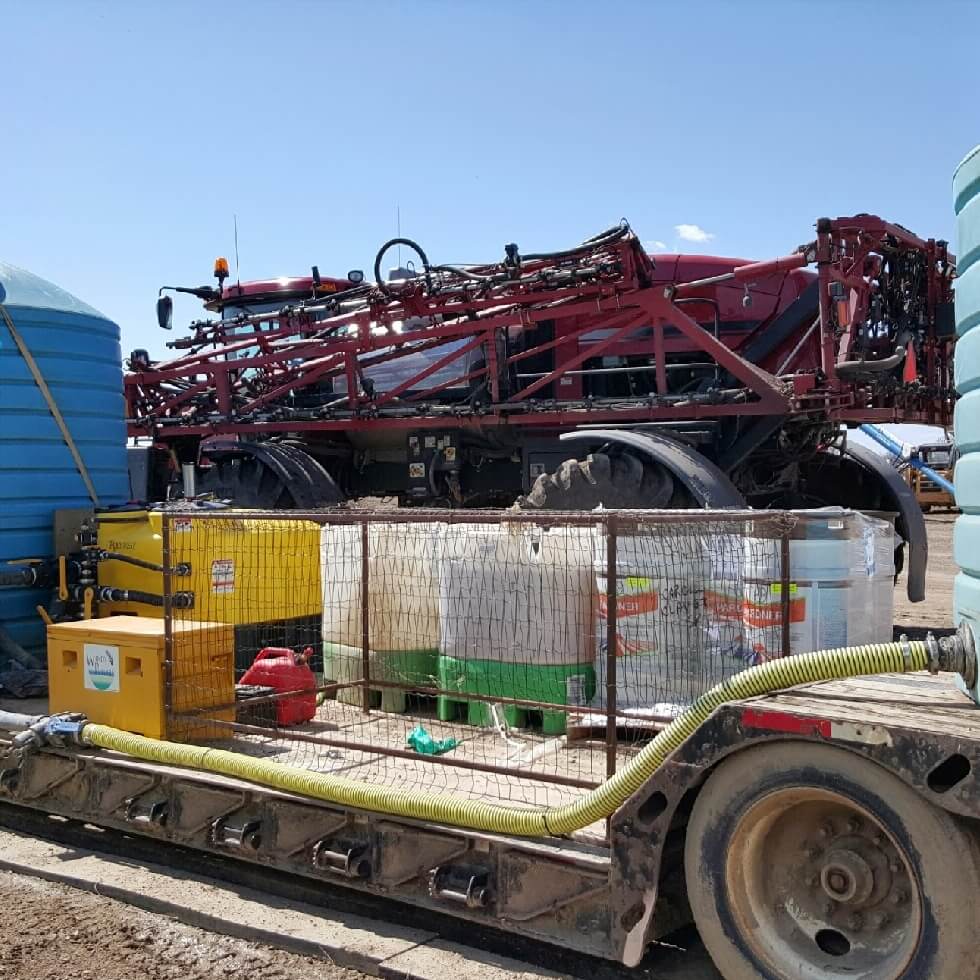
Chemical Payload: Room to fit up to 4 pallets of jugs or 4 450L totes.
Cage: Empty jug and box cage.
Our fourth submission was made by Kelly Baillargeon (@k_baillargeon) of Edam, Saskatchewan
“We have set up many spray trailers the last few years, each design has had its improvements. We run two sprayers between our farm and custom spraying business. It is very important to our operation to carry the sprayers, it allows the sprayer operator to be able to head out in the morning full of chemical and fuel and spray the entire day by himself. Our trailers have a 3200 US gallon tank on them which will give us three full fills on our 1000 gallon 4830 John Deere sprayers.
“We purchased a triaxle water tanker trailer from SGI salvage two years ago (sorry no picture right now as it is tucked away in a shed) that can haul 8000 US gallons per load that keeps our spray trailers full of water and allows my brother and I to spray all day. We built a large cage underneath the tanker out of iron and expanded metal (8′ x 8′ x 2′) that allows us to throw all of our empty chemical boxes and jugs in it when the spray trailer is getting filled with water.
“We used to buy older flat deck trailers and build sprayer cradles for them. But two years ago we decided to buy two of these spray trailers from Flamans in Saskatoon.
“The trailers are built for hauling a sprayer with the cradle being able to be folded up while not in use, which makes it nice for putting into storage or if needing to use the flat deck to haul anything else. These trailers should last a very long time for us.
“We mounted one 3200 gallon tank on the nose of the trailer. This conserves valuable deck space, we used to use 2 smaller tanks, but this really compromised deck space on our trailer that can be used to haul lots of chemical. It is also much safer to have lots of room while mixing and filling the sprayer. We aren’t crowded or tripping over lots of hoses while working on the deck. There is a ladder stored on the side of the tank to be used if we are parked at a water source that we are able to throw a hose in the top of the tank to fill while we are out spraying.
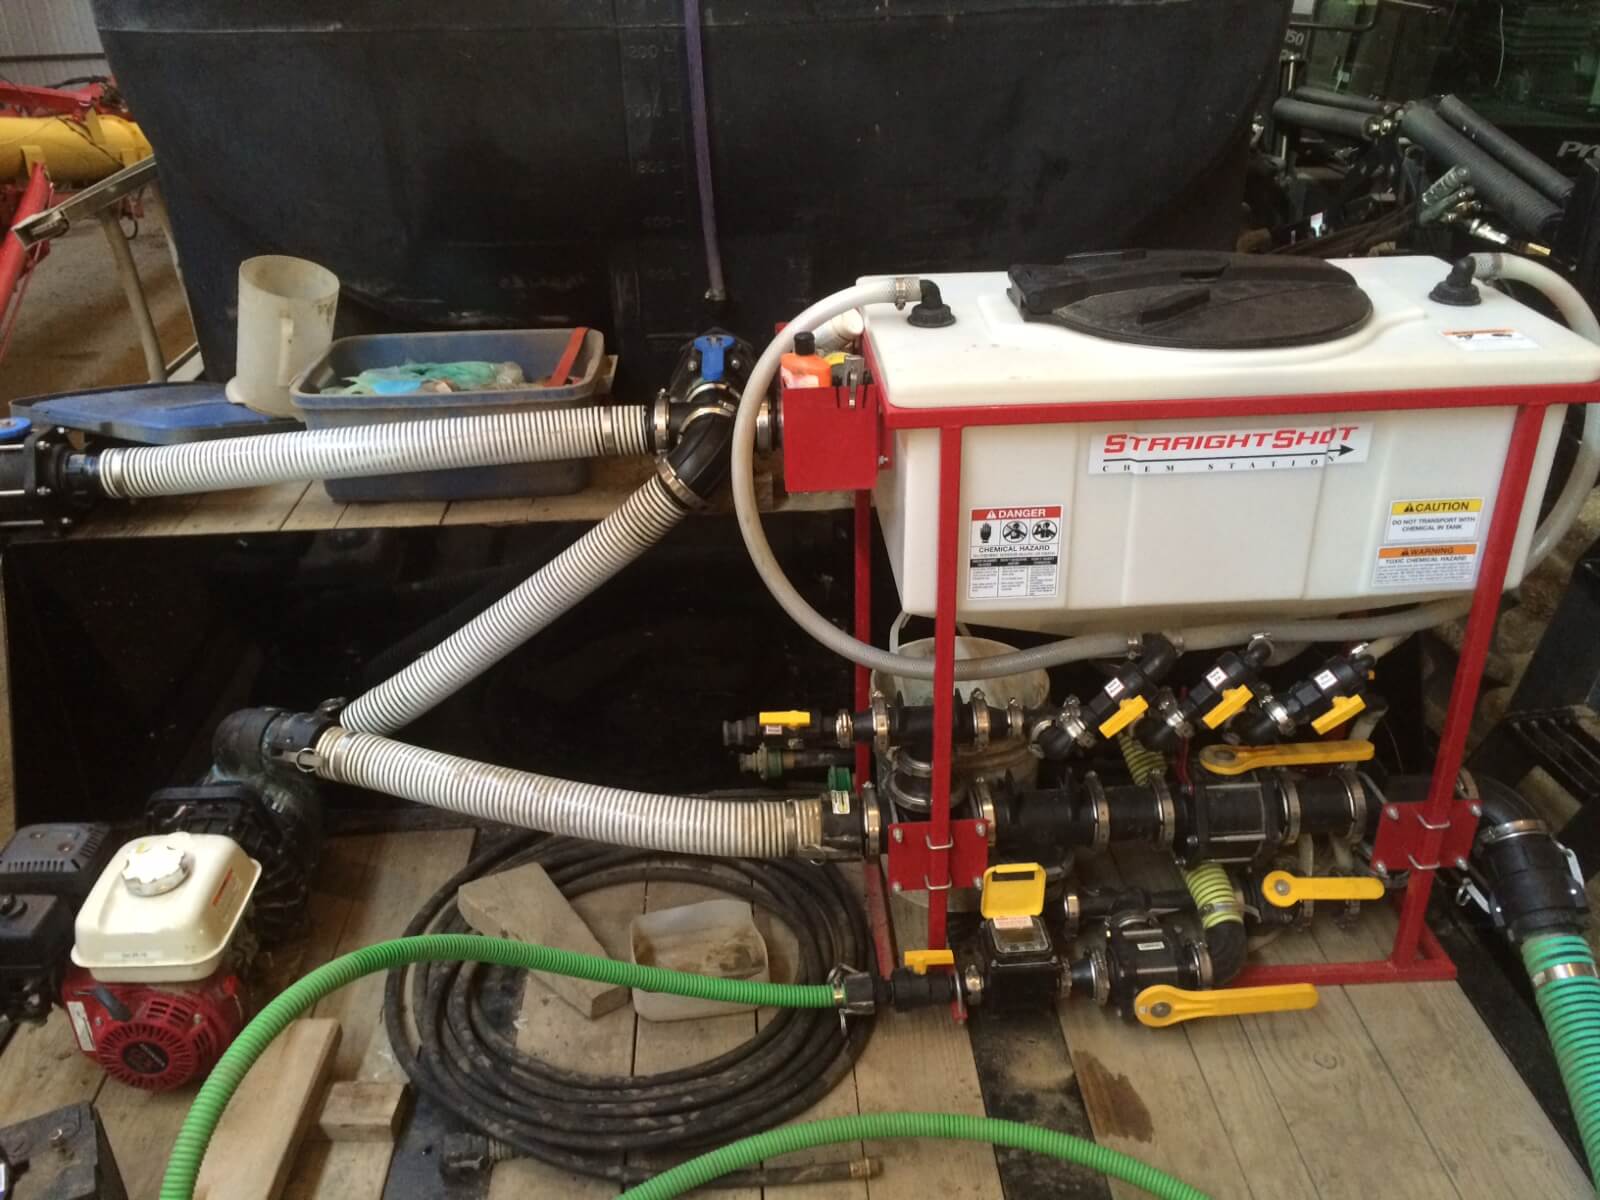
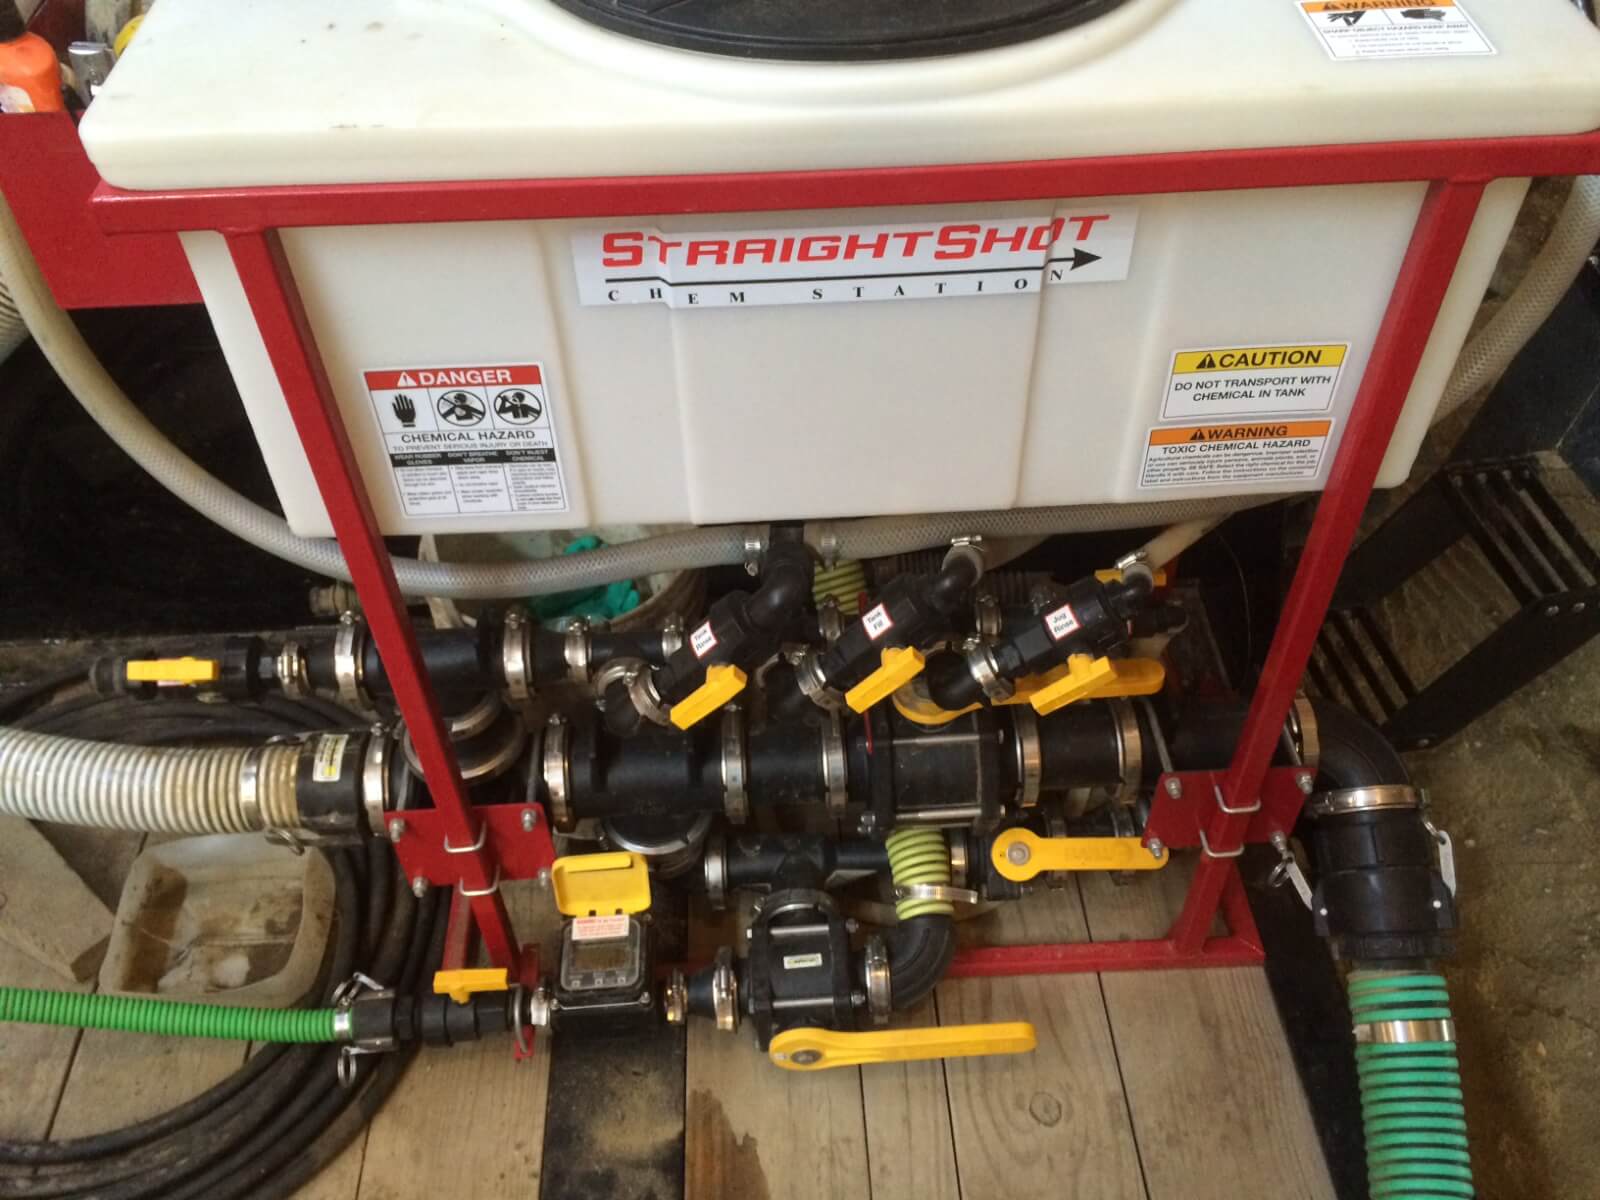
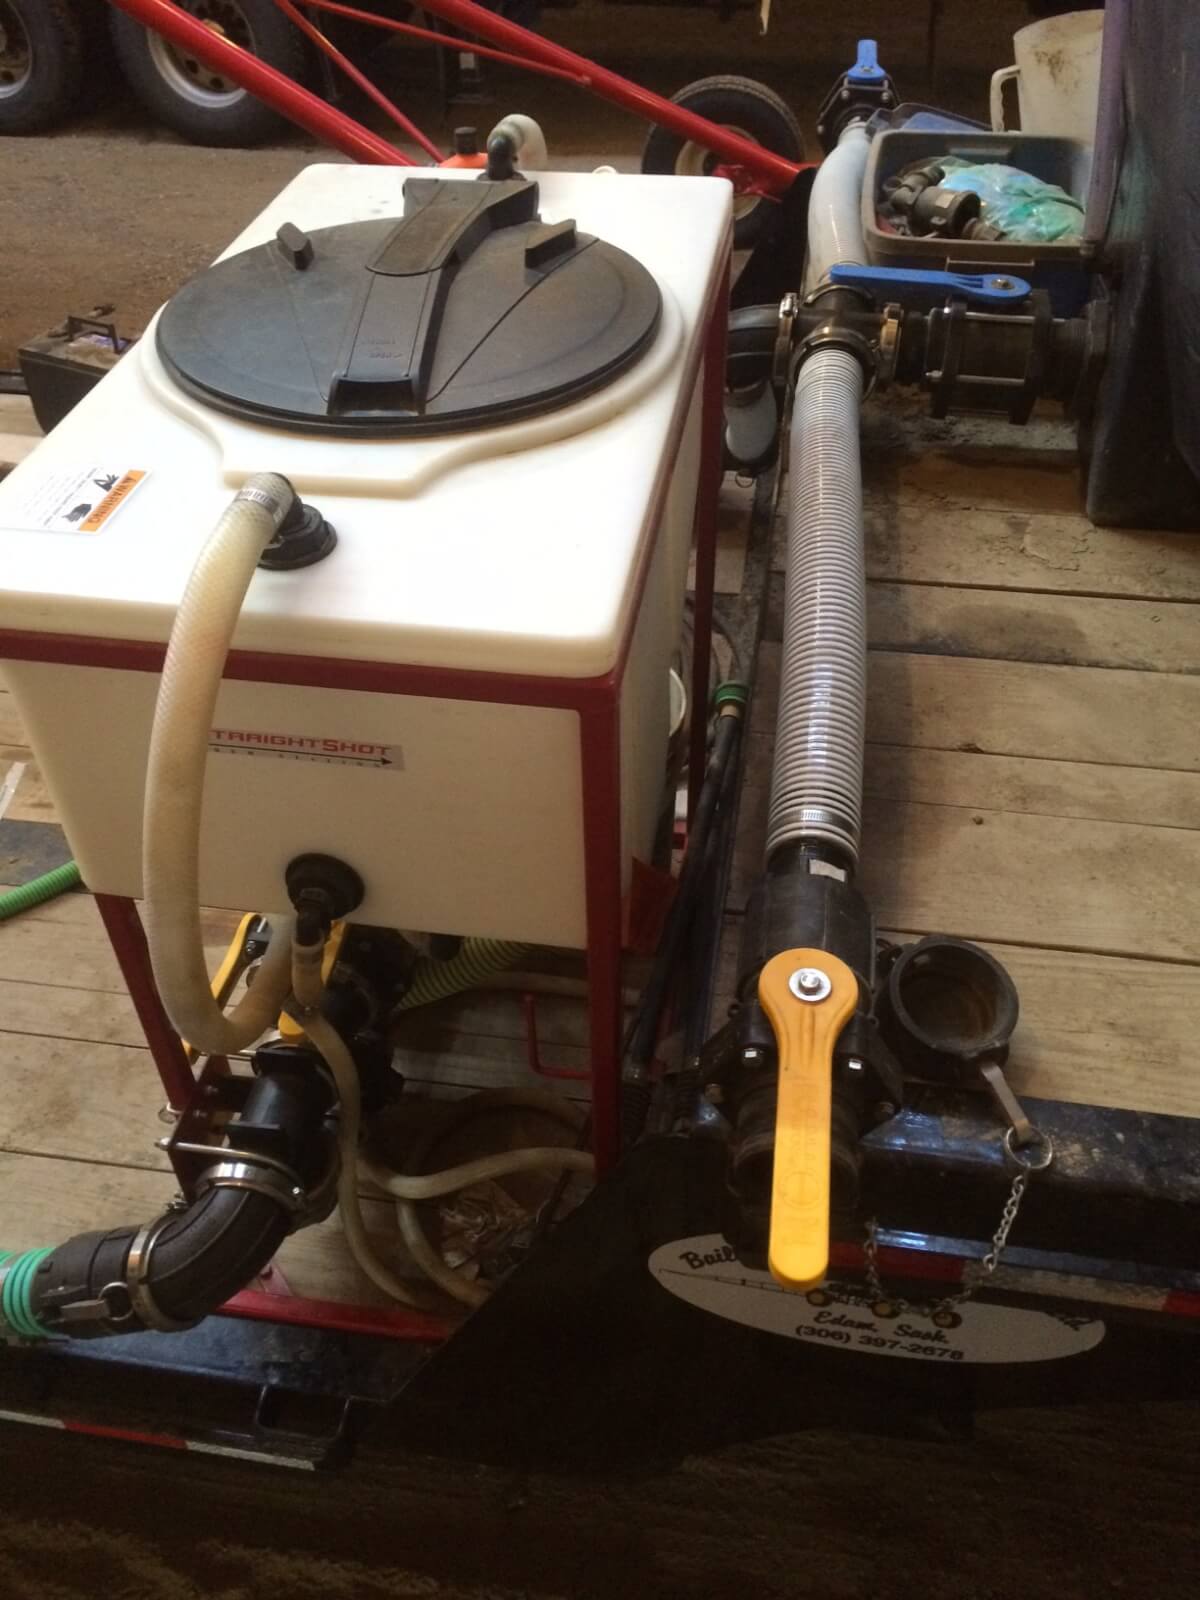
“Each time we have built a spray trailer we try to make the design more simple. In my opinion the less total plumbing I have on the trailer, the better. This makes it easier to teach someone how to use it as well as less chances of making a mistake. I installed a Straight Shot chem station this time, we always used Chemhandlers before and didn’t have any issues. But I really liked the simple straight forward design of this chem station. It is built very compact, saving on more deck space. Everything is very clearly labelled. It has 3” plumbing and when bypassing the handler to fill the sprayer with water, there are no bends or restrictions in the water stream, everything goes straight through. I find that it fills quicker than our Chemhandler did because of this simple plumbing.
“We use a 3″ Honda pump. I replaced the Soterra flowmeter that came with the handler (I had lots of issues with them in a very short amount of time) with a 1” Banjo meter. This meter has no restrictions inside of it, but will not meter products that are not electrically conductive. I have a backup spinning wheel style meter that I attach to the hose when using these types of products. The venturi on this Straightshot chemstation sucks extremely fast. I am able to suck glyphosate out of totes at 78 litres/minute while filling sprayer with water at the same time. Liberty is much slower, about 45 litres/minute. Seat to seat fill times on my 1000 gallon sprayer is 5-8 minutes depending how many products are being used.
“A rubbermaid tub with measuring jug, fittings, gloves and other safety equipment is located right beside work station. The large tank also includes a sight tube on it to prevent overflowing when filling.
“I used “sweep” 90 degree fittings everywhere the direction of water flow changes, these fittings are “wide open” and do not restrict flow. Another lesson I have learned is to use the flange style fittings everywhere possible, threaded fittings work ok, but a few years down the road when you have leaks showing up, you need to take apart most of your plumbing in order to repair them. Flange fittings don’t leak as much, most repairs involve tightening up the clamp and if you do need to take it apart, you won’t have to take apart any other fittings to change the seal.
“A close up of the chemstation:
“There is a connection on the left side that is used to flush out the chem induction hose. The tank on the chem station rinses really well as it has two spinning rinse nozzles inside the top of the tank. There is also a fresh water hose on it to help with rinsing tank or washing your hands.
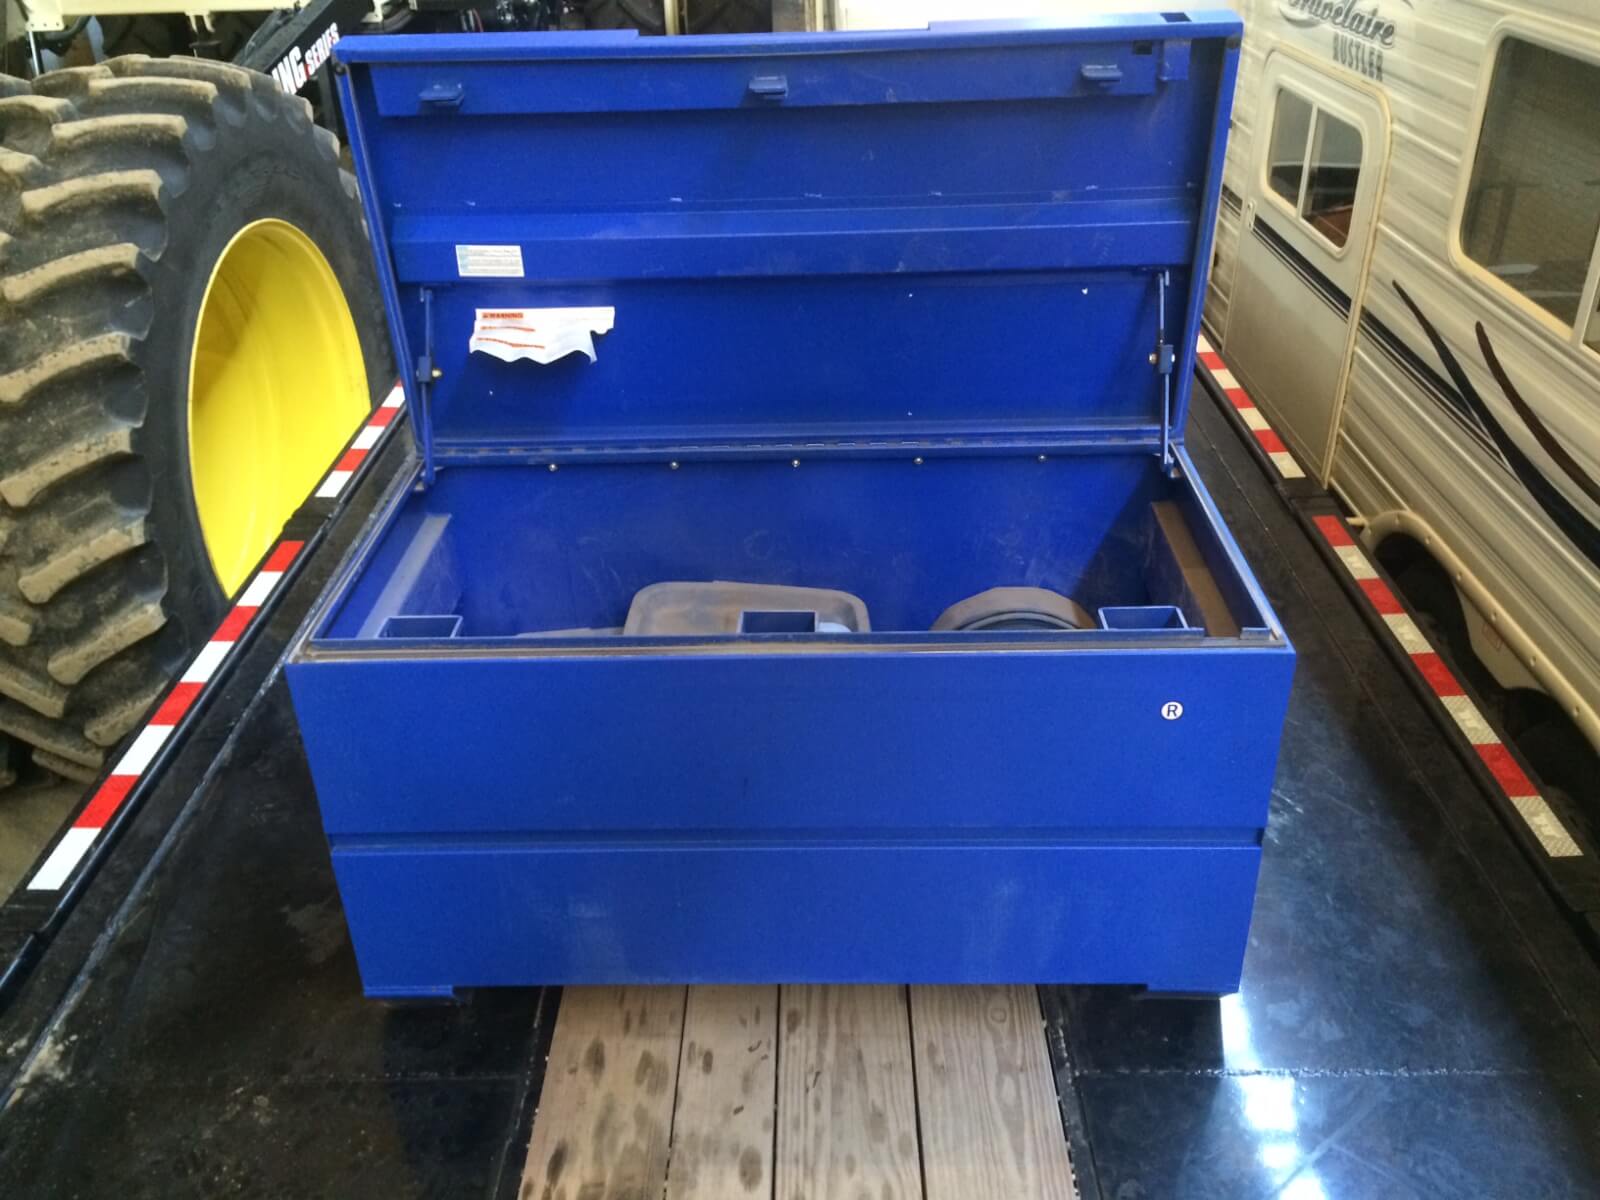
“Located at the back of the trailer, underneath the sprayer, is a large toolbox. I keep extra parts, safety equipment, small jugs of chemical, a firehose for fighting fires and ratchet straps for tying down chemical on the sprayer deck.
“The water tank is able to be filled from either side of the trailer from the ground by the nurse truck, depending how we are parked at the field.
“Long 3” flexible hose for attaching to sprayer:
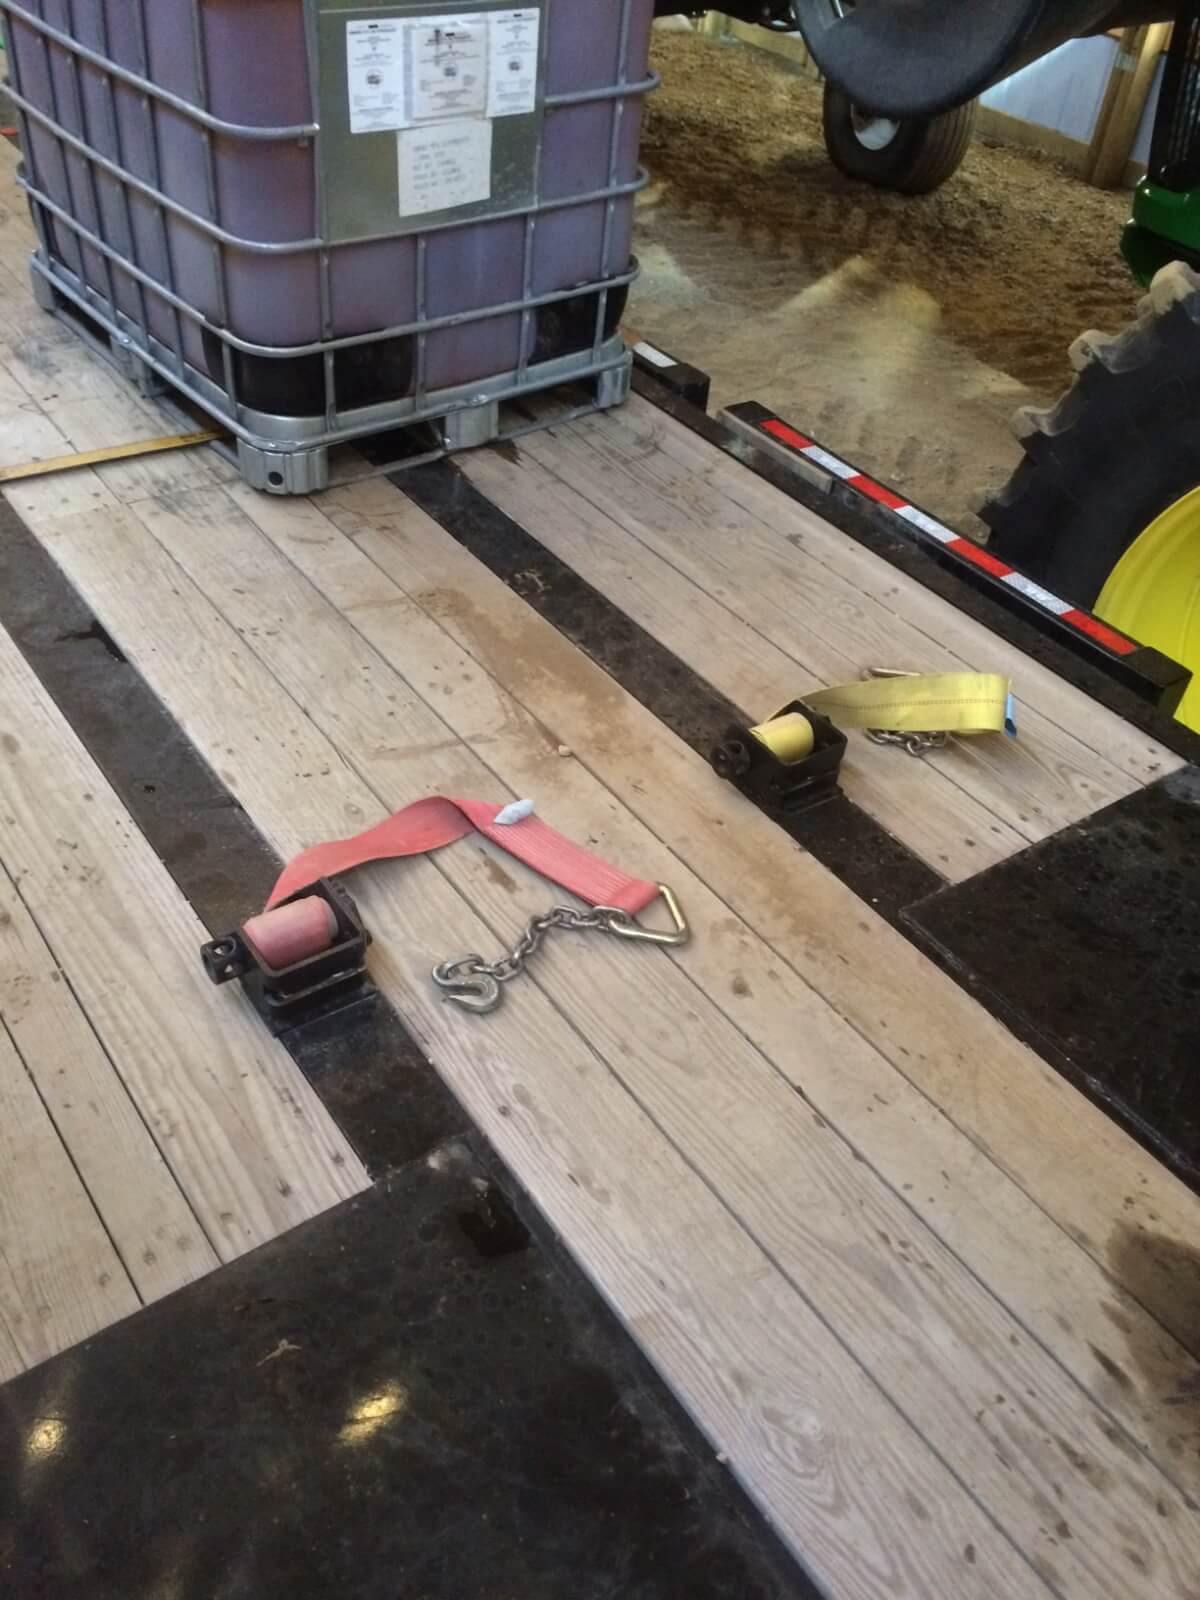
“I bolted 4 large ratchets (2 at the front and 2 at the back) to the trailer deck for tying the sprayer down when in transport. I find straps are much quicker and easier to handle than using chains to tie down the sprayer. I didn’t want to weld the ratchets to the deck because then I would not be able to remove them if we needed to use the trailer for something else.
“When I have the sprayer loaded on the trailer, I have lots of available deck space to carry chemical. I have had as many as 4 1000 L shuttles on the trailer at one time with plenty of room to walk around and work safely.