Category: Mixing

All hort articles about water quality, agitation, tank mixing and adjuvants.

  • Evaluating Methods for Controlling Algae in Carrier Water Storage Tanks

    Evaluating Methods for Controlling Algae in Carrier Water Storage Tanks

    This work was performed with Mike Cowbrough, OMAFA Field Crop Weed Specialist.

    In the early summer months, many field and specialty crop operations collect rainwater (or possibly pump water from holding ponds) into storage tanks for use as a carrier in spray applications. These tanks may be stationary, or they may be part of a nurse or tender truck that delivers both water and chemistry to the field as a means of improving operational efficiency.
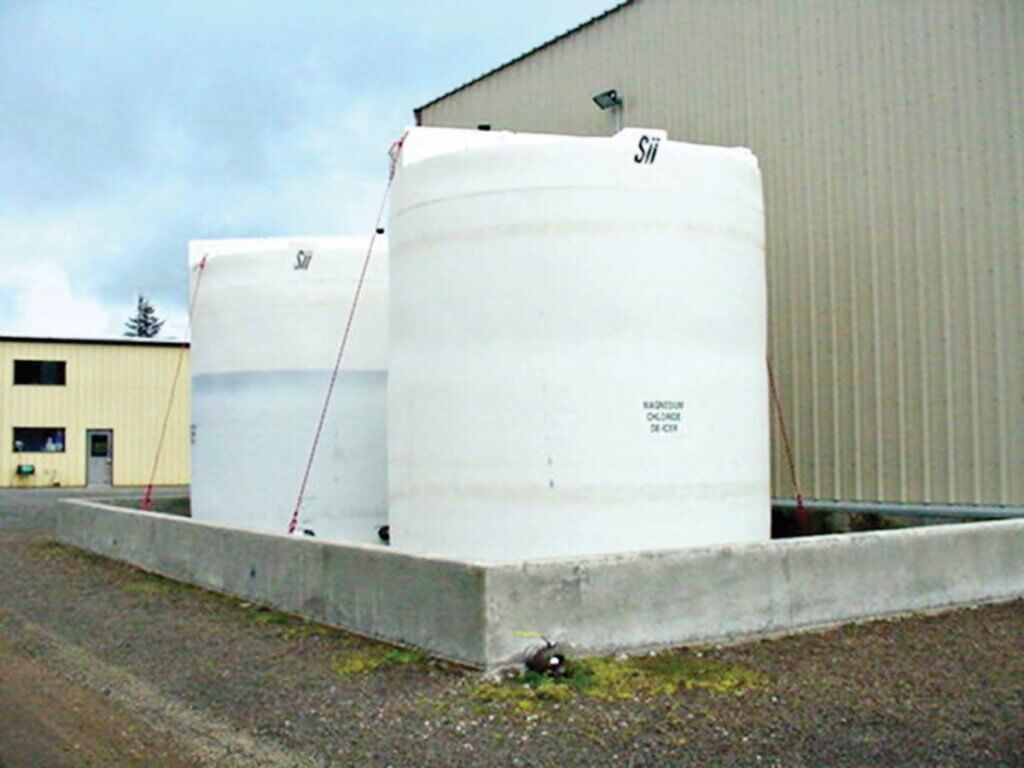
    Poly tanks. Source: Purdue Extension publication PPP-77 “Poly Tanks for Farms and Businesses“.

    In the case of translucent poly tanks, which are commonly used because of their light weight, custom shape, and low price point, light exposure will grow algae. Algal populations multiply exponentially and will clog spray filters and negatively affect filling. In response, growers use home-grown algicides such as copper sulfate, lengths of copper pipe, household bleach, chlorine, bromine, etc. They do so with little or no guidance and therefore little or no consistency. Beyond the obvious questions surrounding efficacy, it is unknown whether these adjuncts create physical or chemical incompatibilities in the tank mix. If so, there is the potential for reduced efficacy and/or crop damage.

    We tested popular methods for algae control by inoculating a series of 10 L translucent plastic jugs with an algal population sourced from a southern Ontario holding pond. The population was left to acclimate and generally establish itself (aka colonize) before we introduced some form of control. Each jug was then gently stirred and emptied through a sieve for qualitative assessment.

    In a parallel experiment, we introduced the same algicides to fill water and conducted spray trials. 10 L volumes were mixed with a field rate of glyphosate and sprayed on RR soybeans. Weed control was assessed and soybean yield measured for each treatment.

    Algicide Efficacy Experiment

    In each treatment, tap water was mixed with a micronutrient growth media (from the Canadian Phycological Culture Centre at the University of Waterloo). This was an unsterilized 10% WC(ed) solution intended to provide micronutrients for algal growth while minimizing fungal and bacterial growth.

    The source algae were collected from the bottom of a holding pond from a farm in Guelph, Ontario. Algae were homogenized and equal parts added to each jug. The jugs were former 10 L pesticide containers thoroughly rinsed and sprayed with Five Star’s “Star San” non-rinse sterilizer. Tank solutions were gently bubbled (one bubble every 10-15 seconds) with air from an aquarium pump. Air was balanced using a manifold and introduced via diffusion stones at the bottom of each jug.
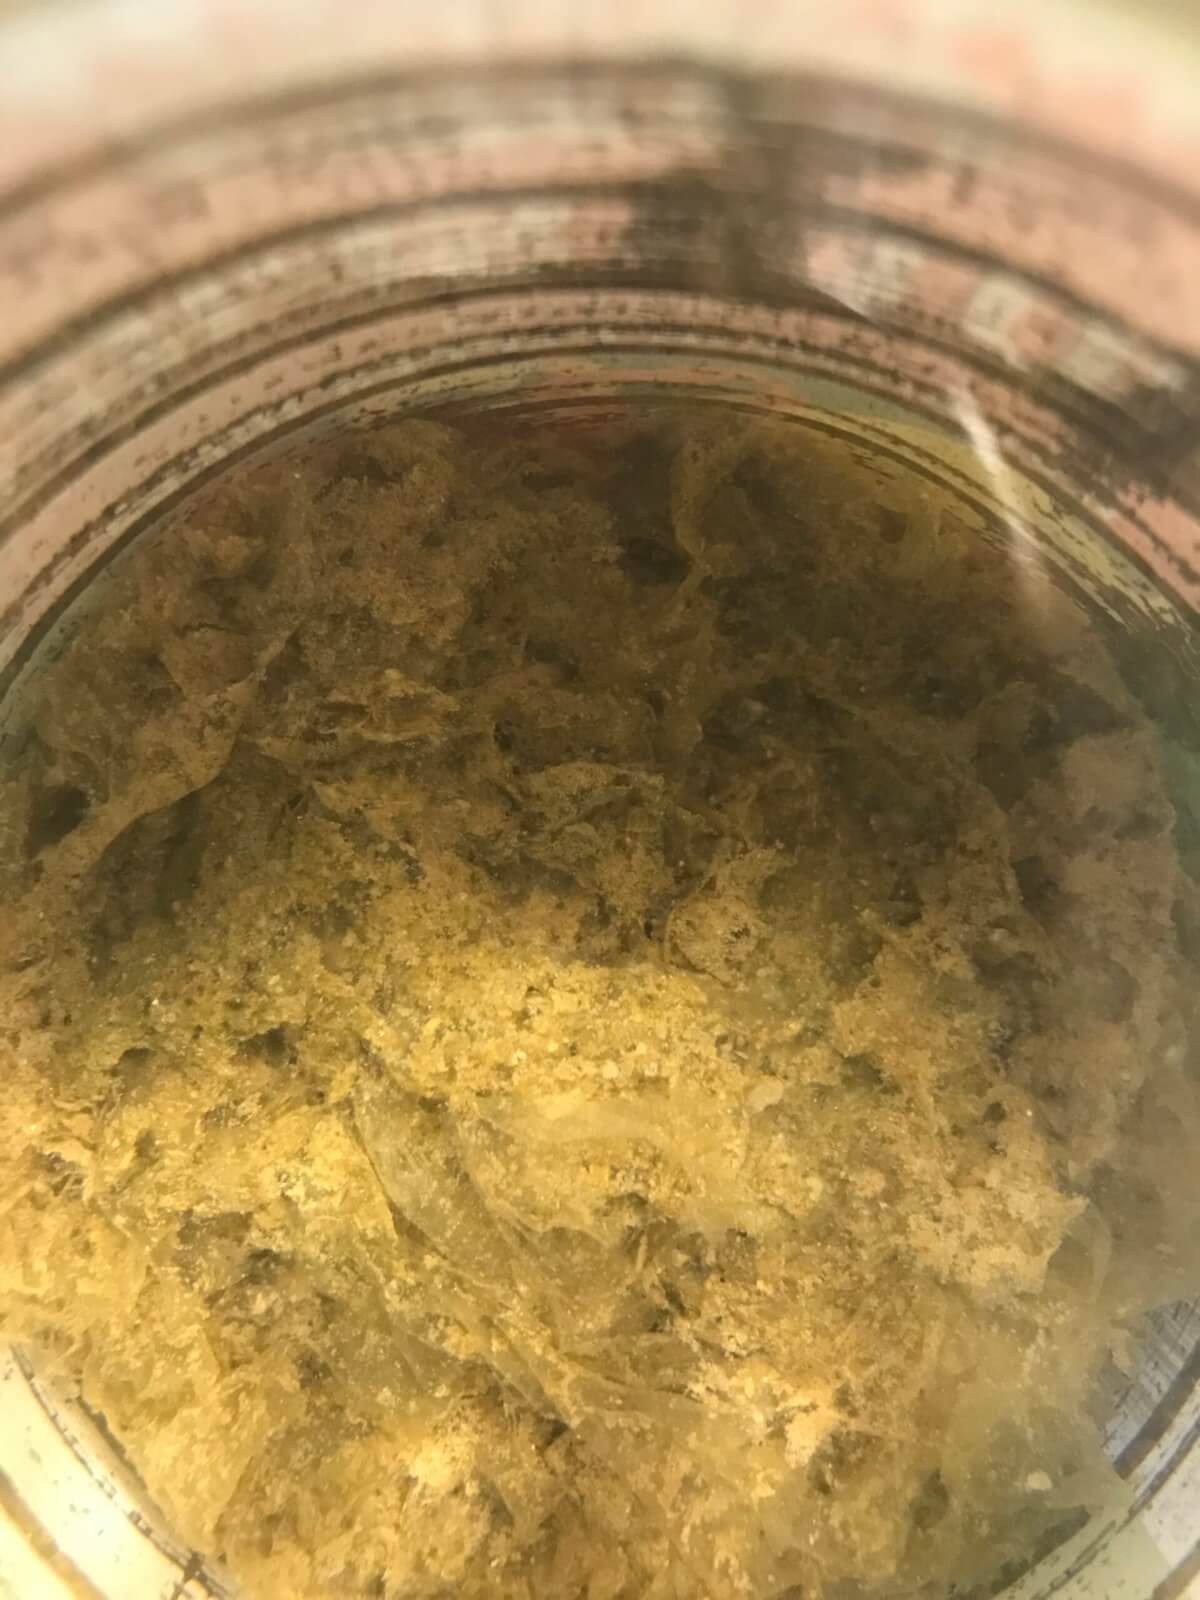
    Algae sourced from a farm’s holding pond near Guelph, Ontario. Algae was homogenized before inoculating treatment jugs with equal parts.

    Treatments

    Each treatment was tap water plus growth media inoculated with algae and exposed to a natural diurnal/nocturnal cycle unless otherwise indicated.

    1. Control (no algicide)
    2. Left in a shaded area (no direct sunlight)
    3. Household bleach (approximately 5.25% sodium hypochlorite)
    4. Container was spray-painted black to exclude light
    5. Ammonia
    6. “Scotch Bright” copper-coated scour pad. (copper is often introduced as copper sulfate at 1 cup / 1,000 US gal. or a short length of copper pipe)
    7. Bromine (sourced from a local pool supply store)
    Treatment NumberTreatment NameRate
    (/US Gal.)
    Rate
    (% v/v)
    Rate
    (/10 L final volume)
    1Control (no algicide)
    2Shaded
    3*Household bleach1/4 tsp0.000333.3 mL
    4Black container
    5*Ammonia solution1/4 tsp0.000333.3 mL
    6Copper-coated scour pad
    7Bromine1/32 ml0.0000040.04 g
    Table 1. * Bleach and ammonia should never be added together as they produce toxic chloramine gas.

    Method

    On July 12, jugs were loaded with water and growth media and inoculated with algae. They were bubbled gently for one week to establish a stable algal colony. On July 19, algicides were added, or transferred to shade or black-out conditions. On August 31 (approximately six weeks later), jug contents were gently stirred and filtered through white cloth for qualitative assessment.
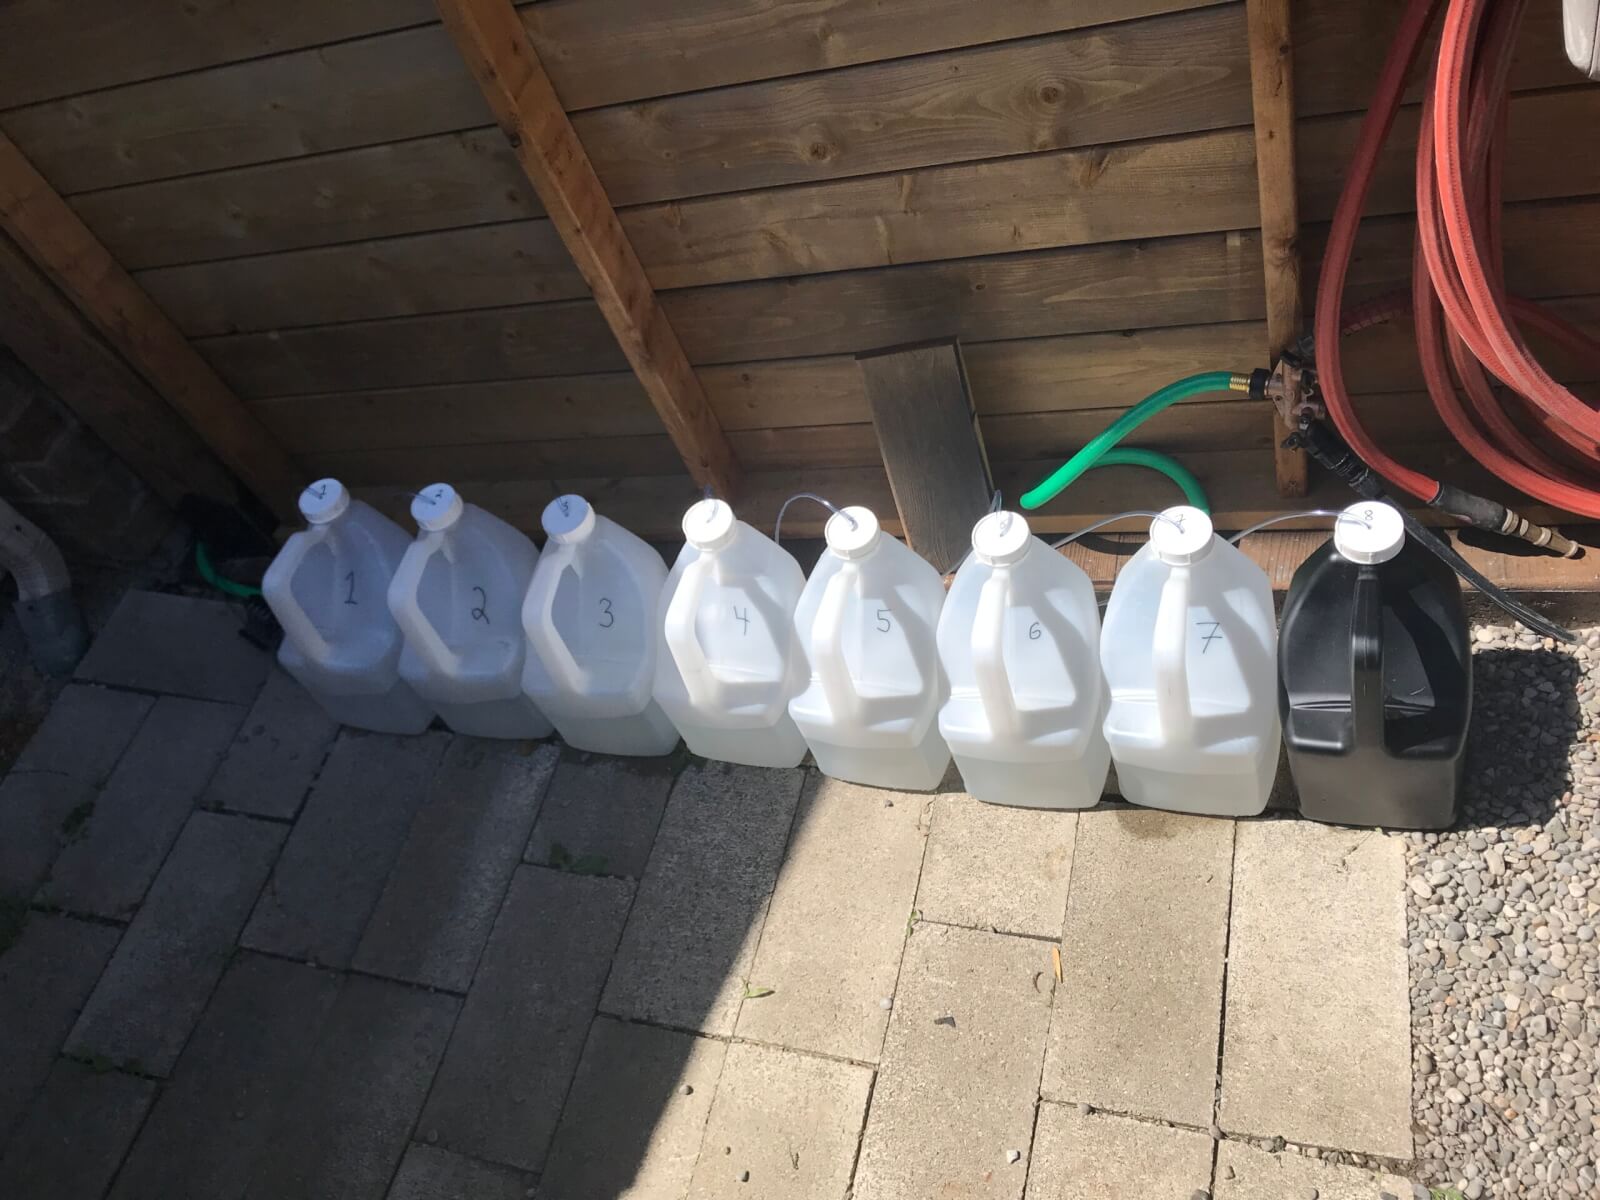
    Building up algal population for each jug. Note air lines through lids for slow, intermittent bubbling. Algae was not moved to black container or to the shade until after the first week of acclimation.
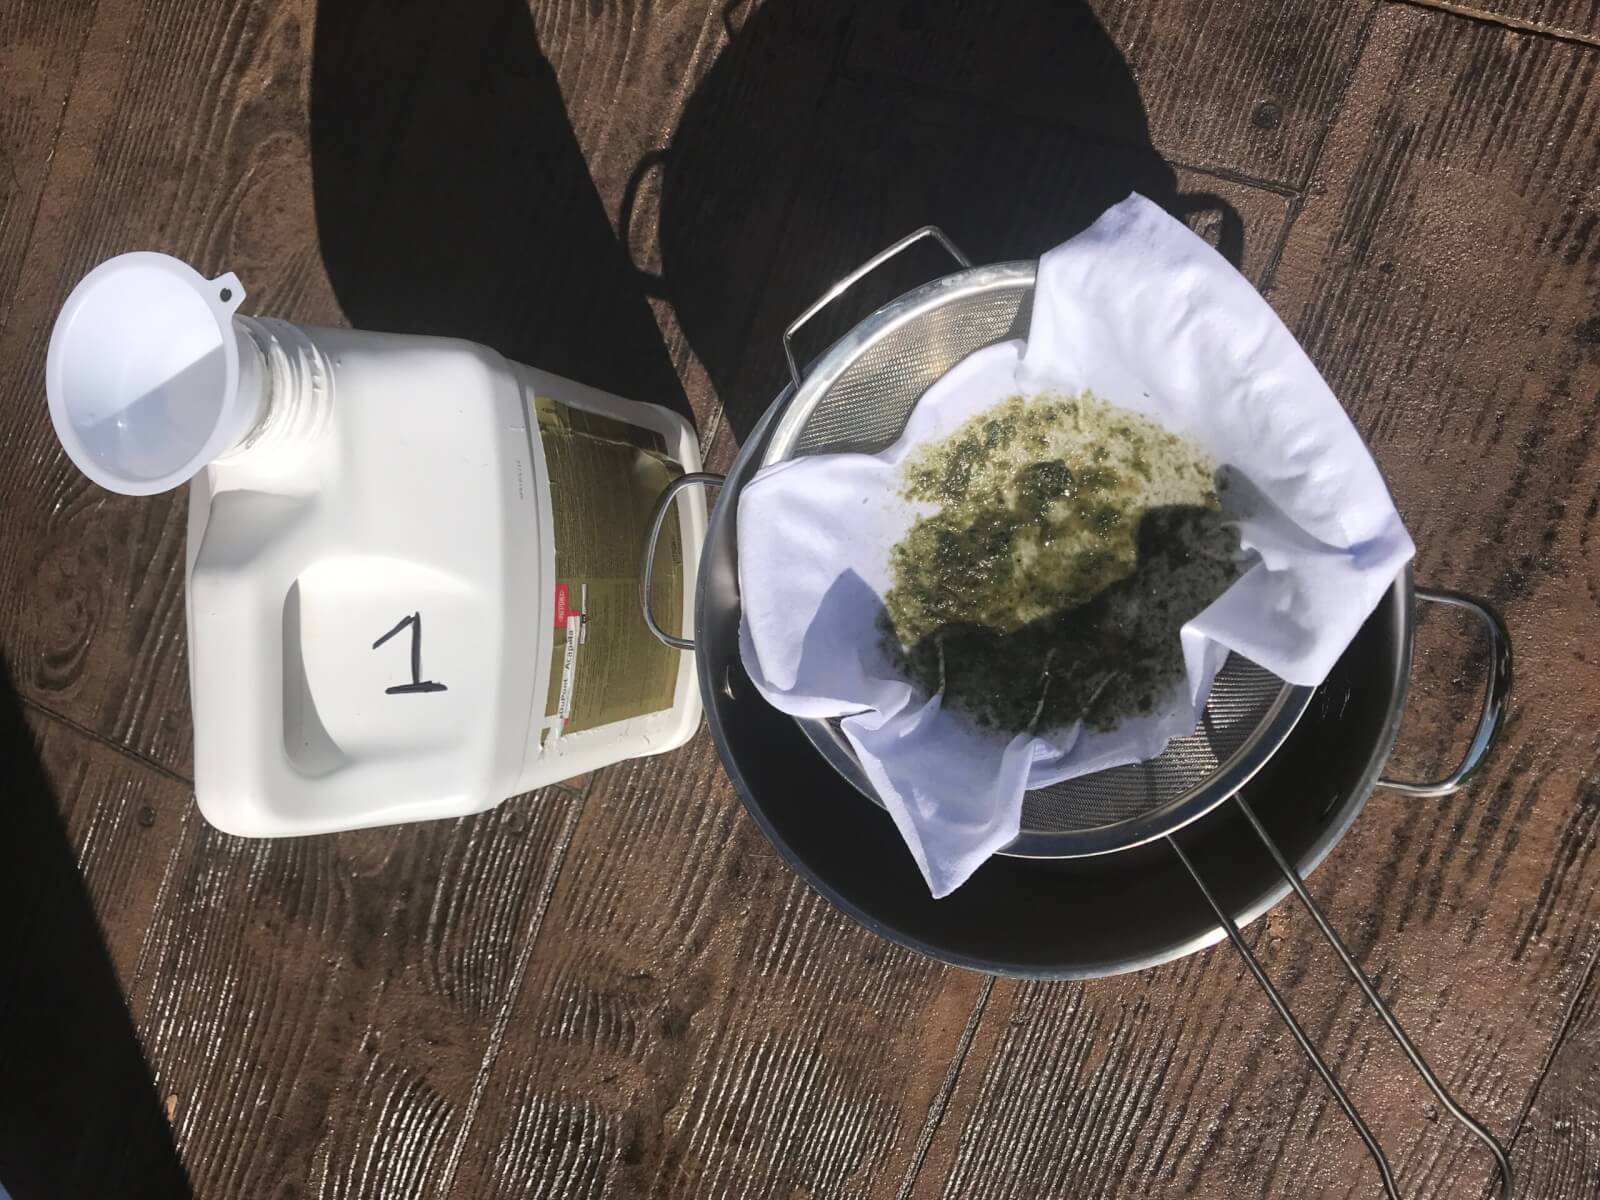
    Almost six weeks after algicide was added, jug contents were gently stirred and poured through white cloth to collect algae and establish how easily the liquid passed through.

    Observations

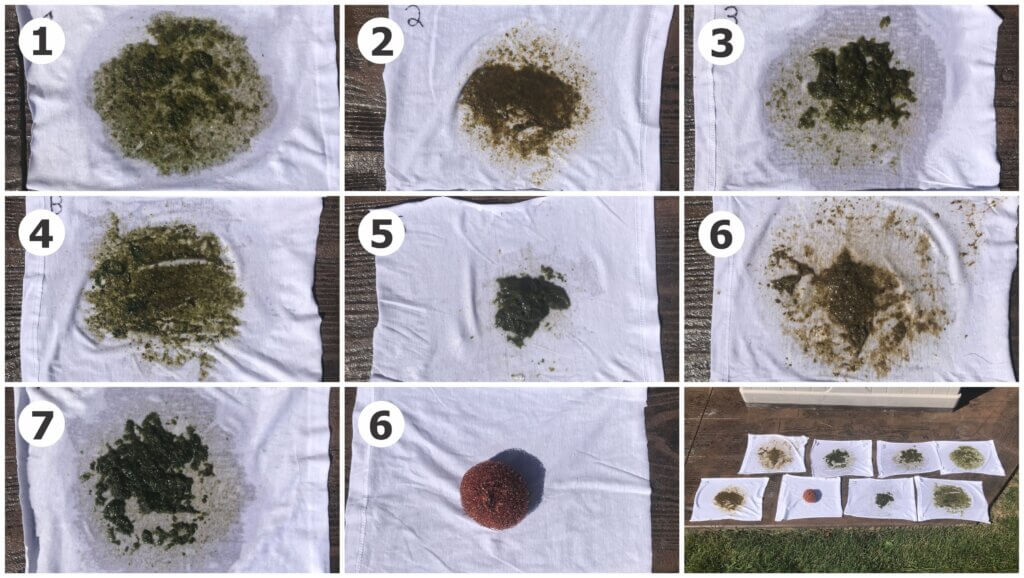
    The results of all seven treatments, plus photos of the copper-coated scour pad.

    (1) Control. Liquid poured slowly through cloth. Algae was still alive and healthy. It formed some clumps but was not as thick as other treatments.

    (2) Shaded. Liquid poured fast and easily through cloth. Was particulate in texture rather than clumpy or gelatinous. Very little mass and entirely brown, suggesting it was dead.

    (3) Household bleach. Liquid poured easily through cloth until the clump of algae sitting at the bottom of the jug came out (i.e., most algae were not suspended). Thick mat of healthy-looking algae (note profile photo #3 below). Much greener and thicker than the control (1).

    (4) Black container. Liquid poured fast and easily through cloth. Algae retained a little green coloration (more than the shaded condition (2)) but was particulate and not as healthy as the control (1). We intended for this treatment to exclude all light, but it was still able to enter at the bottom where the jug wasn’t completely painted. This may have kept the algae alive.
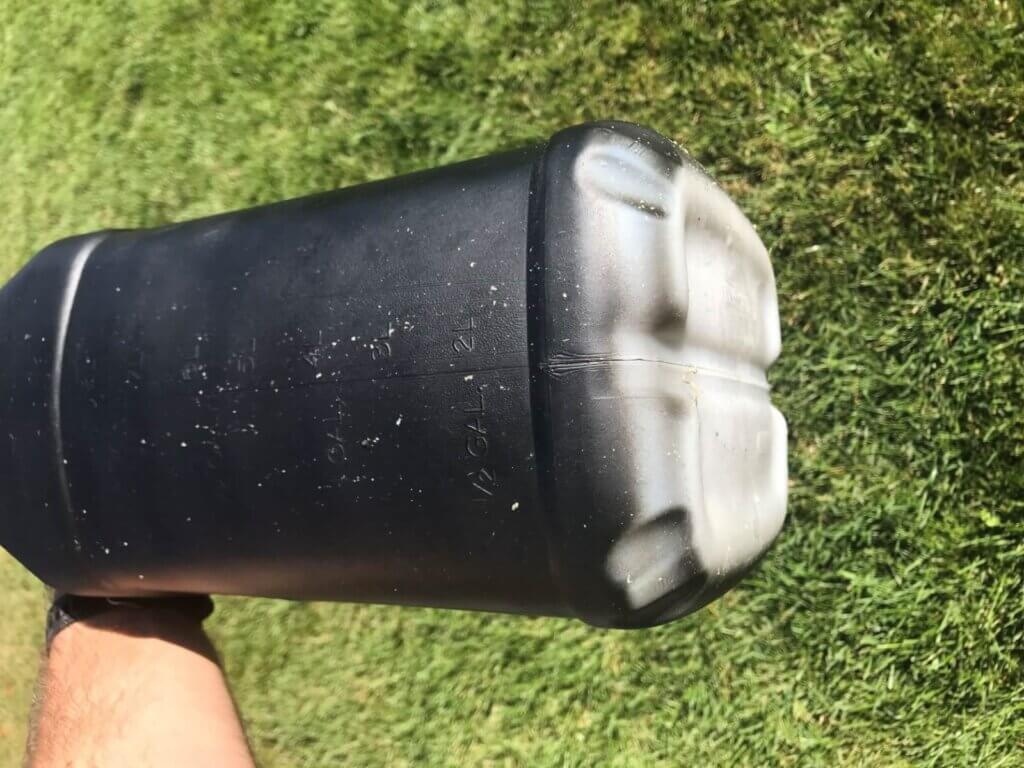
    In an oversight, the jug was not completely painted. This left a source of light at the bottom edge that may have helped sustain algae.

    (5) Ammonia. Very difficult to pour liquid through the cloth (note profile photo #5 below). The only condition where a mat of algae was floating at the top of the jug rather than settled at the bottom. It was healthy, green and thick.

    (6) Copper. The most gelatinous of all conditions, the liquid took the longest to pass through the cloth filter. While the algae seemed brown and dead, the gel would be very problematic during sprayer filling and spraying. Note that the copper scouring pad (shown unrinsed) has nothing growing on it.

    (7) Bromine. Like the household bleach condition, liquid poured easily until the healthy mat of algae at the bottom of the jug came out (i.e., most algae were not suspended). Note profile photo #7 below.

    Profile shots of treatment 3 (Bleach), 5 (Ammonia), and 7 (Bromine).

    Spray Efficacy Experiment

    Ideally, adjuncts added to carrier water are inert. That means they don’t reduce a herbicide’s effectiveness on susceptible weeds or increase crop injury. For example, hypochlorite (found in bleach and in chlorinated water) reduces the biological effectiveness of low concentrations of isoxaflutole (the active ingredient in herbicides such as Converge and Corvus). However, when added to higher, agriculturally-relevant concentrations, the reduction in efficacy wasn’t considered significant (Lin et al., 2003). Conversely, bromide has been added to certain herbicides to improve performance (Jeschke, 2009).

    There’s precious little information about synergistic or antagonistic effects from adding bleach, ammonia, copper or bromine to herbicide carrier water. To learn more, we added each of these adjuncts to the standard rate of glyphosate (900 gae/ha – 0.67 L/ac). Using a CO2-pressurized plot sprayer, the solution was applied to <10 cm tall weeds at 150 L/ha (15 g/ac) in glyphosate tolerant soybean at the 2nd trifoliate stage of growth (Elora Research Station, Ontario).

    Visual crop injury was evaluated at 7 and 14 days after application. Weed efficacy was evaluated at 14 and 28 days after application. Soybeans yields were collected using a Wintersteiger plot combine and adjusted to a moisture content of 14%.

    Weed Control

    All treatments provided excellent control (>90%) of the weeds emerged at the time of application. Table 2 (below) presents the % visual control 28 days after application.

    Carrier Treatment
    (glyphosate 540 g/L at 900 gae/ha or 0.67 L/ac)
    Lamb’s-quarterGreen pigweedWitch grassGreen foxtail
    1) Control0000
    2) Shaded100100100100
    3) Household bleach100100100100
    3a) Household bleach – added prior to mixing9597100100
    4) Black container100100100100
    5) Ammonia100100100100
    6) Copper-coated scour pad100100100100
    7) Bromine100100100100
    Table 2. Visual control of lamb’s-quarter, green pigweed, witch grass and green pigweed at 28 days after the application of glyphosate 540 g/L at 900 gae/ha mixed with various carrier treatments intended to prevent algae growth. Treatment numbers correspond with the soybean injury and yield image below.

    Soybean Injury and Yield

    There was no noticeable crop injury from any treatment (figure below) and yields were not significantly different from the control treatment (Table 3). However, when bleach was added prior to mixing, we did observe a trend in reduced soybean yield. We’re unable to explain this observation, but suggest it may be an unrelated issue (such as field variability). There were no obvious signs of crop injury, and the treatment provided excellent weed control.
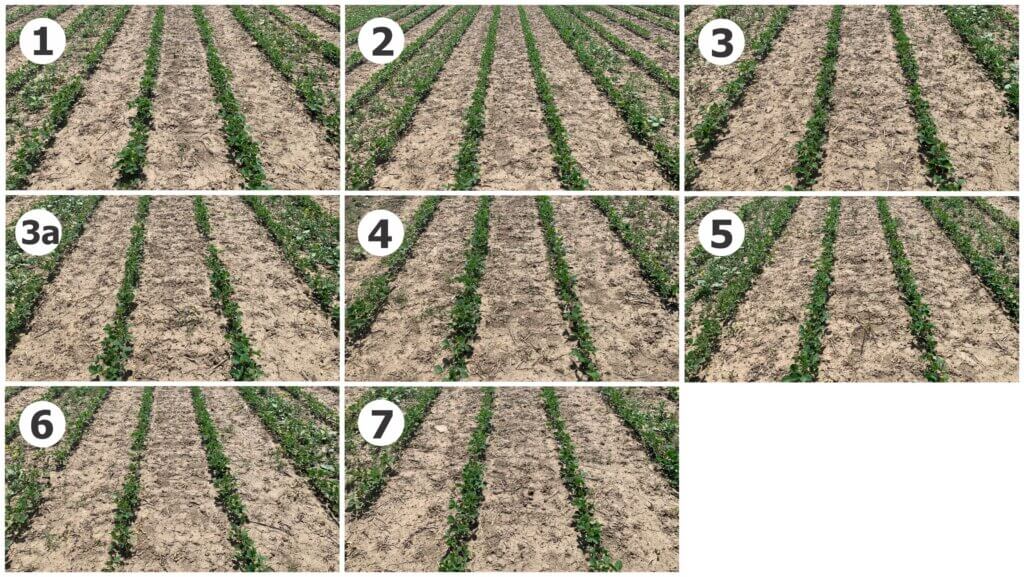
    Photographs of each plot 14 days after application. The number/letter in each inset image corresponds to treatments in Tables 2 and 3.
    Carrier Treatment
    (glyphosate 540 g/L at 900 gae/ha or 0.67 L/ac)
    Crop Injury
    (%)*
    Avg. Yield
    (bu/ac)
    Significance**
    4) Black container040.0A
    7) Bromine039.6A
    2) Shaded038.1AB
    3) Household bleach037.6AB
    1) Control037ABC
    5) Ammonia036.9ABC
    6) Copper-coated scour pad036.1 BC
    3a) Household bleach – added prior to mixing034.0 C
    Table 3. Visual control of lamb’s-quarter, green pigweed, witch grass and green pigweed at 28 days after the application of glyphosate 540 g/L at 900 gae/ha mixed with various carrier treatments to prevent algae growth. *7 days after application. **Duncan’s multiple range test. Soybean yields that don’t share a letter in common are significantly different.

    Discussion

    We elected to use an extreme situation where a single application of algicide was applied to an established, healthy colony. It’s possible that regular applications of algicide in a volume of water with little or no algae could maintain that condition.

    A treatment was considered effective if it slowed or halted algal growth, especially if it also degraded algal populations, causing them to become brown, thin, and/or particulate. Once in the spray tank, the shear forces created by circulation should disperse any dead or degraded algal masses, making it easier to pass them through filters and nozzles.

    The shade treatment appeared to kill algae as well as cause degradation. Second place went to the black-out treatment, where some light was unfortunately allowed in. This would have continued to fuel photosynthesis in the unpainted portion at the bottom of the jug. Conversely, the black exterior likely raised temperatures above >20 °C, which depresses most algal growth and may have contributed to the degradation.

    Copper appeared to kill the algae but also created a gel that would pose problems to filters. Unlikely to be bacterial, as copper is known to suppress bacterial growth, it could have been caused by diatoms; certain invasive species are known to form brown jelly-like material endearingly referred to as “brown snot” or “rock snot”. Alternately, and according to work by J. Rodrigues and R. Lagoa, alginate polysaccharide can form viscous aqueous dispersions (such as gels) in the presence of divalent cations (such as copper).

    No treatment appeared to reduce herbicide efficacy or affect crop health. However, unexpectedly, the household bleach added prior to mixing may have reduced soybean yield. Given the limited number of replications and the single plot location, we suspect this was a field effect, unrelated to the treatment.

    Take Home

    Based on these results, a combination of shade and light-excluding materials (e.g. black paint) would be the ideal approach to algae control. It’s cheap, effective, and doesn’t require periodic management. Buying black tanks is a good choice, or you can paint them. What you should paint them with is a matter of debate and there’s a very good Twitter thread on the subject if you’re interested.

    An Aside: Algae in Ponds and Dugouts

    We didn’t test this, but the question has come up and the best we can do is share some long-standing farmer wisdom. Some have used Aquashade dye to absorb the photosynthetic wavelengths and reduce algae buildup. Reputedly it is moderately successful. Another option is adding aluminum sulfate to the pond, and with a lot of agitation it should clarify in about 48 hours. Still others have added a few square barley straw bales to the water and found it to work surprisingly well (possibly an allelopathic response). Tie a rope to them and float them in the pond.

    Citations

    Jeschke, Peter. 2009. The unique role of halogen substituents in the design of modern agrochemicals. Pest Manag Sci, 2010; 66: 10–27

    Lin, C.H., Lerch, R.N., Garrett, H.E. and M.F. George. 2003. Degradation of Isoxaflutole (Balance) Herbicide by Hypochlorite in Tap Water. J. Agric. Food Chem. 2003, 51, 8011-8014

  • The Label Summary Sheet Proposal

    The Label Summary Sheet Proposal

    We’ve identified and discussed shortcomings in the content and design of today’s pesticide labels in an earlier article. From the perspective of the spray applicator, the information needed most often can be difficult to locate, anachronistic, contradictory, subjective or even missing from the label altogether. To truly encourage an applicator to read and follow the label we need a consistent, concise and clear format that summarizes critical content.

    To that end, we have worked with growers, university/government extension and industry to develop a prototype we’re calling the “Label Summary Sheet”, or LSS for short. We presented the concept in a series of public presentations in western Canada as part of the RealAgriculture TechTour Live event in 2018. You can watch a recording of part of that event at the end of this article.

    The LSS does not replace or interpret the current label, which is a legal document. It is a summary intended to accompany it. At this stage the LSS is simply a proposal. These documents are not intended for use right now; we hope they will grow and change for the better as they stimulate discussion.

    Consider this metaphor: You have just purchased a laptop. When you unbox it, you get an in-depth instruction guide that covers everything from operation to trouble shooting and includes all the legal riders. It’s a daunting technical document that you likely won’t read unless something goes wrong. Knowing that, manufacturers include a graphic and accessible quick start-up guide that summarizes the most common and critical issues. It doesn’t replace the instruction manual, it just augments it. If you can’t find what you need in the quick start-up guide, you are referred to the more fulsome description in the instruction manual. Think of the pesticide label as the instruction manual and the LSS as the quick start-up guide.

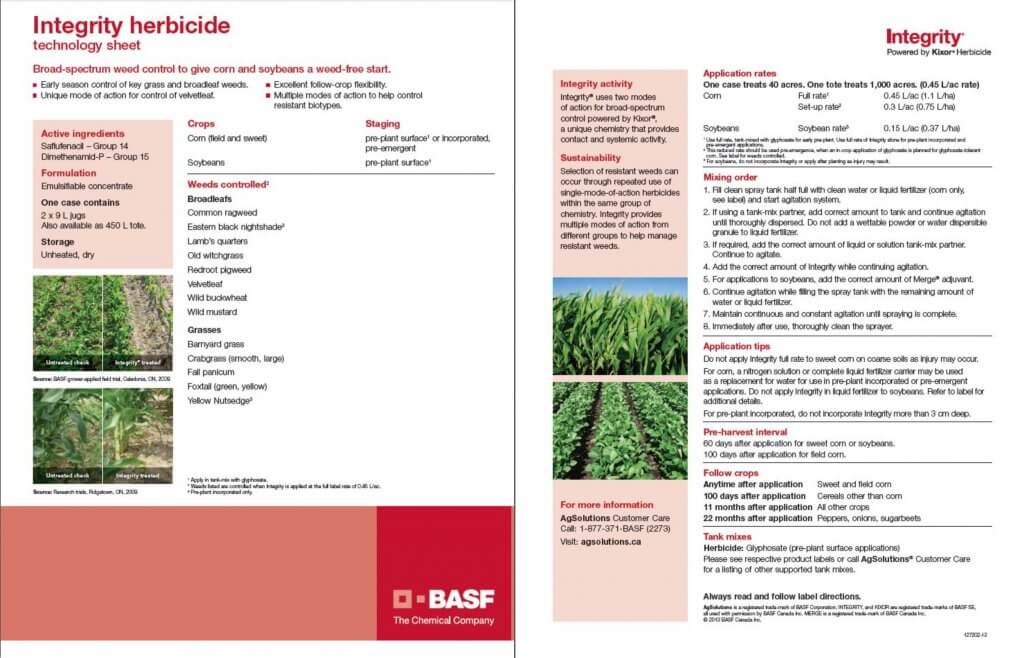
    Some agrichemcial companies recognize this need and have developed short documents to summarize key aspects of the label, but they are inconsistent and brand-specific marketing documents that do not always contain the information we are proposing. Here, for example, is the technology sheet for Integrity herbicide.

    We tested the versatility of our LSS format by summarizing four diverse pesticide labels. Our selections are not intended to imply that these labels are particularly deficient. Only that they are commonly used, somewhat complicated and represent the spectrum of pesticide categories and application methods.

    Download and look at the variety of labels we have summarized as examples. They are available here:

    • Pristine (LSS: 3 pages. Pesticide Label: 25 pages)
    • Dual II Magnum (LSS: 3 pages. Pesticide Label: 38 pages)
    • Liberty 150 (LSS: 2 pages. Pesticide Label 20 pages)
    • Traxos (LSS: 2 pages. Pesticide Label: 12 pages)

    Note that each LSS features the same section headings and a relatively consistent layout, no matter the manufacturer. Generic icons are used to illustrate content and make it easier for users to navigate without language barriers. The LSS are black and white to facilitate reproduction and refer back to their respective pesticide labels (i.e. the online PDF, not the booklets that come with the pesticides).

    LSS Sections

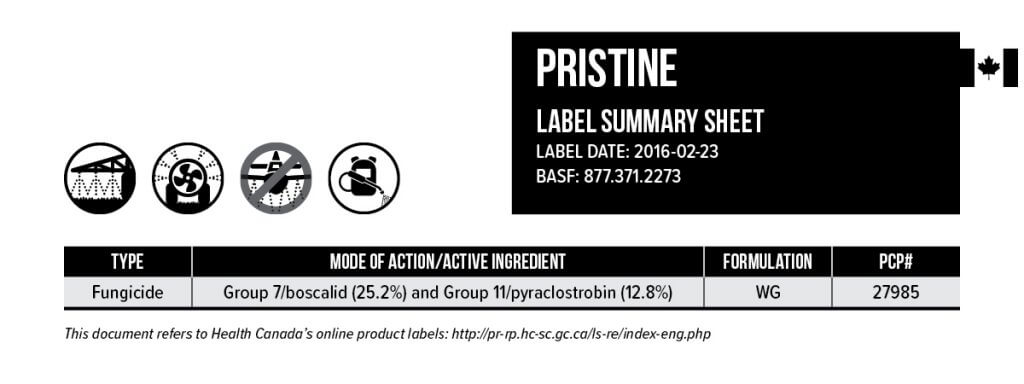
    Here is the Pristine LSS broken down by section to highlight the key features.

    1. Banner Section

    The banner is at the top of every LSS. It gives the commercial product name and the date to ensure the LSS reflects the current pesticide label. Four icons represent the most common application technologies: Horizontal boom sprayer, airblast, aerial and handheld. If an application method is prohibited, a banned symbol appears (such as aerial in this case). Note we have left room for RPAAS (UAV’s) anticipating the day we have products registered for that technology. The table notes the type of pesticide (e.g. fungicide, insecticide, adjuvant, etc.). The mode of action and active ingredient(s) are noted, as well as the formulation and the Pest Control Product number.

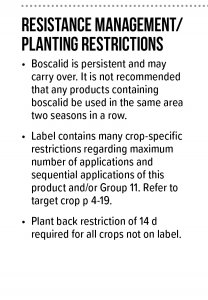
    2. Resistance Management / Planting Restrictions

    Intended to provide key information on managing pesticide resistance, this section reflects label content about carry over and the rotation of active ingredients. Further, to aid in application decisions, it reflects any restrictions around maximum number of applications, sequential applications or plant back issues following use.

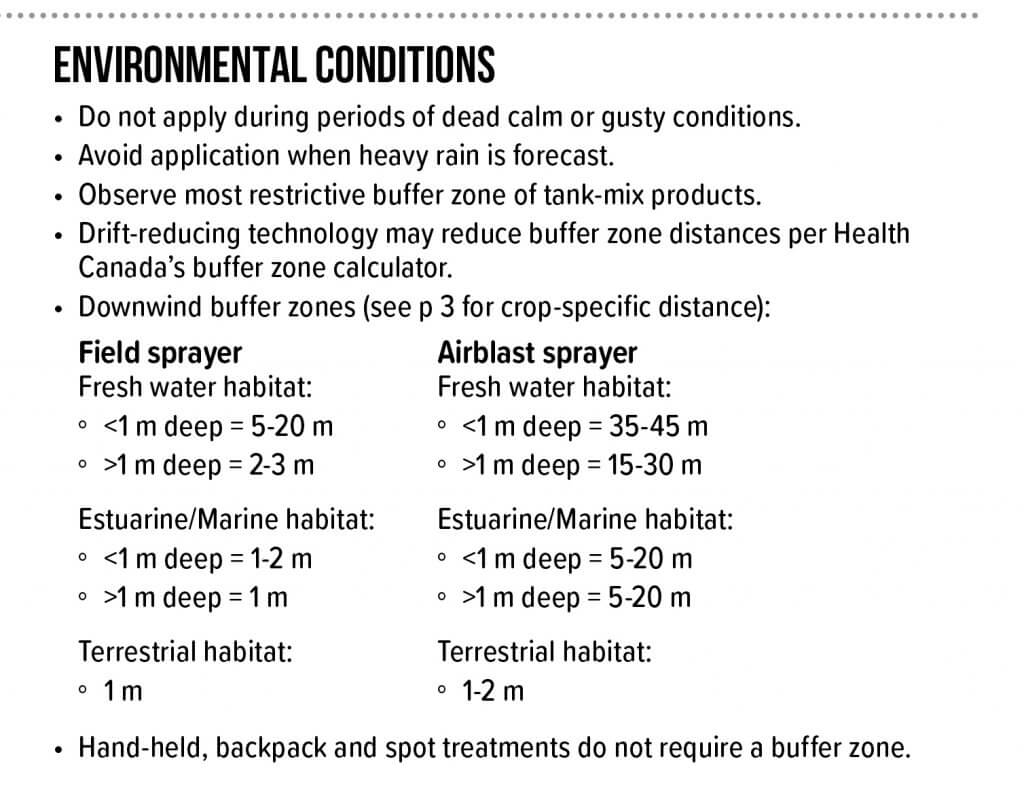
    3. Environmental Conditions


    Any restrictions regarding weather conditions during or after application are noted here. This includes set-backs or buffer zones that reflect method of application and the nature of the adjacent or downwind area in question.

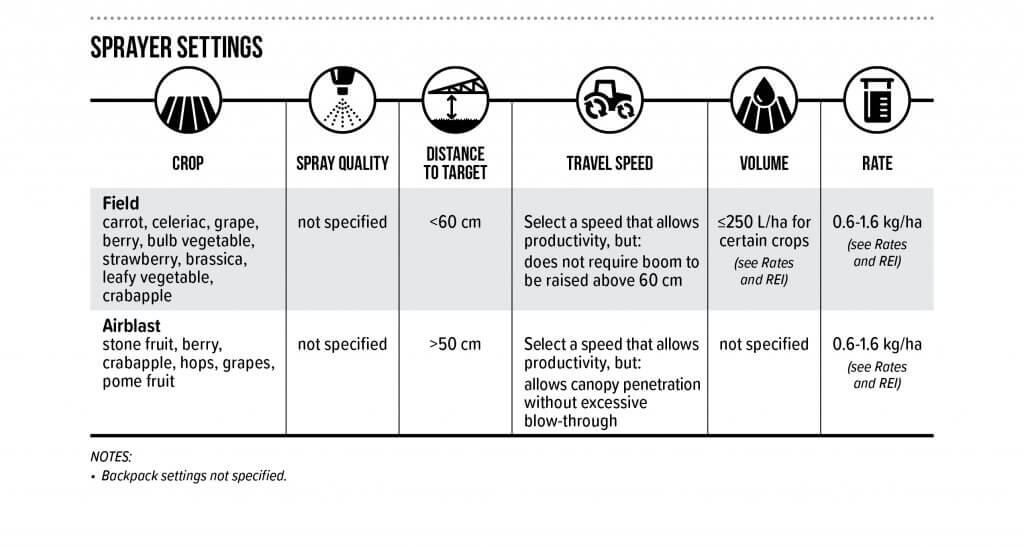
    4. Sprayer Settings

    This section includes the six most commonly asked questions an applicator has when calibrating or adjusting their sprayer prior to use. It is organized by target crop and method of application. When the label provides a high level of detail, the user is referred to the correct page. Note the use of graphics to quickly direct the reader to the information they need. Any additional qualifications found in the label relating to sprayer settings are indicated in the notes beneath the table.

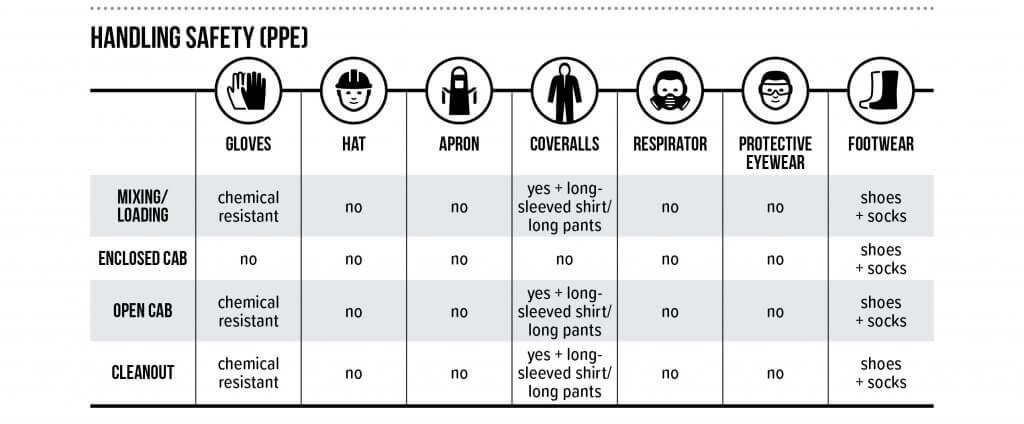
    5. Handling Safety (PPE)

    The concept for this simple and graphic table originated in France, and was communicated to us by Dr. Carol Black of Washington State University. This unambiguous  format encourages the use of PPE while ensuring the handler uses the appropriate level of protection for each activity.

    6. Mixing


    As operators tank mix more products to curtail resistance, improve efficacy or improve productivity, there is a greater chance of chemical or physical incompatibility. This section summarizes any restrictions noted in the label. Learn more by downloading Purdue Universities’ publication “Avoid Tank Mixing Errors“.

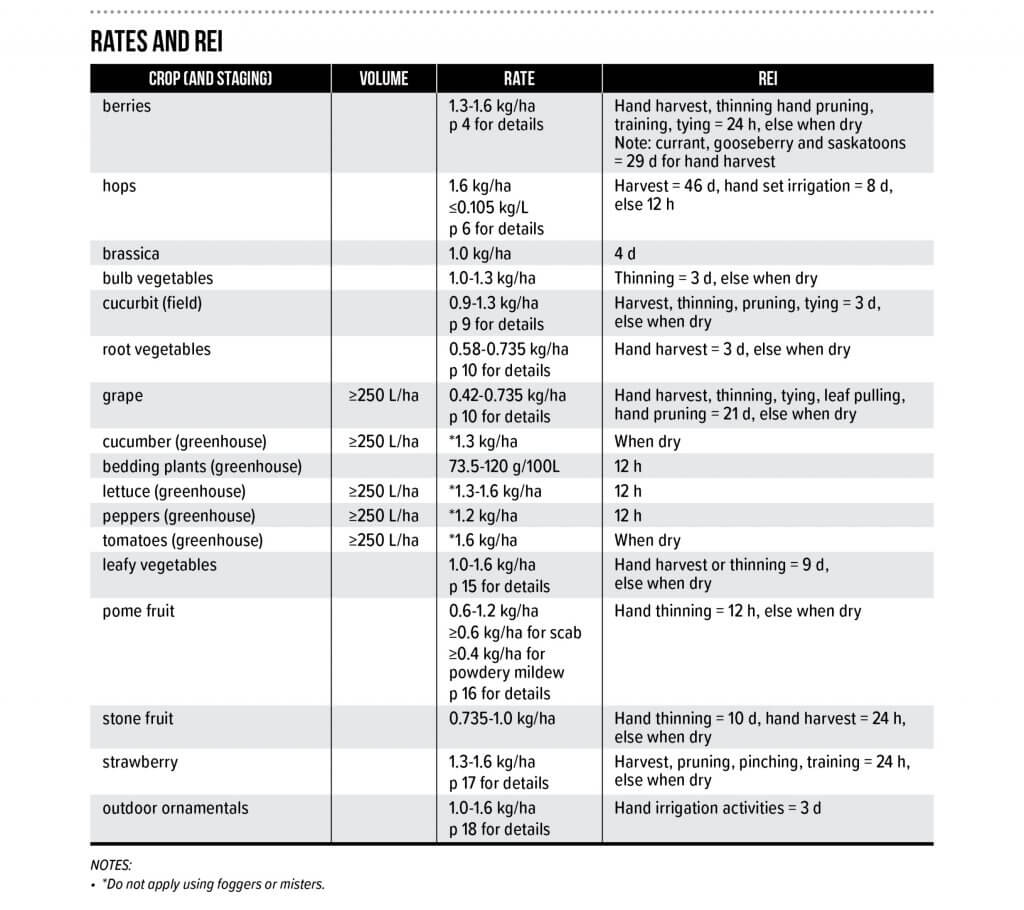
    7. Rates and Restricted Entry Intervals

    This table can be quite complicated depending on the pesticide label. It summarizes the rates, volumes and restricted entry intervals by crop. It reflects the broadest range of product rates listed in the label. Restricted entry duration is affected by the post application activity, and this is captured in the REI column. If more detail is required, the user is referred to the appropriate page(s) of the label. Any additional qualifications found in the label relating to rates, volumes or REI are indicated in the notes beneath the table.

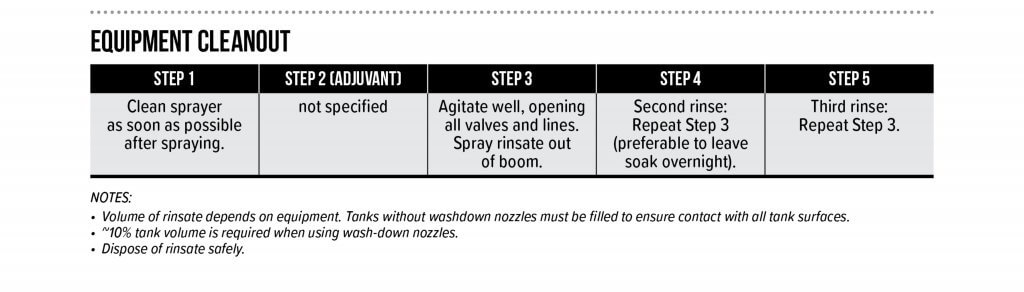
    8. Equipment Cleanout

    Finally, equipment cleanout is summarized (where possible) in a sequence of steps. When the pesticide label is silent on the cleanout procedure, the user is provided with the triple rinse protocol, which is generally held to be the industry best-practice.

    Adoption

    To date, this proposal has been made to Croplife Canada, the American Society of Agricultural and Biological Engineers (ASABE), an International Organization for Standardization (ISO) mirror committee (Equipment for crop protection) and more than 1,400 growers and stakeholders across Canada.

    Our suggestion for adoption of the LSS (in its current form or something similar)  is that regulatory agencies commission a working group comprised of representatives from grower groups, industry and government to oversee the process. The working group would support registrants as they populate (or update) the LSS template when a new product is submitted for registration, or as part of the natural review cycle.

    Should the registrant encounter duplicate, missing or contradictory information while completing the LSS, it should be considered an opportunity to remedy the problem on the pesticide label. This will clarify the safest and most effective use of the pesticide for the applicator, who is currently forced to selectively ignore or interpret such errors. To our minds, this was the intent of the original labelling system, and the inclusion of the LSS is a simple and effective way to achieve that goal.

    The Confusicol Sketch

    In 2018 we participated in Real Agriculture’s TechTour Live event that toured four major cities in Western Canada in four days. We presented the “Confusicol sketch” as a light-hearted way to open a discussion with the audience on the strengths and weaknesses of Canadian pesticide labels and how the Label Summary Sheet might be a viable supplement. Here’s one of the live takes, warts and all. Turns out live sketch comedy is tricky…

  • OrchardMAX

    OrchardMAX

    2016_Orchard_Max_Logo

    OrchardMAX won the 2016 Canadian Agri-Marketing Association’s “Certificate of Merit” in the Mobile Apps Category.

    2022 Update

    OrchardMAX was developed in 2016. iOS and Android have moved on since then, so the links to the app no longer function. Maintaining this app for new operating systems requires a capitol expense which, presently, we have not explored. If you have some interest in exploring the model, reach out to jason@sprayers101.com and we’ll send you a copy that will work on Excel.

    What is OrchardMAX?

    OrchardMAX is a free app developed by the Ontario Ministry of Agriculture, Food and Rural Affairs to improve sprayer efficiency and effectiveness in apple orchards. The app is based on the Crop-Adapted Spraying (CAS) model, which was tested in semi-dwarf and high-density apple orchards in Ontario and Nova Scotia from 2013 to present day. The primary goal of the app is to help the sprayer operator achieve consistent coverage, no matter the architecture of the orchard block, throughout the season. Research has demonstrated that following the process improves coverage while reducing wasted spray by an average of 20% over the season.

    OrchardMAX will:

    • Accept Metric or US Imperial units
    • Create an inventory of your orchard airblast sprayers
    • Create an inventory of your orchard blocks
    • Determine optimal sprayer settings based on the average size, shape and density of the trees in the block
    • Propose a pesticide dose for each block, including ideal nozzle rates, water volume and product(s) per tank
    • Develop a permanent spray record that can be emailed to the user for archival
    • Calculate work rates and estimate productivity

    OrchardMAX won’t:

    • Exceed label rates
    • Calibrate your sprayer
    • Confirm spray coverage
    • Account for environmental conditions such as wind, humidity or temperature
    • Advise a volume below 400 L/ha (about 42.5 US g/ac)
    • Advise a dose that is less than 1/2 the label rate (that may seem low, but consider a first-year planting)

    Recognizing that this app can only approximate ideal sprayer settings based on data entered by the user, sprayer adjustments are still required on the part of the sprayer operator. Specifically, the sprayer operator must still calibrate and adjust the sprayer air to match the tree and the environmental conditions and confirm coverage using water-sensitive paper.

    Why you should try it

    Financial savings: The app will help you match your sprayer settings to the crop you’re trying to protect. That means you will find out if you are over- or under-spraying the tree canopy and by how much. This information, combined with feedback from water-sensitive paper, will improve canopy coverage and very probably improve the quality of the apple crop. Additionally, the app may lead to reduced pesticide volumes, which reduces environmental contamination and saves money.

    Explore different spraying scenarios: Perhaps you’re considering a new planting and you would like to know how many tanks it would take to spray an orchard block for a given speed, or row spacing. Perhaps you are considering a sprayer with a larger tank to reduce the number of refills, or a smaller tank to prevent rutting and you want to see how that affects your spray efficiency. Maybe you’re considering decreasing your fill time by using a tender or nurse truck. Enter the parameters and see how it affects your spray day BEFORE you invest.

    Create permanent spray records: The app will create a library of spray records that are emailed directly to you.

    How it works

    Enter Farmer/Owner information
    Enter Farmer/Owner information

    Like any new practice, you have to put in a little time and effort to realize the full benefit of the app. Try it on a few blocks in the first year, make the changes to your spray program and review the results. As you get used to this new method for spraying, and see the improvement, you can continue to expand its use to the entire operation.

    First you have to enter information about your operation. This only has to be done once.

    1. Enter your profile information
    2. Complete the Inventory
    3. Information for each sprayer in your operation
    4. Information about each sprayer operator
    5. Information about each physiologically different orchard block (e.g. Trellised Gala on 10′ rows is quite different from mature semi-dwarf Empires)

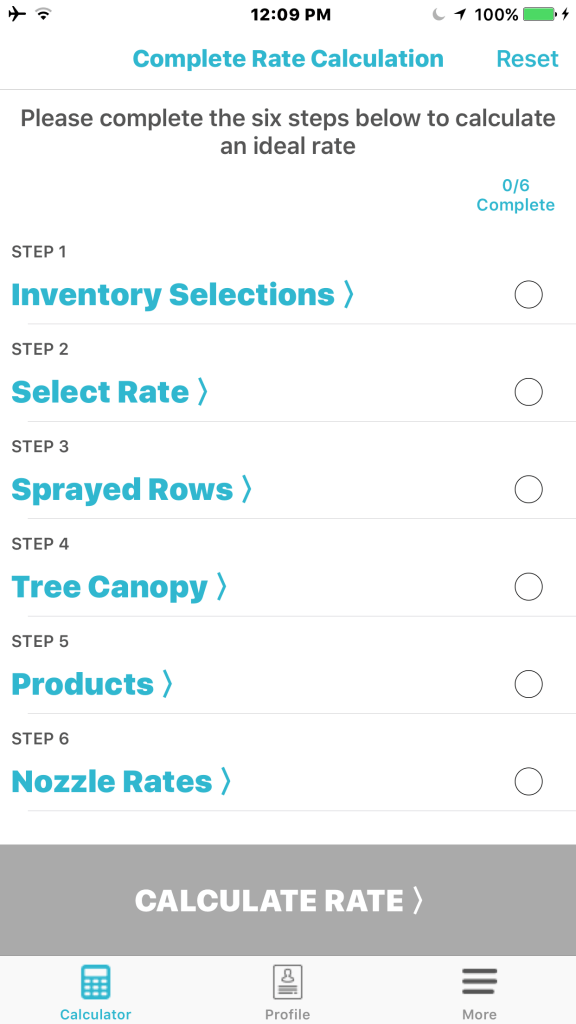
    Now you are ready to calculate rates for a spray day.

    1. Choose the Sprayer, Operator and Block from your Inventory
    2. Decide if you want to use label-rate, or an optimized rate based on tree size
    3. Determine if you will spray every row, or alternate rows (You cannot choose to optimize your rate AND spray alternate rows)
    Select sprayer, operator and block from inventory, then enter spray-day data to calculate rate and sprayer settings.
    Select sprayer, operator and block from inventory, then enter spray-day data to calculate rate and sprayer settings.

    Enter information about the tree shape and density (This accounts for pruning and time-of-season). This is mostly visual, where the user chooses from a series of pictures

    • Enter label rate and preferred rate for each pesticide in the spray mix

    The software then lets you know how much carrier and/or pesticide can be saved if you nozzle your sprayer according to it’s prescription.

    • From a nozzle catalog, enter the nozzle rates for each position within 5% of OrchardMax’s prescription

    The software then assembles a simple spray record, including all the rate adjustments and sprayer settings, which is emailed to you for your permanent records.

    Where can I get it?

    Select your operating system (images below) and you will be taken to the respective store and begin downloading. Please rate the app so we know it’s being used and can work to improve it. Please opt in to provide us with usage information so we can see how it’s being used – this is entirely private, and we will not contact you.

    NOTE: These links may no longer function. Contact jason@sprayers101.com if you’d like to learn more about the model or to try the Excel version.

    The OrchardMAX app was developed by AgNition Inc. with funding from Growing Forward 2.

  • Airblast Agitation and Solubags

    Airblast Agitation and Solubags

    Agricultural products are formulated to be as emulsifiable as possible, but many do not mix well in water. They contain elements that do not dissolve (e.g. wettable powders), or they may be petroleum distillates (e.g. emulsifiable concentrates). Other products are heavier than water and form precipitates (e.g. fertilizers and powdered metals like copper). Consequently, good agitation is very important.

    Effective agitation requires water to “sweep” the bottom of the tank so that any precipitated material is picked up and re-mixed. Turbulence is often not enough. If there is too little agitation, the pesticide will be applied unevenly and not always at the required rate. If there is too much agitation, the pesticide may foam (which can be controlled using anti-foamers) or cause an invert emulsion (a gel). There are two types of airblast sprayer agitation: Mechanical and Hydraulic (learn about pros and cons here).

    Mechanical Agitation

    Mechanical Agitation is produced by paddles that are attached to a shaft mounted near the bottom of the spray tank. While effective, this system cannot always sweep the very bottom of the tank, so there is always some material that precipitates out of reach. Are your nozzles and screens plugging frequently, and is there “sludge” left at the bottom of the tank after spraying? You may have an agitation issue.

    Note the two paddles set at 90° to one another on the mechanical agitation shaft in this very cool “cutaway” Turbomist sprayer.
    Note the two paddles set at 90° to one another on the mechanical agitation shaft in this very cool “cutaway” Turbomist sprayer.

    Hydraulic Agitation

    Hydraulic Agitation is accomplished by returning a portion of the pump output to the tank. Cylindrical and oval tanks are the ideal configuration for the sparging (i.e. rinsing) type of hydraulic return agitation system. This system consists of a tube located longitudinally along the wall of the tank, with volume booster nozzles aimed at the centreline so they sweep across the bottom. Volume booster nozzles take a small amount of water pumped into their venturi chamber and create a vacuum that draws three to four times that volume from the surrounding water and expels it out the end.

    For hydraulic agitation to the effective, the agitator nozzle(s) should be fed by a dedicated line from the pressure side of the pump (not the pressure regulator). They should have a valve to throttle the flow or completely shut it off to prevent foaming.

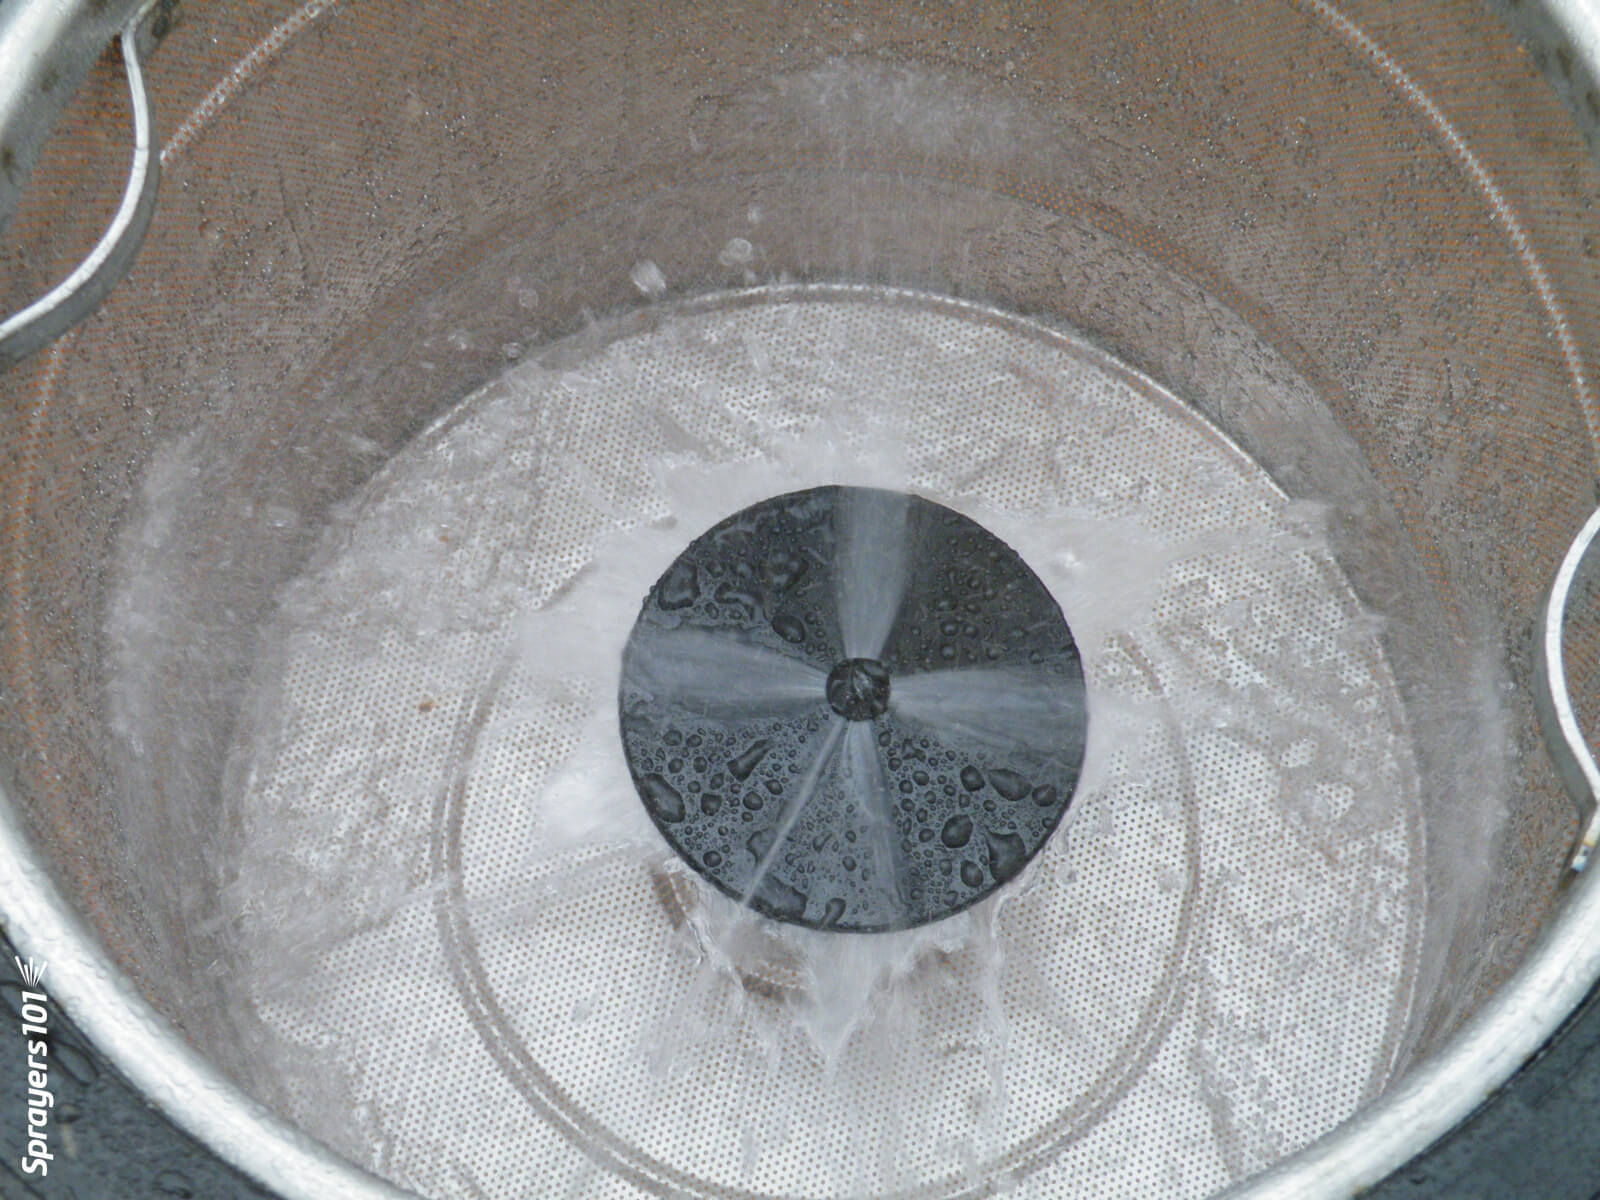
    A mixing nozzle in the basket of a Hol sprayer.
    A mixing nozzle in the basket of a Hol sprayer.
    With enough pump capacity, a hydraulic return in the tank basket is a great way to agitate as you mix. A return in an old FMC.
    With enough pump capacity, a hydraulic return in the tank basket is a great way to agitate as you mix. A return in an older FMC.

    Adding Water Soluble Pouches

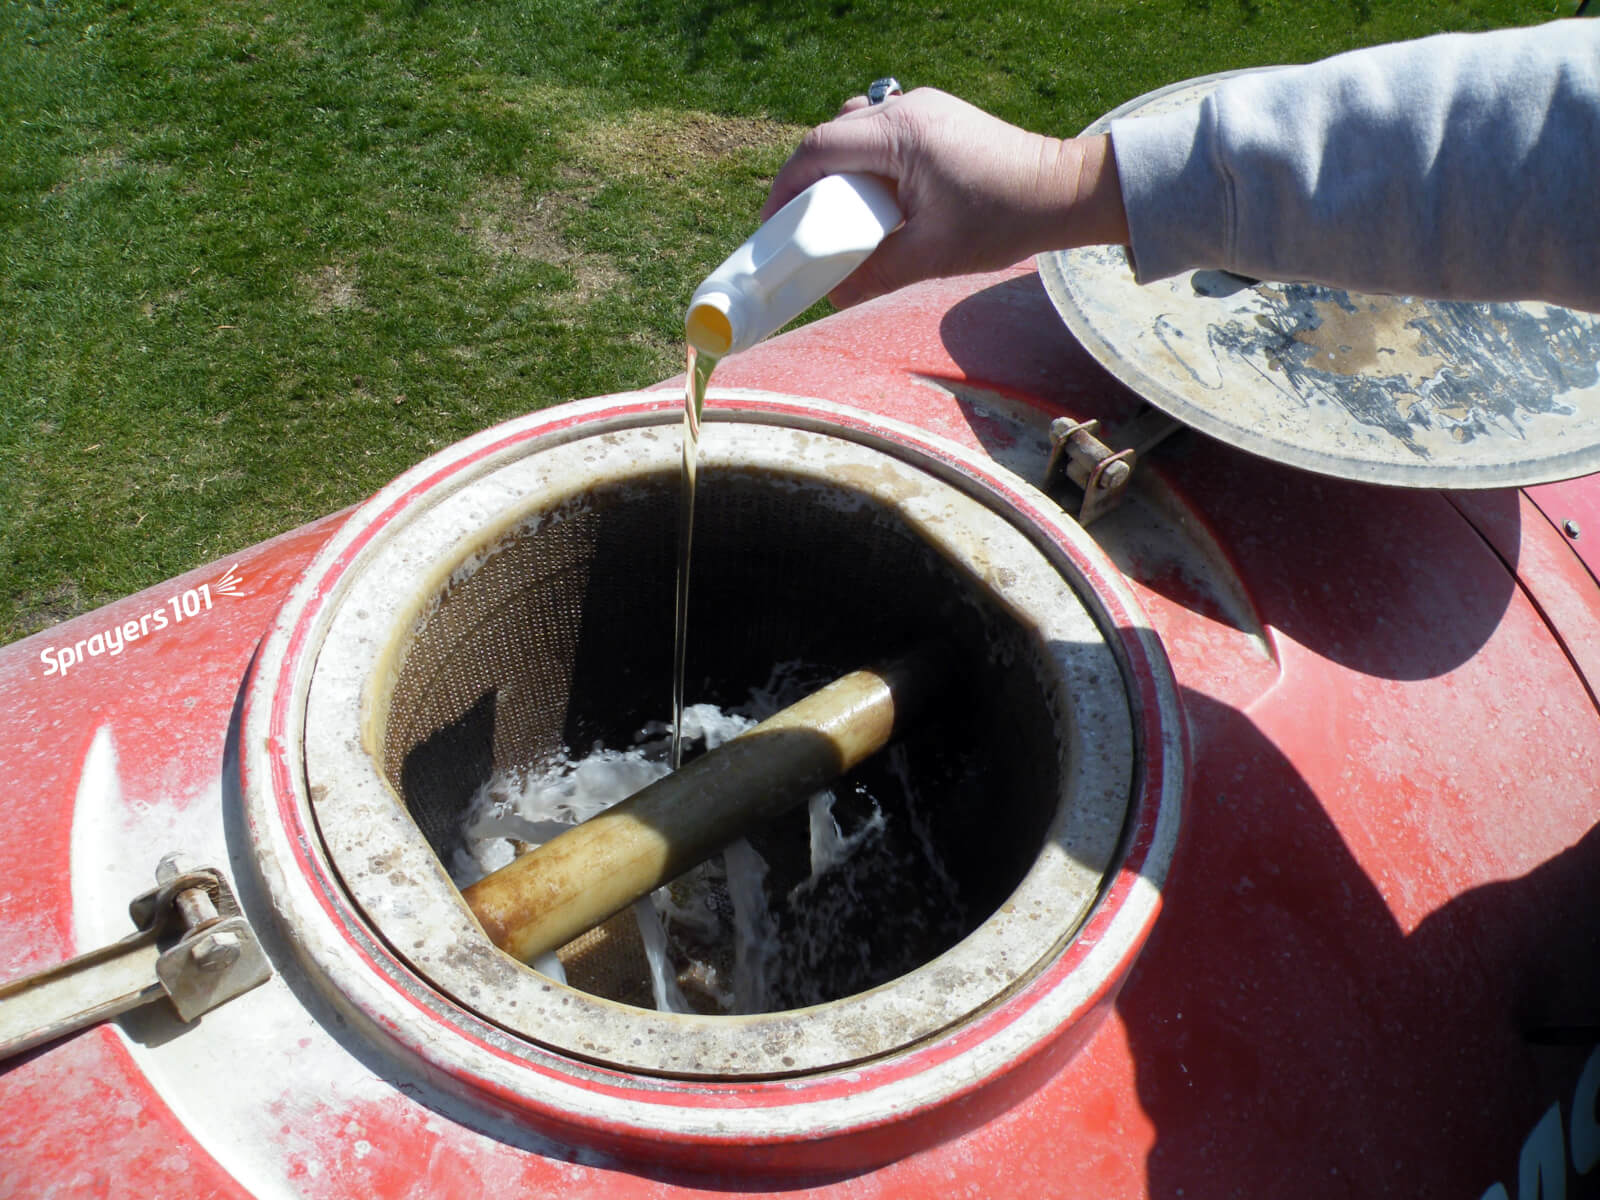
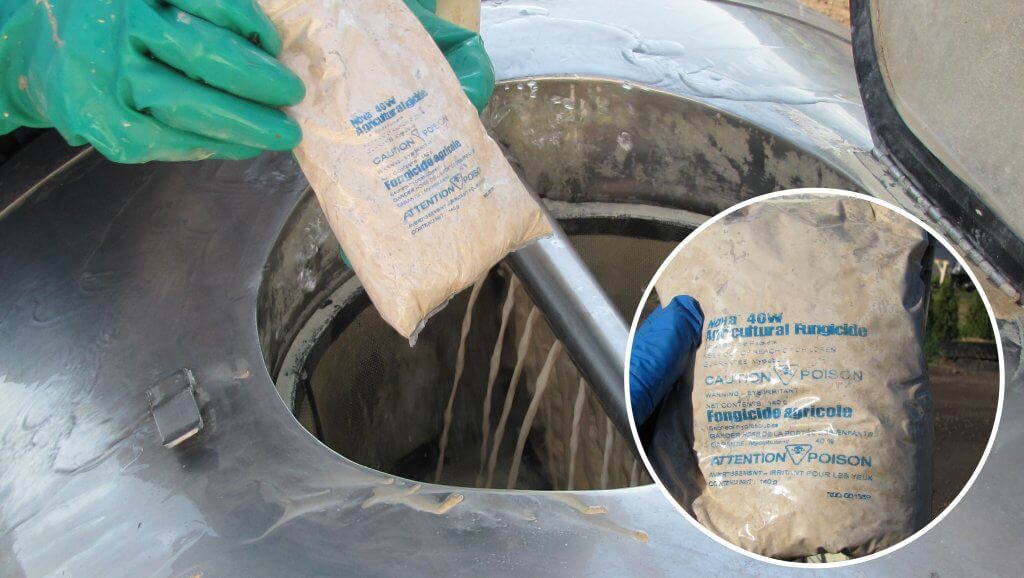
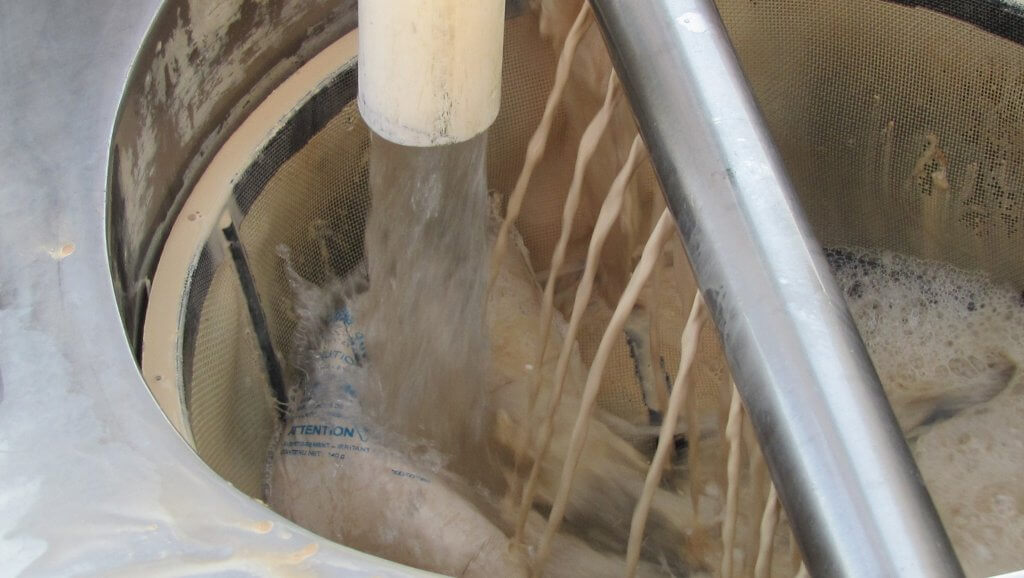
    Adding pesticide to the sprayer may not always be straight-forward. Many airblast operators, for example, place dissolvable pouches in the basket so they can be broken up by the hydraulic return, or the fill water. But fill water often splatters out of the basket, and the bags can burst open, releasing product into the air. This creates unnecessary contamination and both inhalation and dermal exposure concerns.

    Photo credit: Mario Lanthier.
    Photo credit: Mario Lanthier.

    Some elect to temporarily remove the basket and add the pouches to a half-full tank with the agitator on. However, the pump can suck in the partially dissolved bag which then coats the intake screen. This is exacerbated when the fill water is cold. I know of one operator that had to rebuild the pump because the Viton seals burned out. This operator now adds pouches to the basket while standing upwind and away from potential splatter. Or, they mix a pre-slurry.

    Mixing a pre-slurry requires the operator cut the bag into a five or 10 gallon bucket filled with water and to incorporate using a paint mixer. However, mixing a pre-slurry increases the chances of dermal exposure, inhalation and point-source contamination. Dissolvable bags were intended as a form of closed transfer, which is a good idea. Mixing a pre-slurry defeats that intent.

    And so, for all these reason, I don’t feel dissolvable pouches are a good formulation choice. If possible, select product formulations that do not cause possible filling issues and better match the capabilities of your agitation system. Always choose the safest and most effective filling method for your sprayer design.

  • Do Labels Help us Apply Pesticides Properly?

    Do Labels Help us Apply Pesticides Properly?

    It happened three times this spring.  As is often the case, I was contacted by growers who wanted help with herbicide application.  In most of these calls, the discussion revolves around the proper choice of nozzles for a specific task, perhaps some questions on spray pressure, water volume and travel speed.

    But these three were different.  Instead of being seasoned applicators, all three were new to the business.  And more importantly, they had done their homework by looking at product labels before calling.

    Labels give us important information on product rates, crop and weed staging, mixing order, sprayer cleaning, and personal and environmental protection.  They’re very valuable there.  But they also provide application information, and that’s where the problems begin.

    Perseverance Required

    I have to commend my three clients:  they showed great tenacity by actually finding application information on a pesticide label in the first place.  This document is so mired in legalese protectionist language at the front that it discourages all but the most persistent.

    And often, the application information comes in several parts, interspersed among other information.  Mixing instructions.  A little later, application. Somewhere nearby, buffer zones.  Another paragraph for cleaning.  Rainfastness?  Keep looking.

    It forces the reader to skim through the document, hunting for relevant information.

    But once my clients found application instructions, they obviously questioned if they should believe it, or else they wouldn’t have called.  The application statements on many labels, simply put, are from long ago, and it’s obvious.

    Consider the following two label excerpts, the first from a product initially registered in the mid 1980s and still available, the second from one registered about 30 years later:

    1980s:

    Application should be made using a minimum of 55-110 litres of water per hectare, at a pressure of 275 kPa, or 310 kPa if using check valves, and at a ground speed of 6-8 kph.

    The use of 80° or 110° flat fan nozzles is recommended for optimum spray coverage.

    Do not use flood jet nozzles, controlled droplet application equipment or Sprafoil® equipment.

    Application of the spray at a 45° angle forward and higher water volumes will result in better spray coverage and penetration of the crop canopy.

    Uniform, thorough coverage is important to obtain consistent weed control. Higher water volumes should be used under dense crop and weed canopies to ensure thorough coverage of the target weeds.

    2010s:

    Apply in a spray volume of 46.8 – 93.5 L/ha unless otherwise specified in tankmix partner section of this label – at 207-345 kPa (30-50 PSI) pressure to ensure proper weed coverage.

    Flat fan nozzles of 80° or 110° are recommended for optimum coverage.

    Do not use floodjet or controlled droplet application equipment or Sprafoil® equipment.

    Nozzles may be oriented 45° forward to enhance crop penetration and to give better weed coverage.

    Uniform, thorough coverage is important to obtain consistent weed control. Higher water volumes should be used under dense crop and weed canopies to ensure thorough coverage of the target weeds.

    Thirty years apart, but remarkably similar.

    Crop protection companies spend about 10 yrs. and $250 million to produce a new pesticide and register it for use.  Having made this commitment, it would be most useful to see a small further investment to provide current application information that is relevant to applicators.

    After all, these applicators purchase the active ingredient to provide a return on this multi-million dollar investment, to the tune of about 2 billion dollars per year in Canada alone. They deserve good application information.

    Imagine this scene:

    “Doctor, thank you for this new high tech pharmaceutical engineered to help me with my serious illness.  How should I take it?”

    “Not sure.  Here, read this cough syrup label I found in my drawer.  Should be pretty close.”

    It’s clearly ridiculous

    Let’s dissect these labels to see how they could be improved.

    Flat fan nozzles of 80° or 110° are recommended for optimum coverage…

    Our sample labels refer to what we assume are conventional flat fan nozzles.  While popular in the 80s, these have all but disappeared from sprayers over the course of the past 20 years or so.  We haven’t recommended them since then because they drift too much. They’ve been replaced by low-drift nozzles, either pre-orifice, or air-induction.

    Nozzle fan angles are now generally 110 degrees or more, and frankly, the difference between 80 and 110 degrees is not that important.  What’s important is proper overlap, achievable with a visual assessment followed by boom height and pressure adjustments.  Unfortunately the label is silent on that.

    Application should be made … at a pressure of 275 kPa, or 310 kPa if using check valves…

    A nozzle’s recommended operating pressure depends on the specific nozzle model and on the spray quality (average droplet size) required. With literally many dozens of nozzles now available to each applicator, general pressure suggestions are likely to be wrong, and are more of a liability than a help. And they force label non-compliance when over-ruled by a nozzle manufacturer’s recommendations.

    Speaking of spray quality, growers crave to know at what spray quality a product should be applied for best performance and lowest drift. Some labels refer to spray quality (e.g. “apply with a Coarse spray”), but this is with reference to spray drift and buffer zone distances, not efficacy, and that distinction is not made.  Knowing the right quality for efficacy would help applicators choose the right nozzle and pressure to meet that criteria.

    Higher pressures if using check valves?  Nobody has brass screens with check valves anymore.  Sprayers have had modern diaphragm check valves for a generation, and those don’t produce pressure losses.

    And we all know that six to eight km/h is hardly a common speed these days.

    Do not use floodjet or controlled droplet application equipment or Sprafoil® equipment

    Sprafoil nozzles have not been produced in Canada for about 25 years, in fact their manufacturer is no longer in business.  Controlled droplet atomizers, while becoming more popular again on aircraft, were last seen on ground sprayers in the 1980s. Even then, total installed numbers were probably in the single digits.

    As for FloodJet nozzles, those went out of style for herbicides in the late 70s, and were replaced by the very successful TurboTeeJet nozzles shortly after.

    Nozzles may be oriented 45° forward…

    Nozzles are rarely tilted 45 degrees forward for herbicide application anymore.  Maybe that’s because spray booms aren’t built that way today, or because modern booms on self-propelled sprayers are now about 30” (75 cm) above ground, and we travel at about 15 mph (22 km/h).  So the forward tilting, though shown to be effective for grassy weeds at 5 mph (8 km/h) and 20” (50 cm) boom heights, as researched in the 1970s, isn’t relevant for herbicides with higher booms.

    Uniform, thorough coverage is important to obtain consistent weed control.

    Statements advocating for good coverage are nice, but they aren’t useful.  Everybody knows we want good coverage.  What applicators need to know is how they should measure coverage, and what good coverage actually is.  Can we use water-sensitive paper?  How much of the target should be covered?  How many droplets should be in each square centimetre?  How can we measure that in the field, right now? How does it depend on the crop canopy, on weed stage, and on spray quality? The more information an applicator gets, the higher the chance of success.

    Apply in a spray volume of 46.8 – 93.5 L/ha…

    The only statement that survives our little examination is about water volume. Water volume is important.  But even there we have a problem.  The volume is in L/ha.  This is useful in some parts of Canada, but not in the west, where producers communicate primarily in US gallons per acre.  And in the west, provincial guidelines have generated this odd hybrid of L/acre, which few people use for spray volume.  But 46.8 to 93.5 L/ha?  How is that level of precision justified? (I know that this is a conversion from 5 and 10 US gpa…so why not just say so?)

    A Solution

    The problem with having outdated or impractical information on labels is that it creates disrespect.  Since labels are documents enforceable by federal law, applicators want to comply. At this time, they can’t, and probably shouldn’t, if they want to do the job right.

    A vision for a good label should be one that respects the needs of the applicator.  Such a label:

    • places the information that applicators need at the top;
    • is updated regularly to reflect modern practice and useful advice;
    • helps a new applicator work out how to apply the product with any equipment;
    • identifies a spray quality that offers good coverage and low drift;
    • makes reference to research that supports variations in the application guidelines;
    • is available electronically, readable on a mobile device, i.e., not pdf.

    This label would protect the environment and bystanders, and would foster better pesticide performance.

    This label is easy to generate.

    This label would be read by applicators.

    What’s it going to take?

    Additional:

    This article created a great deal of discussion. We decided that if we were going to point out issues with the current labelling system, we should also propose a way forward. Read about our Label Summary Sheet proposal.