Back in 2011 we toured a few vegetable greenhouses in Southern Ontario. I wanted to learn more about how greenhouses used hydraulic sprayers (i.e. not misting or fogging systems) to apply pesticides to tomatoes, cucumbers and peppers. It was an eye-opening experience for me, because like every commodity group I’ve encountered, they had their own unique way of doing things.
Manually-towed sprayers
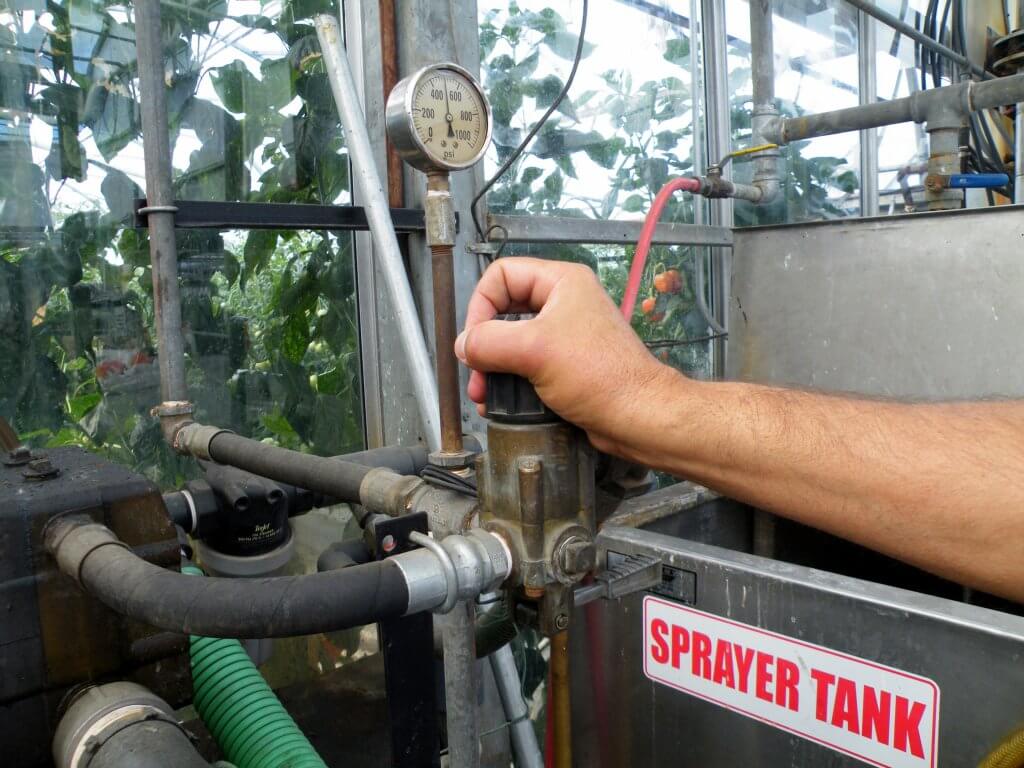
The first operation employed a system that I’ve come to learn is fairly common in greenhouses. There is a centralized tank and pump, located outside the growing area. Products are mixed and pumped from there.
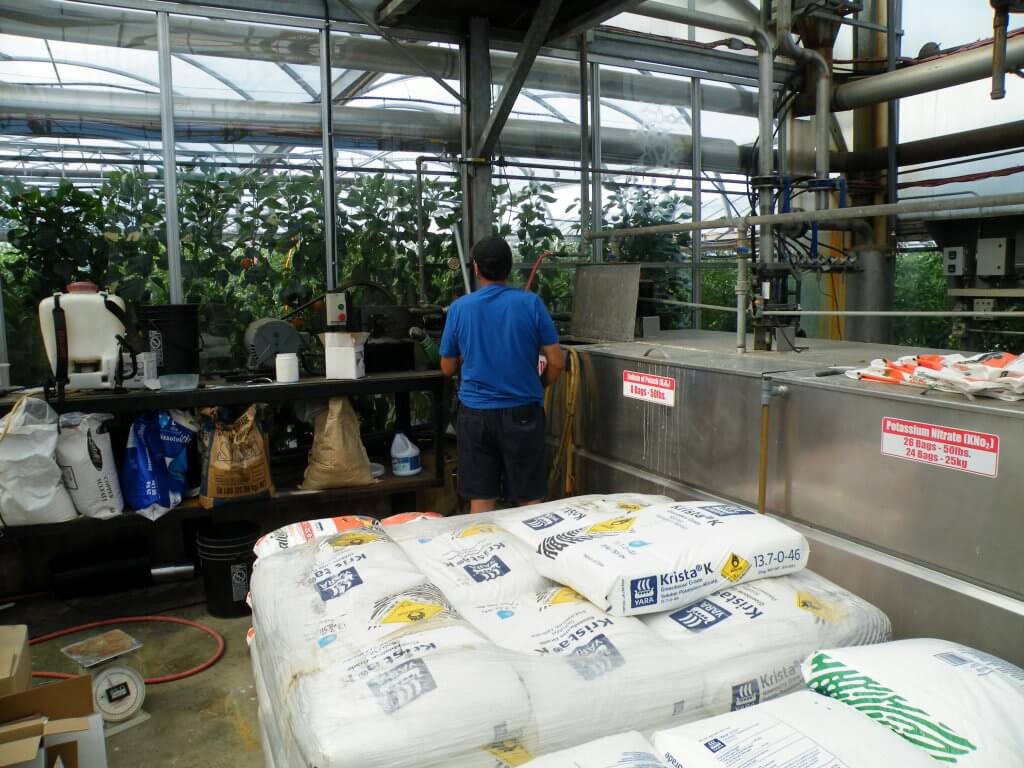
The pressure is set at the source so the spray mix is pumped to the rest of the greenhouse where the sprayer can be quick-connected to one of a number of outlets along a central line. I’ve been surprised in the past to see airblast sprayers set as high as 300 psi, so it really surprised me to see the pressure set to 500 psi! I was told this was necessary to counter the pressure-drop experienced at the far reaches of the greenhouse (see below).
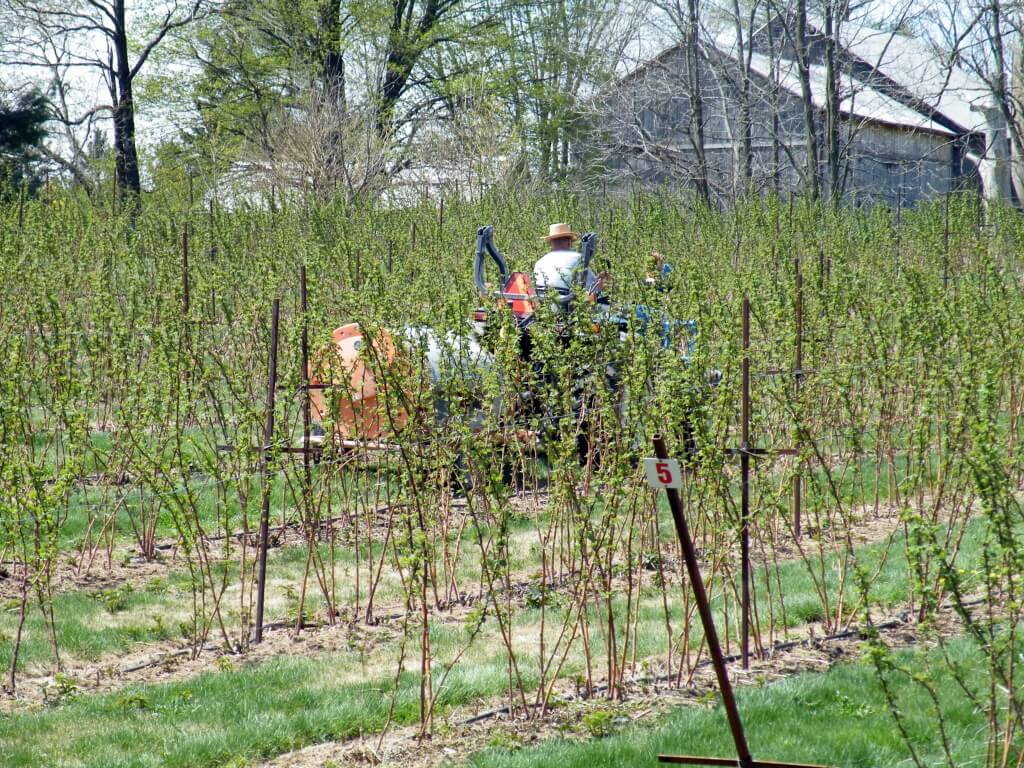
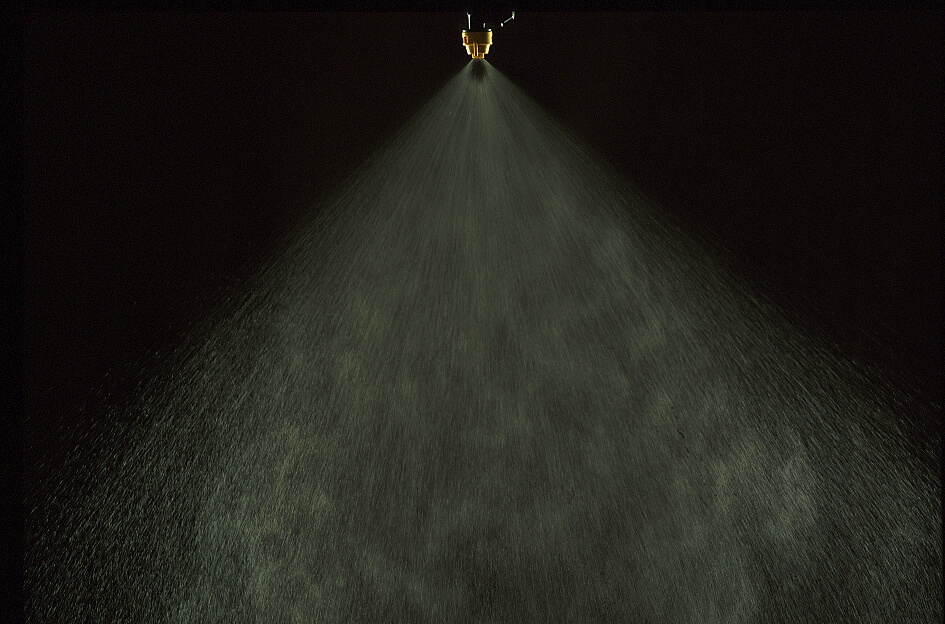
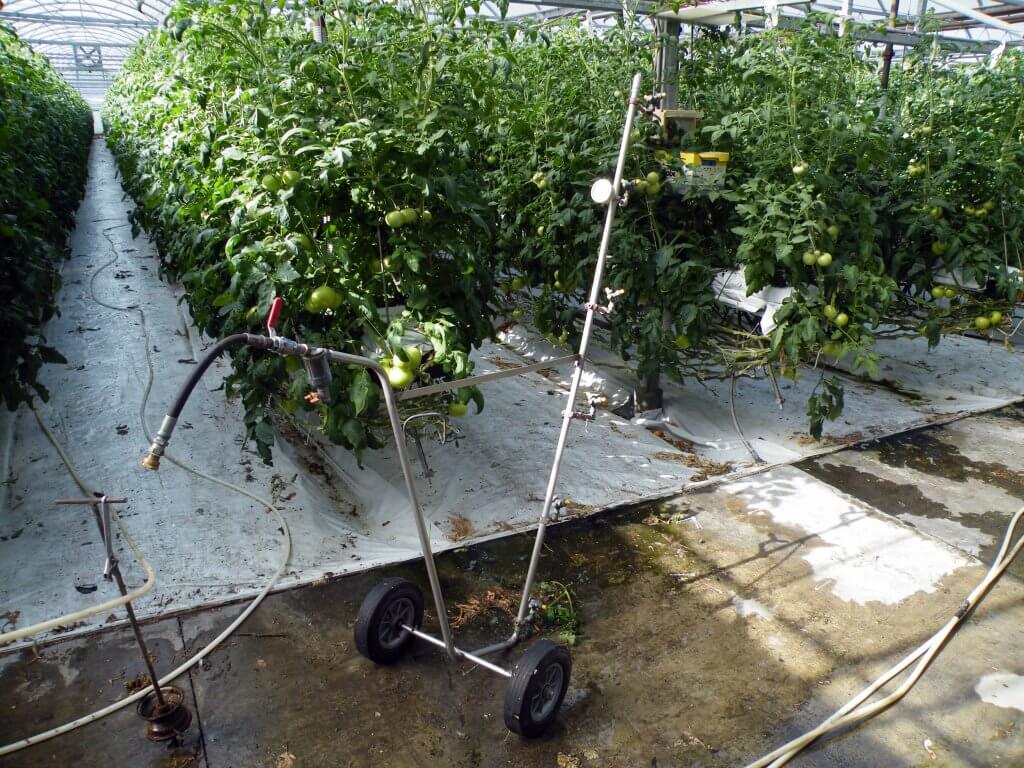
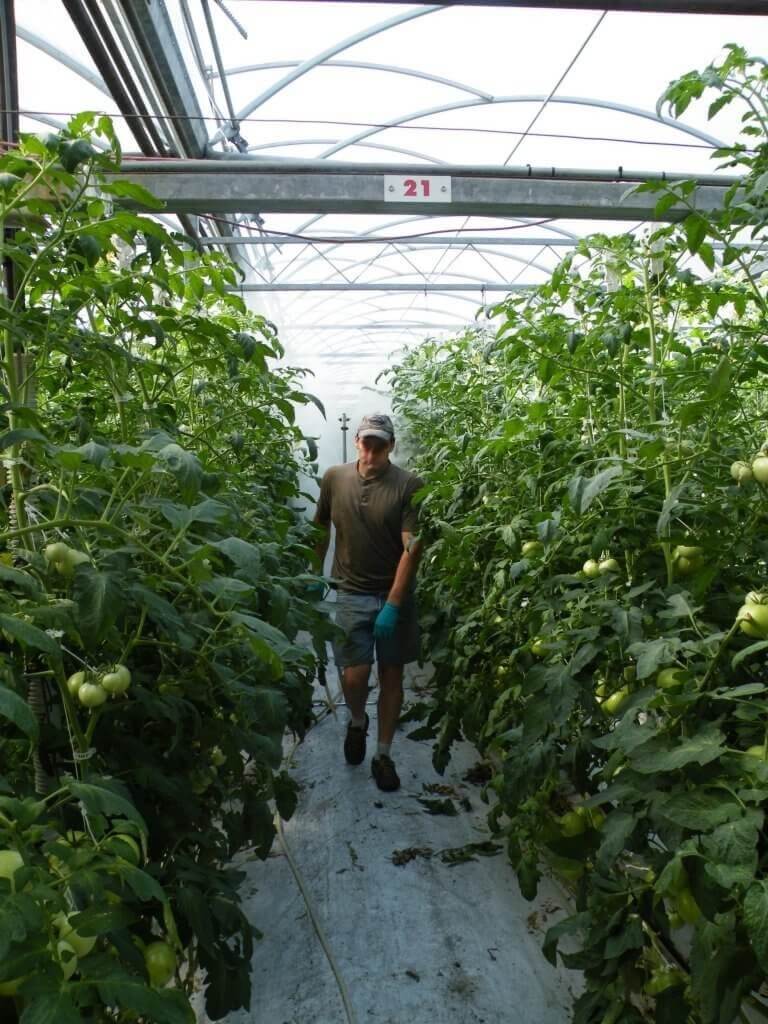
The sprayer itself was a manually-towed vertical boom and a coil of hose. The operator would wear appropriate personal-protective equipment and tow the sprayer between the rows at a constant speed. They may or may not have the ability to control the pressure with a regulator on the boom – the nozzle selection and travel speed dictate the rate.
In this demo, the operator was using yellow TeeJet VisiFlo hollow cones (TX-VK3) which, despite the pressure-drop, were still operating at >300 psi and therefore beyond what the manufacturer lists in their rate charts. The resultant spray quality was Very Fine. We’ve said before that increasing the pressure does not increase the speed of tiny droplets appreciably, but that’s when we’re talking about going from, say, 60 to 90 psi. At pressures as high as 300 psi the droplets are moving fast enough to generate some air movement (i.e. making their own light wind) and there was a visible distortion of the outer potion of the crop canopy. The resultant coverage, even on the underside of a leaf (see below), was hard to fault.
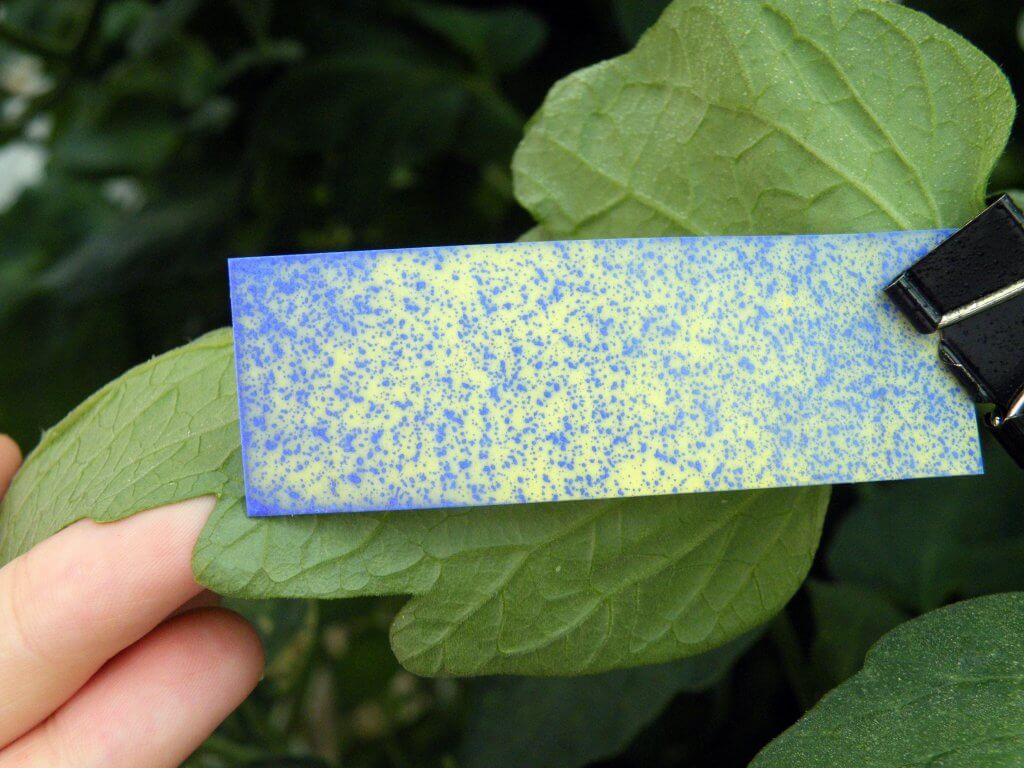
However, as one would expect with Very Fine spray, a lot of the mist didn’t go anywhere. So while the coverage was very good, it was not terribly efficient. I was left thinking there might be an opportunity to find a savings in spray mix and reduce the potential for operator exposure by lowering the pressure. Unfortunately the regulator would not allow us to reduce the source pressure appreciably, so we weren’t able to experiment.
Automated sprayers
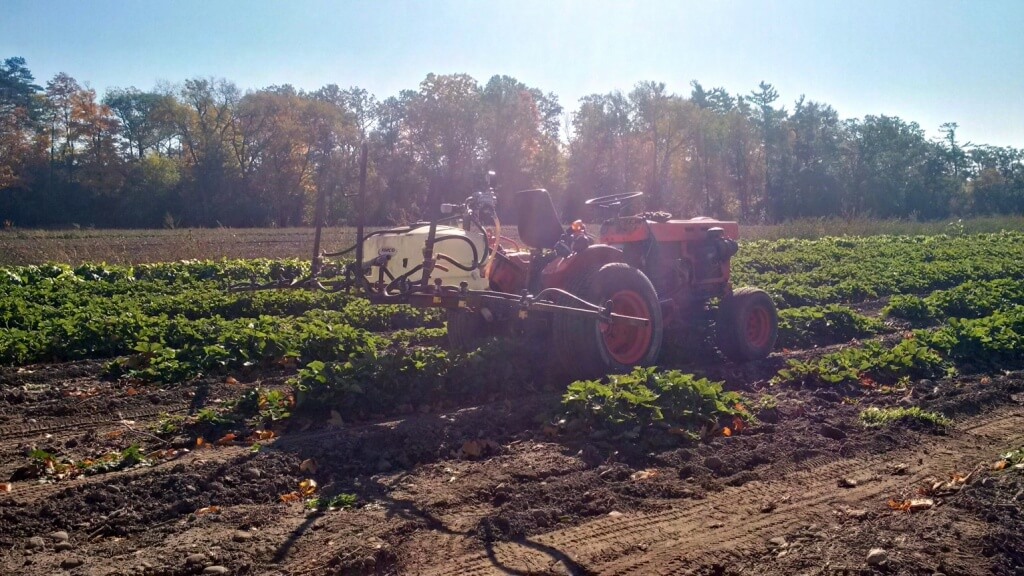
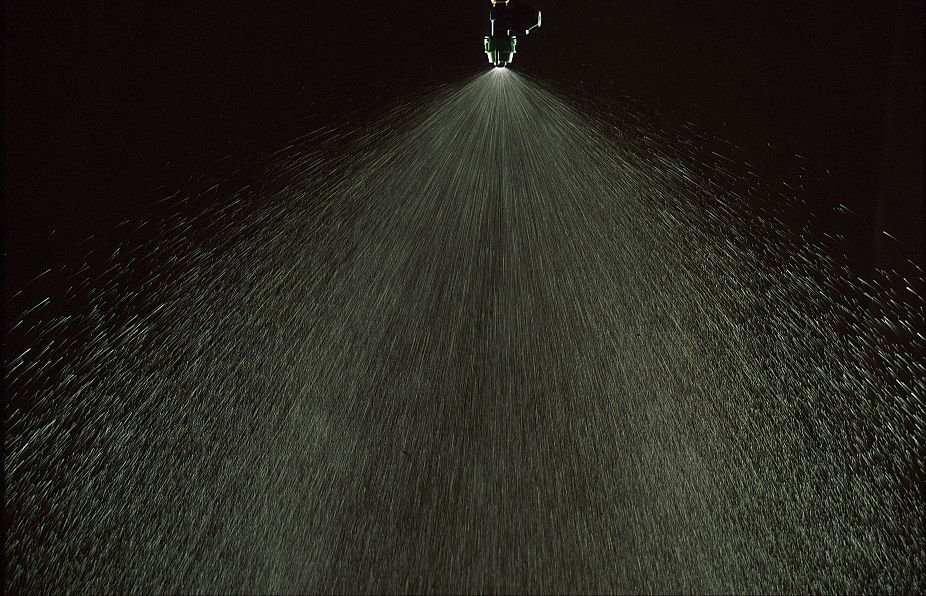
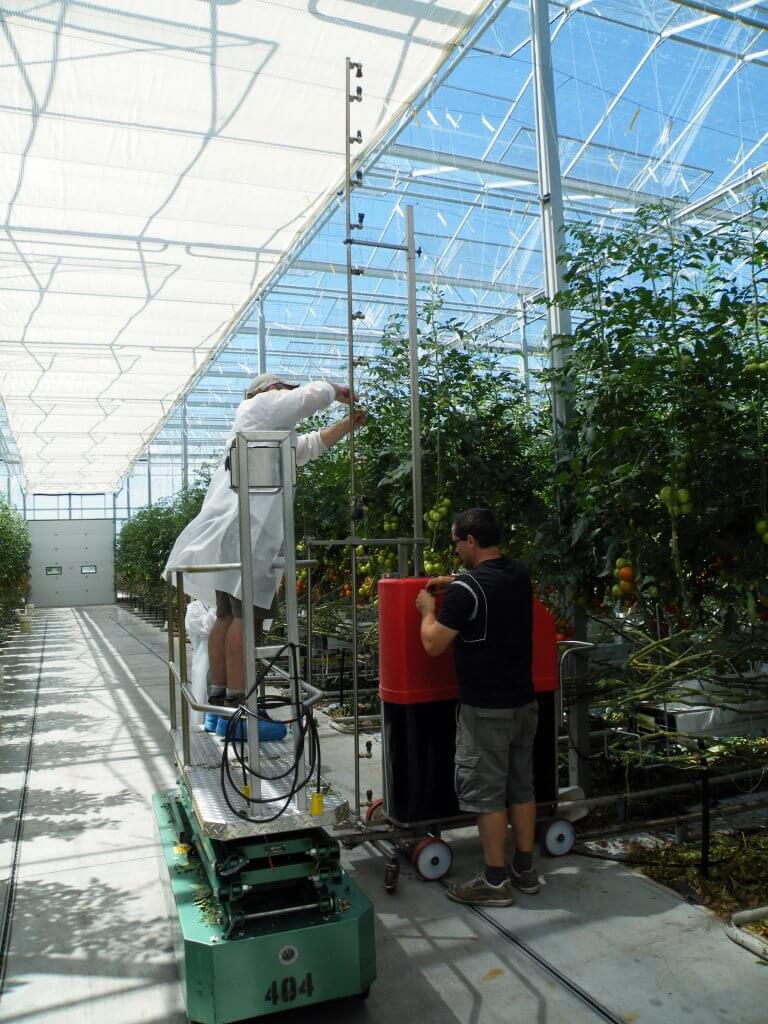
The next greenhouse we toured used a far more sophisticated method for applying pesticides. While they still used a centralized tank and pump, the sprayers were not hand-pulled trolleys; They were robots! Well, they were automated vertical booms that rode along the hot water pipes in the alleys between the crops. The operator would stand in the corridor and send one sprayer hurdling down the left-hand alley. The sprayer sprayed from only one side of the boom as it went. When it reached the end of the alley, the boom would rotate 180°. Just as it began the return trip, spraying the other side of the alley, the operator would send a second sprayer down the right-hand alley. As the second sprayer reached the end of it’s run, the operator would retrieve the first sprayer, and set it rocketing down the next left-hand alley. In that fashion, alternating back and forth, the greenhouse got sprayed.
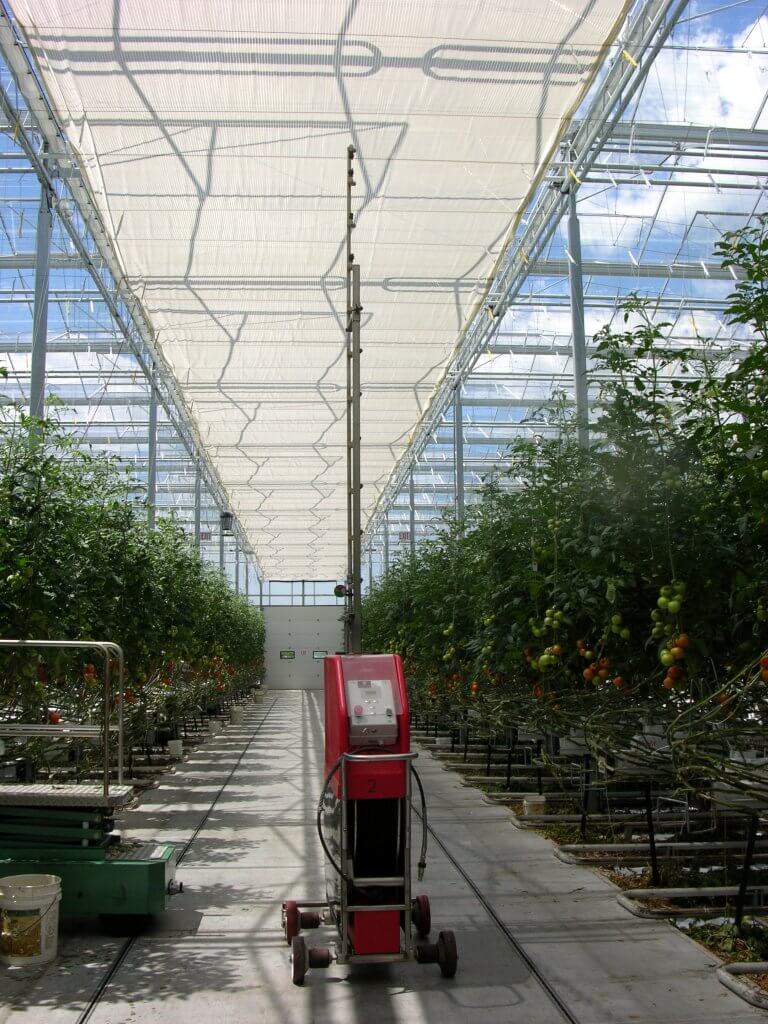
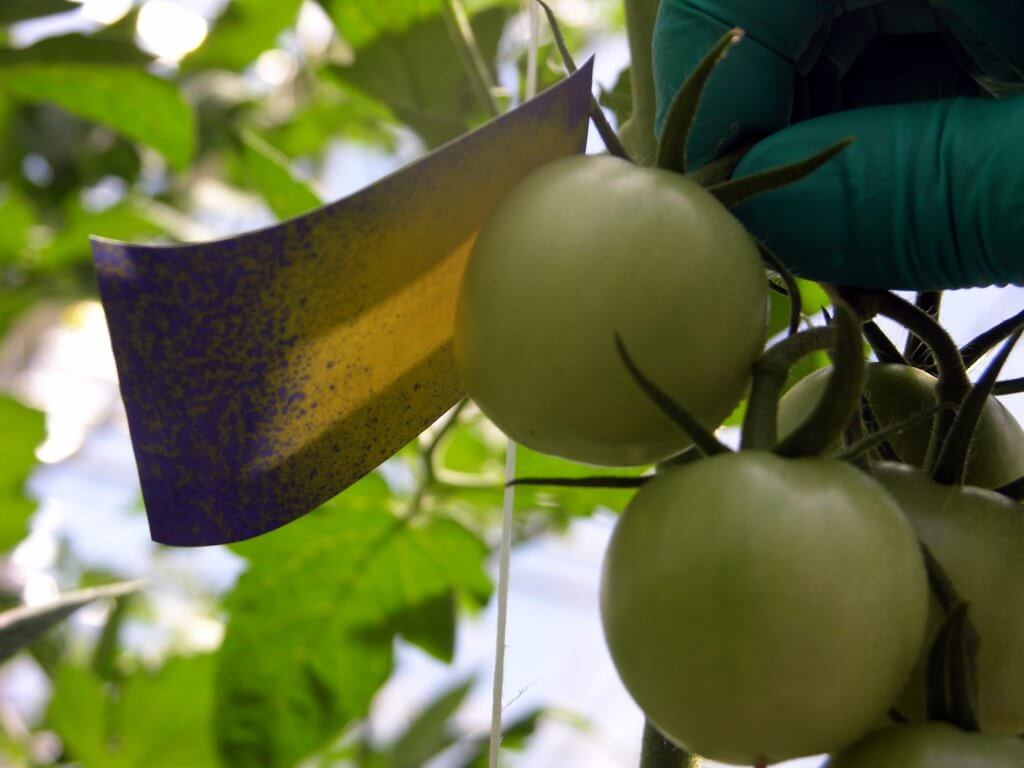
The automated sprayer was set to operate at ~350 psi, traveling at a rate of 75 meters per minute, spraying from a vertical boom equipped with five flat fan nozzles oriented vertically. Water sensitive paper (which has one face that goes from yellow to blue when water contacts it) was placed in three locations in the tomato canopy.
- One was placed directly behind the fruit with the sensitive face square to the sprayer.
- One was placed with the sensitive face facing the ground (this upside-down orientation exposed only the edge of the card to the sprayer).
- The last was oriented with the sensitive face aimed into the direction of the sprayer’s travel, again only exposing the thin edge of the card to the sprayer.
Flat fan nozzles
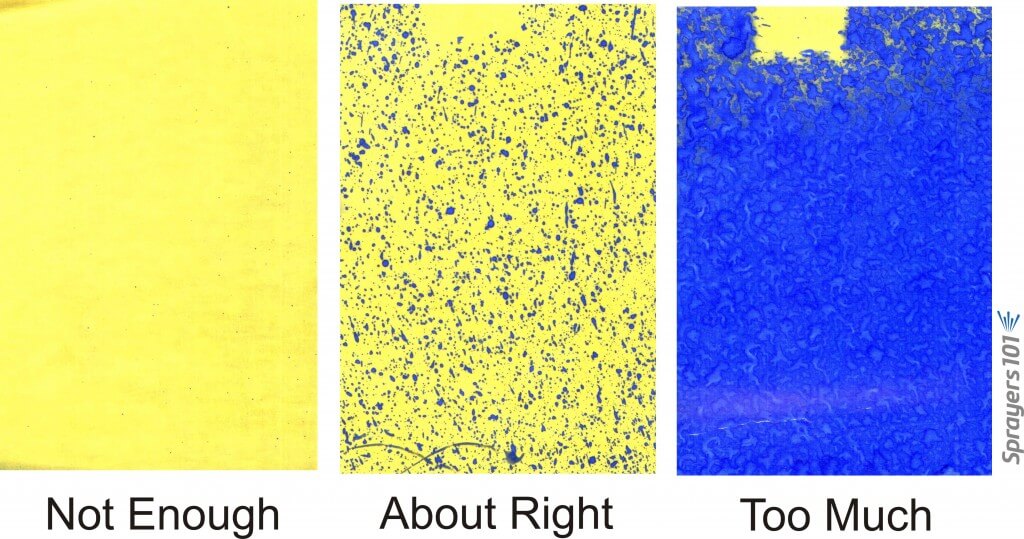
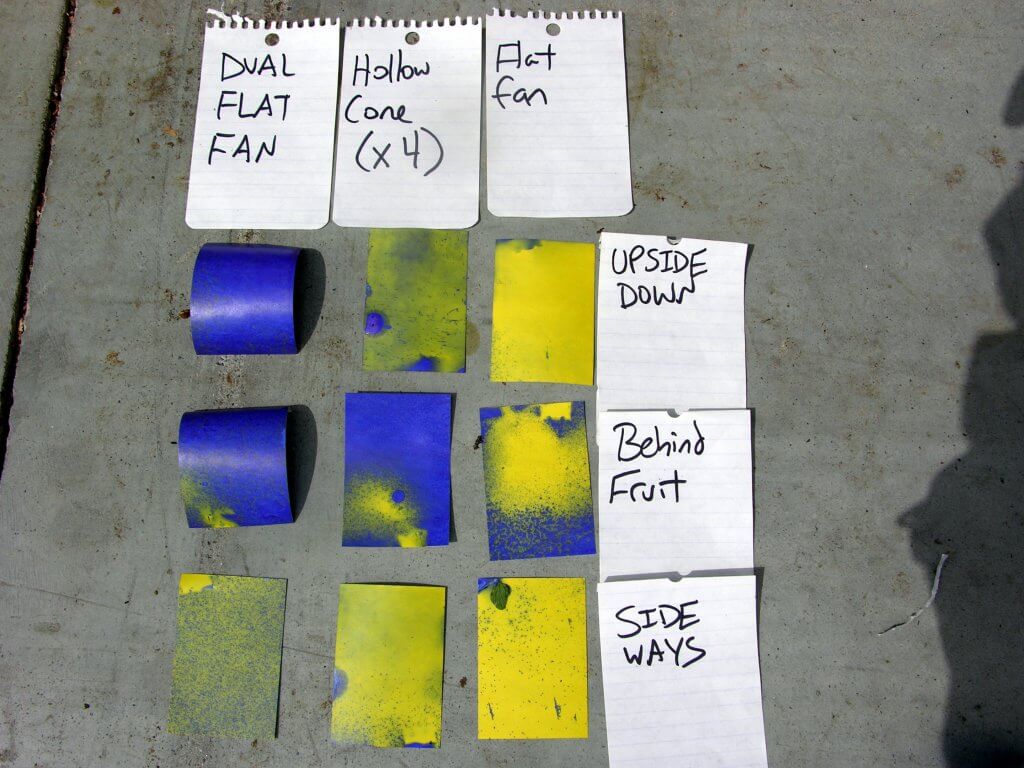
The sprayer was released to spray the 125 metre row using the flat fans. To the observer, it produced a cloud of spray that appeared to completely envelop the target row. Very little was seen to escape through the tomato canopy into the next row. When the cards were retrieved, however, the coverage was disappointing. See the right-hand column of papers entitled “Flat fan” in the image below. This goes to show that a spray cloud can fool you – always use water-sensitive paper to confirm spray coverage.
Hollow cone nozzles
Now, don’t look at the centre column of papers just yet (you just did, didn’t you?).
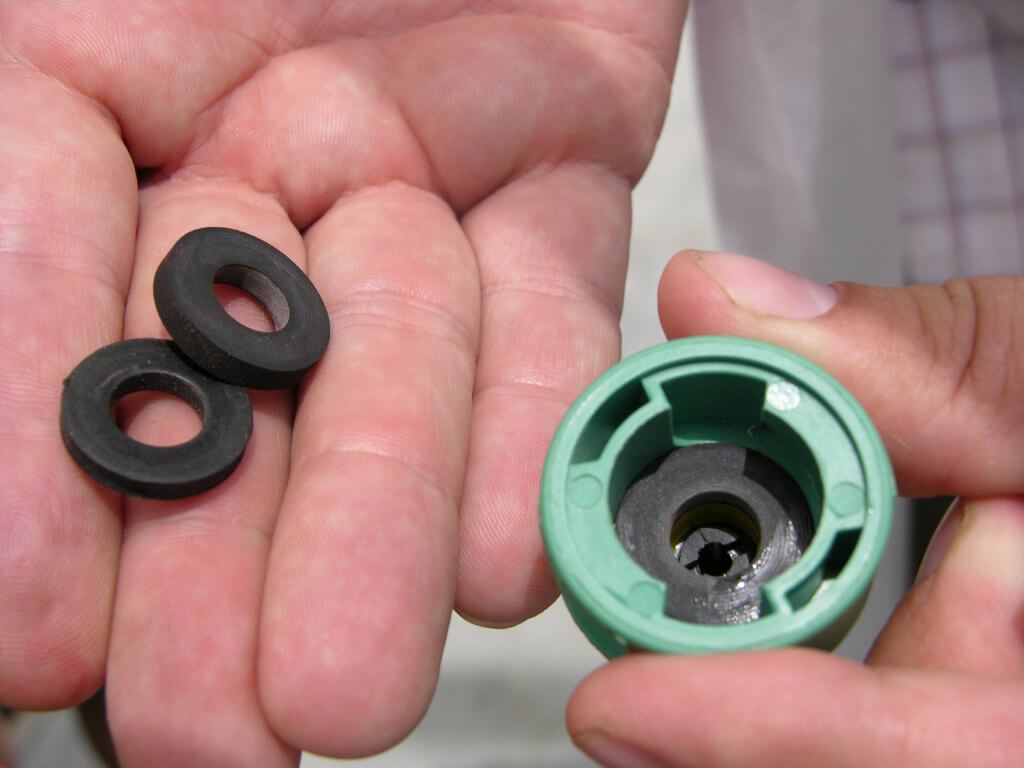
We chose to switch from the vertically-aligned flat fans to hollow cones. The concept was that the spray would be emitted from so many new angles that it would penetrate the canopy more effectively and hopefully cover more of the targets. I’ll note that we had to use extra gaskets to hold the nozzles firmly in place. The sprayer was re-nozzled, the paper targets replaced, and the sprayer sent back down the alley. Once again, the spray swath looked good to us, but when we retrieved the papers, there was almost no coverage; It was far worse than the flat fans.
Finer droplets have very little inertia, so perhaps the high pressure made the droplets too fine for them to move very far. To test this, we reduced the pressure to 100 psi and re-sprayed the same cards, which were simply left in place. The resultant coverage was not improved.
We left the papers in place for a third pass. This time we thought perhaps the spray was still too fine because of the nozzle itself. We replaced the hollow cones with a different set of hollow cones that produced coarser droplets and the same cards were re-sprayed. Still no practicable improvement.
We were getting desperate, now. Cards were left for a fourth pass. It has been demonstrated that a slower travel speed can improve canopy penetration in orchards, berry crops and and grapes, so perhaps the sprayer was moving too quickly? The sprayer was slowed to 50 metres per minute and the cards sprayed for a fourth time. Now look at the centre column entitled “Hollow Cone (x4)” in the figure below. This coverage is the result of four passes with hollow cones. It was disappointing.
Note: a greenhouse is a very hot and humid place. Water-sensitive paper begins to discolour quickly, so don’t leave them out for longer than you have to. That’s why the top paper is cloudy-looking.
Twin-fan nozzles
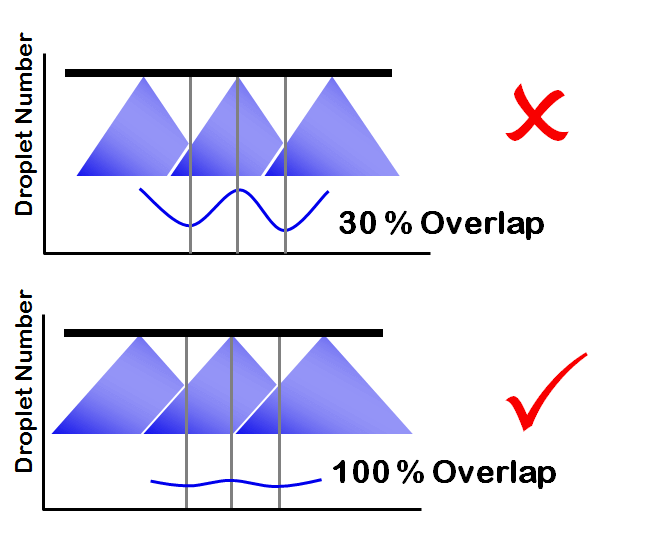
Finally, and only because I had them with me, we decided to try dual flat fans (in this case, TeeJet DG TwinJets). Symmetrical and asymmetrical dual fans are often used to spray vertical targets in field crops (e.g. to control fusarium in wheat heads). We oriented the nozzles so they alternated 45° left, then 45° right. We also turned off every second nozzle. The idea was to prevent the fans from physically intersecting, but still create an overlapping swath. The paper targets were replaced and the sprayer was returned to its original settings (i.e. 350 psi and 75 m/sec). We managed to twist them into that orientation by using a cap with a circular opening and additional gaskets to hold the nozzle snugly. Plus, at 350 psi, we had to get the nozzles extra tight to prevent leaks.
The result was spectacular. Here are the results once more (below). See the left-hand column entitled “Dual Flat Fan”. The cards received so much coverage that two became drenched and curled. Even the card with the worst coverage received more than enough. I will point out that this was achieved with about 2/3 the spray volume the operator typically used to spray with flat fans.
And, this is where the tour and our trials ended. The operator was happy with the improved coverage and so was I. I was sure to tell them that now that more spray was hitting the target, they should explore reducing the spray volume (either via reduced pressure or lower-rate nozzles) until all the papers looked more like the one in the bottom-left. I suggested a goal of about 85 drops per square centimetre (a benchmark for good coverage) rather than the drench/run-off we were currently getting. The spray mix would continue to be the same ratio of formulated product-to-carrier, but a judicious reduction in overall volume would result in reduced pesticide costs and reduced wastage as long as coverage was never compromised.
And now, a warning…
Unfortunately, as I heard two years later from a miffed agrichemical dealer, the operator did not follow through with the volume reduction. I was told the tomatoes began to exhibit symptoms that looked like blossom end-rot but he suspected it might be chemical burn. His hypothesis was that so much spray was getting to the tomatoes that it was accumulating at the bottom of the fruit during run-off, concentrating as the spray dried, and damaging the area. We may never know what really happened.
And so, it’s important to remember that whenever you adjust or calibrate your sprayer to improve spray coverage, you should reconsider how much spray you need to accomplish your goals. If you were getting poor control before the adjustment, improved coverage might help. If your level of control was already satisfactory, and your adjustments were intended to reduce wastage, consider reducing how much spray volume you use. This is called crop-adapted spraying.
Note: If you are concerned that changes to your spray practices might cause unwanted side effects, always perform trials on small test-plots and monitor the crop closely to ensure there are no negative impacts.
Take home
Greenhouse vegetable producers should consider using water-sensitive paper to test nozzle arrangement on their high volume sprayers. From our preliminary work here, dual flat fans at alternating angles might be worth exploring in hanging tomatoes. And, because it cannot be overstated, consider making changes in small test plots first and monitor the results closely.