- Calibrate sprayer: collect nozzle flows, average three reps, ensure within 5%, then use formulas to set speed, flow, or pressure.
- Set boom height for 100% pattern overlap, typically 50 to 55 cm; test on concrete pad; use a visual guide for consistent height.
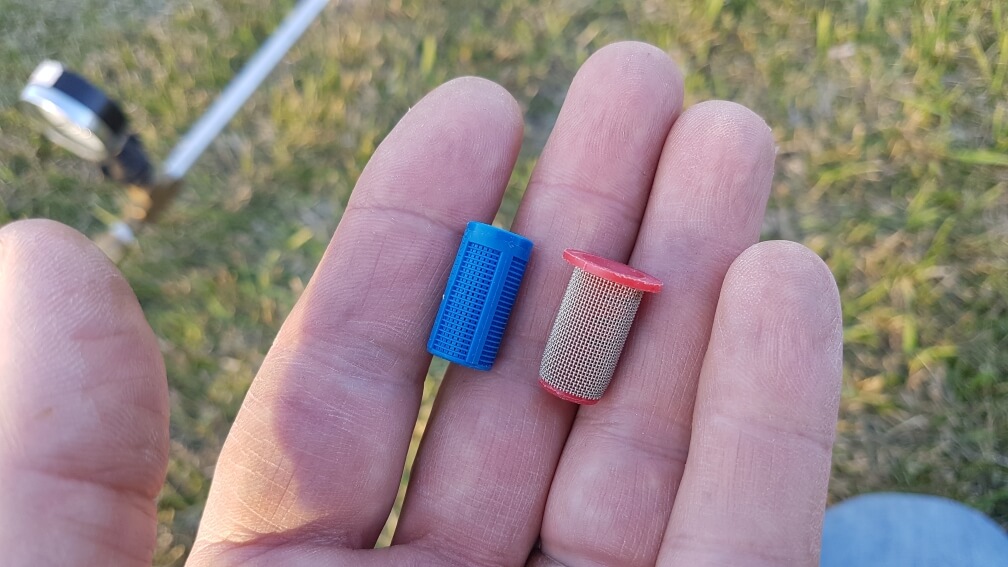
- Use diaphragm shutoff valves, avoid old check-valve strainers; prefer air-induction low-drift nozzles and carry spare identical tips.
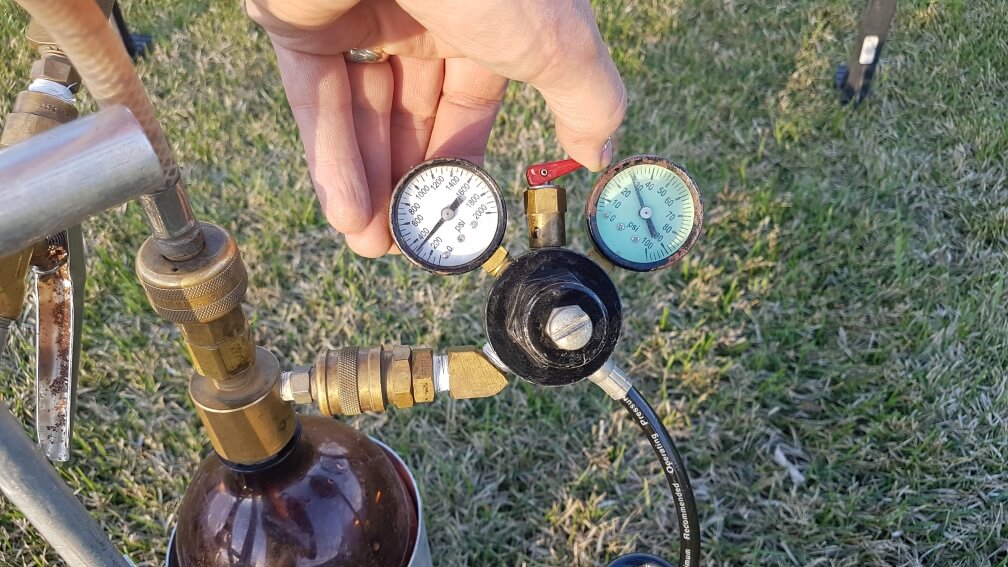
- Install a trusted pressure gauge on the boom, confirm boom pressure differs from regulator, adjust pressure to achieve required flow.
- De-pressurize before disconnecting hoses, spray out leftover mix in designated area, never pour on ground, empty booms between treatments.
This text was generated by OpenAI GPT 5 Mini
It’s the rite of passage of many agricultural summer students across the world: applying experimental treatments to field plots using a research sprayer. The results of these experiments may be the basis of new product use registrations, or provide clues into future scientific studies. Needless to say, the application method needs to be bullet proof to ensure the results are reliable. Here are a few guidelines, starting with some tips:
Pro Tips:
- When assembling a hand-held boom, ensure the threads are properly sealed using Teflon tape. More or less tape can be used to create a snug fit at the right part of the thread rotation.

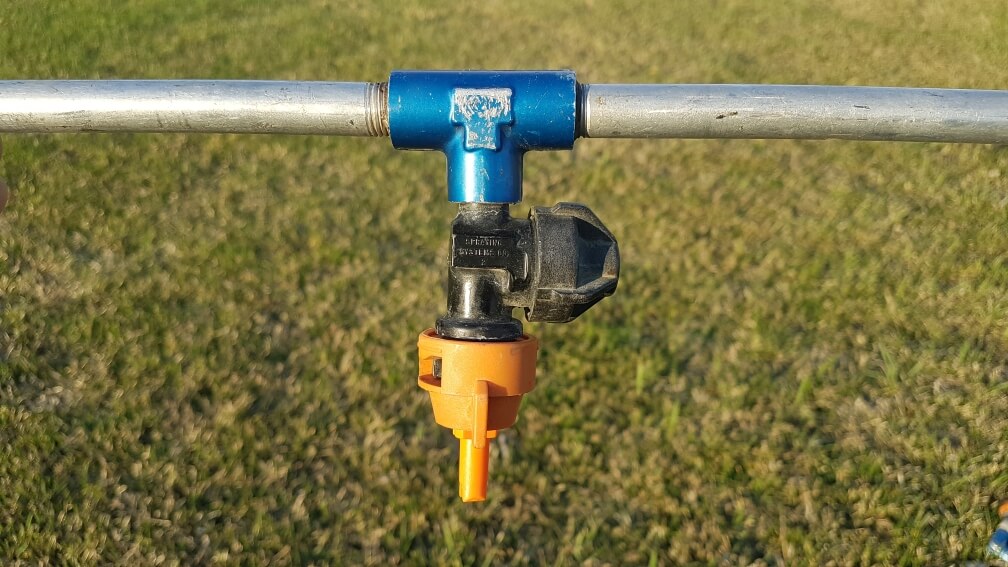
2. Choose nozzle bodies with diaphragm shutoff valves. These valves stop flow below 10 psi and prevent dripping of the nozzles after shutoff, without pressure drop during operation.
3. Avoid the use of older style “check-valve strainers”. Although these also prevent drips, they create a pressure loss of about 5 psi which creates uncertainty around the actual spray pressure.
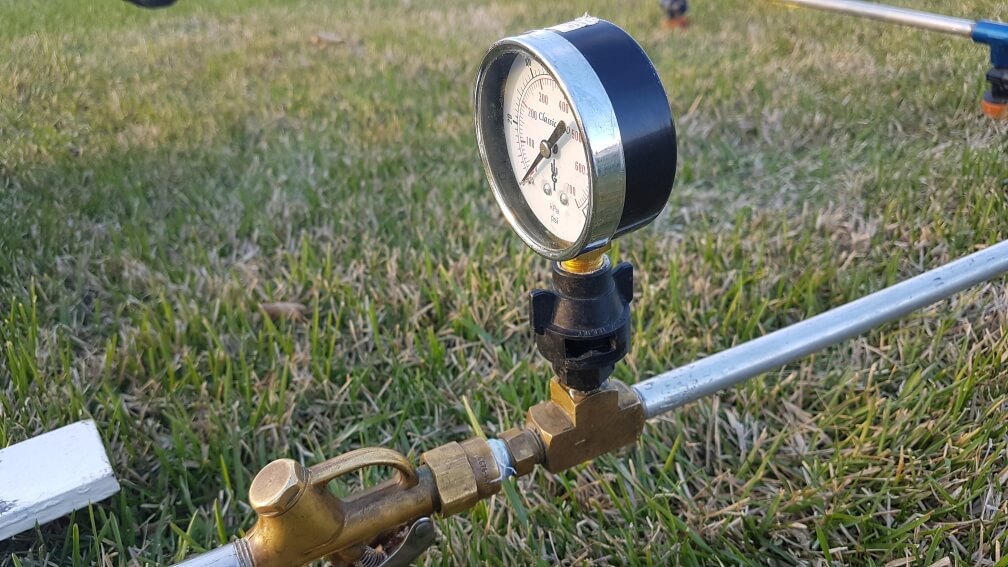
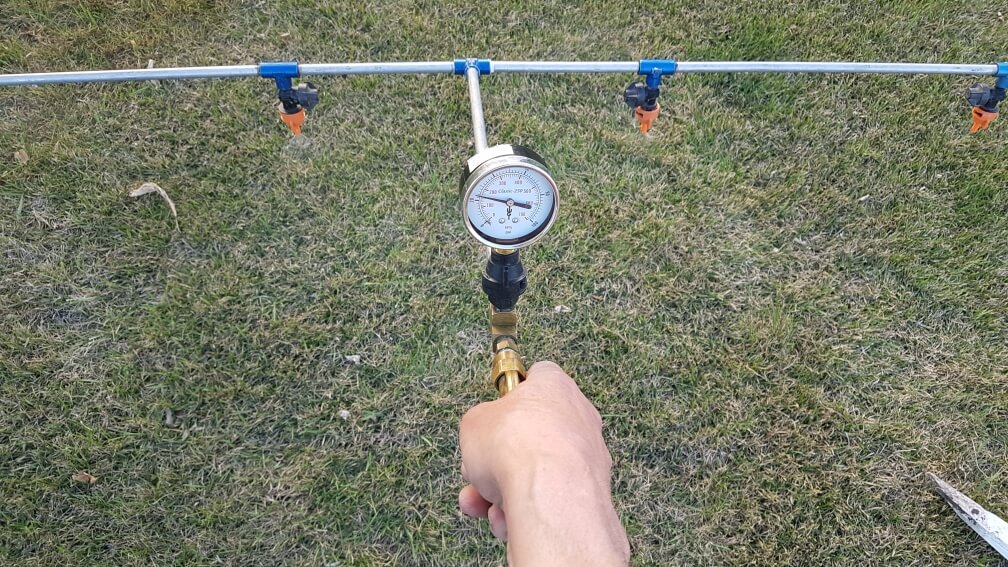
4. Install a trusted pressure gauge on the handle of the sprayer in clear view for the operator. This provides important information. Don’t believe the gauge on the regulator. Ours, for example, is stuck at 30 psi.
5. For hand-held booms, rotate the booms so that the nozzles point down, for each application. Different size people or height of crops will change this angle and make accuracy more difficult.
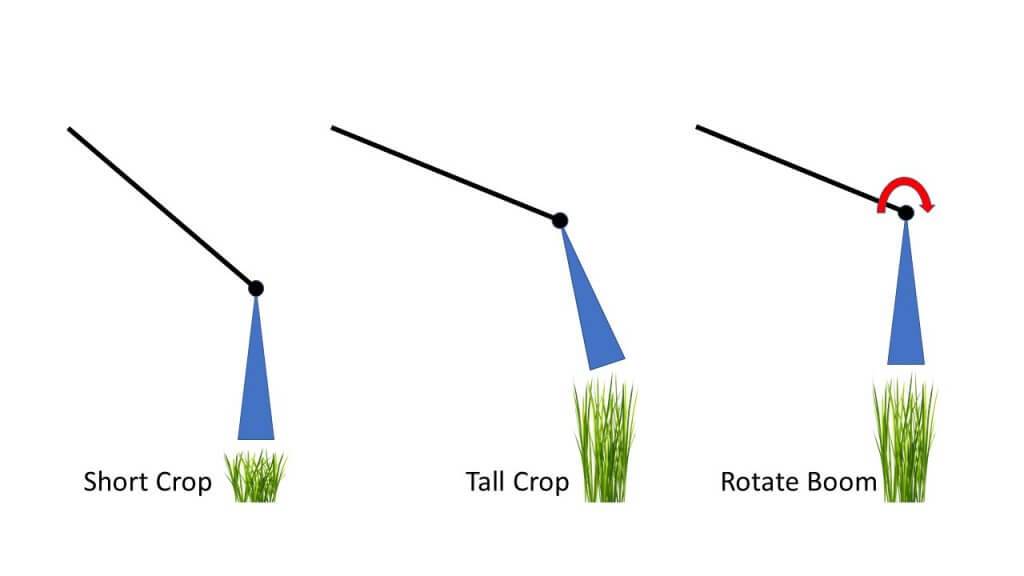
6. Set the boom height so that you achieve 100% pattern overlap. This means that a nozzle’s pattern width should be twice the boom’s nozzle spacing. Boom height will be close to 50 to 55 cm above target, depending on fan. Too low, and the pattern may cause striping. Your supervisor will see that all year long and think of you.
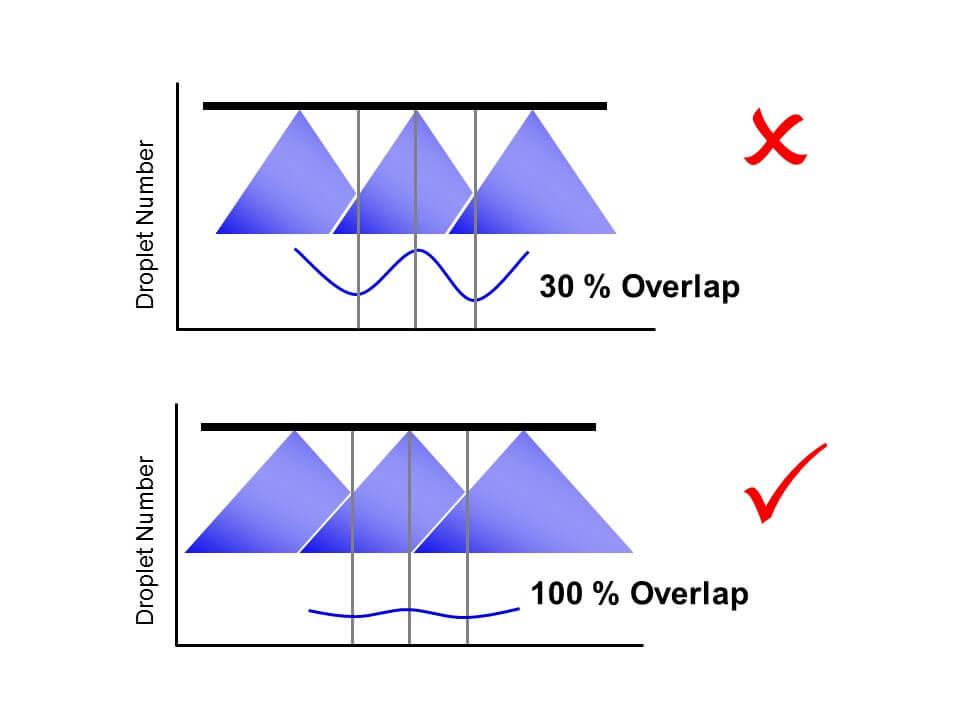
7. You can test the spray pattern by applying water to a concrete pad. At the right boom height, the entire boom width should dry at a similar rate.
8. Install a visual guide for boom height. For example, place a wire flag at the end of the plot, at the correct height. This will provide a handy reference of boom height as your arms get weary. Or hang a wire, zip tie, or chain from a spot that doesn’t interfere with your spray pattern (thanks ACC).
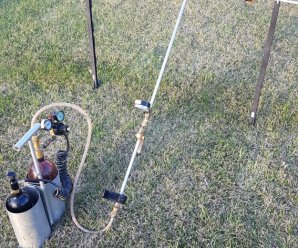
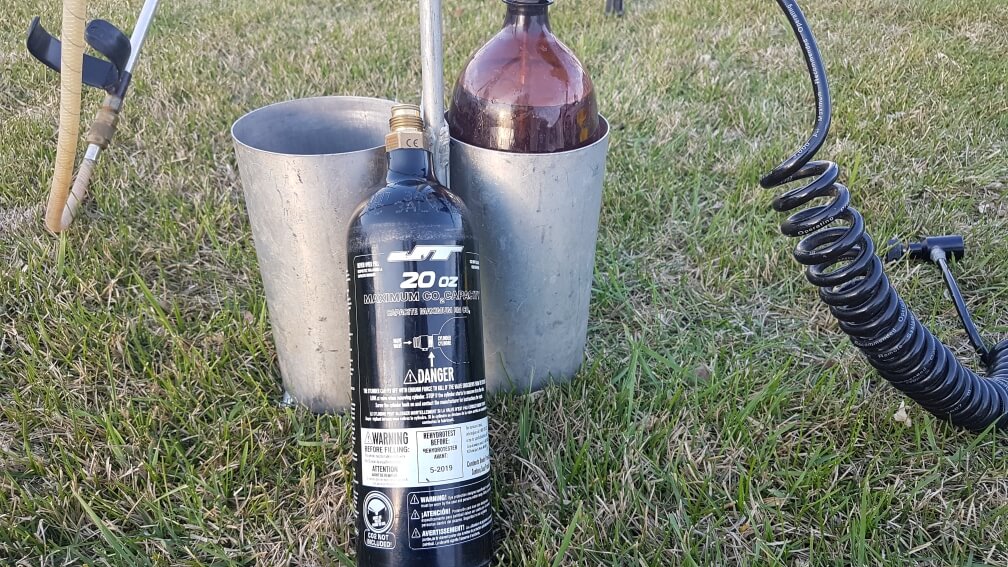
9. Minimize weight by using smaller bottles of CO2. We use 20 oz paintball bottles, they are much lighter, last long enough, and can be legally refilled with liquid CO2 or topped up with gas from a nurse tank in the field.
10. Spray out leftover mix in a designated part of the plot area. Do not pour any mix on the ground. Please. Consider a biobed on your research farm.
11. When completing a treatment, spray the boom completely empty so air comes out of each nozzle. This provides certainty that the next liquid at the nozzles is from the next bottle, be it water or another treatment.
12. When spraying dose responses of the same product, always start with the lowest dose. Again, spray out in a designated place until the boom produces air, no need to flush.
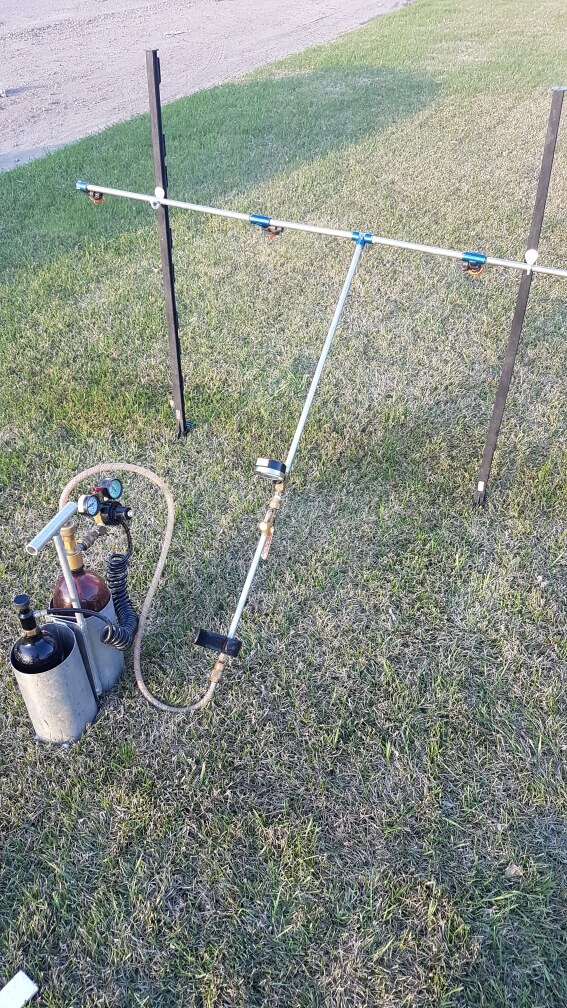
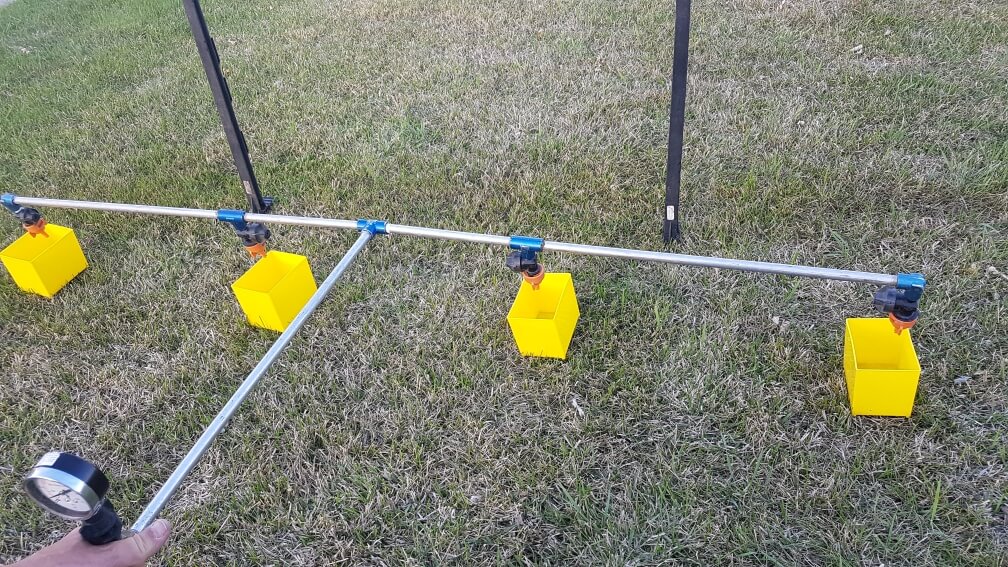
13. Construct a boom hanger from electric fence posts and coat hangers. Nozzles face down and can be serviced. The boom should never lie on the ground.

14. Use nozzle screens to prevent time delays due to plugging. Usually 50 (blue) or 80 (yellow) mesh is sufficient. Any finer mesh may interfere with some dry formulations. Note: Beware old screens – ISO mesh colours have changed. Learn more here.
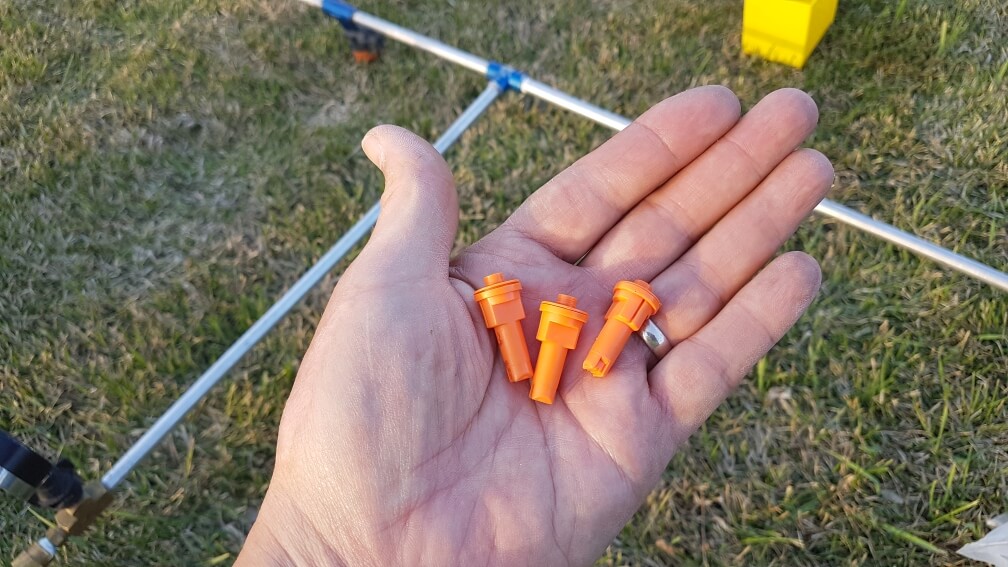
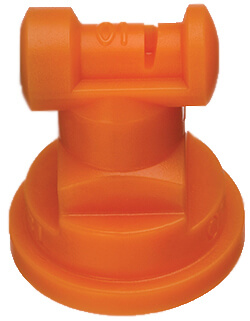
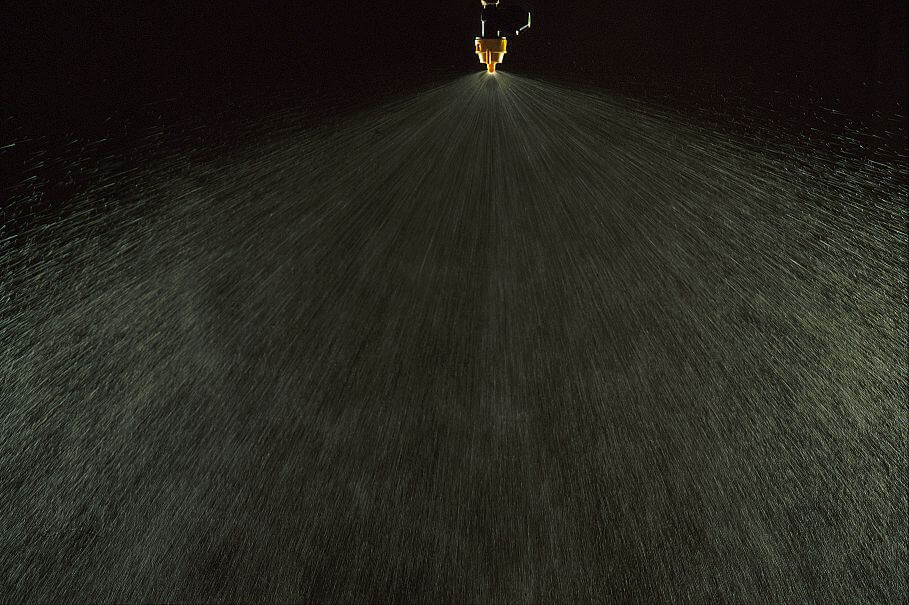
15. It’s very useful to apply research sprays with low-drift nozzles. Air-induction tips are most effective. These reduce drift, and are also closer to the commercial spray quality used by producers.
16. 01 size (orange) air-induced nozzles are available from Albuz (AVI Twin and AVI), Arag (CFA, CFAU, AFC), Billericay (Air Bubble Jet), Greenleaf (AirMix and TurboDrop XL), Lechler (ID3 and IDK). No other major manufacturer produces this small size of tips in air-induction.
17. 015 size tips (green) and larger are produced by the above, as well as Albuz (CVI Twin and CVI), Hypro (GuardianAIR or ULD) and TeeJet (AIXR, AI, and TTI), within both manufacturers listed in order of increasing coarseness.
18. Always carry several other nozzles of the same size and type already on the boom. Should a nozzle plug, replace it, don’t clean it. Clean it later.
19. If a nozzle plugs and there is no extra nozzle, use compressed air to clean it. Compressed air electronics cleaners are available in most electronic stores.

20. If a plugged nozzle can’t be cleaned, simply place it at the end of the boom and continue. Plot ratings and yields are usually taken from the centre. Remind your supervisor of this.
21. Always de-pressurize a sprayer before disconnecting any liquid hoses. You can’t rely on check valves. If two people work together, make sure you practice and communicate this with each other.
Calibration:
- Assemble the sprayer and run water through it to ensure it’s free from silt or residue. Repair leaks.
2. Install nozzles and ensure none are plugged and the pattern looks good.
3. While spraying water, set pressure to what you intend to spray with. (Note: boom pressure will be lower than regulator (attached to CO2 canister) by a few psi, hence the separate pressure gauge on the boom. Also note that the set pressure will always be higher when the system is at rest.)
4. Obtain four containers of similar size that can hold about 500 mL, and place on ground at nozzle spacing. Using stopwatch, emit spray directly into all four for a set time, say 30 s.
5. Expected spray volume at 40 psi: 01 tip, 380 mL/min; 015 tip, 570 mL/min; 02 tip, 760 mL/min. In other words, from a 2 L bottle you’ll not get much more than 30 s spray time from 4 tips.
6. Measure collected volume from four tips using the same graduated cylinder.

7. Repeat, for total of three times.
8. Average three reps for each nozzle and convert to mL/min. Make sure all nozzles are within 5% of the average flow. Replace those that aren’t or place worst offender on outside edge of boom.
9. Advance to “Calculations”, but be prepared to conduct another calibration
Now for the fun part.
Calculations
There are three options for applying the correct amount. We’ll be using metric in these examples:
- Use the average nozzle flow from the calibration (mL/min) and the target application volume (L/ha) to calculate the necessary walking speed (km/h);
or - Use the flow from the calibration and a set walking speed to arrive at an application volume;
or - Use a set walking speed and a set application volume to calculate a required calibrated flow.
Option 1:
Walking Speed = (60*flow)/(Volume*nozzle spacing)
If your nozzle flow was 330 mL/min and you wanted to apply 100 L/ha using a sprayer with 50 cm nozzle spacing, your required walking speed is 60*330/100/50 = 3.96 km/h
Option 2:
Application Volume = (60*flow)/(Speed*spacing)
If your nozzle flow was 330 mL/min and you wanted to walk 5 km/h using a sprayer with 50 cm nozzle spacing, your application volume is 60*330/5/50 = 79 L/ha
Option 3:
Required flow = (Speed *Volume*spacing)/60
If your speed is 5 km/h and you wanted to apply 100 L/ha using a sprayer with 50 cm nozzle spacing, your required flow is 5*100*50/60 = 417 mL/min
If you selected Option 3, you now need to return to your sprayer and find a nozzle, or a pressure, that delivers an average of 417 mL/min. You can use math to get into the ballpark with the nozzle you already have:
New Pressure = (required flow/calibrated flow)2*calibrated pressure
If your required flow is 417 mL/min and the calibrated flow is 330 mL/min, and you calibrated at 30 psi, then you should be close to your required flow at (417/330)2*30 = 48 psi
Now, return to your sprayer, set the pressure to 48 psi, and confirm this estimate.
We use Option 3 when comparing nozzles of the same size but from different manufacturers. It’s not uncommon for these to have slightly different outputs. Rather than adjusting our walking speed slightly, which is very difficult to do accurately, we change pressure slightly so all nozzles produce the same flow. This is also useful when comparing water volumes by switching to a larger nozzle.
Travel Speed:
The last step is to confirm travel speed. Say you want to walk at 5 km/h. The best way to calibrate walking speed is to measure a known distance (m) in the field you’ll spray. Wearing the gear and carrying the sprayer you will use to spray, walk this distance. Use a wire flag to mark the start and end points; when the boom hits the flags, start and stop the timer. Repeat until comfortable.
Time needed to walk distance:
Time (s) = Distance *3.6/required speed
Say your walking distance is 10 m, and you need to walk 5 km/h.
10*3.6/5 = 7.2 s
A simple spreadsheet that can be used for the calculations can be found here.
Congratulations! You’re done. Happy spraying! Remember to not worry too much about a 5% deviation from your expected application. That’s definitely an acceptable error, as long as you don’t allow too many of those to add up.
Low Volume Research (Aerial)
Some product uses are by air, and the label volumes for those are often 30 to 50 L/ha. Registrants need to provide efficacy data at those volumes. Ground application can be accepted as a surrogate for aerial as long as the volumes are correct.
Since the spray nozzles aren’t typically available below the 01 (orange) size and if they are, they usually plug so easily and make such a fine spray that they’re frustrating to use. The alternative, to travel faster, is also problematic on research plots.
We recommend that Turbo TeeJet nozzles be used for this purpose. They produce such a wide fan angle that a 100 cm spacing is justifiable. Simply cap off every second nozzle body. Booms need to be elevated to ensure overlap, for uniformity. The value of the small nozzles and wider spacings is the low total application volume that is now possible.
The TT tips can also be used at fairly low spray pressures (say 20 psi) further reducing their output.

/