Tag: spring

  • Adjusting Orchard Airblast Sprayers for Spring

    Adjusting Orchard Airblast Sprayers for Spring

    For those on the fly, hit play to hear a shortened, narrated version.

    I have far too many photos and videos of airblast sprayers blowing straight up through treetops, or downwind through the last row, during spring applications. I chose not to include any in this article to avoid people recognizing the operations. If you haven’t seen anyone doing it, maybe it’s you!

    I recognize that it can be a tricky balance to adjust a sprayer for spring applications. It’s counterintuitive, but a bare tree can be difficult to spray. Young and/or bare trees represent small targets which have a very low catch efficiency, so a lot of spray will miss. Switching nozzles to adjust rates doesn’t help much in this regard – it’s far better to adjust travel speed and air settings, and we’ll get to that in a moment.

    That lack of foliage also means wind moves through the orchard unabated, so the sprayer may have to blow a little harder into the wind to compensate. In the case of a low-profile axial sprayer, which blows laterally and upward, that means creating greater risk for blowing too high, and blowing through downwind rows.

    That off-target deposition represents a huge loss of materials and potential for drift incidents. To add insult to injury, many of those early season applications often have oil components, which require a drench (higher volume) and are more easily seen by bystanders (opaque droplets). All in all, it’s a bad time of year for crop protection PR. Learn more about drift and drift prevention here: BeDriftAware.

    Air Adjustments

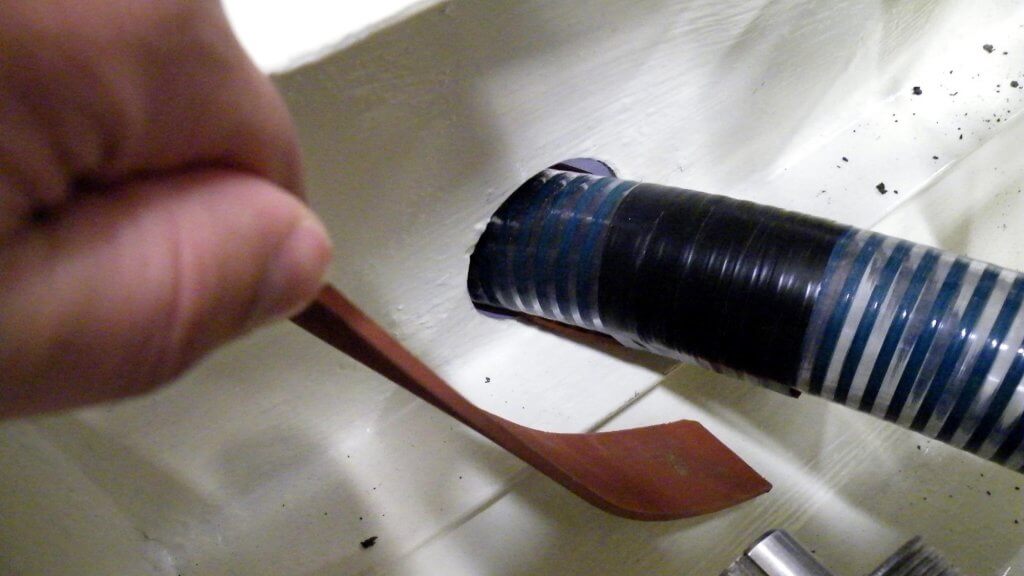
    So, let’s start with air. Air carries spray droplets, so perform a ribbon test to ensure the air outlets are oriented correctly. This is achieved by adjusting deflectors (e.g. low-profile axial), the air outlets on a tower, or the entire head on a wrap-around design with individual fan/nozzle combinations.

    Spray height should always exceed the canopy height by a small degree. This compensates for the increase in wind speed with elevation, the potential loss of spray height with faster travel speeds, and uneven alleys that cause the sprayer to rock, which changes the spray angle.

    It is less critical that spray align with the lower portion of the canopy. As air energy wanes, or as droplets begin to lose momentum, finer droplets will slowly fall, depositing on random surfaces. Coarser droplets will quickly fall towards the bottom of the canopy, settling primarily on upward-facing surfaces. This secondary deposition can also occur from the cumulative impact of blow-through from upwind rows.

    Nozzle Adjustments

    Now pay particular attention to which nozzles are on or off. Park the sprayer in an alley. Stand behind the sprayer and extrapolate a direct line from each nozzle to target canopy. Nozzles that point at the canopy should be left on. Nozzles that point above or below can be blocked, or turned off, via valves or rotating roll-overs.

    Some roll-over nozzle bodies can be swiveled up or down 15 degrees to fine tune the spray angle. An alternative would be to permanently rotate the nozzle body fitting in the boom line. When aiming nozzles using a roll-over nozzle body, be careful not to swivel them too far or the valve will partially close and compromise the spray pattern.

    When extrapolating, remember that the centre of a nozzle only indicates the centre of the spray pattern. Cone and fan angles can span 60 to 110 degrees, depending on the influence of air. Therefore, even though the centre of the lower-most nozzle intersects the bottom of the target canopy, you may still be able to turn it off because the nozzle above has that portion covered.

    Travel Speed, Wind, and Coverage Assessment

    Now let’s consider travel speed. If the wind is blowing hard through the orchard, you can increase the air speed or slow down the sprayer to focus longer. However, in both cases, you run the risk of overblowing the downwind rows by a considerable margin. Easily three rows in a high-density orchard.

    This downwind coverage is cumulative, so when you assess your coverage (preferably using water sensitive paper), don’t do so until you’ve made a few upwind passes. So much of that spray ends up on the orchard floor, and still more evaporates or blows up, but some of it will hit and it adds up.

    Downwind Boundary

    Finally, pay attention to where you are in the block. It may be necessary to turn off the downwind bank of nozzles on the final downwind three (or more) rows. That means you’ll be performing the dreaded alternate row (one-sided) application, and I’ll be the first to say that’s not ideal. However, in this case, the spray will blow back and help cover the unsprayed side. Again, use water sensitive paper to confirm the job you’re doing.

    Final Thoughts

    And, of course, seriously consider when it’s time to wait for better conditions. No one likes to do that, especially when rain is imminent and the ground stays soft, but the alternative is a lot of waste and a poor application. If this always seems to be the fight you’re having, maybe it’s time to consider the return on investment of a tower sprayer, or a shrouded sprayer. Towers improve matters since they more easily reach the treetop without having to blow as hard, and without angling air upward. Shrouded recycling-style sprayers (if they fit the architecture) help even more.

    Plan to do all of this (especially the capital investment number crunching) before the season starts and be prepared to change sprayer settings on the fly, as required. Don’t be the subject of my next spring drift photo.

  • Airblast Spring Start-up and Winterizing

    Airblast Spring Start-up and Winterizing

    Any description of airblast sprayer start-up must, contextually, make assumptions on how it was winterized for long-term storage. This cyclic relationship is why I use a chicken-and-egg title slide when giving this presentation.

    Answer: It was the rooster.

    The inability to describe one process without the other is further complicated by the possibility that the sprayer is brand new and was therefore never winterized. So, what follows is an attempt at a logical sequence of pre-season maintenance activities to restore a winterized sprayer, or initiate a new sprayer.

    New Equipment

    If this is a new sprayer, you have an opportunity to perform some preventative maintenance.

    Loosen, lubricate and re-tighten clamps. Always back gears off before tightening to avoid stretching them. (Image from Purdue Extension publication PPP-121: Preparing Spray Equipment for Winter Storage and Spring Startup)
    Use double clamps on pressurized lines for added safety. Wider clamps are better and T-bolt clamps are better than worm-gear.
    Put thread release on bolts and re-tighten with a torque wrench (not an impact tool). Use a paint pen to mark nut, washer and bolt for future visual checks. This is called a “Witness Mark”.
    Protect hoses and wires at rub points. Follow hoses and with a paint pen, number the hose-ends and connections for future reference.
    Using a new tractor? You may have to re-calibrate to account for different gear ratios. When hitching a new sprayer, note that the distance from the ball on the drawbar hitch to the tip of the PTO should be ~14″. Don’t exceed maximum working angles for PTO shafts (usually <25 degrees). If your tractor or implement manufacturer says differently, go with that. And get it in writing.

    Winterizing (Long-term storage)

    If you are preparing the sprayer for long-term storage, follow the normal rinsing process, but don’t reinstall strainers and nozzles.

    Look in the nozzle bodies for debris. Discard worn or broken nozzles.
    Soak, scrub, rinse and store nozzles and nozzle strainers. You may replace them once the sprayer is clean, but I prefer to store them separately since they have to come back off during start-up.

    With the agitation on, circulate undiluted plumbing antifreeze (the sprayer already has 5-10 L (1.25-2.5 gallons) of water in the system from the decontamination process) for five minutes and drain it through the plumbing system (not the booms).

    Disconnect hoses where they attach to the booms and drain as much liquid from the sprayer as possible. (Image from Munckhof Sprayers). Take the time to examine any hose fittings.
    Clean the sprayer (Triple rinse with a detergent) and scrub the exterior. Do not use pressure washers on bearings, fittings, pumps or any lubricated or moving parts.
    Examine fan blades for cracks, build-up or nicks that can cause imbalance. Replace (not just repair) punctured entrance grills.
    Don’t ignore tank damage. Poly tanks are prone to sun damage and cracks. Never climb into a tank to repair it. Quite often, replacement is the best option.
    Clean and inspect wheel assemblies. It’s best to do this during winterization to prevent bearing corrosion as the sprayer sits all winter.
    Remove any rust and repaint (or just touch up). Paint not only looks good, it protects.
    The excellent YouTube channel Ask Tractor Mike proposed storing the PTO shaft indoors in two pieces, and to cut away a portion of the interior guard to facilitate reassembly later on. Also, use a paint pen to mark the splines on the shaft for easier hook-up (see inset top-right of image).
    RV antifreeze is a 50% solution of antifreeze and water with a rust inhibitor. It should not cause phytotoxicity if sprayed or dumped, but be sure to dispose of it away from water sources during start-up. Turn the pump manually to get antifreeze throughout the system. Close the nozzle bodies, loosely fit the tank lid and store indoors. (Image from Purdue Extension publication PPP-121: Preparing Spray Equipment for Winter Storage and Spring Startup).

    Spring Start-up

    Most operators are guilty of neglecting their airblast sprayers and babying their tractors. Sprayers are precision tools that must be kept in good operating order to prevent costly breakdowns, improve their performance, and increase their lifespan.

    Your car is serviced based on distance travelled. Your sprayer should receive regular maintenance based on working hours, per the manufacturer’s recommendations. Daily sprayer inspections are part of regular maintenance since the operator will (hopefully) find small problems before they become big problems.

    Never assume your sprayers is ready to go right out of long-term storage. Parts seize, scale breaks away from surfaces, and small beasties sometimes choose to eat, or make their homes in, cozy sprayers.

    When planning spring start-up, never assume the winterized sprayer is ready for immediate hook-up. Expect a minimum half day per sprayer.
    Attempting to loosen or shift something that hasn’t moved in several months is risky. Pressure gauges snap off, fittings crack, welds break. Expect the unexpected and either have spare parts on hand, or a plan to get them quickly.
    Parts are most likely to seize during the first spray. Bearings and PTO universal joints, especially.
    Start-up is a good time to lubricate parts. Grease the guard ring bearing every 100 hours, the universal joint cross every 25 hours and the shaft and shear bolt regularly.
    Insects, birds and rodents eat, or make homes in, sprayers. Professional rodent bait/traps, steel wool and peppermint oil/gel are possible solutions.
    Check belt tension, alignment and wear. (Image from Purdue Extension publication PPP-121: Preparing Spray Equipment for Winter Storage and Spring Startup).

    Pump specific maintenance is beyond the scope of this article. Hypro recommends changing oil after 40 hours of break-in operation and every 500 hours after that. The diaphragms should be replaced every 1,000 hours. Generally speaking, EPDM (black) diaphragms are a better choice for airblast sprayers, while the Desmopan (amber) diaphragms are really for lawn care sprayers.

    Pump maintenance is beyond this article, but change the oil every 500 hr or 3 months. Use a paint pen to write on the pump what type of oil it requires, and then date the filters. Note the “winterized” sticker.

    At minimum, check the tire pressure. Hard tires drive faster, but leave compacted ruts. Soft tires drive slower, but disperse weight better. Airblast sprayer wheel assemblies should be cleaned and inspected as part of regular annual maintenance. Wheel bearing maintenance before long-term storage may prevent water from corroding the bearings.

    Ensure tire pressure matches the ideal stamped on the tire. Or, if using less pressure to avoid spring soil compaction, ensure both tires have the same pressure.

    The relief valve on your sprayer should always be in the bypass position during start-up. If your gauge spikes then the gauge may always read high afterwards and should be replaced.

    A reminder to always set the relief valve to the bypass position when starting up the sprayer. This is one reason why pressure gauges spike and can eventually fail.

    Replacing leaking, opaque or inaccurate gauges improves sprayer performance. Be sure to use the oil-filled variety of gauge to eliminate a bouncing needle. You can also get suppressors that fit between the gauge and sprayer to prevent pulsing. Consult the article on testing airblast pressure gauge reliability.

    Use a wrench to turn gauges at the nut. Don’t twist them by hand holding the face. Ensure they are not opaque, leaking, plugged or resting above the zero pin.

    Many spray materials do not mix well and one of the common causes of uneven application is poor agitation. If you find deposits at the sump in the bottom of the sprayer after an application, your agitation is insufficient. For mechanical agitators, check for propeller wear and ensure paddles are secure on the agitator shaft. Learn more about agitation here.

    If the agitator shaft is leaking a little, tighten the packing. The packing gland is a common source of leaks. Keep it properly greased. If a leak occurs you can usually repair it by tightening the bolts on the packing gland by ½ a turn, but if that doesn’t work you may have to remove and repack (or replace) it.

    On sprayers with mechanical agitators, look for prop wear and loose or damaged paddles. Fill the sprayer with water and looks for tank leaks. Tighten the bolts 1/2 turn if the packing gland on the agitator shaft is leaking. You may have to remove and repack the gland if the leak persists.
    Look for signs of hose wear and examine the sprayer for leaks while under pressure. Be careful when pressurizing the sprayer for the first time in the spring; this is when lines are likely to come loose or burst. (Image from Purdue Extension publication PPP-121: Preparing Spray Equipment for Winter Storage and Spring Startup).
    Minerals chelate (i.e. scale) more readily on stainless steel than plastic tanks. In either case, the first tank of water and leftover antifreeze should be sprayed from the nozzle bodies with no line or nozzle strainers, and no nozzles. Replace them once the tank is sprayed out.

    The last step is calibrating the sprayer, and that process really depends on your definition. If the preceding steps conflict with those of the manufacturer’s, always follow the manufacturer’s. Do this for reasons of safety and to preserve any warranty.

    Thanks to Fred Whitford (Purdue University), Gail Amos and Mark Ledebuhr (Application Insight LLC) for reviewing the content of this article and for their helpful edits.