In this study, 3D sampling of drone spray applications in wheat demonstrates that coverage is strongly influenced by the interaction between drone downwash, flight speed, and wind conditions. These factors collectively determine where droplets land, how evenly they are distributed, and how reliable coverage is from pass to pass. In 2025 we characterized wheat head coverage from a DJI Agras T50. In this study, we explore the larger, faster DJI Agras T100, and relate the observations to what we’ve seen in previous studies.
Materials and Methods
Site and crop
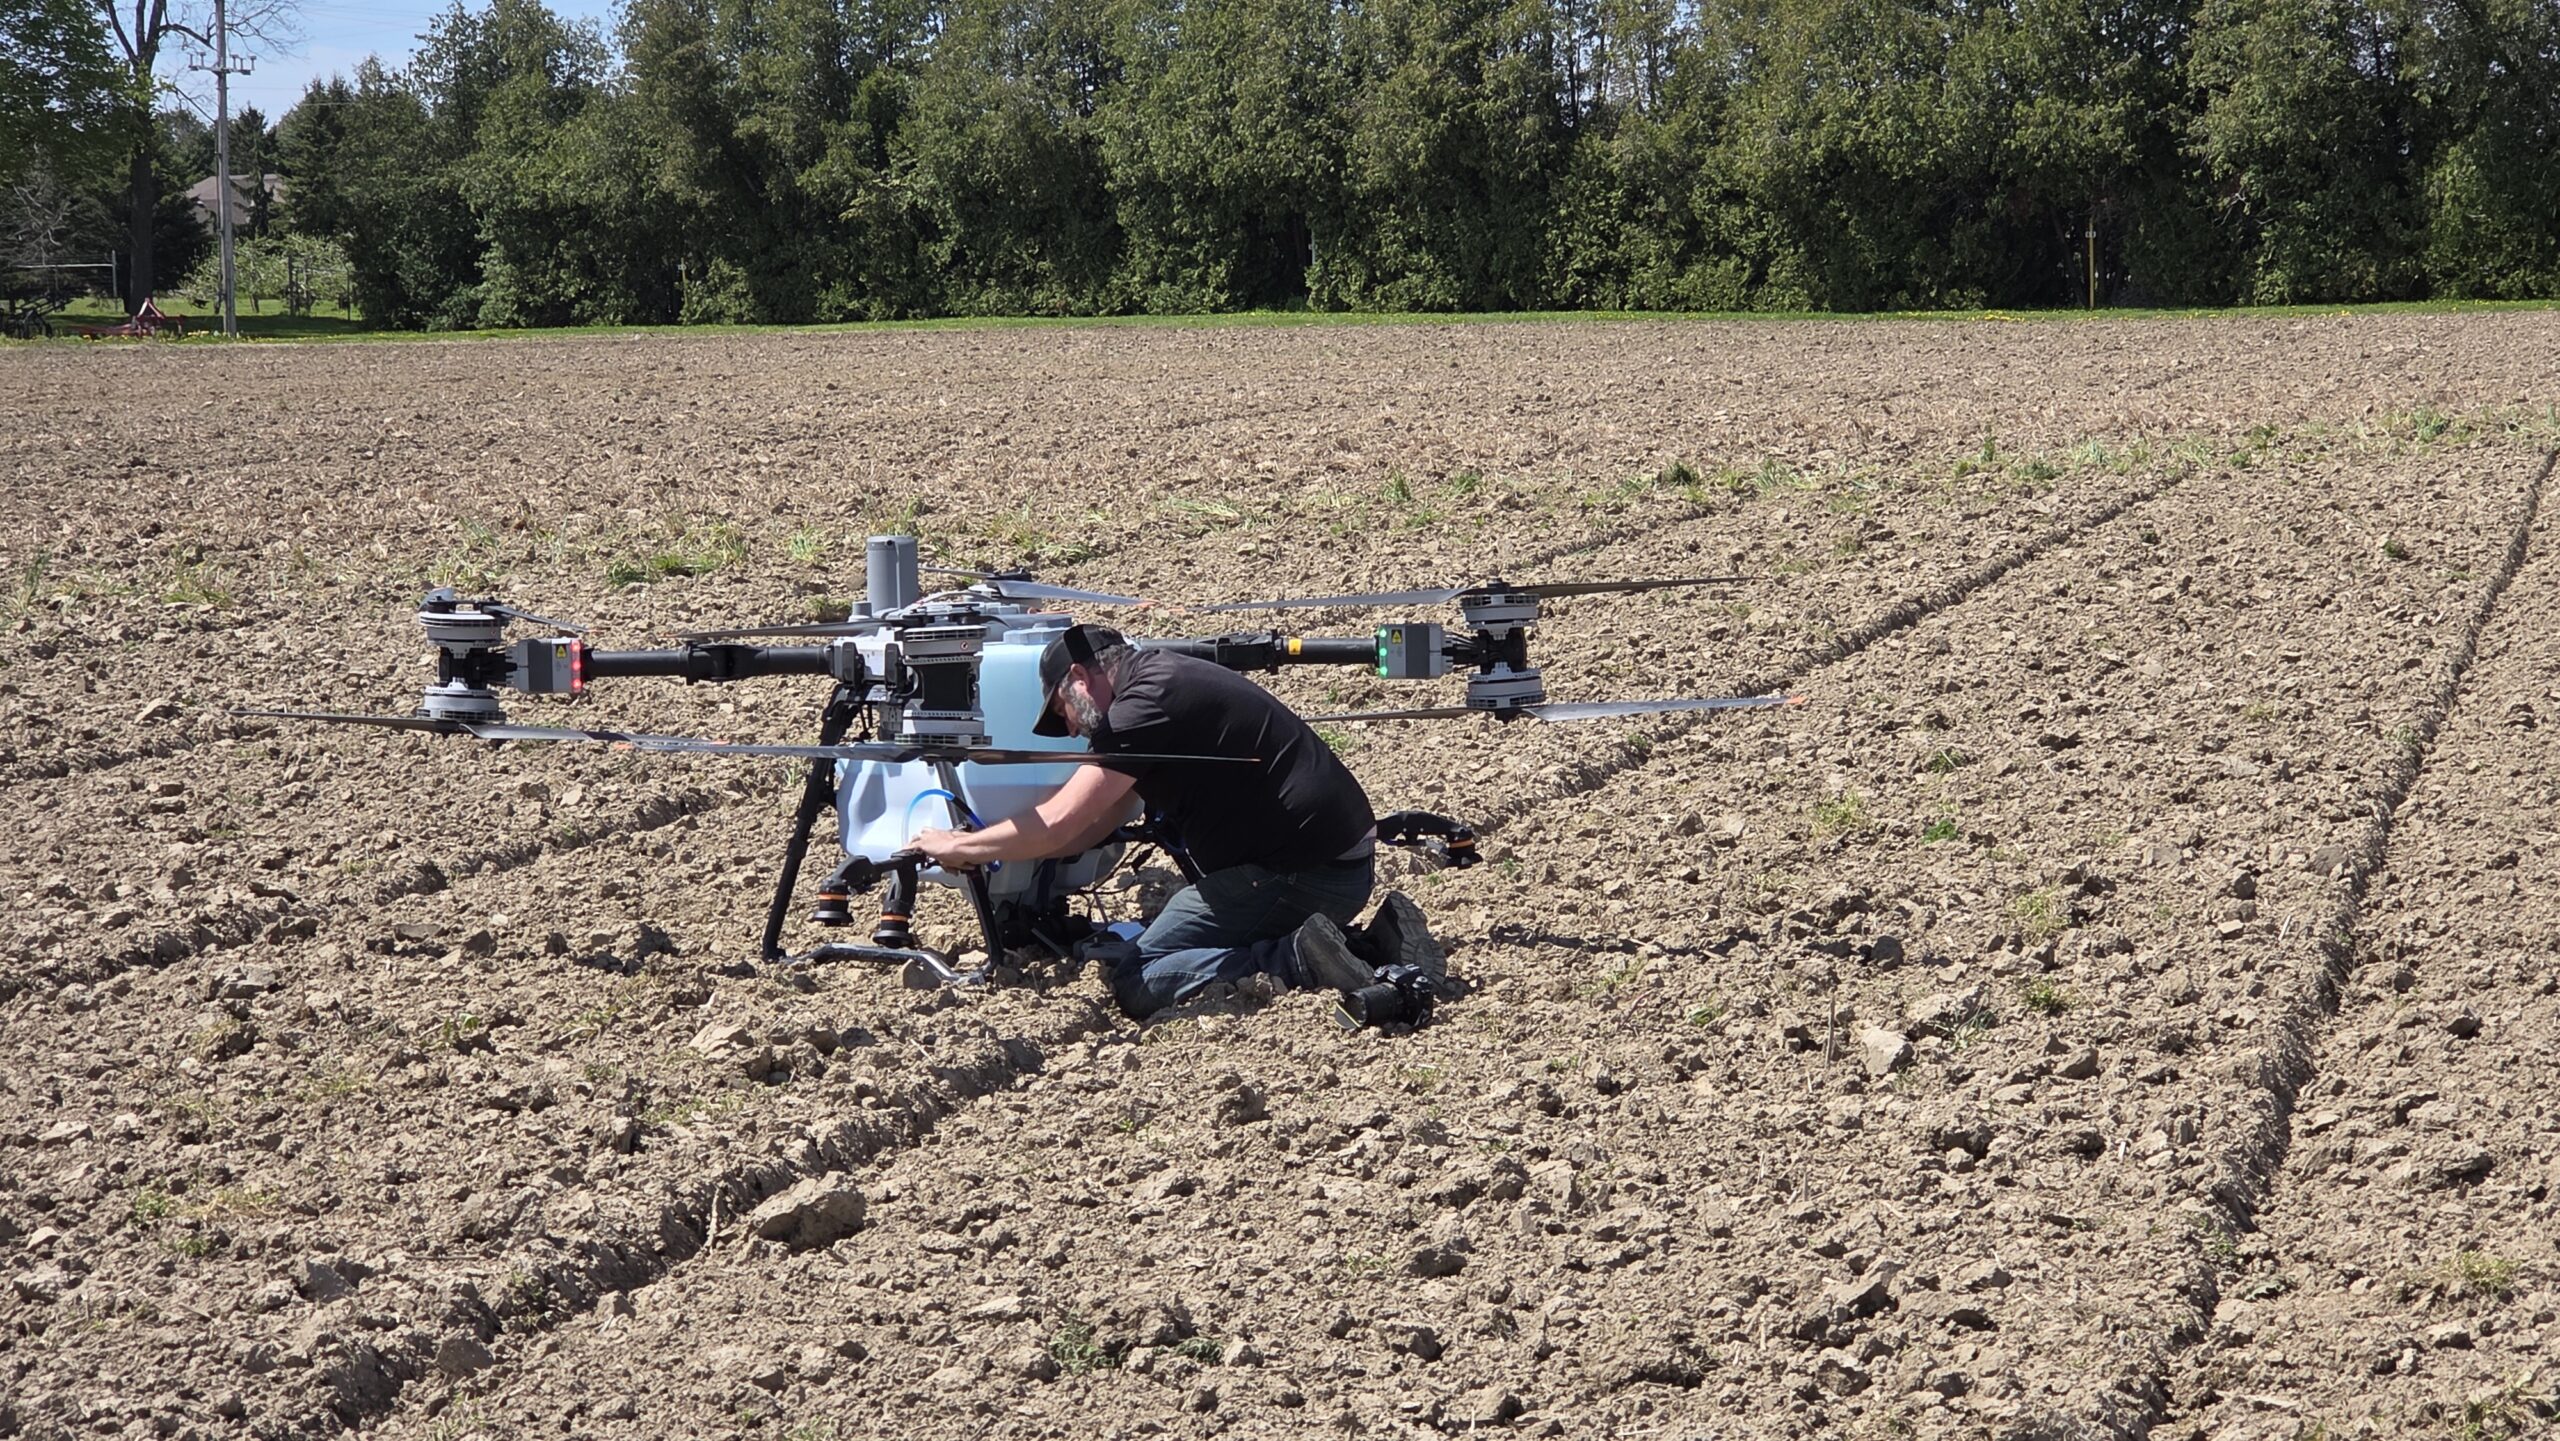
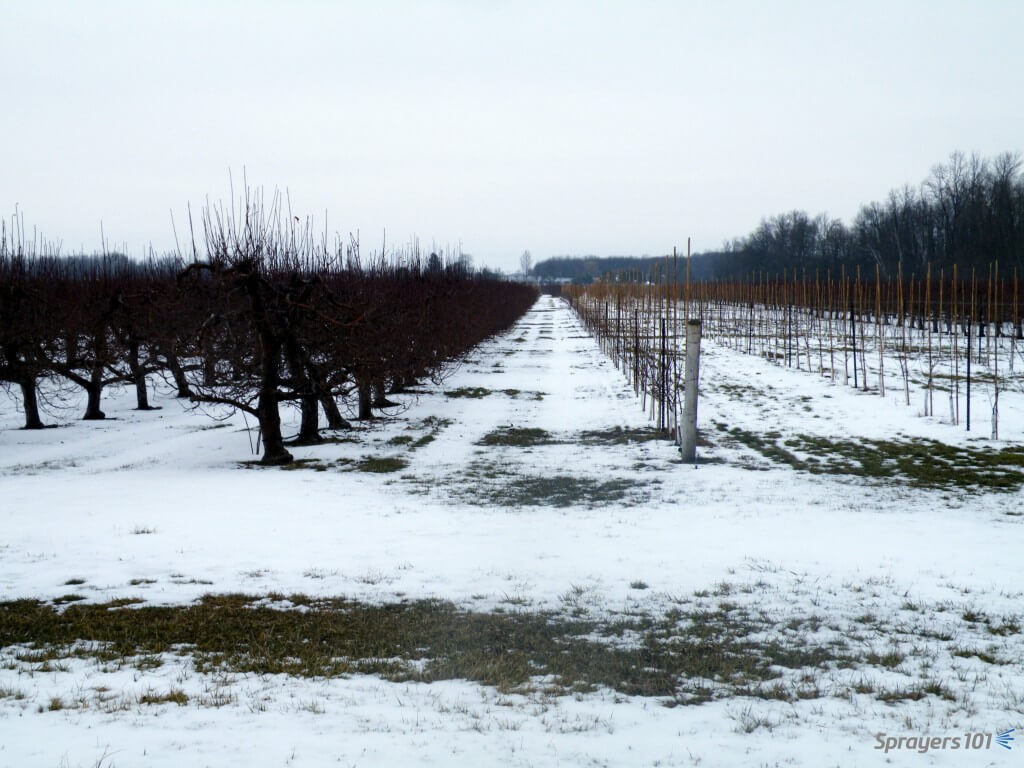
The experiment was conducted at 45939 John Wise Line, St. Thomas, Ontario (42°43’57.0″N, 81°05’49.8″W) on June 3, 2025. Wheat was seeded at 1.8 million seeds/ac on 19 cm spacing and was at the T3 stage (~0.7 m height) at application.
Design
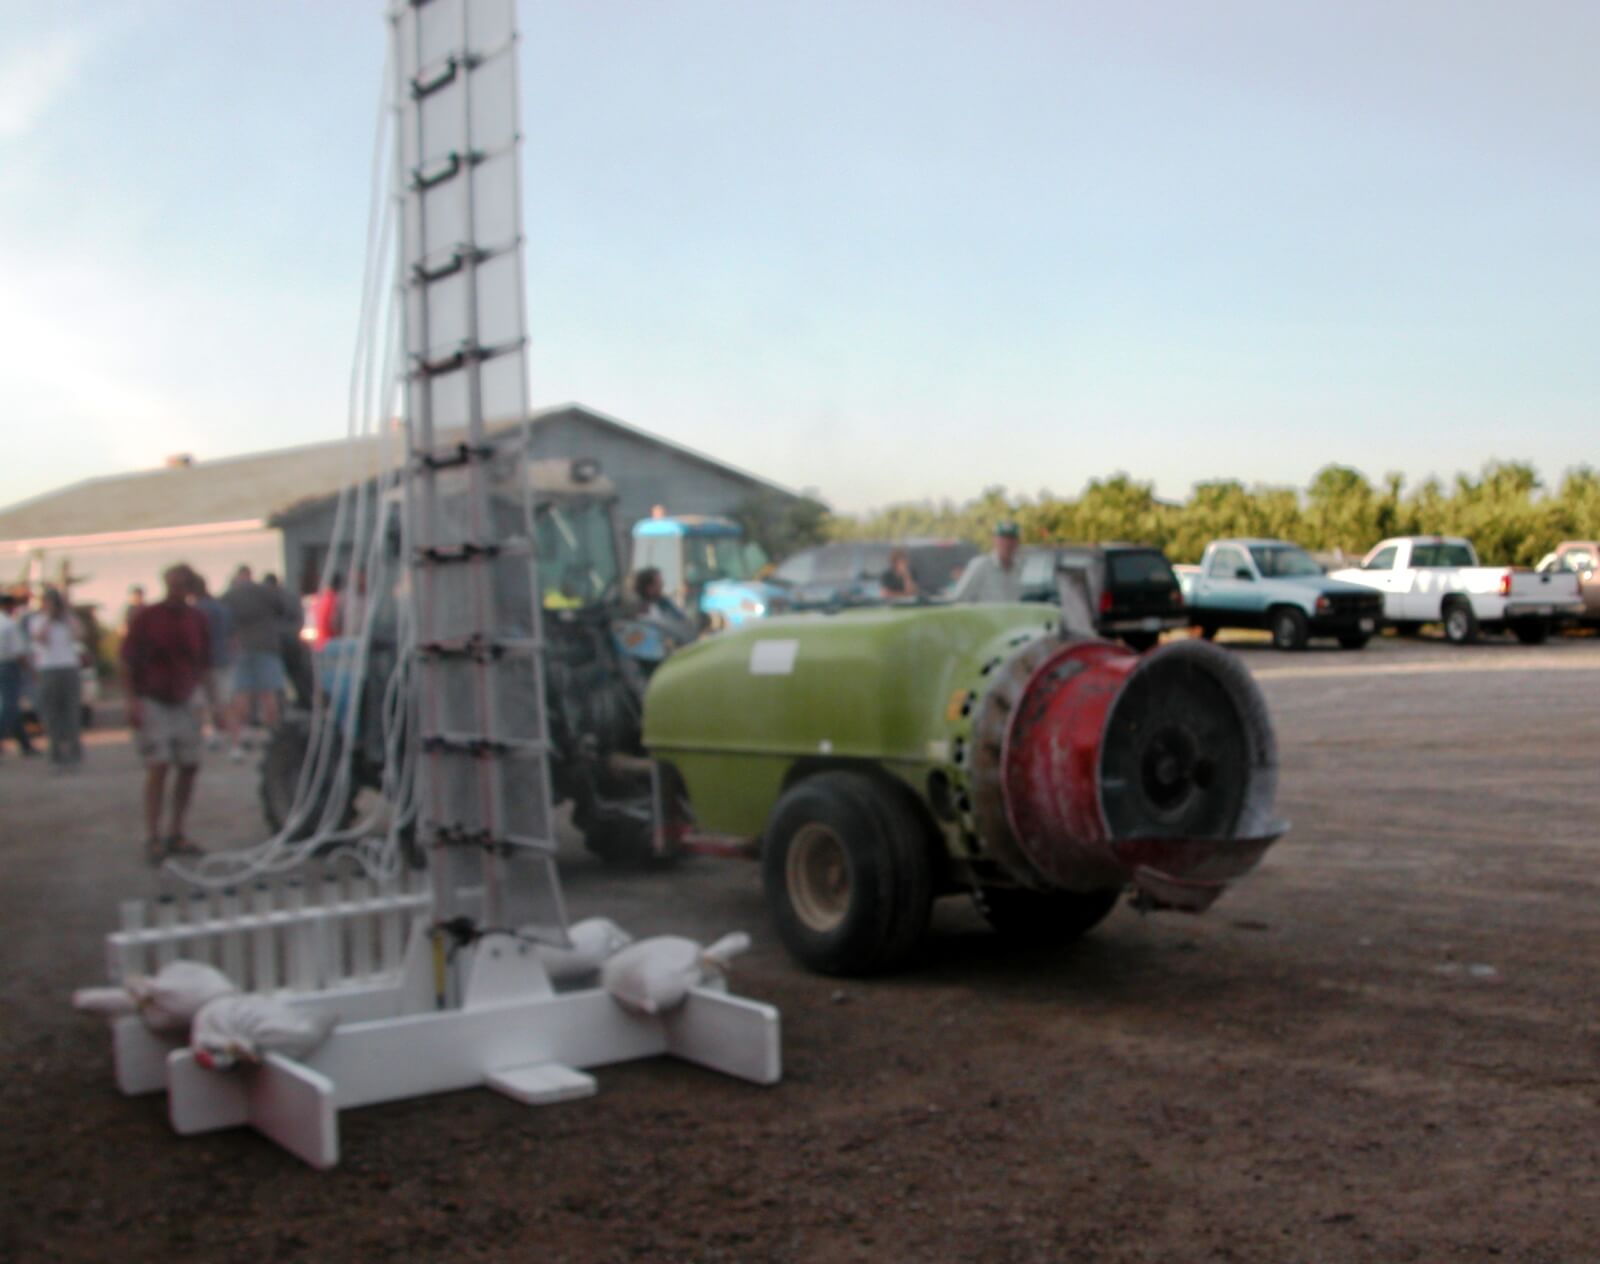
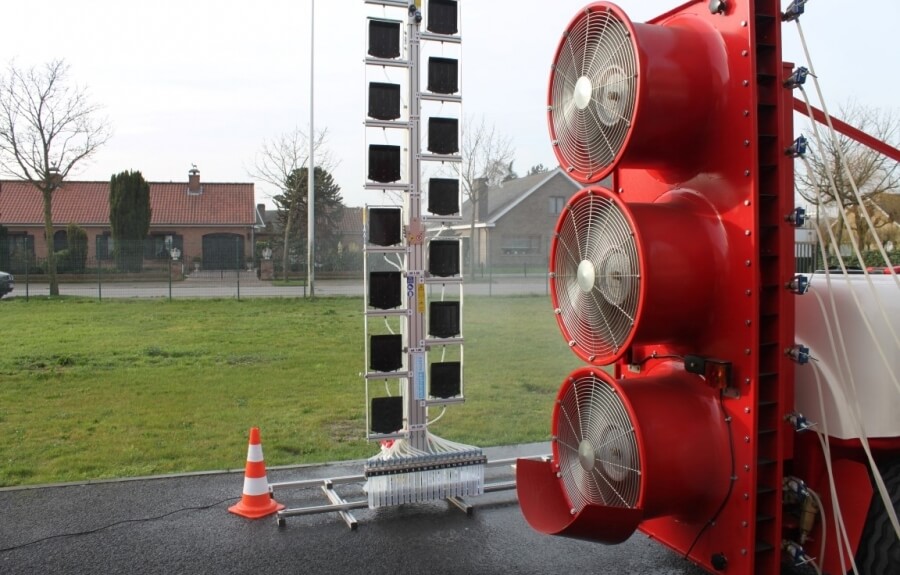
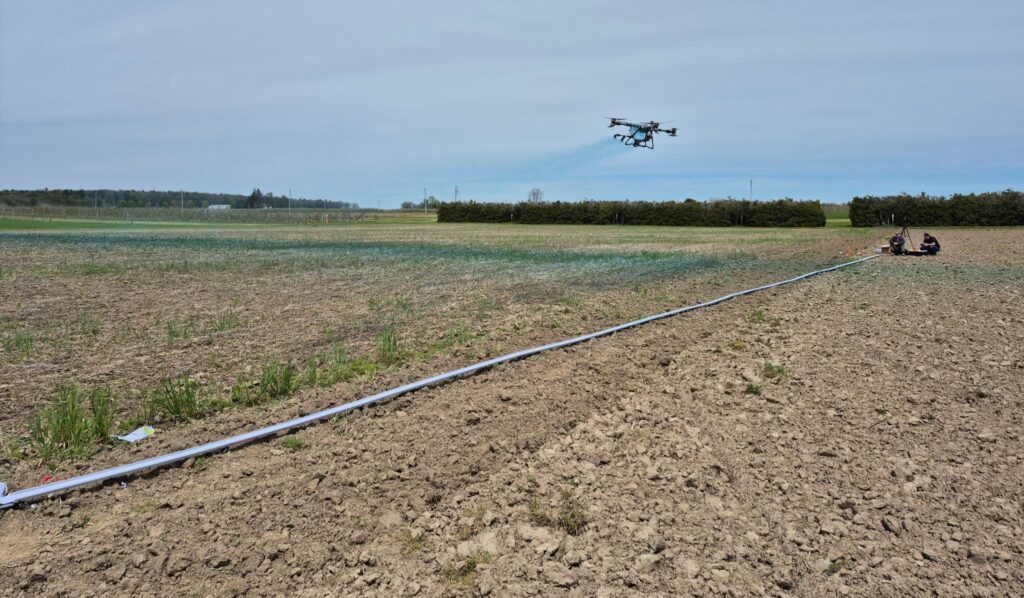
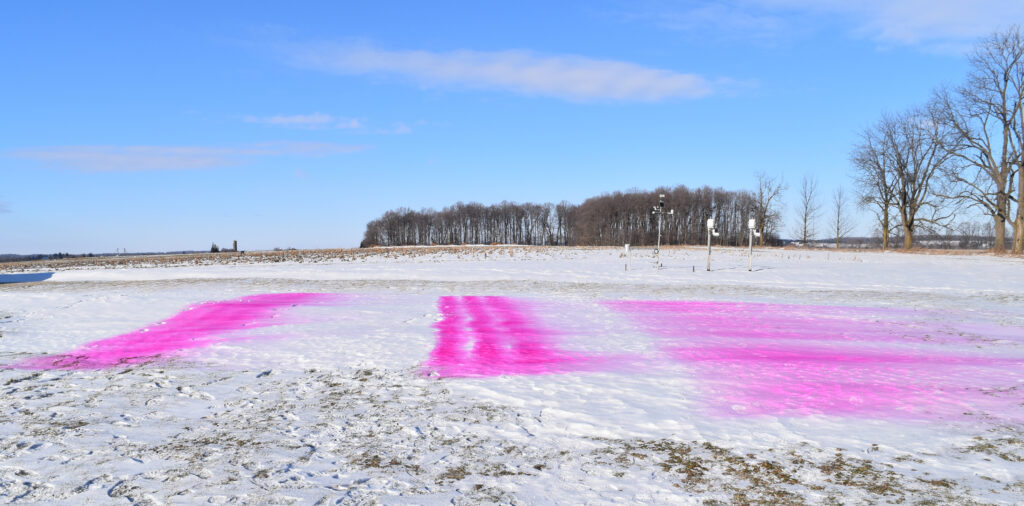
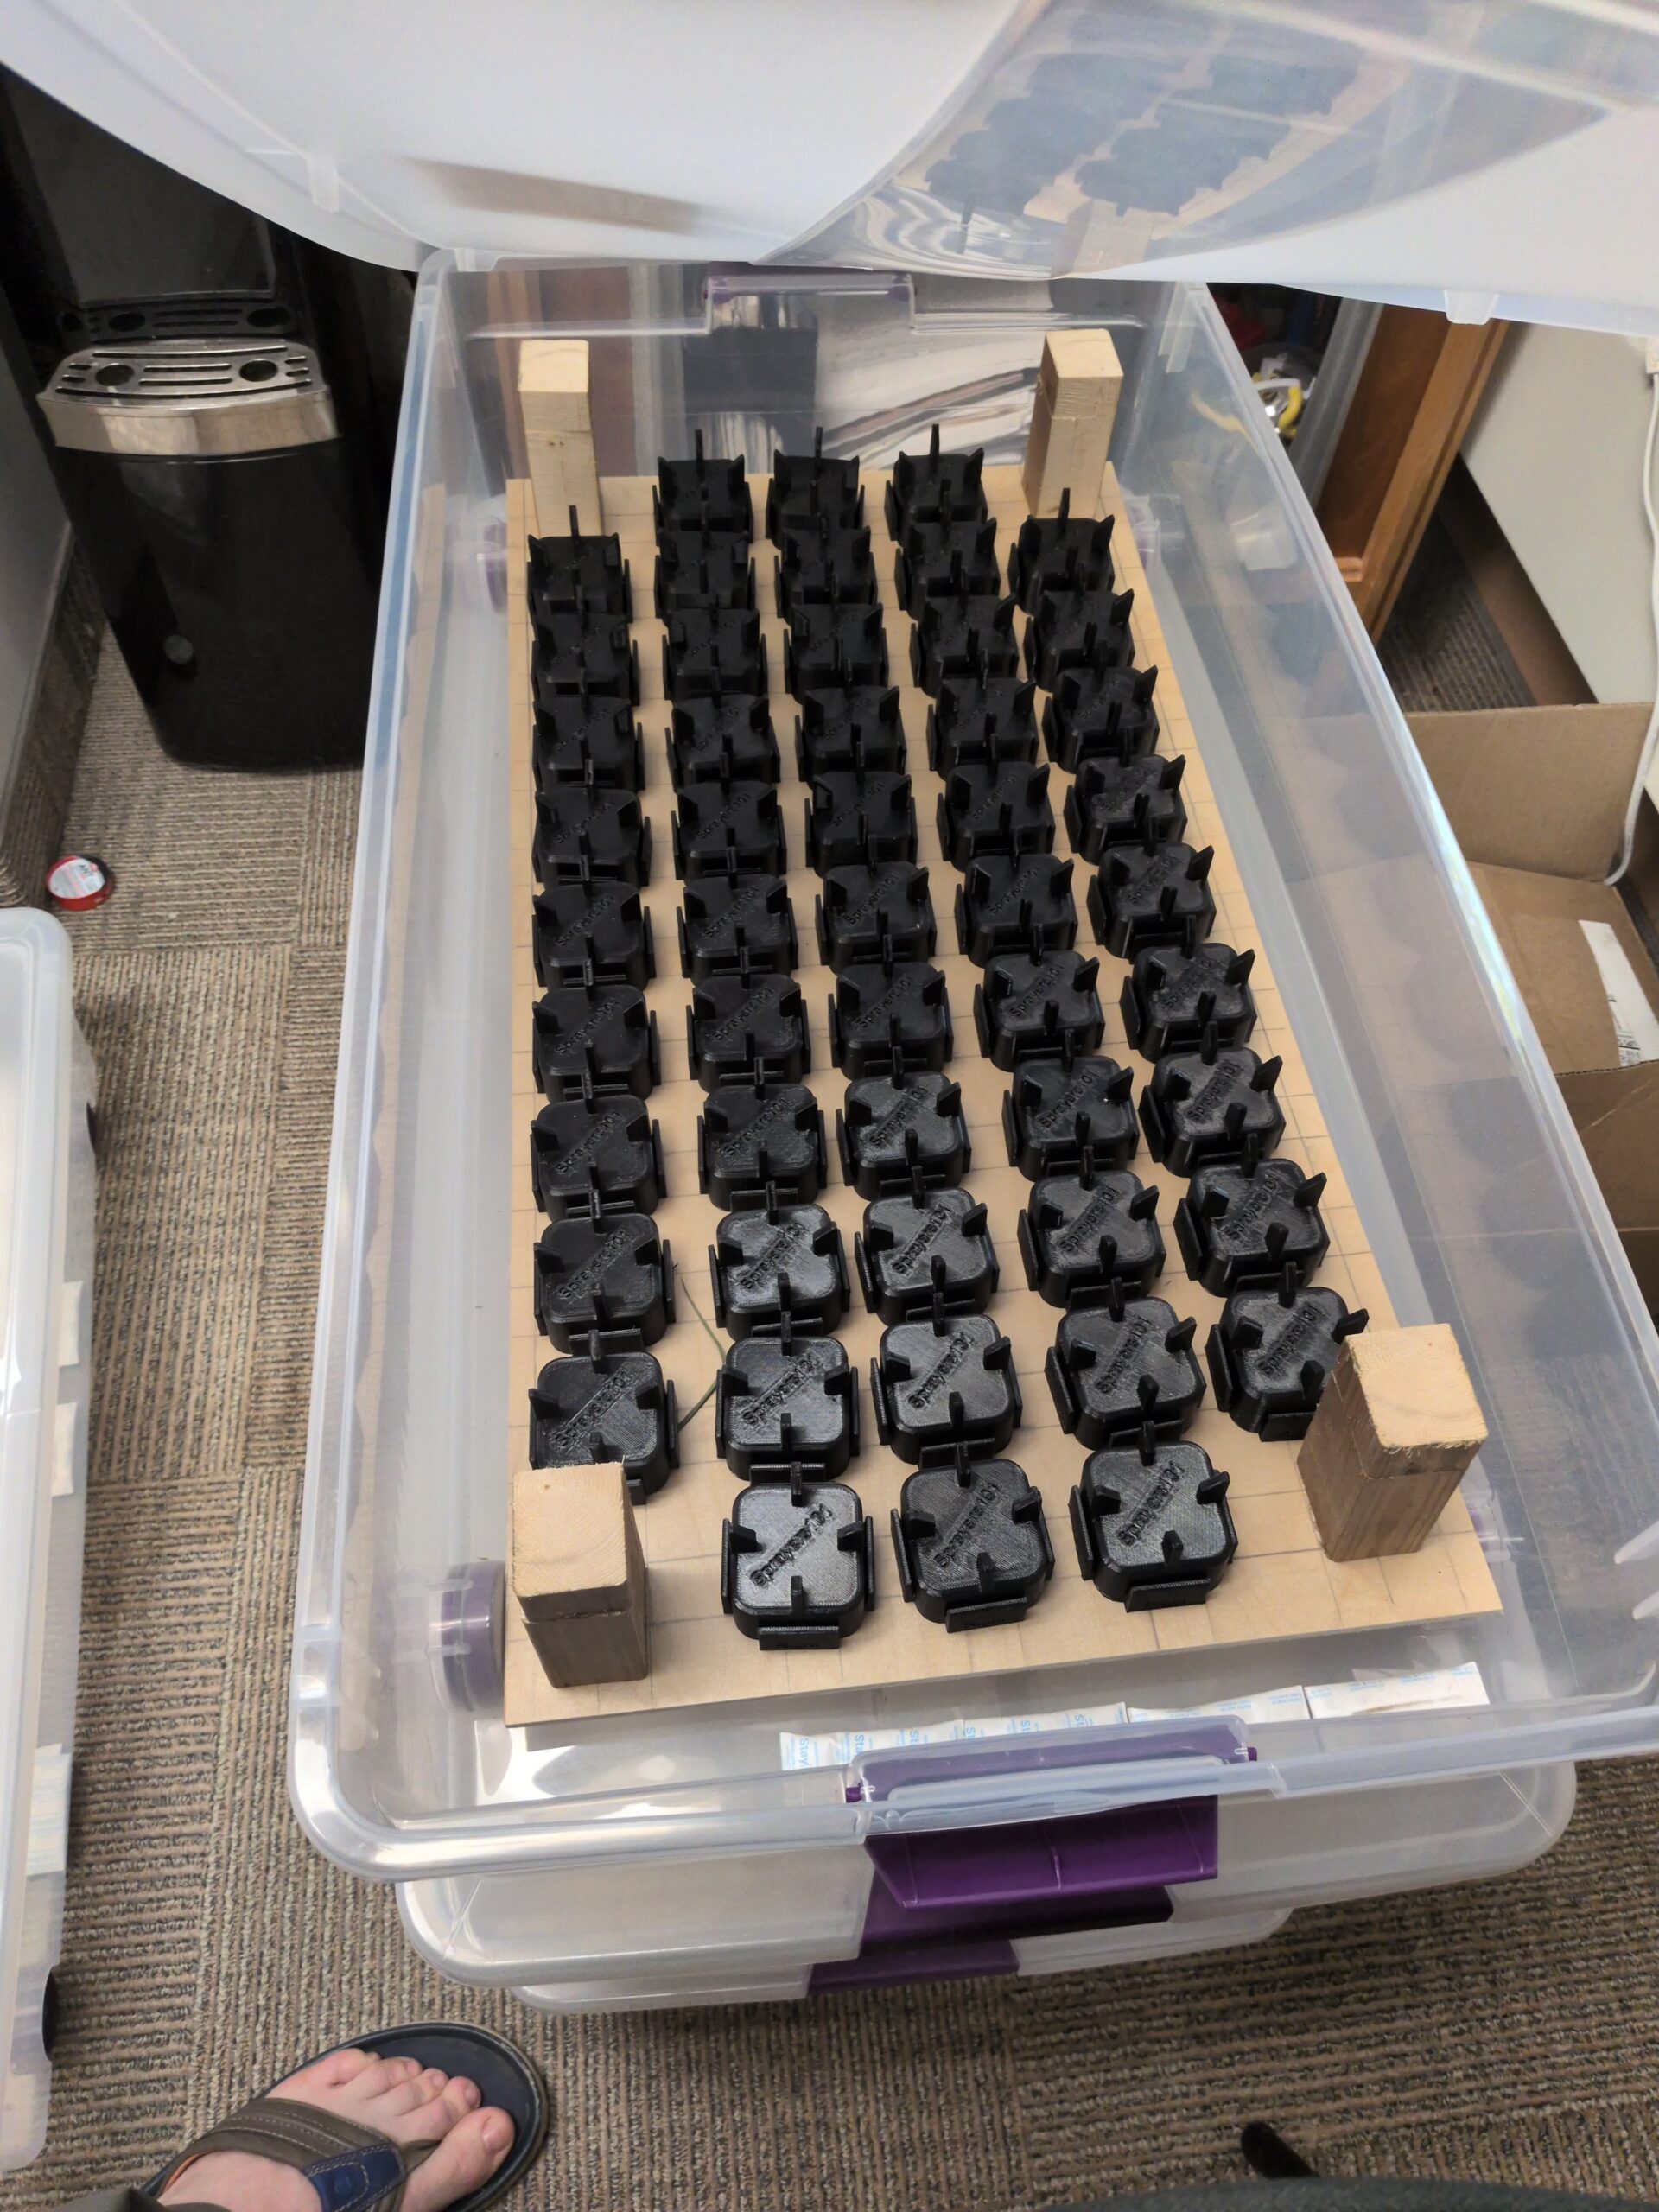
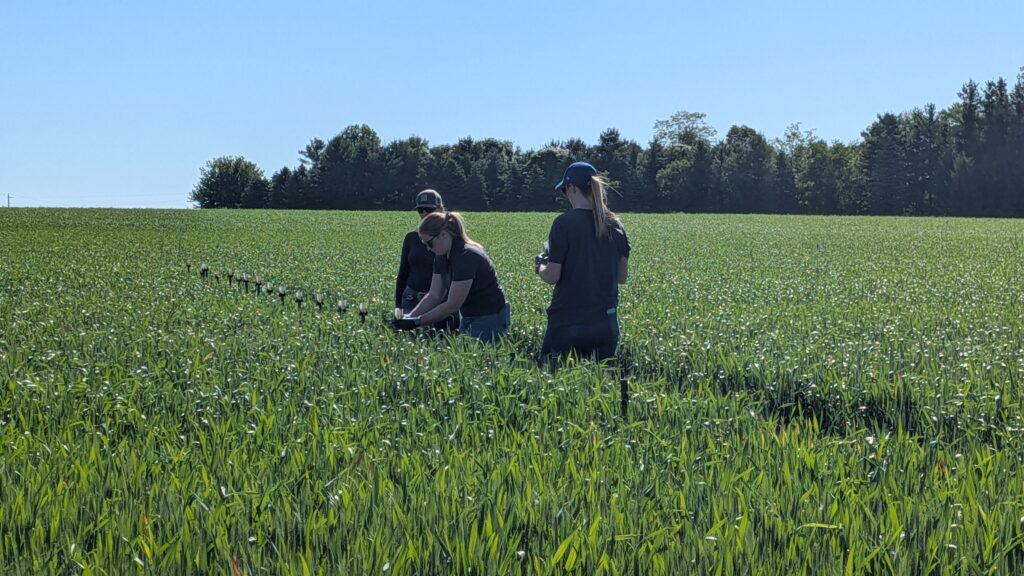
Twenty-one poles spaced at 1 m intervals held 3D-printed mounts with 1×3″ water-sensitive papers oriented in four directions relative to the drone flight path: advance, retreat, left, and right. A tramline behind the array preserved canopy structure while allowing access to the samplers (Figure 1).
Drone Operational Settings
The primary objective of the study was to explore the effect of flight speed on coverage. Speed was increased from 6, to 10, to 14 m/s with the following operational settings:
- 4 LX07550SX (sprinkler) nozzles
- 50 L/ha application volume
- 350 µm droplet size
- 4 m flight altitude
- 7 m programmed swath width
- Tank volume maintained at ~50 L
The drone began spraying 50 m before and continued 20 m after the samplers, flown on full auto over pole 10 and 11 (the middle of the 21 poles). The spray liquid was municipal water with 0.5% v/v of MasterLock (Winfield United).
The secondary objective was to compare coverage from the drone spraying 5 gpa (6 m/s) to a 10 gpa (7 m/s) condition.
Weather
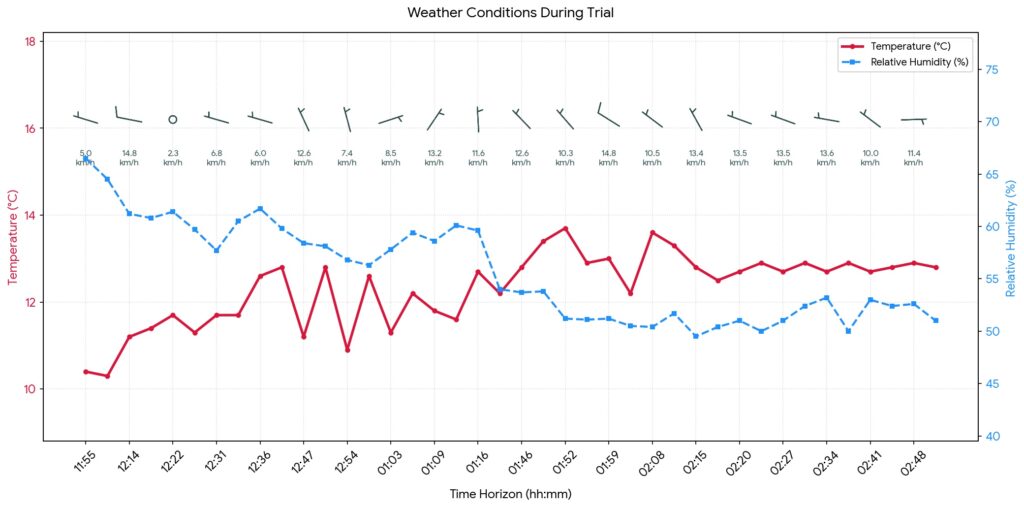
Weather data was collected using a Kestrel 3550AG weather meter (Kestrel Instruments) in a vane mount positioned roughly 2 m below drone altitude. Data was logged as the drone passed the samplers (Table 1).
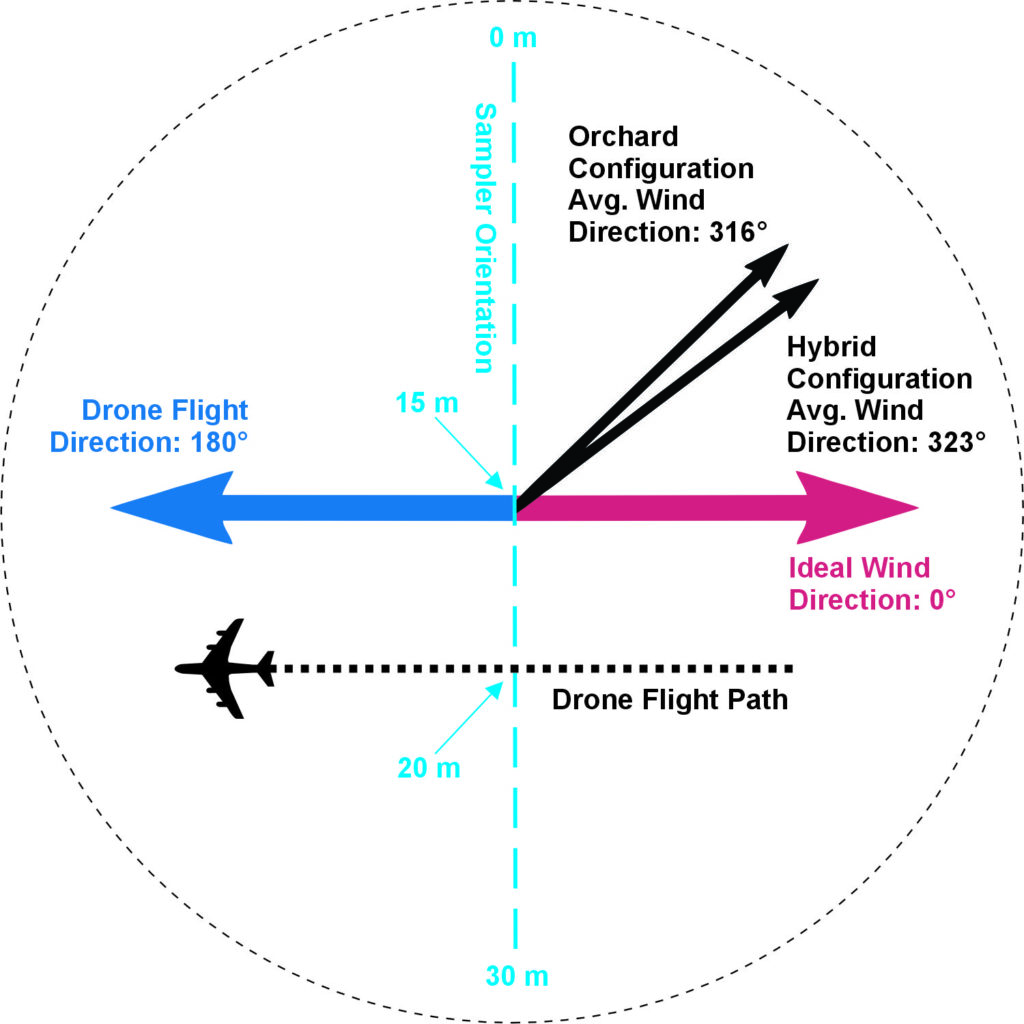
Flights were conducted under a prevailing tailwind (rather than the preferred headwind) due to field constraints. Wind conditions during application varied by treatment. The 6 m/s treatment experienced higher and more variable wind speeds (avg. 6.6 km/h, SD 3.7 km/h, 177°), predominantly from the north (tailwind). The 10 m/s treatment occurred under moderate and stable winds (avg. 4.8 km/h, SD 1.1 km/h, 136°) with a slight right-to-left crosswind component. The 14 m/s treatment experienced low and variable wind speeds (avg. 1.6 km/h, SD 2.0 km/h, 198°) including periods of calm .
Results
Deposition Magnitude and Orientation
Papers were analyzed using a DropScope™ (SprayX, São Carlos, Brazil). Deposition differed strongly by collector orientation (Table 2). Some repetitions were removed if wind pushed spray beyond the collectors. This left a minimum 2 repetitions per condition.
| Speed | Direction | Mean (deposits/cm2) | Std Dev | Min | Max |
| 6 m/s | Advance | 45.70 | 67.03 | 1.3 | 210.7 |
| Left | 40.06 | 66.19 | 0.0 | 211.8 | |
| Retreat | 20.10 | 20.25 | 0.0 | 71.0 | |
| Right | 45.47 | 73.55 | 0.0 | 208.9 | |
| 10 m/s | Advance | 52.07 | 63.05 | 0.1 | 189.3 |
| Left | 31.95 | 43.65 | 0.0 | 136.0 | |
| Retreat | 5.12 | 9.19 | 0.0 | 37.6 | |
| Right | 37.22 | 70.18 | 0.0 | 202.1 | |
| 14 m/s | Advance | 39.02 | 37.51 | 0.5 | 115.3 |
| Left | 26.89 | 43.91 | 0.0 | 130.9 | |
| Retreat | 0.43 | 1.27 | 0.0 | 5.7 | |
| Right | 11.03 | 22.53 | 0.0 | 71.2 |
Forward-facing collectors (advance) consistently recorded the highest deposition across all speeds, followed by lateral orientations. Reverse-facing collectors (retreat) recorded substantially lower deposition. Variability was high for advance and lateral orientations, whereas retreat collectors showed consistently low variability (Table 3).
| Direction | Mean (deposits/cm2) | Std Dev | Min | Max |
| Advance | 39.02 | 37.51 | 0.5 | 115.3 |
| Left | 26.89 | 43.91 | 0.0 | 130.9 |
| Retreat | 0.43 | 1.27 | 0.0 | 5.7 |
| Right | 11.03 | 22.53 | 0.0 | 71.2 |
Directional Bias (Anisotropy)
Anisotropy refers to the property of having different values when measured in different directions. We can quantify this by dividing the average coverage on one plane by the opposite plane; The resulting indices show the relative direction of deposition.
For the lateral plane (left-to-right), we divide the average coverage on the left-facing orientation by the right. On the sagittal plane (advance-to-retreat), we divide the average coverage on the advance-facing orientation by the retreat (Table 4).
| Speed | Lateral (L÷R) | Sagittal (A÷R) |
| 6 m/s | 0.88 (slight right-dominant) | 2.27 (moderate advance-dominant) |
| 10 m/s | 0.86 (slight right-dominant) | 10.17 (strong advance-dominant) |
| 14 m/s | 2.44 (strong left-dominant) | 90.05 (almost entirely advance-dominant) |
Bias in the lateral index was relatively weak, with a subtle shift with the wind (wind-facing is left) at higher speeds. The sagittal index (advance-to-retreat) increased from a 2x between 6 m/s and 10 m/s to 5x between 10 m/s and 14 m/s, demonstrating strong forward bias with flight and wind direction despite the down-and-back vector created by the downwash.
Spatial Distribution
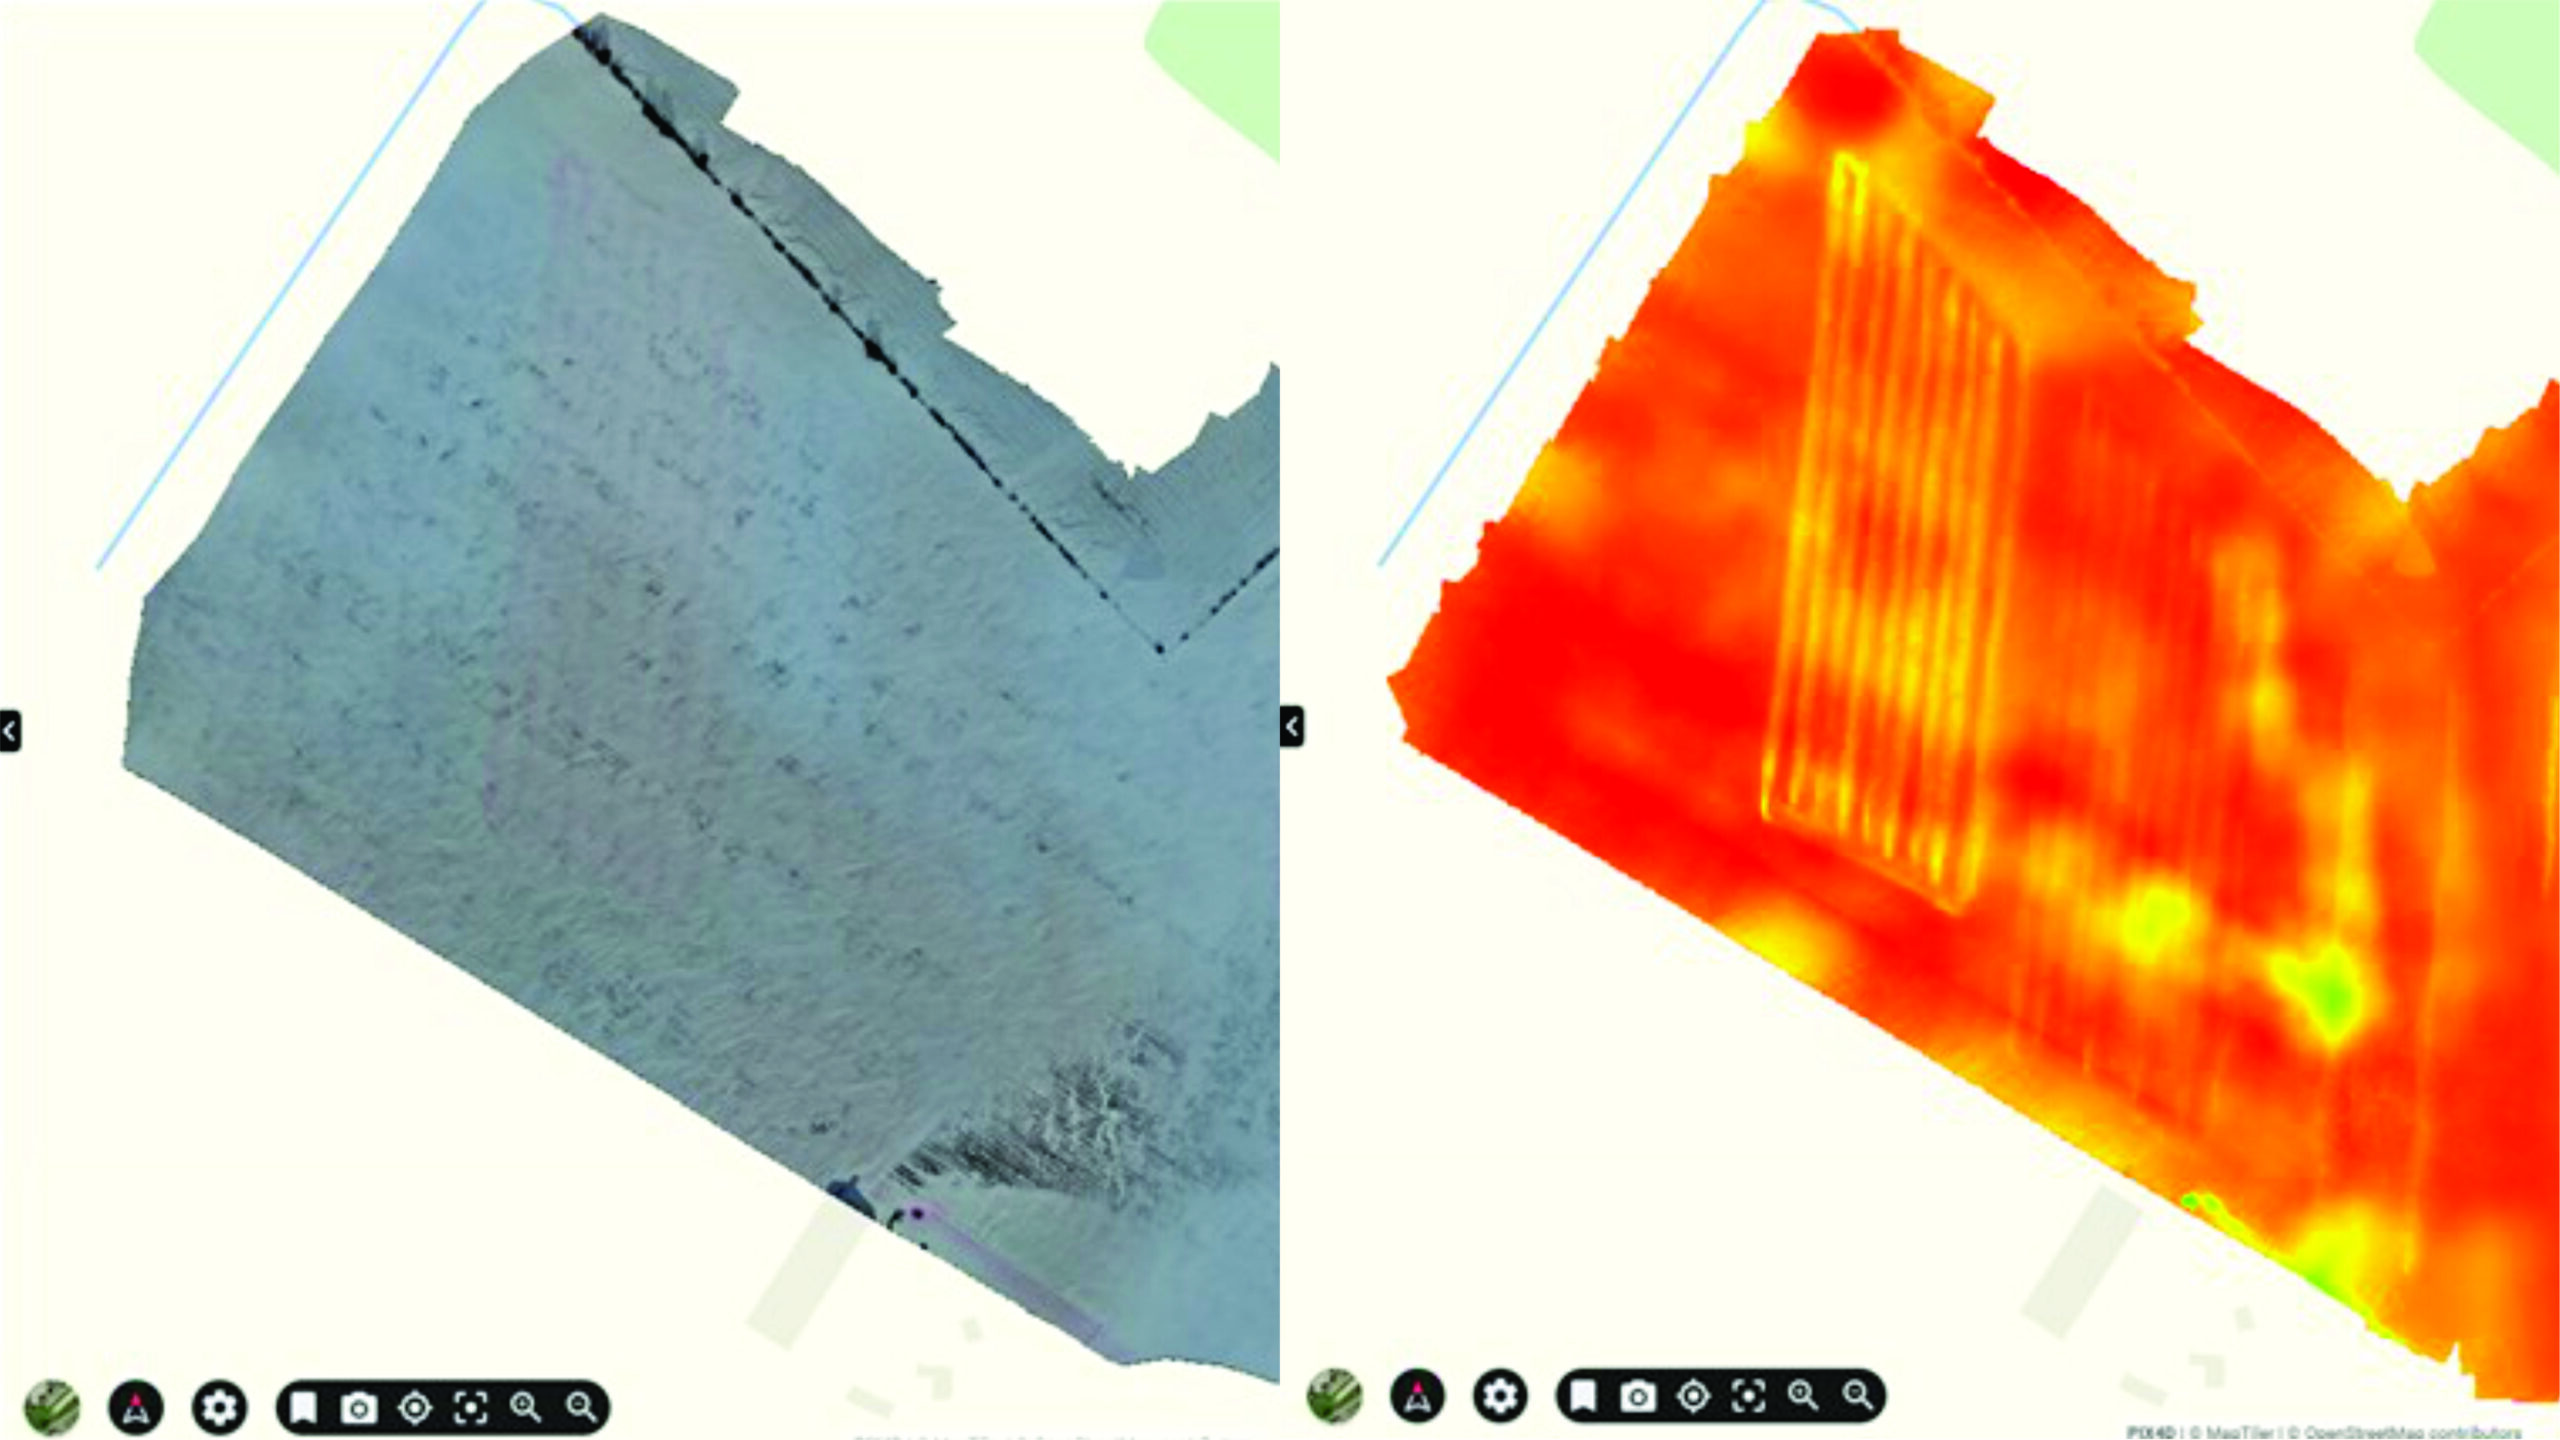
Peak deposition consistently occurred 1 to 5 m downwind of the flight line, rather than directly beneath it. A cross-tail wind shifted deposition laterally, while forward motion (inertia) and wind reinforced deposition in the advance direction. This can be illustrated by isolating the average coverage for each orientation, for all three speeds (Figures 2 to 5).
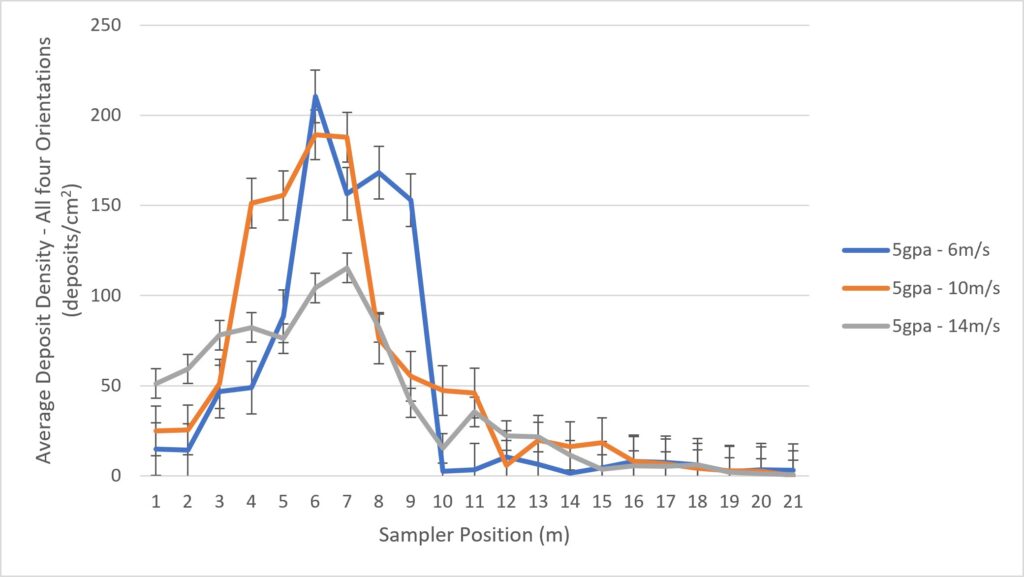
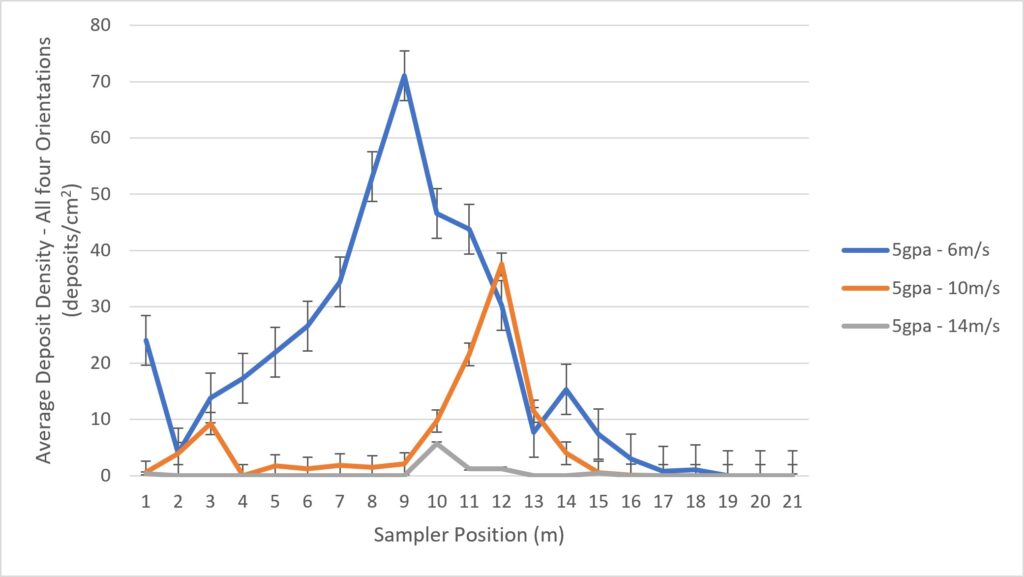

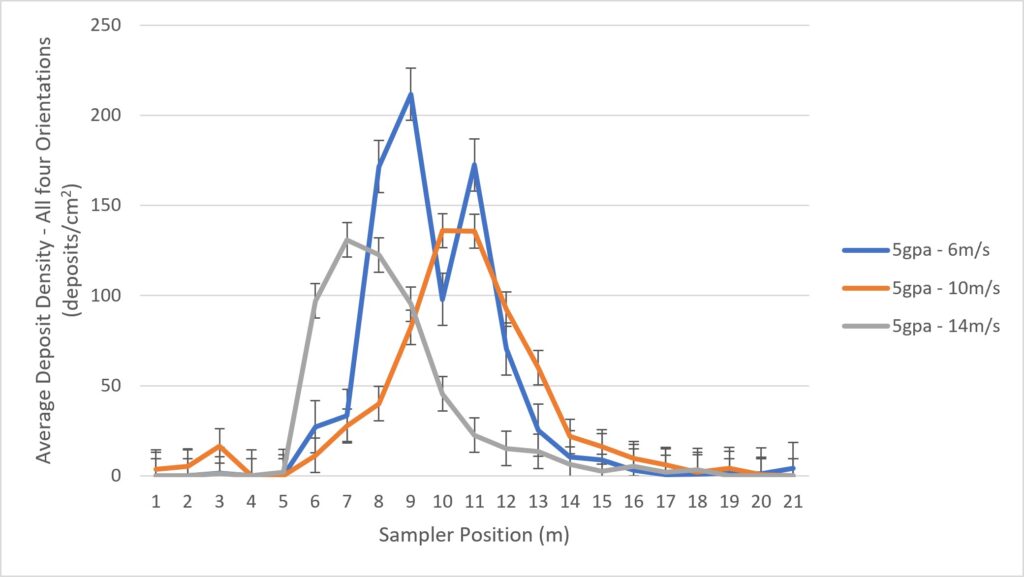
By combining and plotting average coverage on all orientations in a top-down heatmap, we can clearly see the lateral shift to the left of the flight pass (with the light crosswind), the higher relative coverage on the advance face, and indications of bi-modal coverage that likely corresponds to the position of the rotary atomizers(Figure 6).
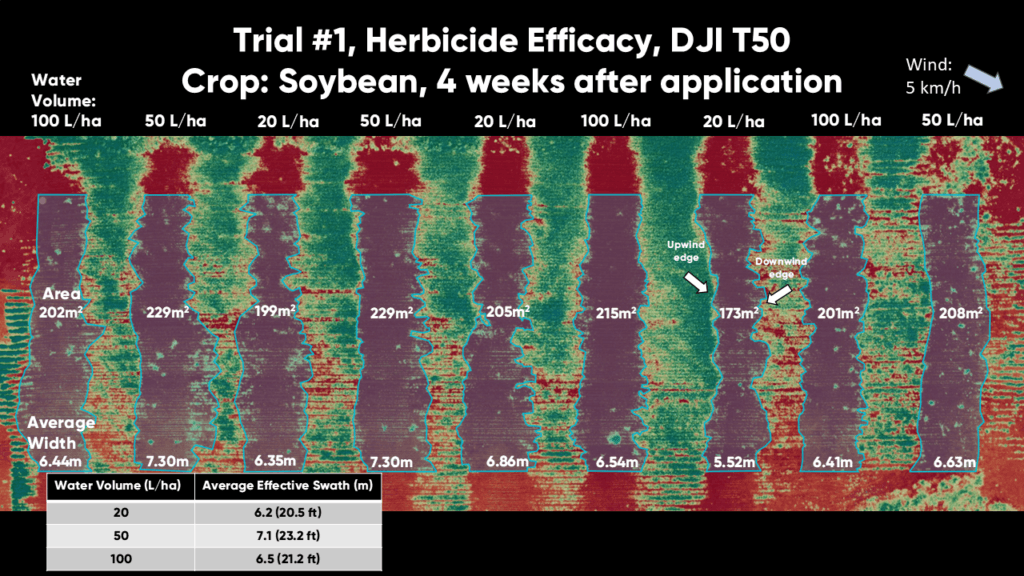
Effect of flight speed on swath width
Swath width was determined by averaging all deposition on each post for each speed and using our online swath width calculator. The range of flight speeds used in this study did not significantly affect swath width.
- 6 m/s: 8 m swath width (16.3 % C.V.).
- 10 m/s: 7.5 m swath width (22.5 % C.V.)
- 14 m/s: 7.5 m swath width (22.3 % C.V.)
These widths are 15-20% wider than the widths calculated in the same manner during the 2025 study with the T50.
Averaging swath widths can mask variability
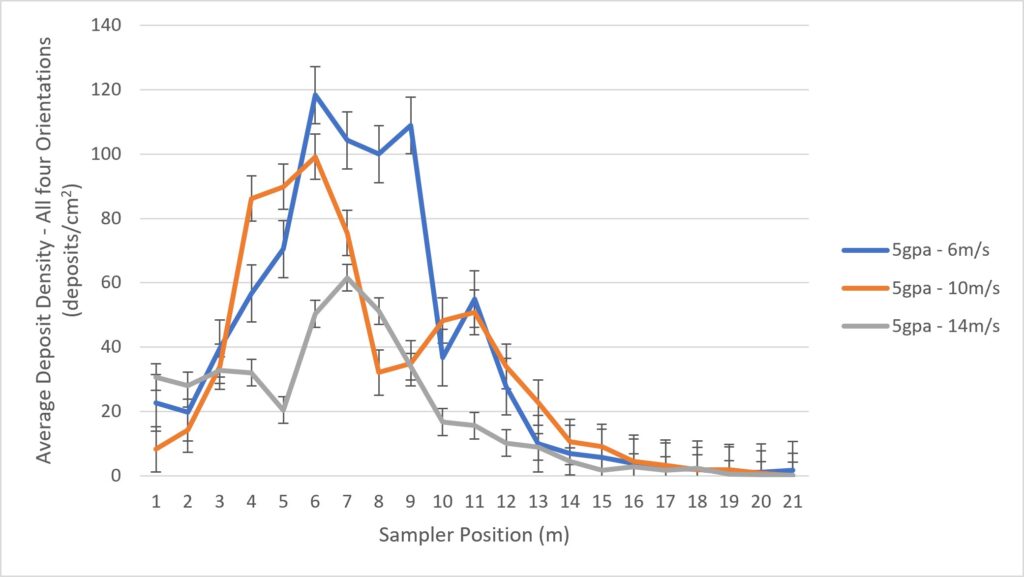
This method of calculating and comparing average swath widths is convenient, but it hides any variability in the amount of spray deposited within the swath. Consider that an 8 m swath with 10 deposits/cm2 every meter would have the same C.V. as an 8 m swath with 100 deposits/cm2. Deposit variability can be illustrated by plotting the average coverage along the swath with standard error (figure 7). We see that flight speed significantly influenced the degree of deposition, where higher speeds reduced the average droplet density (counts) as well as the variability (standard deviation).
Think of each repetition as a randomly-selected cross section of the swath from somewhere along a spray pass. Calculating swath width from averaged coverage data can hide shifts in the relative position along the flight path, making the composite value greater than that of any single replicate. This variability and the potential for inadvertent smoothing can be exposed by plotting each repetition. (Figure 8).
Therefore, the order of operations matters. When swath width is calculated for each repetition, and then averaged, we would expect the widths to be somewhat smaller. They are presented here in table form next to the previous values for comparison (Table 5).
| Speed (m/s) | (A) Deposition averaged, then swath calculated (m) | (B) Swaths calculated, then average (m) | Difference (A-B) (m) |
| 6 | 8 (16.3% C.V.) | 6 (29.6% C.V.) | -2 |
| 10 | 7.5 (22.5% C.V.) | 6 (33.5% C.V.) | -1.5 |
| 15 | 7.5 (22.3% C.V.) | 7.5 (30.5% C.V.) | 0 |
Statistical Analysis
No matter the method, we can draw conclusions from the swath widths calculated here.
- 6 m/s: highest deposition but greatest variability.
- 10 m/s: best balance of deposition, uniformity, and swath width.
- 14 m/s: lowest deposition and most directional bias.
A two-way analysis of variance (ANOVA) was conducted to evaluate the effects of flight speed and collector orientation on spray deposition. Deposition differed significantly between Advance, Left, Right, and Retreat collectors (F = 6.1, p = 0.0005). Flight speed had a statistically significant effect on deposition, where deposition was reduced with speed (F = 3.03, p = 0.05). The effect of orientation did not significantly depend on speed (F = 0.46, p = 0.83), suggesting that the pattern of deposition was consistent across speeds.
Effect of volume on deposition
In a secondary investigation, the drone was flown at 7 m/s, applying 10 gpa to compare coverage to the 6 m/s, 5 gpa condition (Figure 8).
Surprisingly, there was no significant increase in total deposition within the swath when volumes were increased. In fact, the 5 gpa condition is ~8% higher when all deposits are summed or when area under the curve is calculated. The relative shape of the curve was notably different with 5 gpa producing a sharper, higher-intensity central peak, while 10 gpa produced a broader and more uniform deposition profile.
It was expected that higher volumes would result in higher counts. One theory for the absence of this result was that overlapping depositions in the high volume treatment might have underestimated counts when the papers were digitized. Therefore, the percent surface area was also analyzed (Figure 9). Once again, there was no significant difference in the total percent area or a comparison of area under the curves.
When swath widths were calculated for each repetition, then averaged for each speed, we arrived at (5 m + 7 m) ÷ 2 = 6 m for the 5 gpa condition, and (5.5 m + 6.5 m) ÷ 2 = 6 m for the 10 gpa condition. We have no explanation for why there was no volume-related difference.
Discussion
Wind direction strongly influenced deposition, overriding the down-and-back pattern seen in previous studies. A tail-cross wind likely drove deposition (likely occurring after the drone passed the sampling location), explaining why retreat-facing collectors captured minimal deposition, and peak deposition was accordingly displaced from the flight line.
Overall, results confirm that wind conditions fundamentally reshape spray distribution. The implication is that wind direction must be accounted for alongside swath width when developing flight path spacing to minimize the potential for overlaps and gaps between passes.
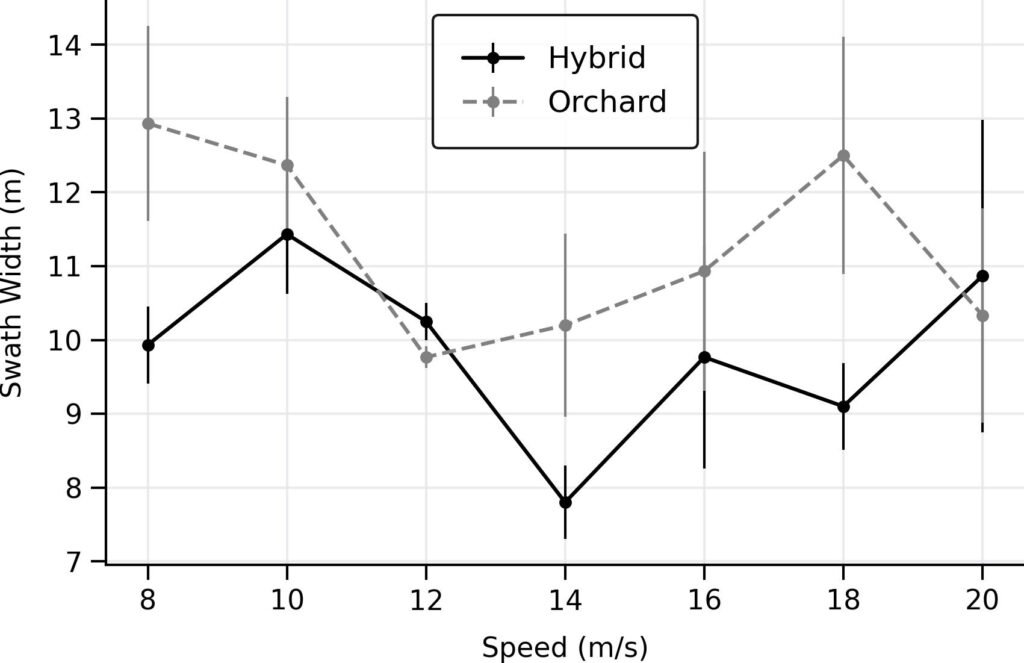
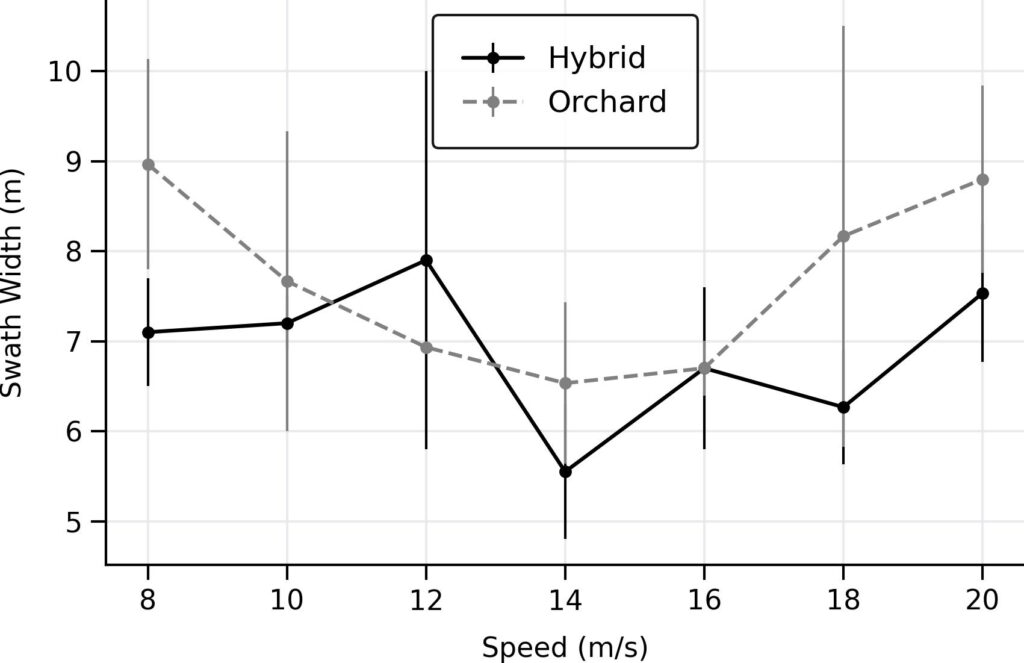
Further, previous studies have demonstrated a direct and positive relationship between flight speed and swath width up to 8-10 m/s with no further response after ~8 m/s. This study supports the hypothesis that rotary-wing drone speed and swath width share an asymptotic relationship that inflects at ~8-10 m/s (variability makes it difficult to determine an exact value). Flight speed also has a direct and inverse impact on the degree of spray deposition and deposit variability within the swath.
Finally, caution is advised when interpreting average swath widths. There may be no indication of the degree of coverage within the swath (affecting efficacy), or the lateral variability along the flight path (affecting fieldwide uniformity).
Related video
Thanks to Adam Pfeffer and Bayer Canada for in kind and financial support, and thanks to volunteers Erin Jewson (OMAFA Engineer), Halle Barton and Nikki Intranuovo (Bayer Summer Students) for their help with the field work.
Author’s Note: These results were adjusted in July to exclude outliers and include the results of the spray volume comparison.