The time and attention spent during sprayer loading is a worthy investment. It ensures that the products in the tank perform as intended and reduces the chance of incompatibilities.
The label
Pesticide labels are always the first point of reference. Labelled mixing instructions should be obeyed even if they contradict conventional practices (see Mixing order, below). Consult this article on tank mix compatibility for more information on how to quickly and easily consult labels for each of your tank mix partners.
The carrier
Typically, the carrier is water, and understanding its role in pesticide performance is another article (or several). We’ve provided some links here for further reading.
- Take some time to read Les Henry’s 2016 Grainnews article called “The Coles Notes of Water Chemistry“.
- You can also read about pH and water hardness. It should be noted that pH and the resultant hydrolysis that can affect product half-life is typically an insecticide issue (not fungicide or herbicide). The famous fungicide example is Captan, which has a half-life of 32 hours at pH 5, but only 10 minutes at pH 8. Michigan State did a great summary (in 2008 and on US product formulations) which you can find here.
- Finally, learn how to read a water quality report, here.
Carrier volume
Products dissolve better in higher volumes. The sprayer tank (vat, inductor, etc.) should be at least ½ full or water before adding the first product. In the case of a fertilizer carrier, it may look like water, but it contains high levels of salts that tie up free water and reduce solubility. For fertilizers, a higher initial volume of ¾ full is required.
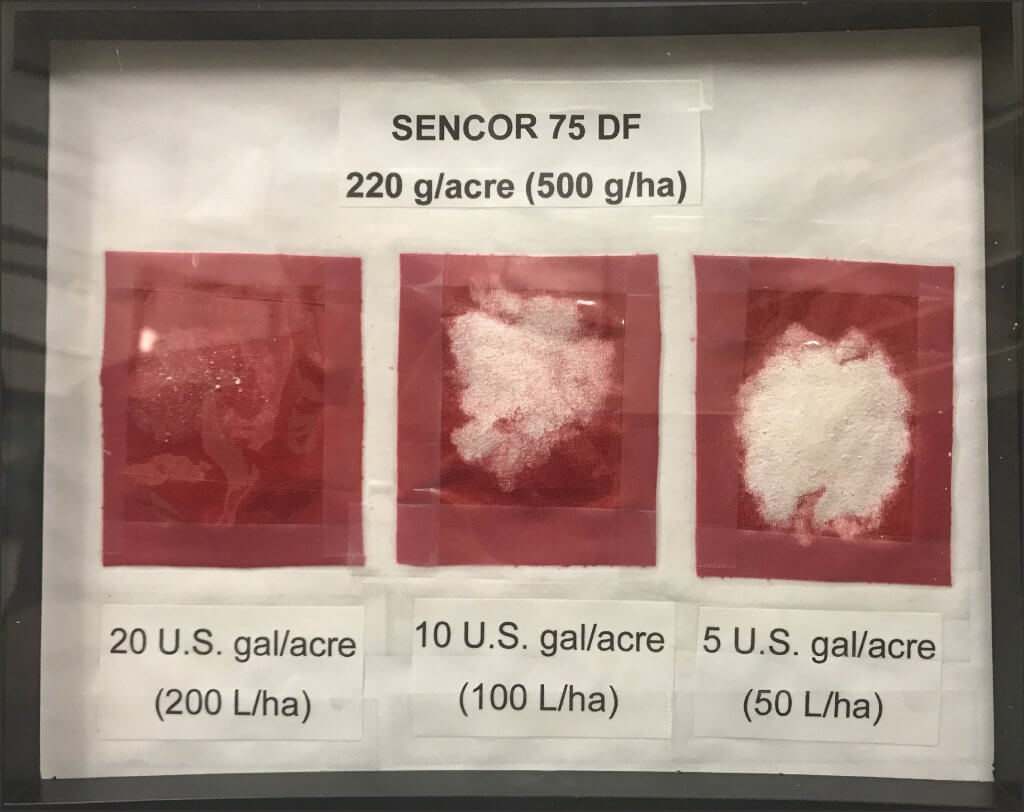
The incomplete dissolution of products can leave hard-to-clean residues, plug fluid lines, and result in a non-uniform application that reduces efficacy. The risk of incompatibility is greater with low carrier volumes and high product rates (especially dry formulations). This is a common problem in regions that use low water volumes to apply multiple tank mix partners.
Carrier and product temperature
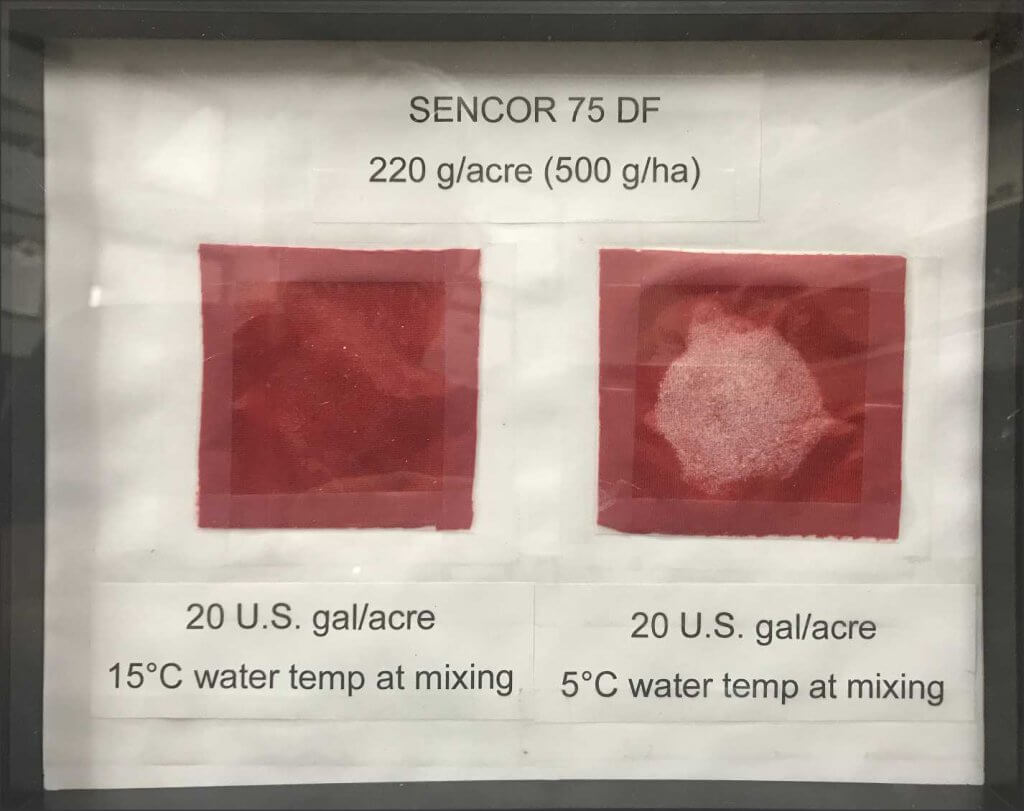
Both carrier and product temperature affect mixing. Imagine mixing sugar in hot tea versus iced tea – more sugar dissolves more quickly in hot liquid. Here are three common temperature-related issues:
- Dry formulations and liquid flowables take more time to disperse (consider using a pre-mixed slurry).
- Emulsified concentrates and oil might form gels rather than milky blooms.
- Water soluble packages might not dissolve completely and could plug filters and nozzles – or clog the pump intake.
Note: Water and fertilizer are very different carriers. Beware of carrier-specific incompatibilities
Agitation
Keep agitation running throughout mixing and spraying. Aim for a “simmer” on the liquid surface rather than a “rolling boil.”
Low agitation can cause products to settle, making them difficult or impossible to resuspend later. Conversely, aggressive agitation (especially in half-full tanks) can cause foaming, pump suction loss, or product separation / clumping.
Pace
Adding products too quickly can cause product separation / clumping or poor suspension, leading to tank mix incompatibilities. While loading quickly improves operational efficiency, complex mixes require patience; Sometimes over five minutes between additions, especially in cold water or when using dry products.
To save time without sacrificing quality, consider pre-hydrating dry products or using a separate nurse tank to pre-mix loads for quick transfer. Remember: even if dry products look dissolved, they may still need more time.
Product formulation
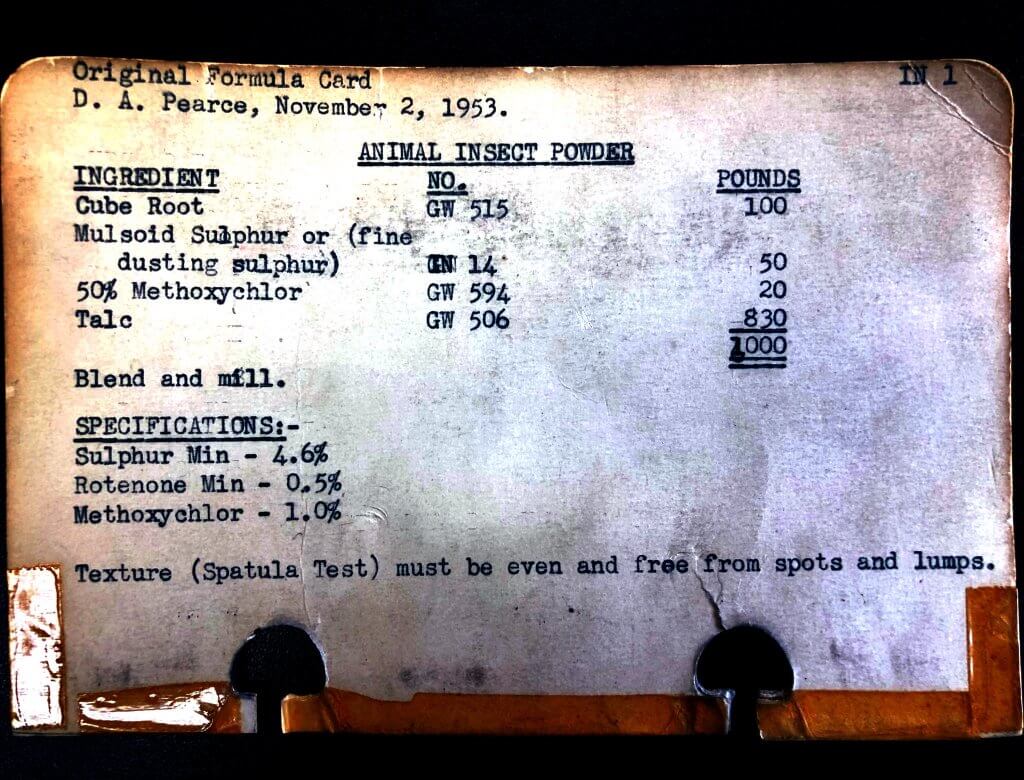
Product formulation is a complicated science. In the 1950s a formulation might have three active ingredients and an inert filler. See the historic formulation index card shared by Dr. M Doug Baumann (formally with Syngenta, Honeywood).
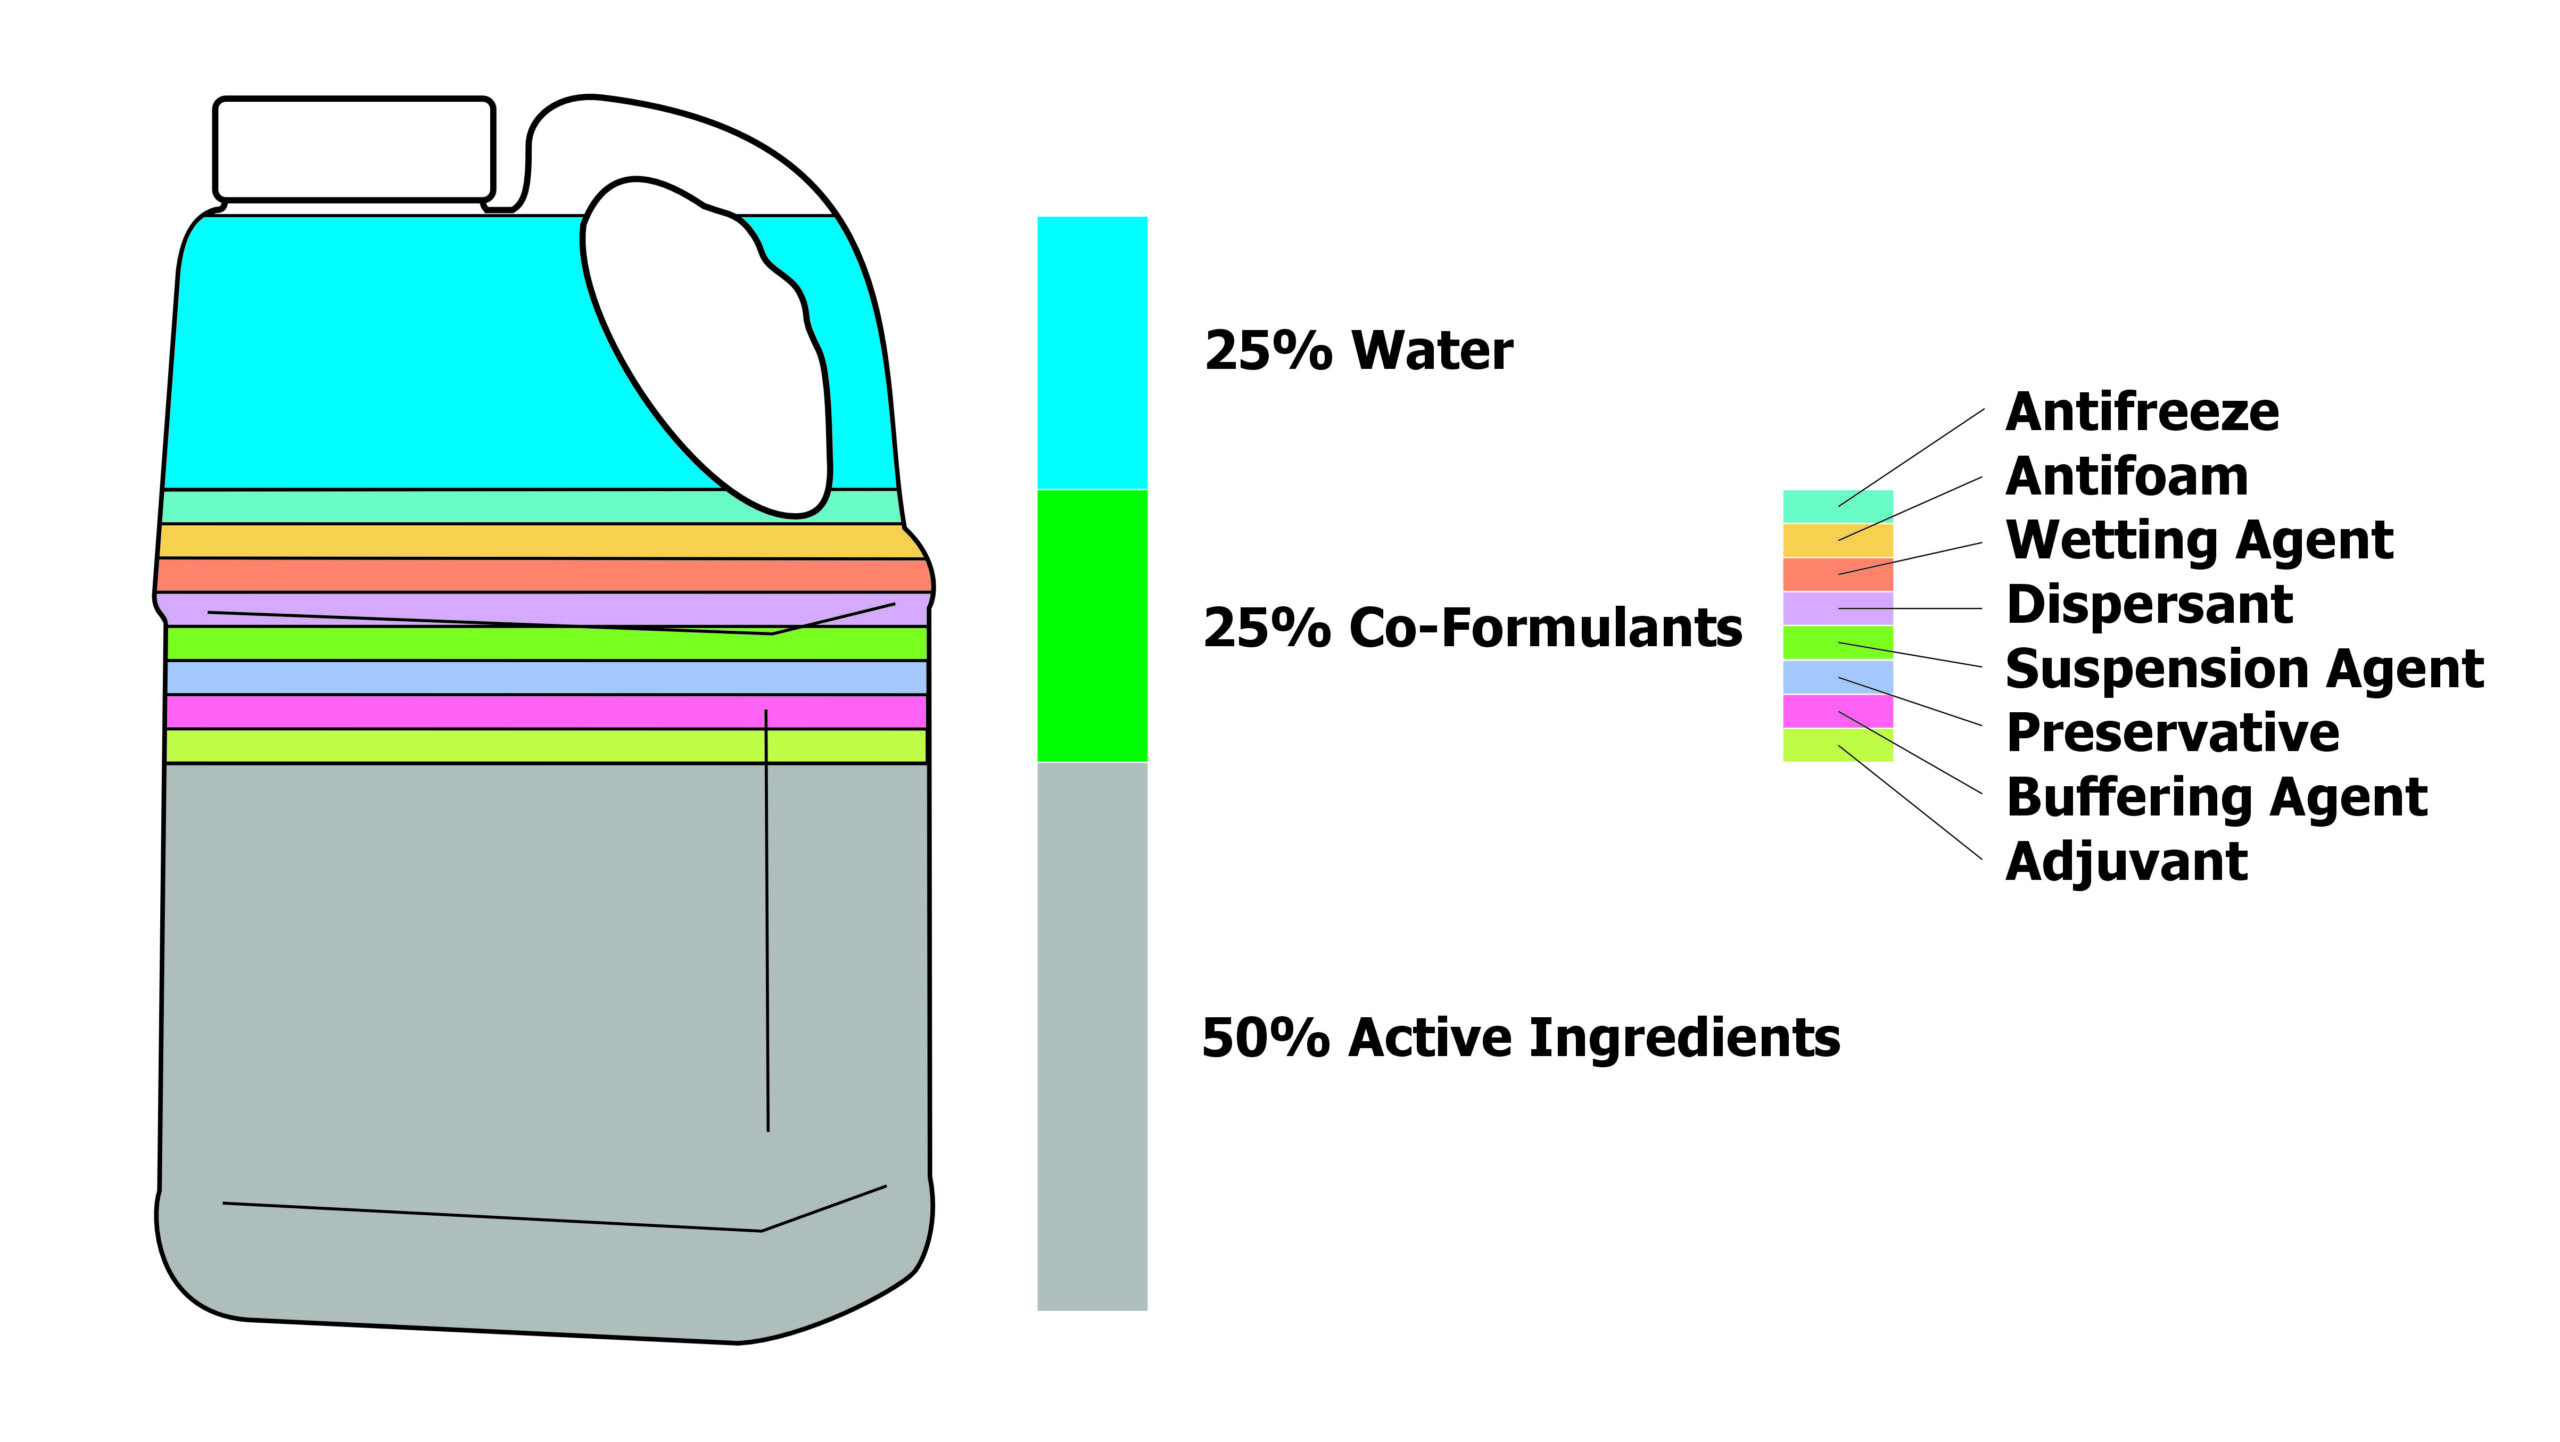
Today, a product can include as many as 40 ingredients with formulation testing lasting two to four years! Generally, only 25% of the volume is water, 50% is active ingredients and the remaining 25% is co-formulants. This is why the more products you add to the tank, the higher the risk of antagonism. This is also why operators should carefully consider the cost benefit of generics, which may include the active ingredient, but do not tend to include the co-formulants.
Mixing order
Tank mixing order is critical for chemical compatibility. While common acronyms like w.w.w.W.A.L.E.S., W.A.M.L.E.G.S., and A.P.P.L.E.S. serve as reliable guides 95% of the time, always defer to the pesticide label for specific instructions.
Expanded generic mixing order:
- Water: Fill tank 1/2 full (or 3/4 if fertilizer carrier).
- Agitation
- Water-Soluble Bags (WSB): Allow to fully dissolve.
- Wettable Powders (WP)
- Water Dispersible Granules (WDG, WG, SG)
- Liquid Flowables (F, FL, SC, SE, CS, DC, EW)
- Emulsifiable Concentrates (EC, MEC, OD)
- Solutions (SN, SL, Liquid Fertilizers/Micronutrients)
Adjuvants:
- Water Conditioners (e.g. anti-foamers, compatibility agents): Add before pesticides.
- Activator Surfactants (e.g. NIS, COC): Add after pesticides or by formulation type along with pesticides.
- Drift Retardants: Add last.
Examples of mixing errors
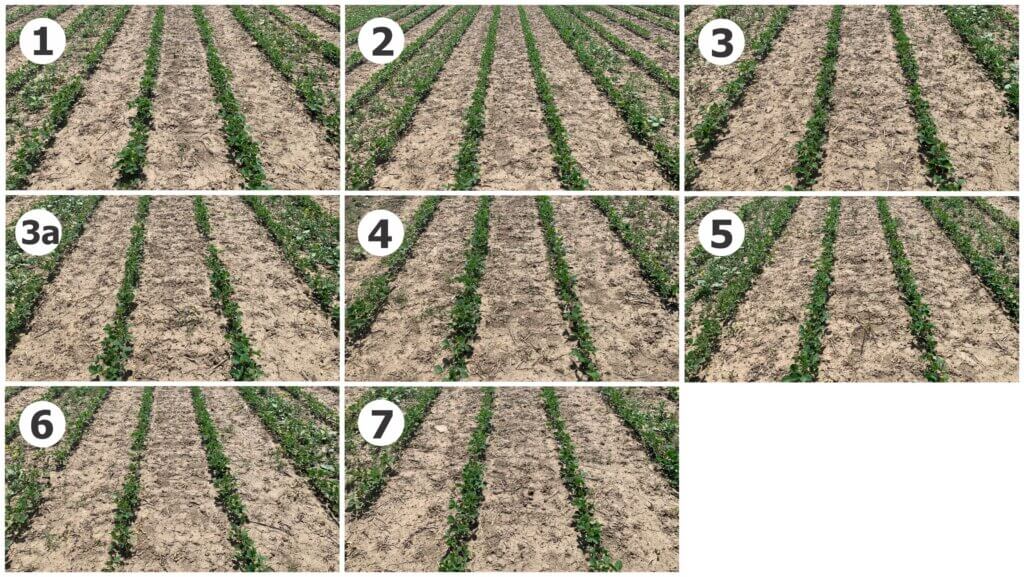
Micronutrients like sulfur (e.g. ATS) added to nitrogen-based formulations (e.g. UAN) can cause physical incompatibilities. This became a problem during “weed-and-feed” applications in Ontario corn in the late 2010s, and working with the registrants, we found a solution.
What follows is not only a good example of why mixing order is critical, but why growers should get into the habit of performing jar tests. Learn more about a real-world ATS example here.
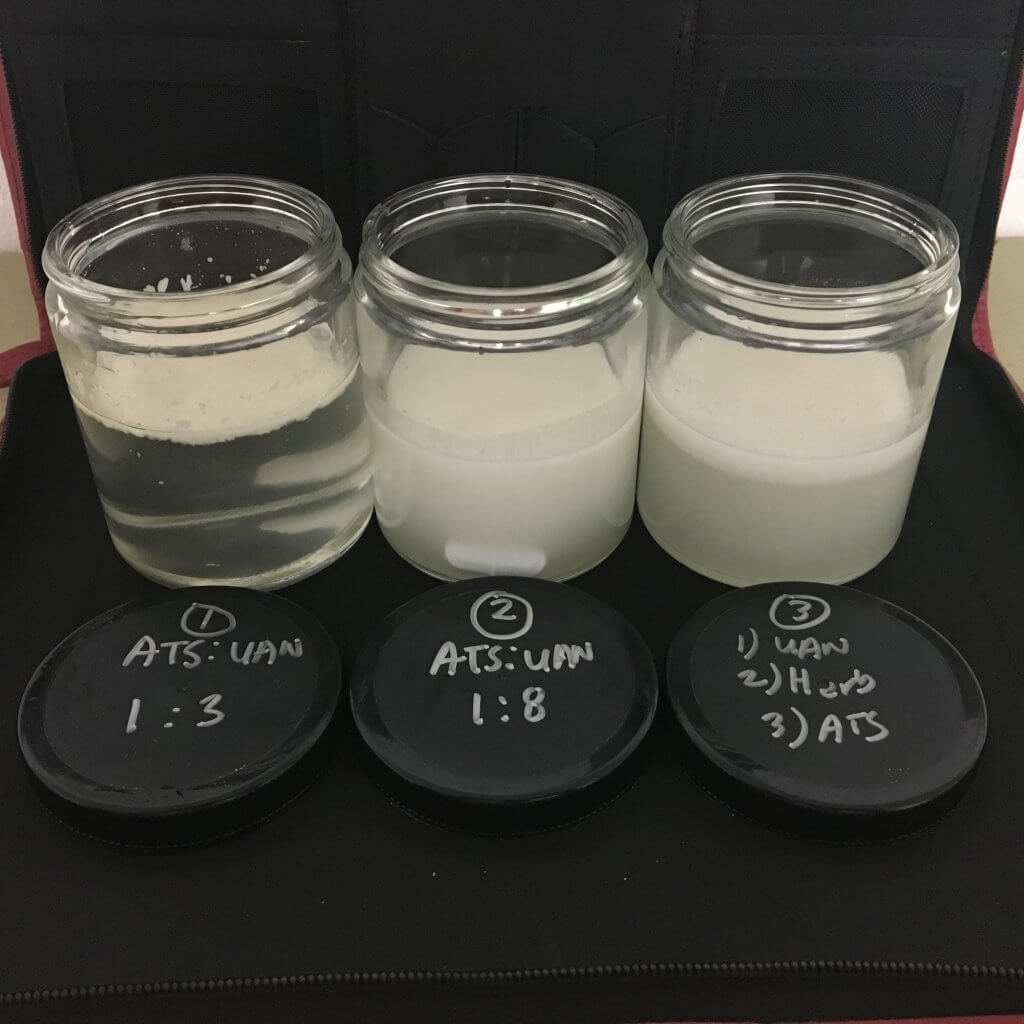
Centre: UAN, followed by low-load ATS followed by Primextra worked.
Right: UAN followed by Primextra followed by high-load ATS worked.
Mixing errors are just as likely in small plot work as in commercial sprayers. Watch this short video by Mike Cowbrough describing his experience with mixing order for Elevore and glyphosate.
The jar test
A jar test is a small-scale version of tank mixing used to check for physical incompatibility. Always wear PPE and work in a well-ventilated area away from ignition sources.
Jar test steps:
- Prepare: Read all labels for formulation details, water quality requirements (pH/hardness), and mixing order. Shake liquid containers to ensure consistency.
- Initial Carrier: Fill a 1-litre glass jar with 250 ml of water (or 375 ml if using oil/fertilizer).
- Add Products in Order: Add chemicals following the standard mixing sequence, stirring constantly. Scale rates to match your tank concentration (e.g., 1 kg per 1,000 L equals 0.5 g in a 500 ml test).
- Wait and Observe: Allow 3–5 minutes between additions—especially for dry products—to ensure full dispersion. If testing water-soluble bags, include a small piece of the film.
- Final Volume & pH: Top the jar up to 500 ml with your carrier. Check the pH with a digital meter and add adjusters if required by the label.
- Evaluate: Let the jar stand for 15 minutes.
The mix is likely incompatible if it generates heat, forms gels or scum, or if solids settle out (excluding wettable powders). Note: Jar tests only identify physical issues; they do not guarantee biological efficacy or crop safety.
Compatibility kits
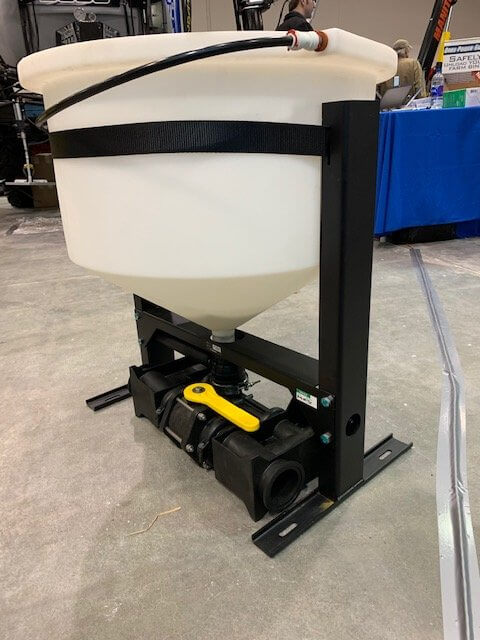
When performing a jar test you must maintain the same product-to-carrier ratio as in a full-sized sprayer tank. This math is made easier with commercial compatibility kits such as the one from Precision Laboratories (below).
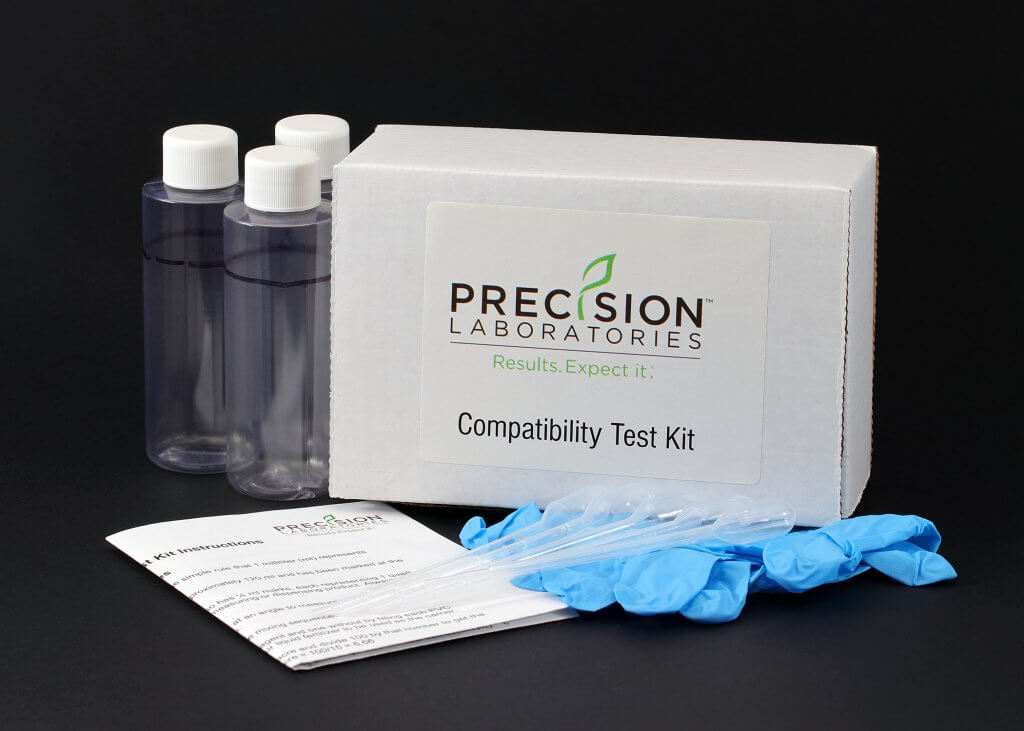
Such kits contain a few plastic “jars” and disposable micropipettes. By following the instructions included with the kit, you can easily reduce large labelled volumes (e.g. 1 kg of product in 1,000 litres) of multiple products to small volumes at the same ratio. In this case we assume the final volume would have been 1,000 L, and so we reduce all the quantities accordingly to get 500 ml. The following mixing order is provided as an example.
| Order | Ingredient | Quantity for 500 ml or 500 g of product labeled for 1,000 L of final spray volume |
| 1 | Compatibility agents | 5 ml (1 teaspoon) |
| 2 | Water soluble packets, wettable powders and dry flowables. Include a 1cm2 cutting of PVA packaging. | 15 g (1 tablespoon) |
| 3 | Liquid drift retardants | 5 ml (1 teaspoon) |
| 4 | Liquid concentrates, micro-emulsions and suspension concentrates | 5 ml (1 teaspoon) |
| 5 | Emulsifiable concentrates | 5 ml (1 teaspoon) |
| 6 | Water-soluble concentrates or solutions | 5 ml (1 teaspoon) |
| 7 | Remaining adjuvants and surfactants | 5 ml (1 teaspoon) |
Records and delayed reactions
Maintain detailed mixing records for traceability and to track performance. These records help you replicate successes and avoid future failures.
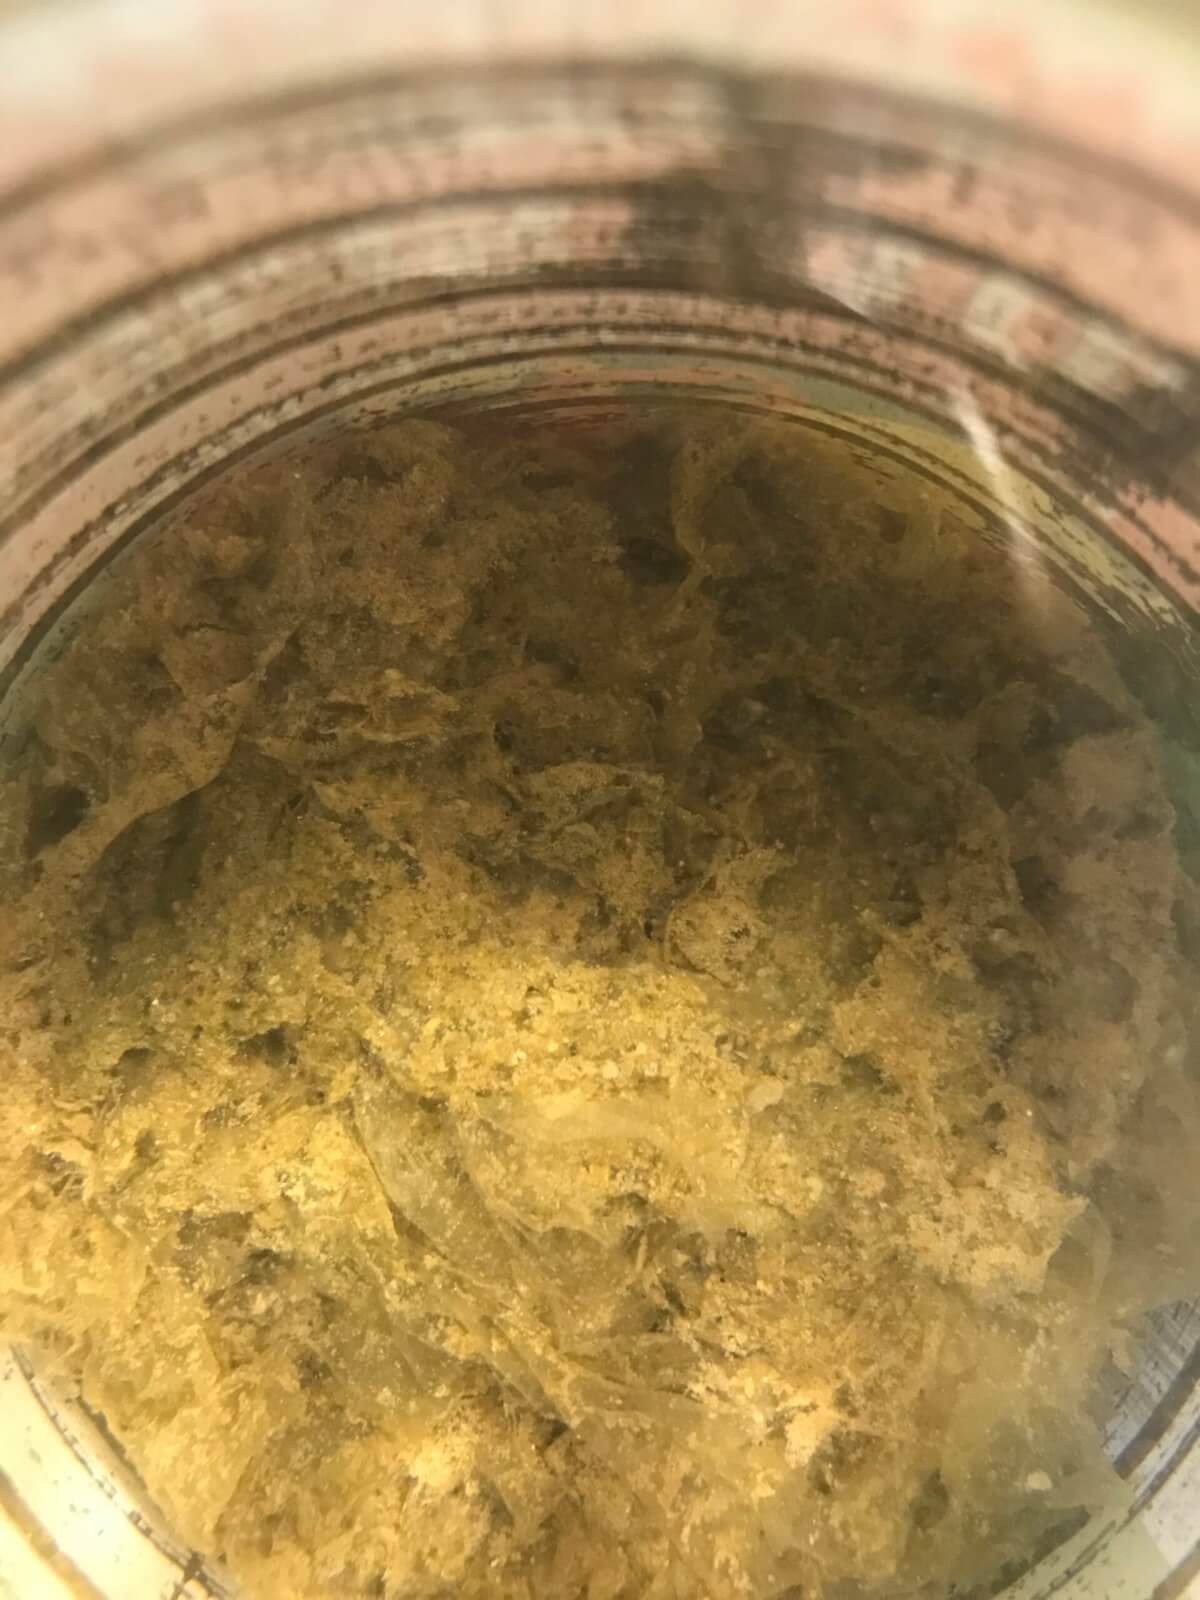
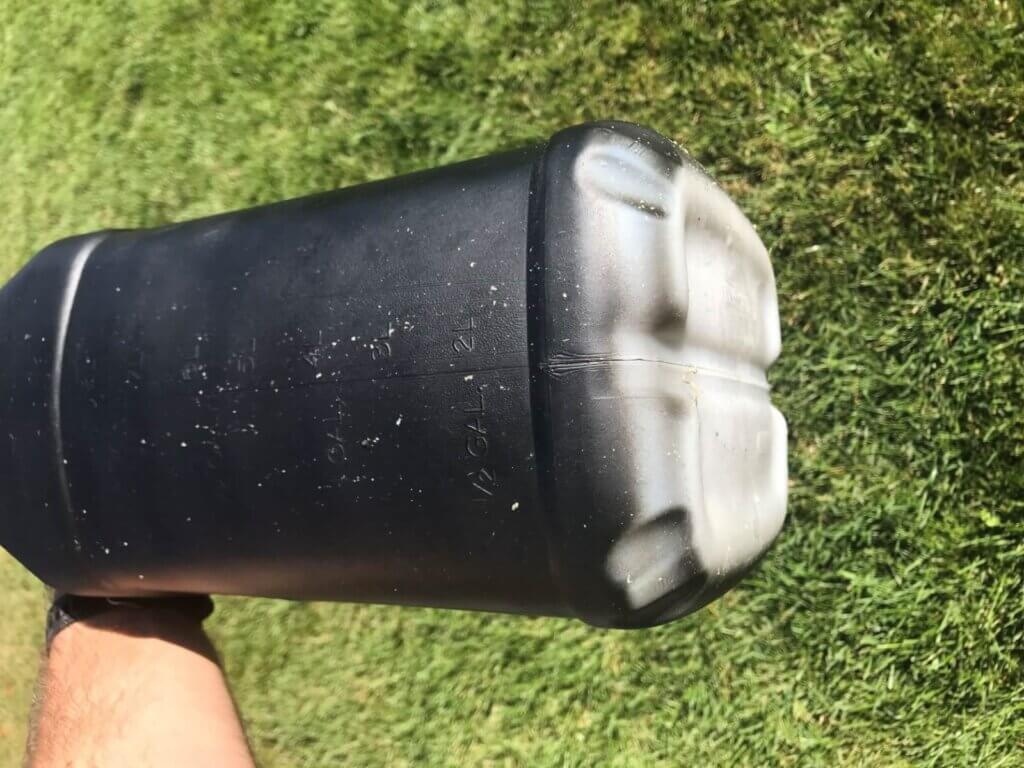
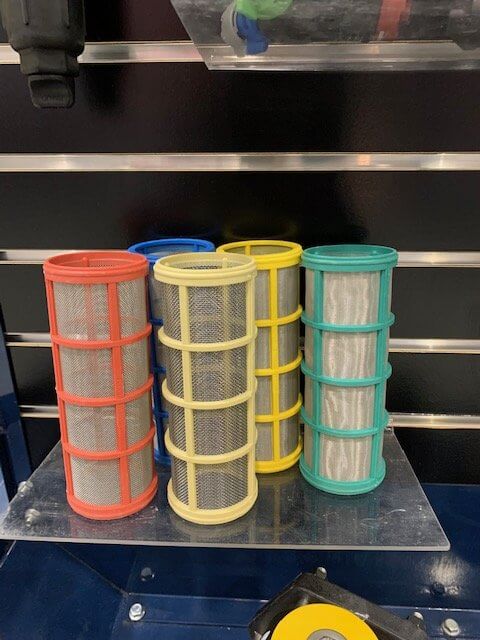
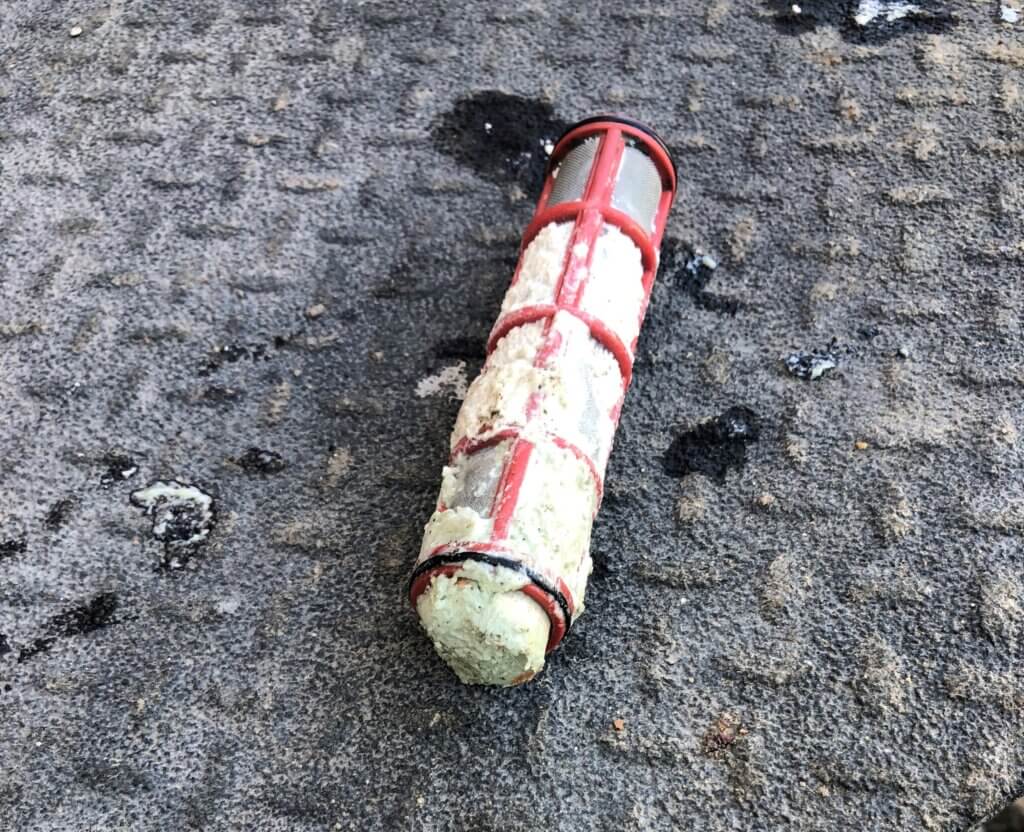
Labelled jar tests are also valuable; by leaving them in the chemical shed overnight, you can see if products separate or solidify over time. This indicates whether a mix can safely sit in the sprayer or if it requires immediate rinsing. For example, one grower’s Enlist and Manzinphos mix appeared fine until it sat during a rain delay. It turned into “lard,” clogging the entire system and requiring a manual teardown. They even had to dig some of the substance out with screwdrivers (see the picture of the filter below). An overnight jar test likely would have predicted this problem.
Closed transfer
As a brief mention, an expansion of closed transfers systems for loading pesticides is on the horizon in North America. They have great potential to make loading more efficient, reduce operator exposure and reduce point-source contamination. Depending on the design, however, the operator may not be able to open pesticide containers to obtain samples for jar testing. This would be a great loss.
For more information
Learn more about physical and chemical incompatibility in our article on Tank mix compatibility. Be sure to download a copy of Purdue University’s 2018 “Avoid Tank Mixing Errors”. Finally, if you have questions about a specific product, contact the manufacturer, who have likely already performed the testing with common tank mix partners and can advise you.
This article was co-written with Mike Cowbrough, OMAFA Weed Management Specialist – Field Crops