Editor’s Note: Changes and updates have been made to this article since its original publication in 2019.
The quality of water being used in the spray tank to act as the carrier for your pesticides can have significant effects on how well those pesticides will work. So it may be surprising that very few growers have had their water quality tested.
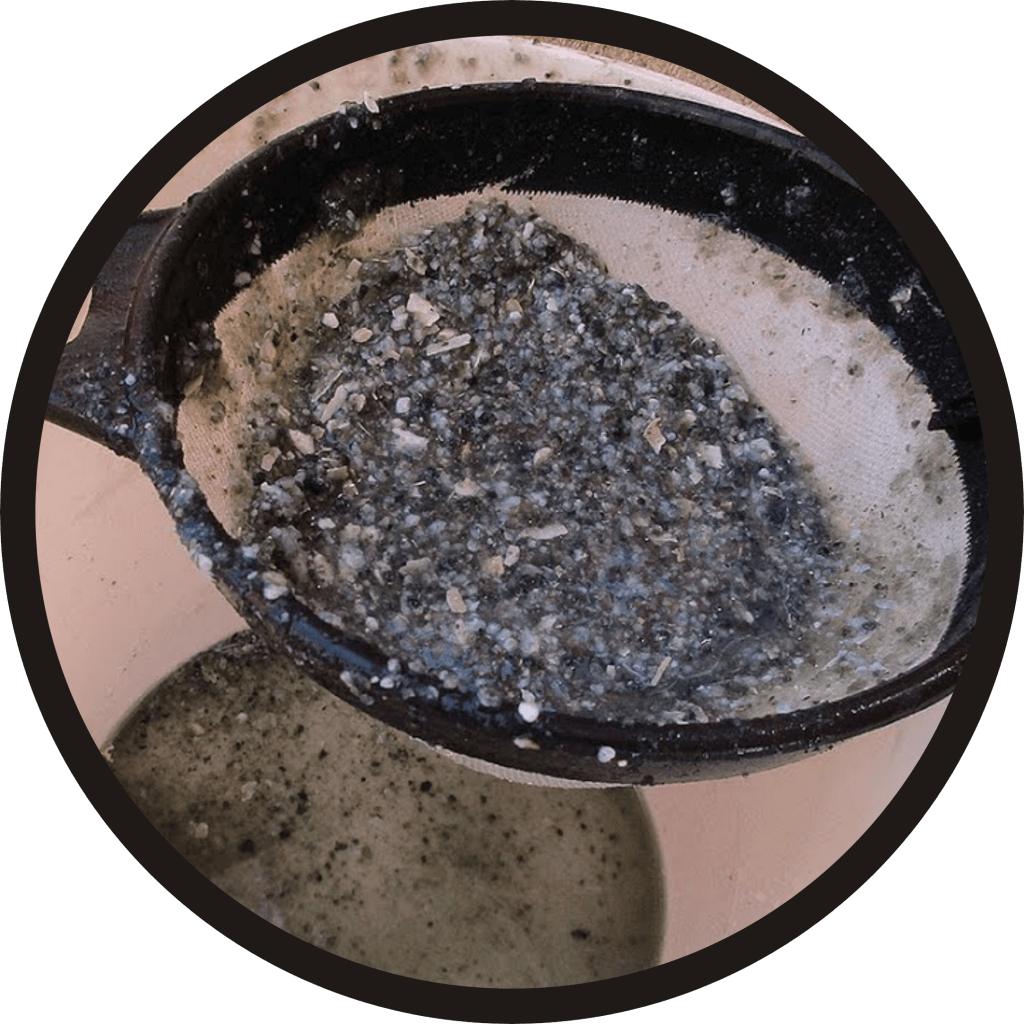
Obviously, water that contains suspended materials such as clay, algae and other debris will block filters and possibly nozzles, making spraying very frustrating. However, there are a range of water quality variables unseen to the naked eye that can also affect pesticide performance. The two that cause the most confusion are water hardness and pH.
Water Testing
Knowing the quality of the water you are using is essential for effective pesticide application. Water should be initially tested by a qualified laboratory to establish an accurate baseline for your water quality. Check with your pesticide dealer or look for accredited laboratories near you.
It is important to remember that water quality can vary over time depending on its source. Scheme or town water quality tends to vary very little, however water from surface sources such as dams, tanks and rivers will vary depending on rainfall and other factors. Groundwater can also vary over time depending on how much is being pumped and the recharge rates of the aquifer.
At minimum, water should be tested for:
- total hardness
- bicarbonate (HCO–)
- salinity (electrical conductivity) or total dissolved salts (TDS)
- pH
Test strips can be used to quickly check water quality before and after addition of pesticides and monitor changes in water quality between laboratory tests. High-quality test strips can be purchased online from companies such as Hach. Water testing for swimming pools will not be as accurate as those from a scientific supply company. No mater the course of the paper strips, they may be hard to read when used in solutions already containing product. Alternately, and preferably, hand-held meters can be used as long as they receive regular calibration to maintain accuracy.
Water Hardness
Water that is considered “hard” has high levels of calcium, magnesium or bicarbonate ions. Calcium and magnesium ions have positive electrical charges that enable them to bind with negatively charged products such as weak-acid herbicides, making them less soluble. Extreme cases can lead to the herbicides settling out in the spray tank, or more commonly (and insidiously) reducing the ability of the active ingredient to be absorbed through the plant leaf. Examples of weak acid herbicides include glyphosate and amine formulations of 2,4-D, MCPA, clopyralid and diflufenican.
It can depend on your region, but generally a water hardness above 250 to 350 parts per million (ppm) (calcium carbonate – CaCO3 equivalents) should be treated before adding weak acid herbicides.
The cations that can cause the most trouble for pesticides include:
- aluminum (Al3+)
- iron (Fe3+, Fe2+)
- magnesium (Mg2+)
- calcium (Ca2+)
- sodium (Na+)
Magnesium and calcium are the most common cationic culprits of water quality problems. Aluminum can sometimes be a problem if alum (potassium or aluminum sulphate) has been used to remove (i.e. flocculate / settle-out) suspended particles such as clay from the spray water.
Bicarbonates
Bicarbonates can also affect herbicides such as Group 1 ‘dims’ (e.g. clethodim) and 2,4-D amine at levels greater than 500 ppm. Bicarbonates are not typically detected by standard water hardness tests and may have to be analyzed in a separate test. Be suspicious if your groundwater comes from an area with lots of limestone.
pH
The pH of a liquid is represented on a scale of 0 to 14, and it describes how acidic or alkaline it is, respectively. A neutral pH is about 7 whereas a pH of 2 is very acidic and a pH of 14 is very alkaline. It is important to remember that the pH scale is logarithmic, not linear. This means that a value of 6 is 10x more acidic than a pH of 7, while a pH of 8 is 10x more alkaline than 7 and 100x more alkaline than 6.
The following table gives the pH of common materials to give a sense of perspective.
| pH | Substance |
| 14 | Sodium hydroxide (caustic soda) |
| 12.6 | Sodium hypochlorite (bleach) |
| 11.5 | Ammonia |
| 10.2 | Magnesium hydroxide (antacids) |
| 9.3 | Sodium borate (borax) |
| 8.4 | Sodium bicarbonate (baking soda) |
| 8.1 | Sea water |
| 7.4 | Human blood |
| 7.0 | De-ionised water |
| 6.8 | Tea |
| 6.7 | Milk |
| 6.0 | Rain water |
| 4.5 | Tomatoes |
| 4.2 | Orange juice |
| 4.0 | Wine & Beer |
| 2.8 | Vinegar |
| 2.2 | Lemon juice |
| 2.0 | Stomach acid |
| 1.0 | Battery acid |
| 0.0 | Hydrochloric acid |
Excessive Alkalinity
Most recognize that a pH above 8 will reduce the effective life of certain pesticides, such as organophosphate insecticides (if you’re still allowed to spray them where you are). In certain situations, water above pH 8 can change herbicide solubility (poor mixing), reduce product stability (reduced half-life) and negatively affect droplet interaction with the leaf surface. However, the effect of high pH on herbicides is largely overstated.
Excessive Acidity
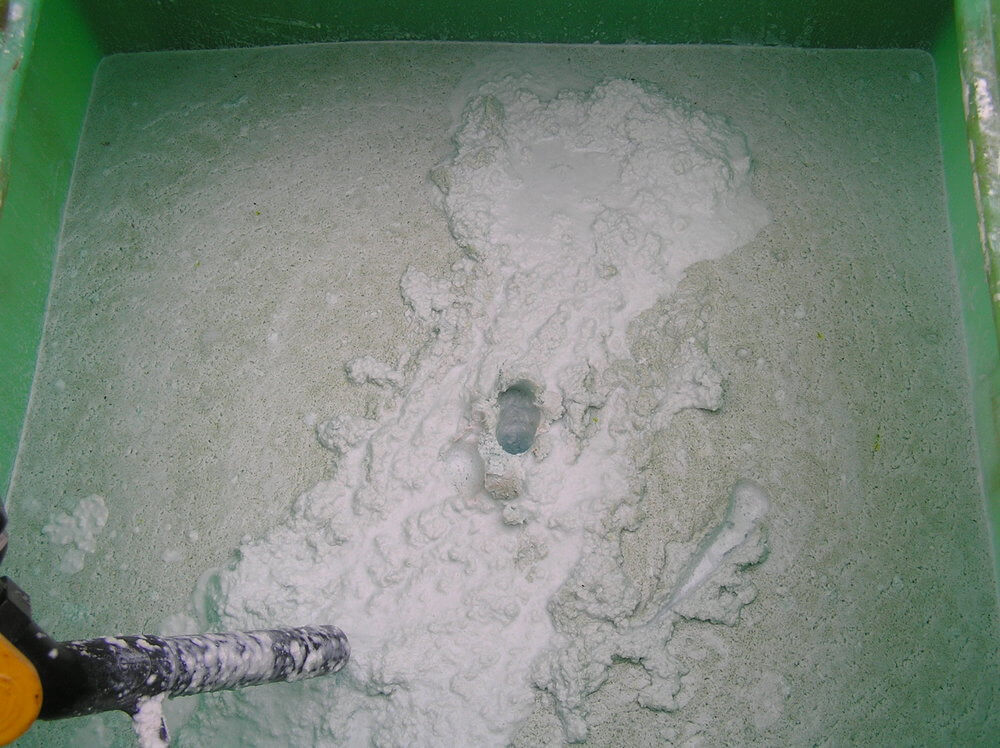
Glyphosate has been found to work slightly better in moderately-acidic solutions. This effect is from the precipitation of calcium compounds in the tank, preventing the formation of calcium glyphosate on the leaf surface. Excessively acidic water (pH < 5) can affect the stability of mixes (see the following image) and leads to gelling of salt-based products. It has also been found to increase the volatility of herbicides such as dicamba (this is discussed later in the article).
Do I need to adjust the pH of my water?
There are many half-truths in the marketplace about the effect of pH on pesticides. But generally:
“If the pH of the water in the spray tank is between pH 6 and 8, it’s is suitable for spraying.“
Something that is rarely discussed is that the addition of the pesticide will modify the pH of the solution. Therefore, each pesticide user needs to test the water before the addition of pesticides and then check the pH after the addition of the pesticide. They will be very different.
The addition of glyphosate to the spray solution will drop the pH of the spray mix from 8 to less than 5. In the following figure the test strip on the right is town water which normally has a pH of about 8.5, compared with the test strip to the left which is from a 1% glyphosate (450 g/L) solution using town water, which is below a pH of 4.

Research in the United States has found drift damage from dicamba continued to be a problem despite the mandating of using XC and UC spray quality. They found one cause was the addition of glyphosate to the mix, which reduced the pH of the spray solution (Table 2). Volatilization of dicamba increases with decreasing pH. Different formulations of dicamba were found to drop the spray solution pH from 7.8 to between 6.5 and 6.9, however the addition of different formulations of glyphosate dropped the spray solution to 5 or lower.
Table 2 Effect of different formulations of dicamba and glyphosate on spray solution pH. Source: Larry Steckel
| Starting pH (water) | Dicamba added (3 formulations) | Glyphosate added (3 formulations) |
| 7.8 | 6.9 | 4.8 |
| 7.8 | 6.5 | 4.8 |
| 7.8 | 6.7 | 5.0 |
Currently, in Australia, the recommendation for dicamba is to not add glyphosate to the mix. This will minimize pH drop and therefore reduce the volatilization of dicamba and potential off-target damage.
There’s even more about adjusting the pH of carrier water here.
Adjusting pH using Ammonium sulphate (AMS), Ammonium thiosulphate (ATS) and adjuvants
The degree of bicarbonate, or alkalinity, depends on the presence of calcium and sodium, which can inhibit herbicide performance. Readings higher than 500 ppm inhibit 2,4-D-amine and MCPA-amine. Adding AMS can be effective at countering bicarb. According to Jim Reiss (former Vice President, Ag Chemistry with Precision Labs in Illinois), the following formula can be used to calculate how many pounds of AMS are required to raise the alkalinity. It involves soil testing levels of sodium, calcium, magnesium and iron, along with potassium:
0.002 x K ppm + 0.005 x Na ppm + 0.009 x Ca ppm + 0.014 x Mg ppm + 0.042 x Fe = lbs of AMS/US gallon.
Generally, AMS has no negative impact on mixing in a water-based carrier when added at any stage, but always follow the label if it specifies a mixing order. Especially if mixing in a fertilizer carrier instead of water. Read more about AMS here, under the “Water Conditioners” heading.
Ammonium thiosulphate (ATS) is another option, but must be used with care. Research from Purdue University (2019) concluded that using ATS with a burndown herbicide program that relies on glyphosate or glyphosate plus 2,4-D could lower the control of weeds (e.g. barnyard grass, velvetleaf or lamb’s quarters), or cover crops.
Adding UAN can also help neutralize the effects of bicarbonates, but be aware that adding UAN (or any sulfur) to a carrier could cause physical incompatibilities – especially when adding to a fertilizer carrier. Follow mixing order directions on the pesticide label and read more, here.
Alternately, you might consider a mixing aid or water conditioning adjuvant to deal with bicarbonate. The following table describes the difference between using AMS and a pH adjuster (based on information from Winfield United). If you’re in doubt, speak to your crop consultant and/or pesticide dealer about the best pH adjustment method for your situation.
| AMS | pH Adjuster Adjuvant | |
| How it works | Sulfate binds to cations in water and on leaf surfaces | Lowers pH to prevent glyphosate binding to cations. |
| pH of solution | Remains neutral (pH 5.5-7.0) | Lowers pH to 5.0 or less |
| Tank compatibility | Compatible with pesticides and micronutrients | Only compatible with glyphosate and weak acid herbicides |
| Herbicides | Compatible with wide range (often used with Groups 1, 9, 10 and 27) | Helps glyphosate and weak acids (e.g. 2,4-D amine). Antagonizes many others (e.g. Groups 2, 27) |
| Fungicides | Generally compatible | Not recommended |
| Insecticides | Generally compatible | Not recommended |
Final Thoughts
While we share some general best practices in this article, the standards defining the suitability of carrier water can often be region-specific. Be sure to have your water tested and interpret it within the context of local best practices before making adjustments. If an adjustment is warranted, be sure to follow the pesticide label and the water treatment product label, exactly.
Additional Resources
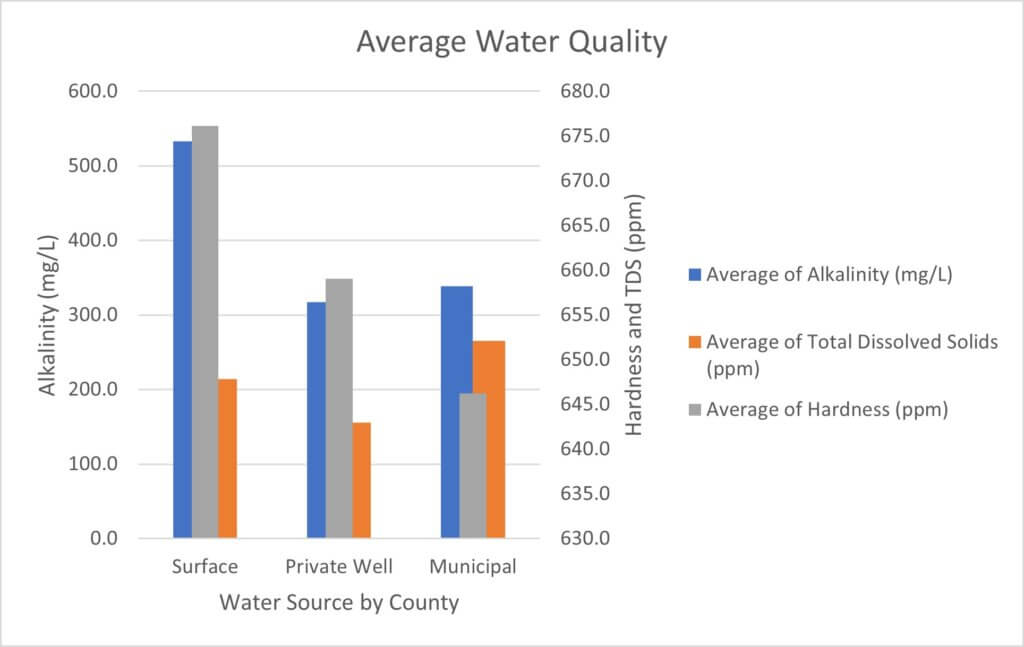
In 2024, Ontario held a sprayer event (Spray Smart) where sprayer operators were asked to bring in their water for testing. This article discusses some of the observations made that day, and a graph of the fill water survey is presented below. Assuming no adjustments are needed for a hardness < 600 ppm, a TDS < 325 ppm and and alkalinity (esp. bicarbonate) <500 mg/L, the averaged results of the sampling indicated no adjustments were required. However, there were a few outliers that are lost in the averaging.
For more information on how water affects spraying, consult Purdue Extension’s “Adjuvants and the Power of the Spray Droplet – PPP-107”. You can also consult Purdue’s “The Effect of Water Quality on Pesticide Performance – PPP 86”.