Targeted spraying is a technology that enables the site-specific application of plant protection products and liquid fertilizers based on sensor readings. Some of the latest machines incorporate computer vision and processing capabilities that can distinguish between different types of weeds and crops based on multiple adjustable criteria.
The Swiss-made ARA Sprayer by Ecorobotix, has recently generated significant interest among Ontario growers. This article provides a technical overview of the machine, including a detailed explanation of its main features and capabilities.
The Sprayer
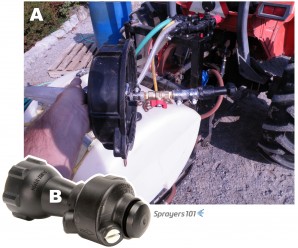
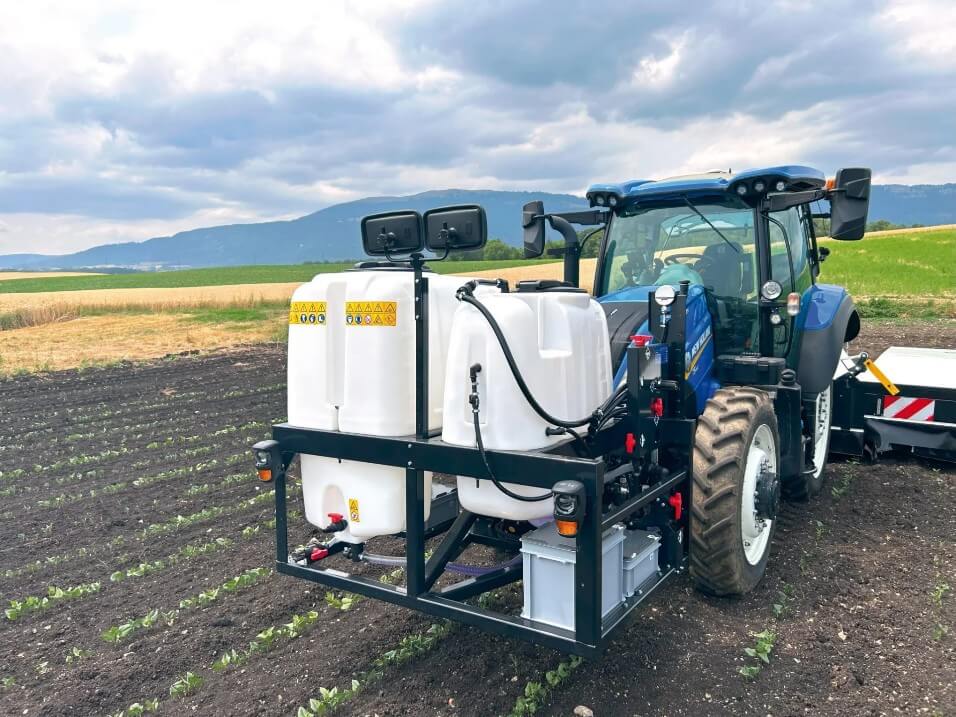
The sprayer is a two-component system, mounted directly onto the front and back of a tractor. The front unit consists of two separate tanks: one dedicated to the chemical solution and the other to fresh water, which can be used for rinsing or refilling the chemical mixture tank. The front component also includes the pump and processing unit (Figure 1).
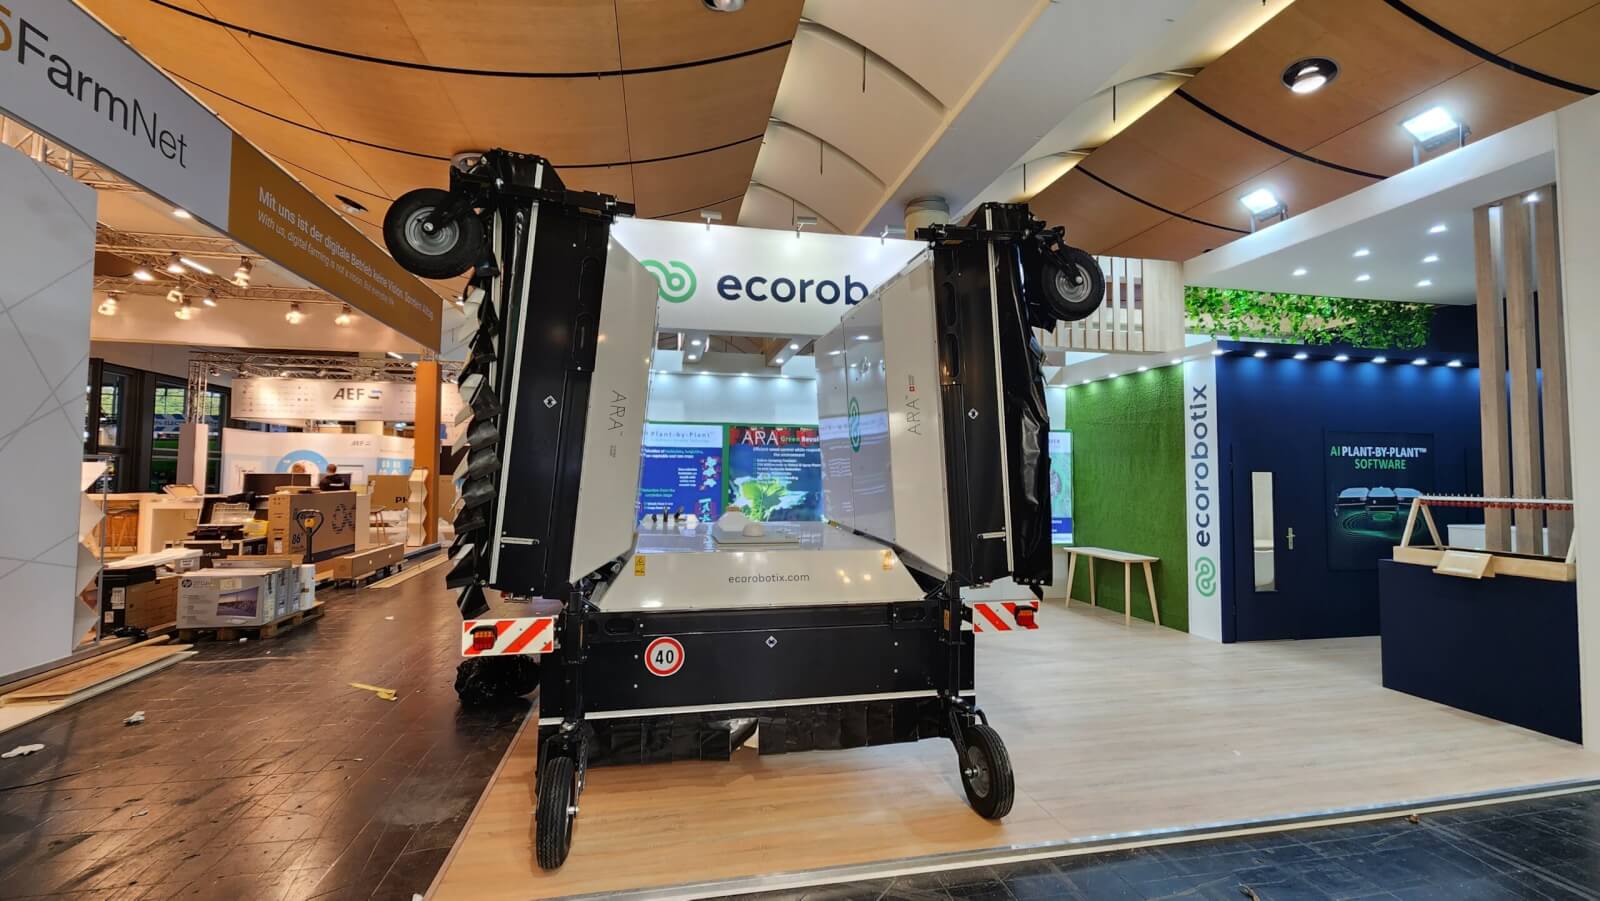
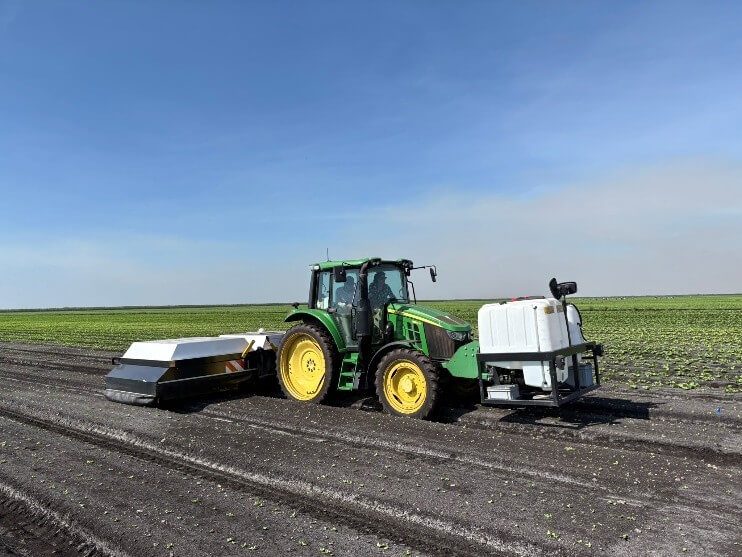
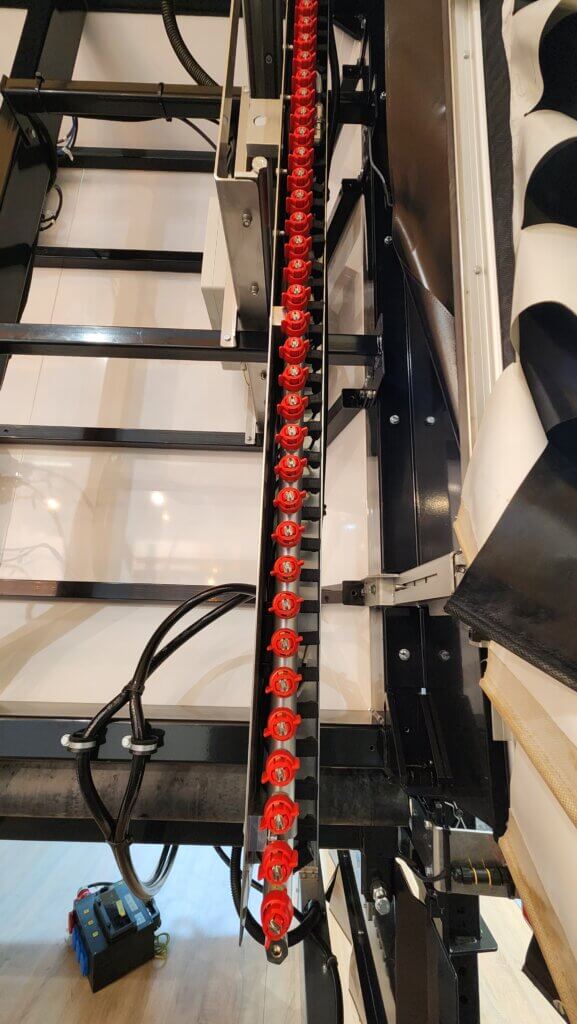
The boom section is mounted via three-point hitch to the rear of the tractor (Figure 2). The shrouded boom folds for transport and storage and features 156 individually controlled nozzles (Figure 3).
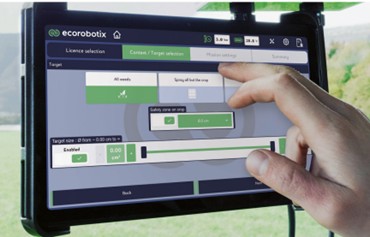
The unit can be controlled and monitored from a tablet or smartphone connected through the machines’ own Wi-Fi. External data connection through internet is only required for occasional maintenance and updates but not for regular field operations. Regardless of the complexity embedded in the smart operating system, the interface is intuitive and easy to manage. Most of the parameters are automatically optimized by the software (Figure 4).
Capabilities
Since the intelligent vision system acts as the central controller for each individual nozzle, it enables a wide range of operating modes and potential applications. Depending on user needs, the system can process information and respond in various ways. The following list outlines the currently available and tested features, which may be expanded in the future.
Banded Spraying
In this mode, parallel bands of variable width are sprayed, which might include or exclude the crop (Figure 5), depending on the objective. The lines are defined based on AI detecting a planting pattern, which will lead to the automatic definition of the spraying swaths.
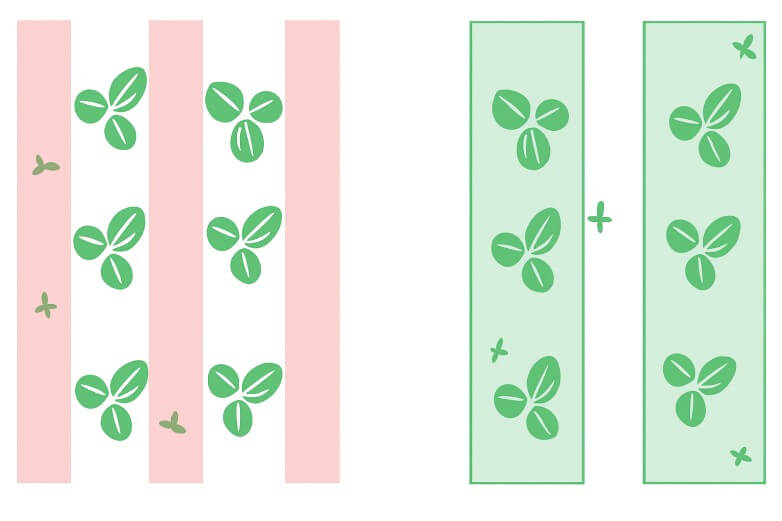
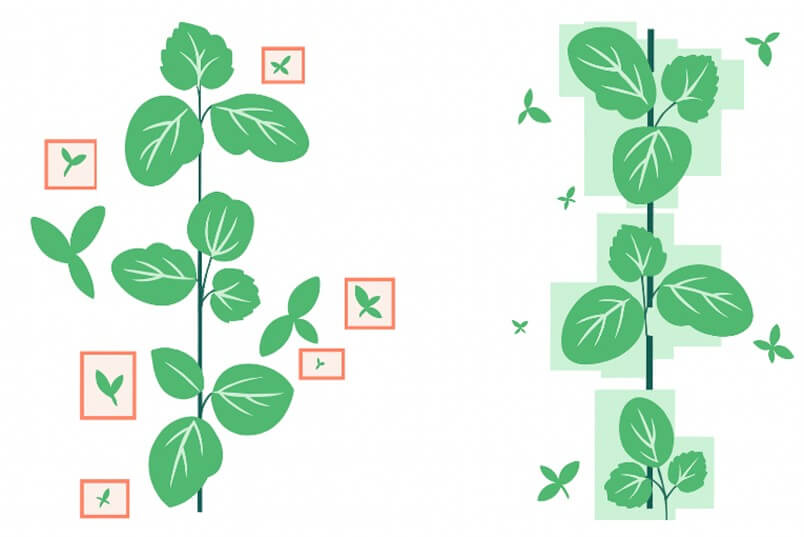
Size-Exclusive Spraying
This option allows targeting the spray based on the plant size. It can either be used to:
- Detect and spray weeds larger than a small emerging crop.
- Detect smaller emerging weeds in an advanced-stage crop. Weeds similar in size or larger than the crop will be missed in this case. (see figure 6 – left).
- Spray only the crop with fertilizers or pesticides when no-specific algorithm has been developed to differentiate it from the weeds. The crop must be significantly larger or smaller than the weeds for this mode to work efficiently. (see figure 6 – right)
Green on Brown Spraying
The machine will spray all detected green material (Figure 7). This is particularly useful for improving chemical use efficiency in stale seedbed and insecticide applications. It also offers an interesting option to reduce the risk of herbicide carryover in pre-plant, post-weed-emergence control, especially when weed cover is low and the product may persist in the soil long enough to affect the crop.
Green on Green Spraying (Six Scenarios)
The vision system and processing capabilities can identify the crop, distinguish it from weeds, and selectively target either, regardless of plant size. Additionally, a variable safety buffer can be defined to determine how close a spray can be applied to the nearest crop leaf. If this feature is inactive, any overlapping weeds will be sprayed, even if the herbicide contacts the crop. If active, the sprayer will avoid targeting weeds that are closer than the defined safety buffer distance, which can be set up to 16 cm (6.3”).
The parameters can be configured to cover six difference scenarios:
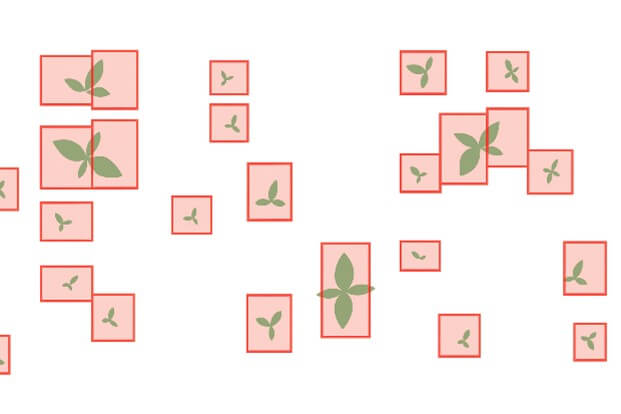
1. Selective herbicides when no safety buffer is required
All weeds will be sprayed, regardless of their proximity to the crop. If they’re very close, the crop might receive part of the spray (Figure 8). This mode is suitable for selective herbicide applications.

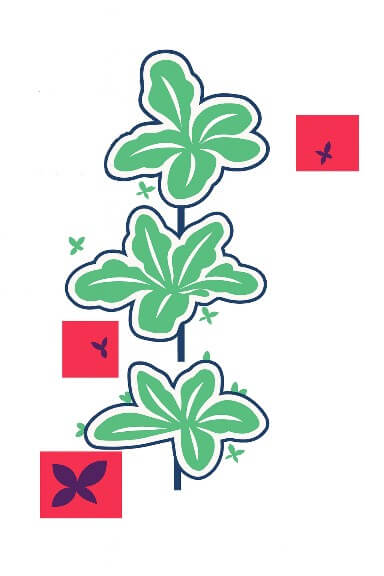
2. Non-selective herbicides when the contact with crop canopy should be minimized
In this case, depending on the potential damage caused by the chemical contacting the crop, a variable buffer can be programmed. Only weeds that can be sprayed while maintaining the defined buffer distance from the crop will be targeted (Figure 9). Inevitably, weeds in very close proximity or overlapping with the crop will be missed.
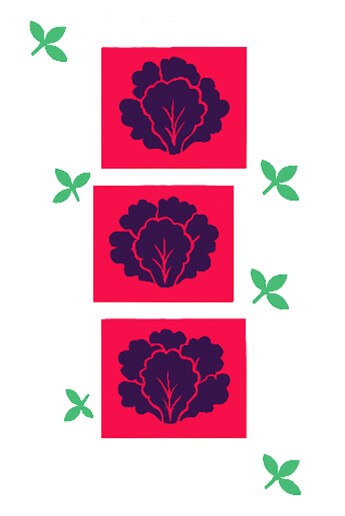
3. Crop-targeted spray
The machine will detect the crop and will not spray anything else (Figure 10). This can be useful for insecticide or foliar fertilizer applications.
4. Application of weed pre-emergence herbicides post-crop-emergence
In this case the entire surface, except the crop canopy is sprayed (Figure 11). It can be utilized to spray herbicides with soil residual activity post crop emergence.

5. Monocots vs dicots weeds differentiation
This mode is limited only to onion fields for now. It can be configured to spray only monocots weeds (grasses, sedges) or only dicots weeds (broadleaf). This can be useful to increase the efficiency of post-emergence broadleaf or grass selective herbicide applications.
6. Specific weeds targeted
In this mode only the target weeds will be sprayed. As of now, it’s only available for thistles, docks, and common ragwort. It can be used when a specific herbicide is used to target hard-to-control species.
Speed and Accuracy
For all applications, the company claims to have a spray accuracy of 6 cm by 6 cm (2.4”x2.4”). The speed of operation will be dependent on the weed size. The larger the weed size, the lower the recommended speed to allow for an optimal spray coverage of the weeds, increasing the treatment efficacy. The speed operating range is 0 to 7.2 km/h (0-4.5 mph).
Weed coverage or density does not affect the maximum recommended speed, as the machine can process images at such high rates that it is capable of scanning and spraying 100% of the area when moving at full speed. In other words, the processing unit does not need to slow down to detect, differentiate, and target weeds, even when they are present at very high densities.
Ecorobotix claims the machine can cover 2.8-3.2 ha (7-8 acres) per hour under typical conditions and can run 24/7 independent of light conditions.
Crop Portfolio
As of August 2025, the company has developed the following algorithms for specific crop recognition:
Vegetable Crops:
- onion
- carrot
- lettuce
- endive/chicory
- beans
- spinach
- broccoli (beta)
- cauliflower (beta)
- leek (beta)
- other cabbages (beta)
- potatoes
- sweet corn
Field Crops:
- sugar beet
- rapeseed (canola)
- corn
- soy (beta)
- cotton (beta)
- wheat (beta).
For the crops not listed, the equipment can still be used but not with the features that required crop identification for targeted sprays.
Technical Specifications
- Minimum weed size required for weed detection: 4 x 4 mm.
- Maximum plant height: 40 cm.
- Minimum crop size for proper identification: at least two true leaves.
- Minimum tractor power: 90 HP
- PTO: 540 RPM, 4 HP (3 kW) max
- Three-point hitch: cat 2 front and back.
- Weight:
- Front unit: 705 lb or 320 kg (empty), 2,645 lb or 1,202 kg (full)
- Rear unit: 2,257 lb or 1025 kg
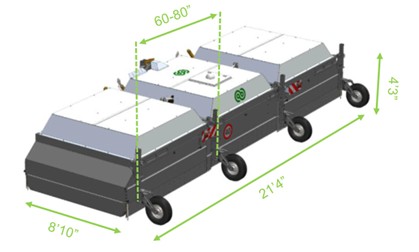
- Dimensions (Figure 12):
- Front unit: 5’7” x 4’7” x 5’7” (W x D x H)
- Rear unit: 21’4” x 8’10” x 4’3” (W x D x H)
Cost of Purchase and Operation
At the time of writing, the purchase cost for a complete unit is around $300,000 USD, depending on the algorithms purchased and shipping fees. In the following years, there is an annual fee associated with the operating system maintenance and development. The basic subscription includes algorithms for three crops, as well as access to all beta-stage models currently in development. Additional crop algorithms can be purchased. For accurate pricing, contact their Canadian partner, Univerco.
According to the manufacturer, the equipment does not require regular replacement of expensive components beyond standard sprayer preventative maintenance. While some components are standard and readily available, the company also keeps a regular stock of specialized parts at its warehouse in Pasco, WA, available for immediate shipping. Comprehensive service and maintenance support is provided locally by Univerco.
Testimonial
Wendy Zhang is the head agronomist for Keejay farms. She oversees more than 5,000 acres of diverse vegetable crops, predominantly carrot and onions. In her own words, the machine is “easy to operate, very accurate, and fast enough for a large-scale farm.” She also highlighted substantial savings on chemicals and the significant advantage of being able to safely spray close to the crop using products that cannot be broadcasted due to the risk of unacceptable crop damage.
The most important benefit, she says, is the ability to apply treatments very close to the crop canopy, using effective rates and chemistry without compromising crop safety. No other practical tool offers this capability. A clear demonstration of its effectiveness is that no other spray equipment is currently being used for their large onion operation.
The Grower Magazine published an excellent article about this machine, featuring other grower testimonials.
Thanks to Olivia Soares de Camargo, Business Development Manager at Ecorobotix, for providing much of the information used in this article.