Category: General Operation

All general hort articles on sprayer operation.

  • Alternate Row Spraying

    Alternate Row Spraying

    Alternate Row (aka Alternate Row Middle [ARM]) spraying is an application method where the air-assist sprayer does not pass down every alley during an application. The sprayer operator is relying on the spray to pass through one or more rows and provide acceptable coverage to the entire canopy (or canopies) on a single pass.

    Some state agencies promote this spraying strategy to various degrees, and many sprayer operators (whether they admit it or not) have used this method of spraying. I have advised it myself for very young and/or very sparse vineyard and orchard plantings, but never without confirming coverage. When I tell operators that I have serious reservations about alternate row spraying, they defend it. Here are the most common justifications I’ve heard over the years, and my response:

    JustificationReply
    “I do not have enough spray capacity to spray every row when time is short.”You need more sprayer capacity. Get another sprayer so you can get spray on in time or invest in a multi-row sprayer is possible.
    “ARM spraying saves money and reduces environmental impact because I use less pesticide.”Technically, if you travel every second row with a sprayer calibrated to travel every row, you have indiscriminately reduced your carrier and chemical inputs by half (or more). Without close monitoring you may compromise your efficacy.
    “I only perform ARM spraying early in the season when canopies are empty, or only on young plantings.”I grudgingly grant this one as long as coverage is closely monitored. I’ve prescribed it myself in young or sparse plantings where I couldn’t get the sprayer output low enough to prevent drenching the targets.
    “The spray plume in the alley beyond the target row must mean the spray is providing adequate coverage. More is better!”If the spray is blowing through the canopy, it isn’t landing in the canopy. Further, if the air speed/volume is too high, droplets can ‘slipstream’ past the target without impinging on them. I’ve removed water-sensitive paper from canopies with barely any spray on them despite the plume in the downwind alleys. It looks like a magic trick, albeit an unhappy one.
    “Uncooperative weather doesn’t always leave me enough time to spray the entire crop, and it is the lesser of two evils to spray alternate rows than not at all. I’ll make sure I come back to spray the other rows later.”Choosing to do half a job requires an understanding of the products’ mode of action. If you are spraying an insect at a particular stage of development, there’s no “coming back later” to get that generation – if you missed, your window has closed. If it’s a protective fungicide that offers no kick-back, then once the disease has infected tissue, the damage is done. Get the spray on as best you can, but if it washes away before it has a chance to dry sufficiently, be prepared to reapply at the earliest opportunity as long as the label allows it.
    “ARM has always worked in the past.”Would you mind picking my lotto numbers for me? You’re a very lucky person!

    My reservations about ARM spraying come from published research and personal experience that show that coverage is almost always compromised when spraying from one side of a canopy. The spray must pass through the canopy to reach the far side, and the canopy filters droplets from the air as it passes through. This reduces the number of droplets available to cover the far side. In addition, high velocity spray will create “shadows” where any targets on the immediate far side of a leaf or branch become shielded and receive little if any coverage. Further still, fine droplets slow quickly as they leave the nozzle and take a long time to settle. As the entraining air slows and becomes erratic, the droplets float and change course, making their behaviour hard to predict.

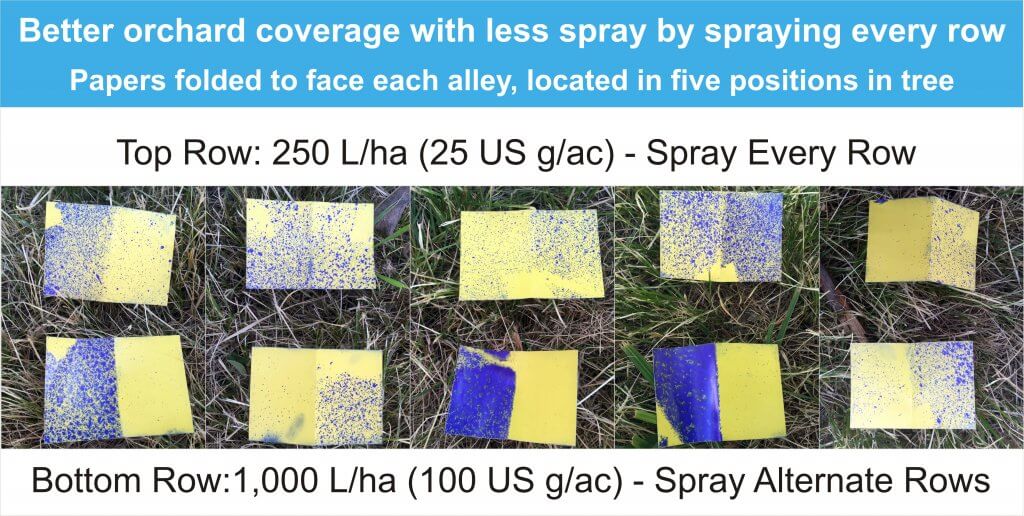
    The cumulative impact can be seen in this infographic I built in 2016. The orchardist was a dyed-in-the-wool ARM applicator and he was resistant to driving every row because it took so much time. I wanted to show that he could claw back some of the lost time by spraying less pesticide every row versus his current volume every second row. He would need fewer refills, and save a LOT of unnecessary pesticide. The water sensitive paper does the talking, and while I’d like to think I’ve convinced him, I’ll bet he’s still out there dicing with fate.
    2016_ARM

    A very popular argument in favour of ARM spraying comes from orchardists that are shifting from semi dwarf to high-density plantings. They ask “How it is different to spray a four foot diameter tree from one side compared to an eight foot diameter tree from both sides”? 

    Well, we know coverage is reduced as a factor of distance. Spraying from one side gives a single opportunity to cover the middle and far side of a canopy, whereas spraying from both sides provides an opportunity for an overlap in coverage. Essentially, the centre of a canopy receives the cumulative benefit of two sprays. Coverage is therefore always improved when spraying from both sides, period.
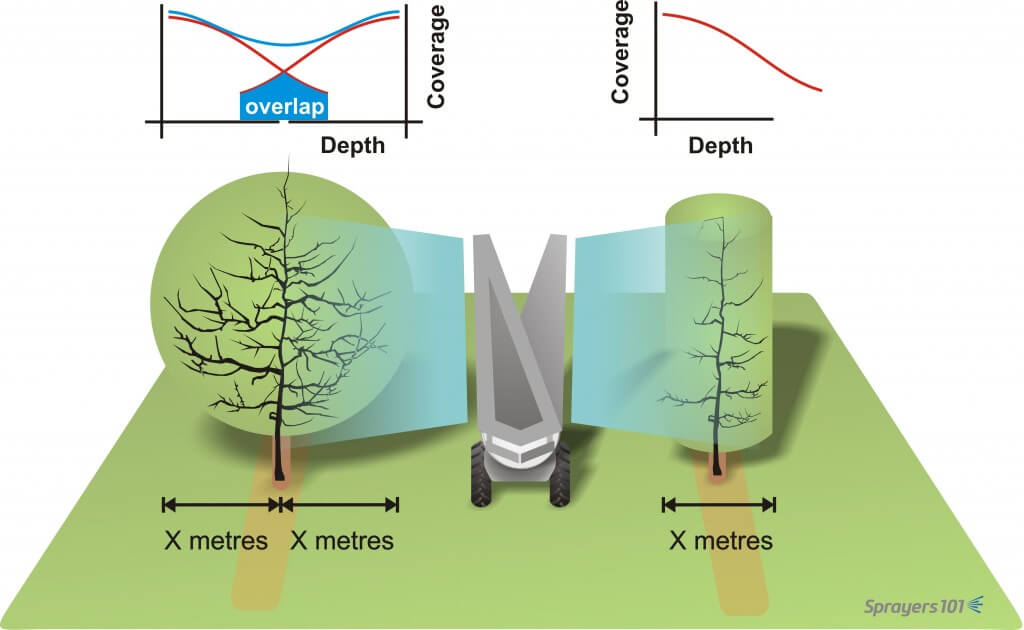
    Spraying from one side gives a single opportunity to cover the far side of a canopy. However, spraying from both sides provides an opportunity for an overlap in coverage. In other words, the centre of a canopy receives less spray than the outside, but is essentially sprayed twice resulting in a compounding effect.
    Spraying from one side gives a single opportunity to cover the far side of a canopy. However, spraying from both sides provides an opportunity for an overlap in coverage. In other words, the centre of a canopy receives less spray than the outside, but is essentially sprayed twice resulting in a compounding effect.

    Why, then, do some sprayer operators claim that alternate row applications work? Because sometimes, they do! Just because coverage is reduced doesn’t mean it isn’t sufficient to protect the crop. It simply means that the potential for poor coverage and reduced dose is dramatically increased by alternate row applications. A sprayer operator might perform alternate applications successfully for years before conditions conspire to defeat the application: unfavourable wind, poor timing, increased pest pressure, poor pruning practices, excessive ground speed, high temperatures, low humidity, insufficient spray volume, and several other factors might occur simultaneously and reduce coverage below a minimal threshold for control. This confluence of bad luck may not happen the first year, or the second, but eventually…

    Product failure isn’t the only concern. Repeated reduced dosages may play a role in developing resistance. In those situations where the operator recognizes insufficient coverage, they may have to spray more often to compensate, negating any savings in time or product. Reduced dosage is a common error when a sprayer operator elects to use ARM.

    If you still aren’t convinced, at least perform alternate row spraying the “right” way. Here are three situations that I’ve heard operators refer to as alternate row spraying. Situation 1 is most common, but to my mind only Situation 2 would be considered acceptable. Even then, confirming coverage is a must.

    Situation 1:

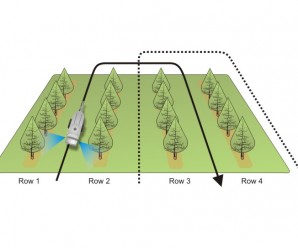
    The sprayer has a typical calibration for spraying every row, but only drives alternate rows. The first application (solid line) covers different rows from the second application (broken line). The operator will claim to spray more frequently, but generally does not perform the second application unless there is high pest pressure. The result is half-a-dose per hectare per application.
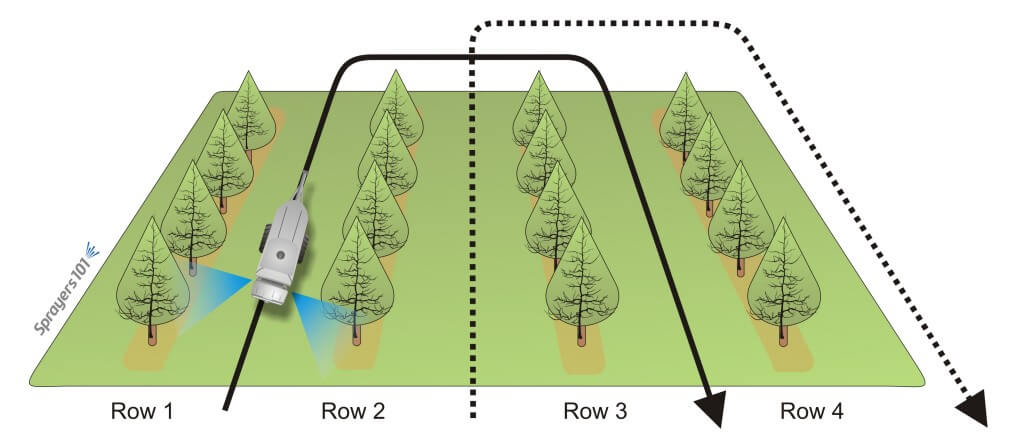
    The sprayer has a typical calibration for spraying every row, but only drives alternate rows. The first application (solid line) covers different rows from the second application (broken line). The operator will claim to spray more frequently, but generally does not perform the second application unless there is high pest pressure. The result is half-a-dose per hectare per application.
    The sprayer has a typical calibration for spraying every row, but only drives alternate rows. The first application (solid line) covers different rows from the second application (broken line). The operator will claim to spray more frequently, but generally does not perform the second application unless there is high pest pressure. The result is half-a-dose per hectare per application.

    Situation 2:

    The sprayer is calibrated for double output compared to a typical every-row situation, and the operator drives alternate rows. The result is that the hectare gets the whole dose per application, but coverage is always inconsistent.
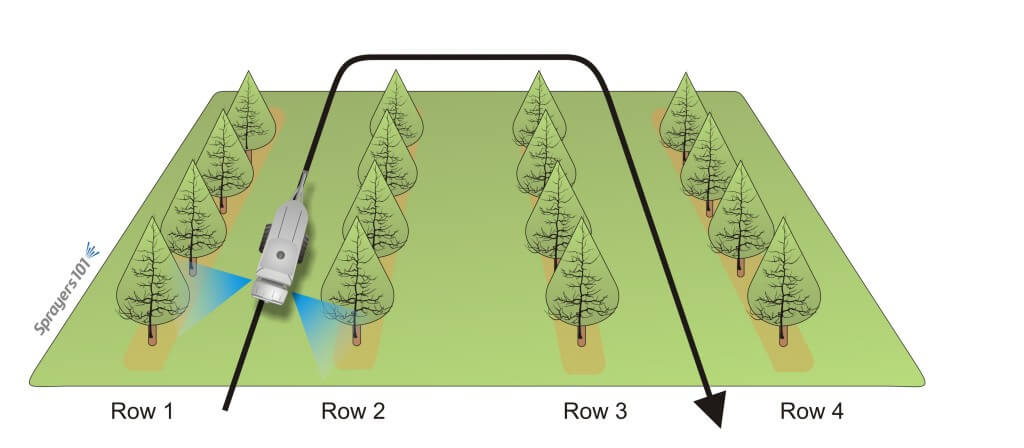
    The sprayer is calibrated for double output compared to a typical every-row situation, and the operator drives alternate rows. The result is that the hectare gets the whole dose per application, but coverage is always inconsistent.
    The sprayer is calibrated for double output compared to a typical every-row situation, and the operator drives alternate rows. The result is that the hectare gets the whole dose per application, but coverage is always inconsistent.

    Situation 3:

    Since the sprayer will only drive alternate rows, the operator mistakenly sets the sprayer to emit half the output compared to a typical every-row situation. The first application (solid line) covers different rows from the second application (broken line). The result is a quarter-dose per application, and if the operator chooses to spray a second time, the hectare will only ever get half-a-dose. Yes, this happens.

    The sprayer has a typical calibration for spraying every row, but only drives alternate rows. The first application (solid line) covers different rows from the second application (broken line). The operator will claim to spray more frequently, but generally does not perform the second application unless there is high pest pressure. The result is half-a-dose per hectare per application.
    The sprayer has a typical calibration for spraying every row, but only drives alternate rows. The first application (solid line) covers different rows from the second application (broken line). The operator will claim to spray more frequently, but generally does not perform the second application unless there is high pest pressure. The result is half-a-dose per hectare per application.

    So, my final word on alternate row applications is that they should be performed with extreme caution. I’ve used them myself in early season applications in new plantings, but never without confirming coverage with water-sensitive paper, and never in conditions that might further compromise coverage to the point that the application does not give control.

    Caveat Emptor!
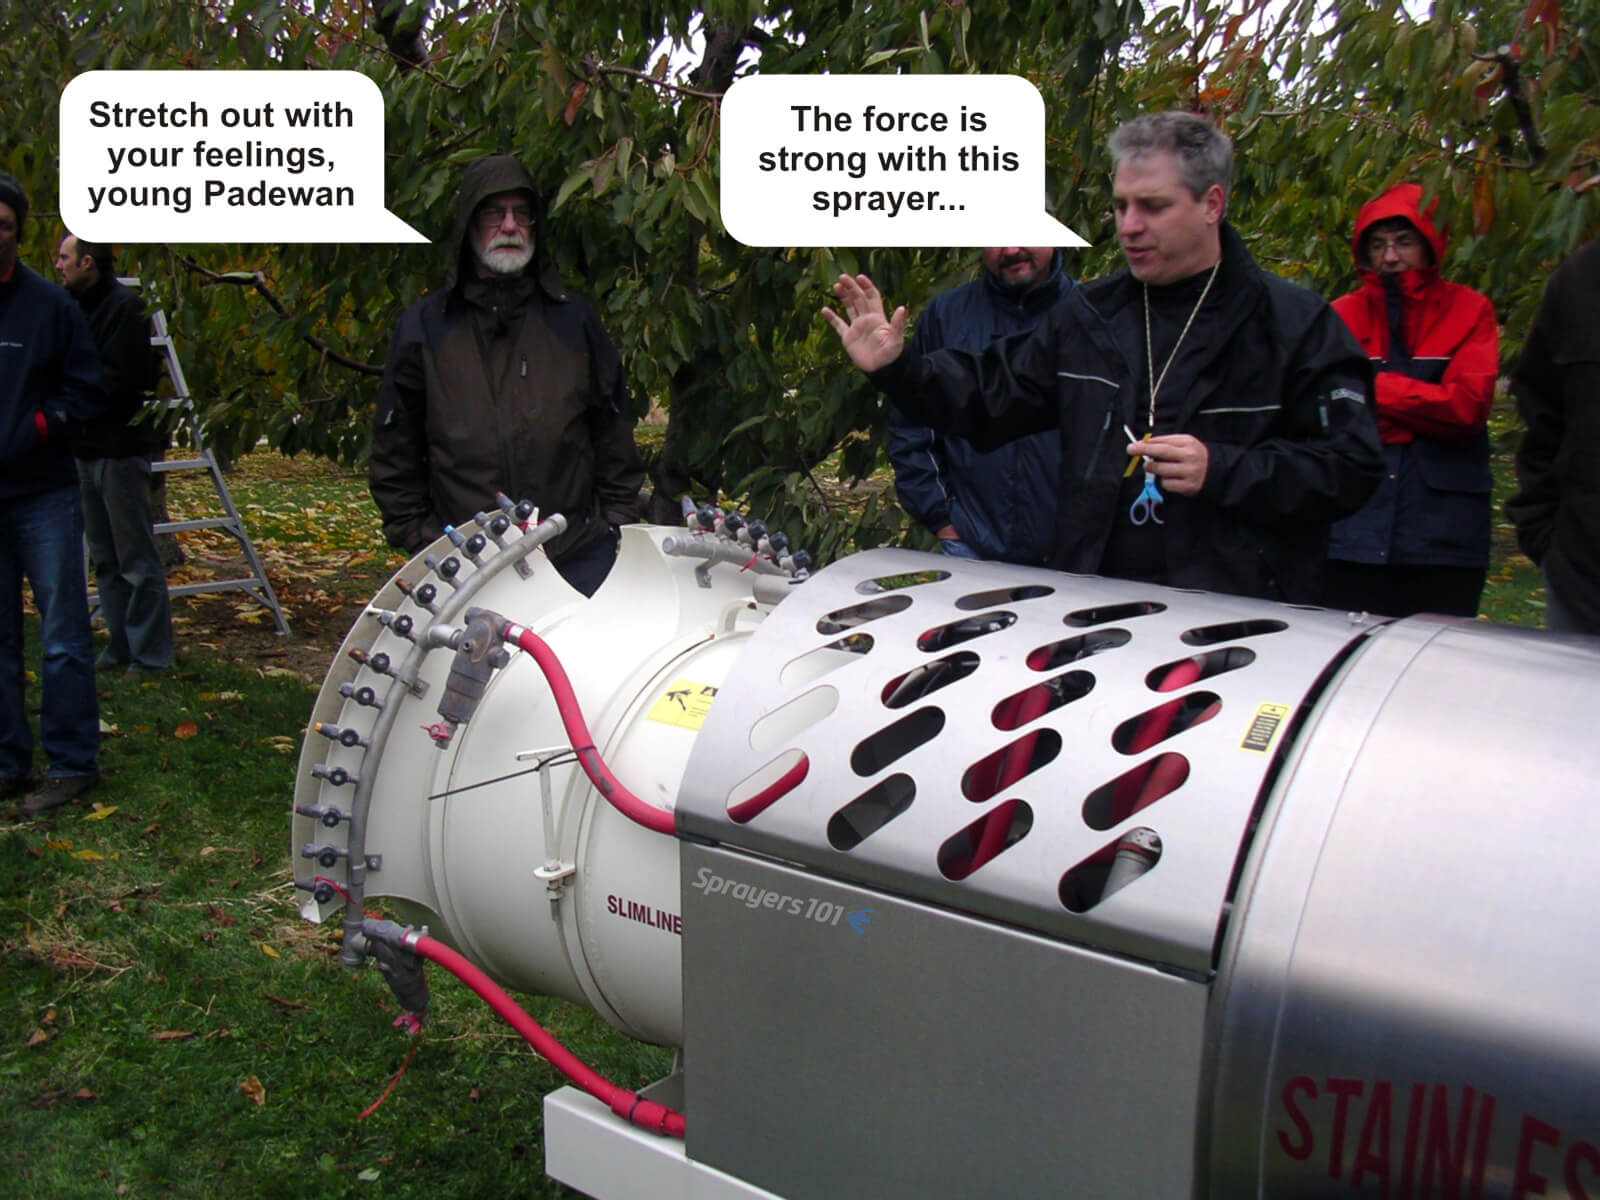
    Well, I thought it was funny. My apologies to J. Luymes from British Columbia (pictured) and Obi Wan Kenobi (not pictured… or is he?)
    Well, I thought it was funny. My apologies to J. Luymes from British Columbia (pictured) and Obi Wan Kenobi (not pictured… or is he?)
  • Airblast Spraying in Poor Conditions

    Airblast Spraying in Poor Conditions

    Some springs are tougher than others. This article was originally written in 2019, which was particularly challenging. The frequency and duration of rain events left limited opportunity for orchard sprays. Even then, the periods between rains were transitions between warm and moist conditions and cold fronts, which makes wind gusty and changeable. These same periods leave wet alleys prone to rutting and compaction, and conditions that favour spraying may also favour pollinator activity.

    In response, applicators get frustrated. Some may be tempted to spray in sub-optimal conditions and risk drift thinking even a little coverage is better than none. But the adage that “there is no wasted fungicide spray” does not apply here. Some may disagree, but spraying in wet and high-wind situations:

    • greatly reduces coverage and subsequently, crop protection.
    • may result in repeated sub-lethal doses that can encourage resistance.
    • greatly increases the degree of surface run-off and off-target drift, risking environmental, commercial and residential
      contamination.

    The argument itself may be moot because the decision to spray is not strictly a consideration of economics, productivity, and risk tolerance. When environmental restrictions exist on a pesticide label they are inviolate. That is, they are not suggestions but legal requirements. Statements might include:

    • Not spraying when rain is forecast within 12 hours following application. This is, in part, to prevent water-soluble products from moving in surface or channel run-off.
    • Not spraying in calm conditions (generally <3 km/h, as measured at the top or outside of the orchard). This is to prevent airborne spray from moving in unpredictable directions during a thermal inversion, or downhill with stratified air.
    • Not spraying in gusting or windy conditions (generally >10 km/h, but there is no Canadian standard). This is to prevent airborne spray from moving with the wind. This is of particular import when there are sensitive downwind areas that can bring buffer zones into play

    Technologies exist that extend the spray window, but they require long-term planning and may not be economical (or even completely proven). They are generally a combination of orchard architecture and sprayer design. Examples include:

    • Tented orchards (more common in Australia) designed to exclude pests and insulate against hail, wind and inversions.
    • Shrouded vertical booms (e.g. Lipco) designed for trellised orchards.
    • Solid-set emitters (more common in Europe and still experimental in parts of the northern US) that reduce drift and can spray large areas quickly.
    • Vertical towers with downward-oriented fans (e.g. Curtec Proptec or Sardi sprayers) that rely on the orchard itself to filter
      lateral/downward-directed spray.

    Assuming the pesticide label does not prohibit application, there are adjustments that can improve coverage and reduce drift in sub-optimal conditions, but only marginally. These are compromises that sacrifice time, money, effort and/or the level of crop protection. Further, they are only intended for sprayers with towers (i.e. not low-profile axial sprayers):

    • Convert to air induction nozzles (at least in the top two nozzle positions, and likely at one rate higher than you usually use).
    • Be certain to turn off any nozzles spraying excessively over the top of the canopy. A little can’t be helped and is actually a best practice to ensure spray reaches the treetop. Be reasonable.
    • Reduce fan speed to only reach just past the middle of the canopy on the upwind side.
    • Turn off the boom on the downwind side of the sprayer and adjust airspeed and nozzle rates for upwind alternate row spraying only. Especially on the last three downwind rows, which you may have to leave unsprayed entirely.

    The best advice is unpopular: Park the sprayer until conditions improve. Like hail, there are environmental factors that are out of the farmer’s control. They are inconvenient and highly frustrating, but do not be tempted to takes risks on what might ultimately result in poor coverage and accusations of pesticide drift.

  • Drone Spraying in Canadian Agriculture (up to 2024)

    Drone Spraying in Canadian Agriculture (up to 2024)

    Note: There have been updates to Canadian regulations governing drones since this article was written. For updates, please refer to this article.

    Introduction

    In Canada, the use of drones for pesticide application, otherwise known as RPAS, is regulated by two Federal Departments: Transport Canada establishes regulations for safe operation and Health Canada for the registration and conditions of use of pest control products.

    Drones are already used in Canadian agriculture for crop surveillance and livestock management, and they’re being used to apply granular fertilizers, for pollination, for frost protection and greenhouse shade management. The use of drones for general spraying was cleared by Transport Canada in July 2017. In 2018, Health Canada stipulated that the use of RPAS for pesticide application is not allowed under the Pest Control Products Act (PCPA) without sufficient data to characterize the hazards or risks associated with this use. You can read the updated (as of June, 2023) Pest Management Regulatory Agency Information note on the subject of pesticides applied by drone, here.

    At this time this article was written, only three pest control products were registered for application by RPAS in Canada. These were restricted-use microbials (two granular and one liquid) intended for larval mosquito control. Their labels were expanded to include RPAS in the fall of 2022 but as of 2023 no province or territory has yet permitted their application. International RPAS working groups (e.g. the OECD working party on pesticides and drones) comprised of academics, the agrichemical industry, government regulatory agencies, and both drone manufacturers and operators, are working collaboratively to assemble the evidence-based information we need to inform the expansion of other pesticide labels. These studies include:

    • comparative evaluations of efficacy
    • operator and bystander exposure studies
    • drift studies
    • residue studies, and
    • technical evaluations of how environmental, topographical, and operational parameters affect the above

    In parallel, several groups are working to develop pesticide safety certification and training materials. Pesticide training and certification programs across Canada are based on the Standard for Pesticide Education, Training and Certification in Canada. Canadian provinces/territories are responsible for the training and certification of pesticide vendors and applicators based on these standards. A national core manual for RPAS operator is anticipated.

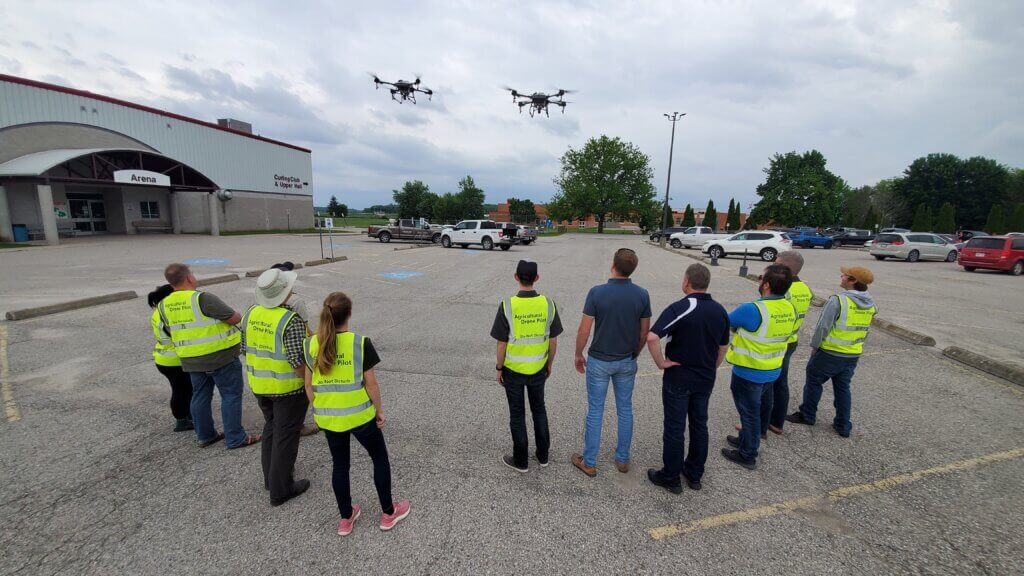
    A candid moment from one of the many Health Canada-authorized RPAS research programs happening in Canada.

    Registration and Certification

    Anticipating future pesticide label expansions, perhaps you’re planning to buy and fly a RPAS. Pilots must register their drone (online for a $5 fee) and display that number on the drone. For more information, the Canadian Aviations Regulations (CARs) covers drones here. It’s a massive document, so jump to the end to find the relevant information under Section IX.

    Transport Canada requires all pilots with RPAS over 250 g to obtain a Pilot Certificate, either for Basic Operations or for Advanced Operations. In some cases, pilots may also have to apply for Special Flight Operations Certification (SFOC), which must be approved before the mission can take place. See below for details.

    Basic Operations Pilot Certificate

    The Basic Operations certificate allows pilots to operate any drone from 250 g up to and including 25 kg. This allows the pilot to fly:

    • Outside controlled airspace
    • No closer than 100 ft laterally from bystanders
    • In VLOS (or in contact with someone in VLOS)
    • Over 1.8 km from heliports
    • Over 5.6 km from airports

    If you’d like to explore the requirements, Transport Canada has an online document called TP15263 which describes required knowledge for Basic Operation pilots of small RPAS. Personally, I took a $100 online course (from a Canada-based drone flight school) to help me prepare for my exam. A good course will supply you with what you need to know about the laws, the environment, the aircraft, and your responsibilities as a pilot.

    The $5 exam has 35 multiple choice questions. You have 90 minutes to complete it and you need a 65% to pass. It was a surprisingly challenging exam, so don’t be discouraged if you don’t pass on your first try. You can take another swing at it after 24 hours, and you’ll encounter new questions randomly drawn from their database.

    Advanced Operations Pilot Certificate

    The Advanced Operations certificate allows pilots to operate any approved RPAS over 25 kg in VLOS. This allows the pilot to fly:

    • Inside controlled airspace
    • No closer than 16.4 ft laterally from bystanders
    • Under 16.4 ft above bystanders (essentially directly overhead)
    • In VLOS (or in contact with someone in VLOS)
    • Within 1.8 km from heliports
    • Within 5.6 km from airports

    There are two parts to this certification. The $10 exam requires an 80% to pass, covers more topics than the Basic Operations exam, and has the same 24h wait to retry. You must also undergo a Flight Review with a certified trainer, who changes about $200 for the service. Once the exam and flight review are successfully completed, there’s a $25 issuing cost. Be aware that flying a drone over 25 kg will also require an SFOC.

    Special Flight Operations Certificate

    In some cases pilots will have to apply for a Special Flight Operations Certificate (SFOC). Based on the CARs part IX regulatory structure, examples include operating a drone over 25 kg, flying at an advertised event, operating with foreign credentials (i.e. not a Canadian pilot) or operating outside the rules for Basic or Advanced operations, such as Beyond Visual Line-Of-Sight (BVLOS). Note, the requirements surrounding SFOC’s are under review as Transport Canada reassesses weight classes and streamlines the process, which can take weeks or months to complete. The new requirements are anticipated in late 2023 or early 2024 in Canada Gazette 2 (the 2019 update to Gazette 1 can be found here).

    Recency

    Once you have your Certificate(s) you must carry a copy with you while flying. Technically, Pilot Certification doesn’t expire, but you still have to maintain it. According to CARs 901.56, pilots cannot operate a drone unless they have successfully completed the following within 24 months preceding the flight:

    • Testing / Issue of their pilot certificate (Basic or Advanced).
    • A Flight Review
    • Any of the recurrent training activities set out in section 921.04 of Standard 921. This is an online questionnaire that has the answers posted right after each question. Don’t ask… just comply. Be sure to print it out after you complete it because it doesn’t save the answers.

    Just like the Certificate, the pilot must have Proof of Recency with them at all times. Unlike certification, it’s free.

    Learning from one another at a 2022 RPAS workshop in Southern Ontario.

    Records

    Every owner of a remotely piloted aircraft has to keep certain records. They need to be with you while flying for a certain period of time and all records must be transferred with the system if you sell or give it to a new owner.

    • The name of the pilot(s) and crew involved with each flight, noting time and date (keep with you while flying for 12 months).
    • Any maintenance, modification or repair of the RPAS, including precisely who did what and when. This should detail the instructions used to complete the work (keep with you while flying for 24 months).

    Fines and Enforcement

    Fines for contravening regulations range from a maximum of $3,000 for an individual to a maximum of $25,000 for a corporation. The RCMP and local police are part of the enforcement team.

    Crop Protection Products Registered in Canada

    This list is subject to change. To date, there are no pest control products registered for use in agriculture in Canada. There is no distinction between personal (i.e. home farm) and custom application. It is currently illegal to spray a registered agricultural product by drone. There are, however, two liquid formulation pesticides registered for non-agricultural use:

    • VectoBac 1200L – A biological larvicide intended for black flies and mosquitoes that must be applied over water sites. Label expanded in 2023.
    • Garlon XRT – A herbicide registered for industrial applications (e.g. controlling woody plants and vegetation in non-crop settings, such as around power lines and other utilities). Label expanded in 2024.

    Final Thoughts

    Get certified before you buy your RPAS, and do your research before you commit to a system. Rotor-based RPAS design is changing rapidly as manufacturers adapt to the demands of North American and European applicators. We once thought a swarm of lightweight, nozzled drones would be the path to success, and now the industry is leaning towards larger solitary drones with payloads over 40L and rotary atomizers instead of conventional nozzles.

    Be sure you understand what they can and what they cannot do. Only buy from a reputable dealer with practical spraying experience, and not someone with slick advertising that over-promises RPAS work rate, swath width, reduced drift or improved coverage potential. Ask to see data and remember, at the time this article was written: In Canada, it is currently illegal to spray pesticides in agriculture from a drone, whether it is on your property or not.

  • Airblast Spring Start-up and Winterizing

    Airblast Spring Start-up and Winterizing

    Any description of airblast sprayer start-up must, contextually, make assumptions on how it was winterized for long-term storage. This cyclic relationship is why I use a chicken-and-egg title slide when giving this presentation.

    Answer: It was the rooster.

    The inability to describe one process without the other is further complicated by the possibility that the sprayer is brand new and was therefore never winterized. So, what follows is an attempt at a logical sequence of pre-season maintenance activities to restore a winterized sprayer, or initiate a new sprayer.

    New Equipment

    If this is a new sprayer, you have an opportunity to perform some preventative maintenance.

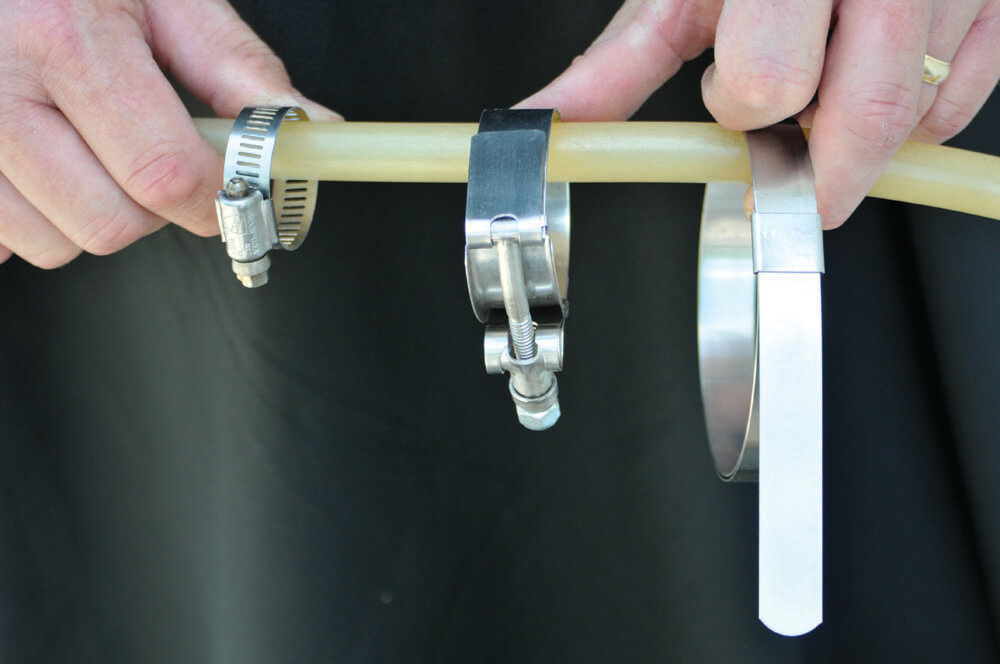
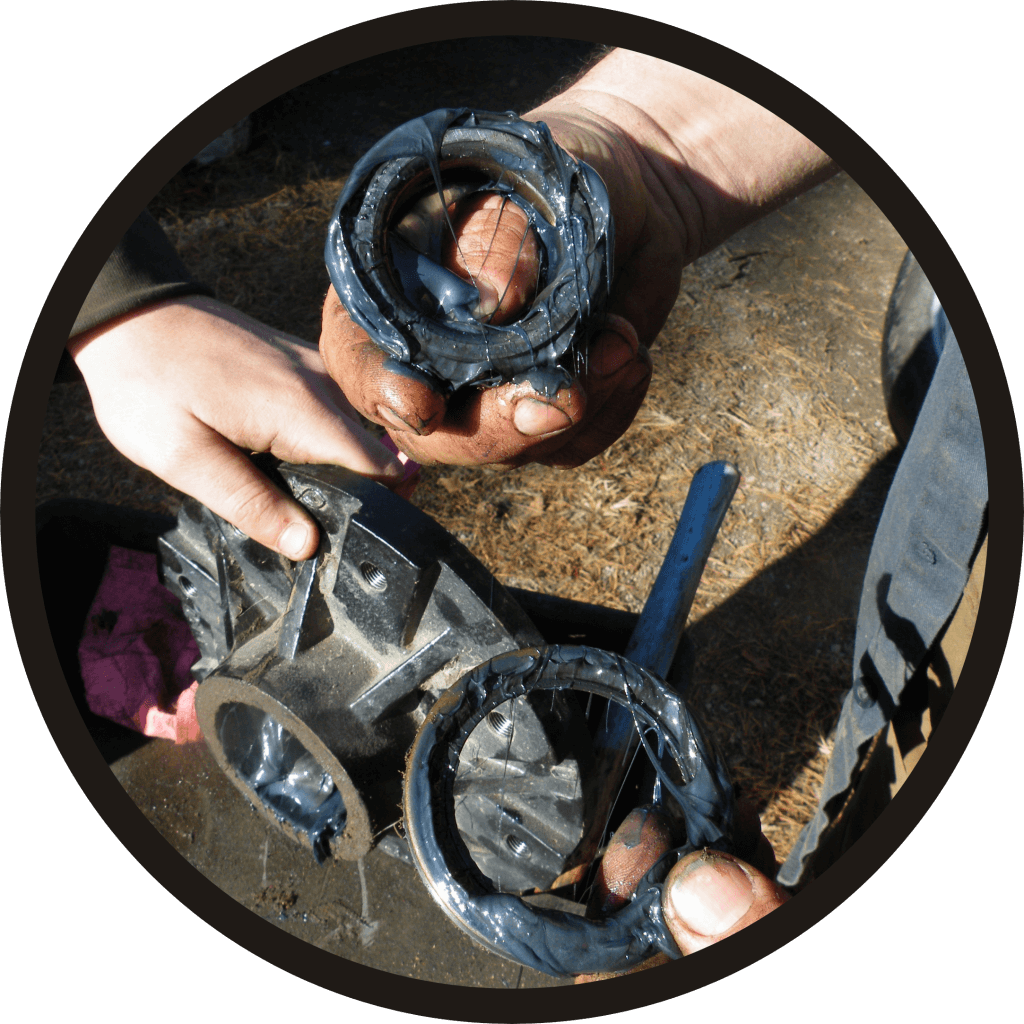
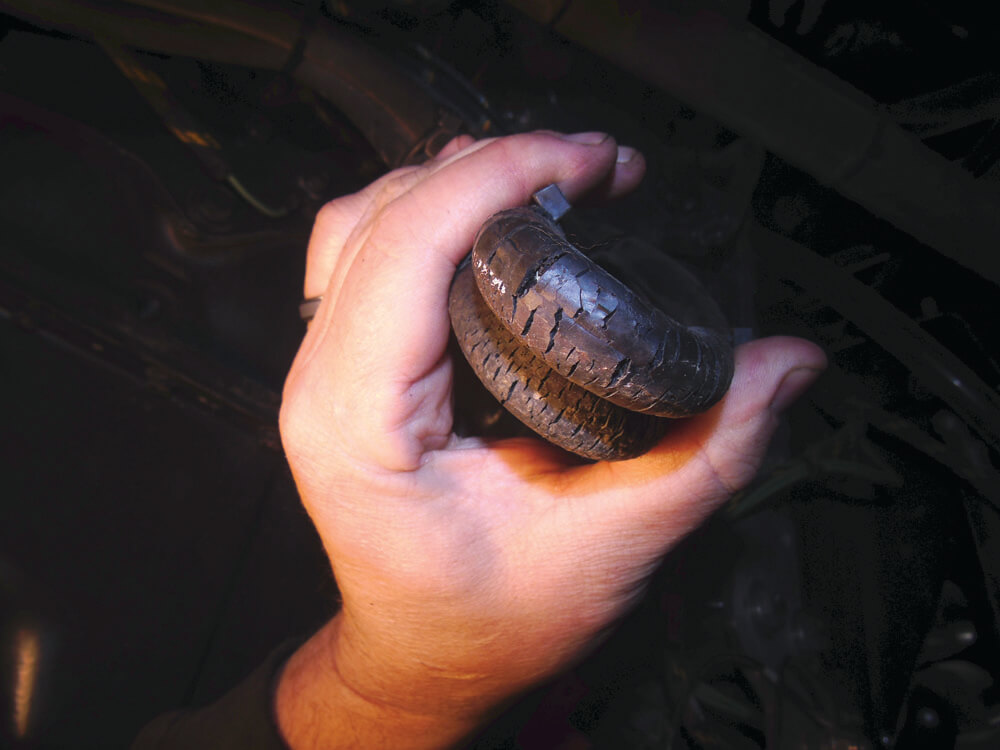
    Loosen, lubricate and re-tighten clamps. Always back gears off before tightening to avoid stretching them. (Image from Purdue Extension publication PPP-121: Preparing Spray Equipment for Winter Storage and Spring Startup)
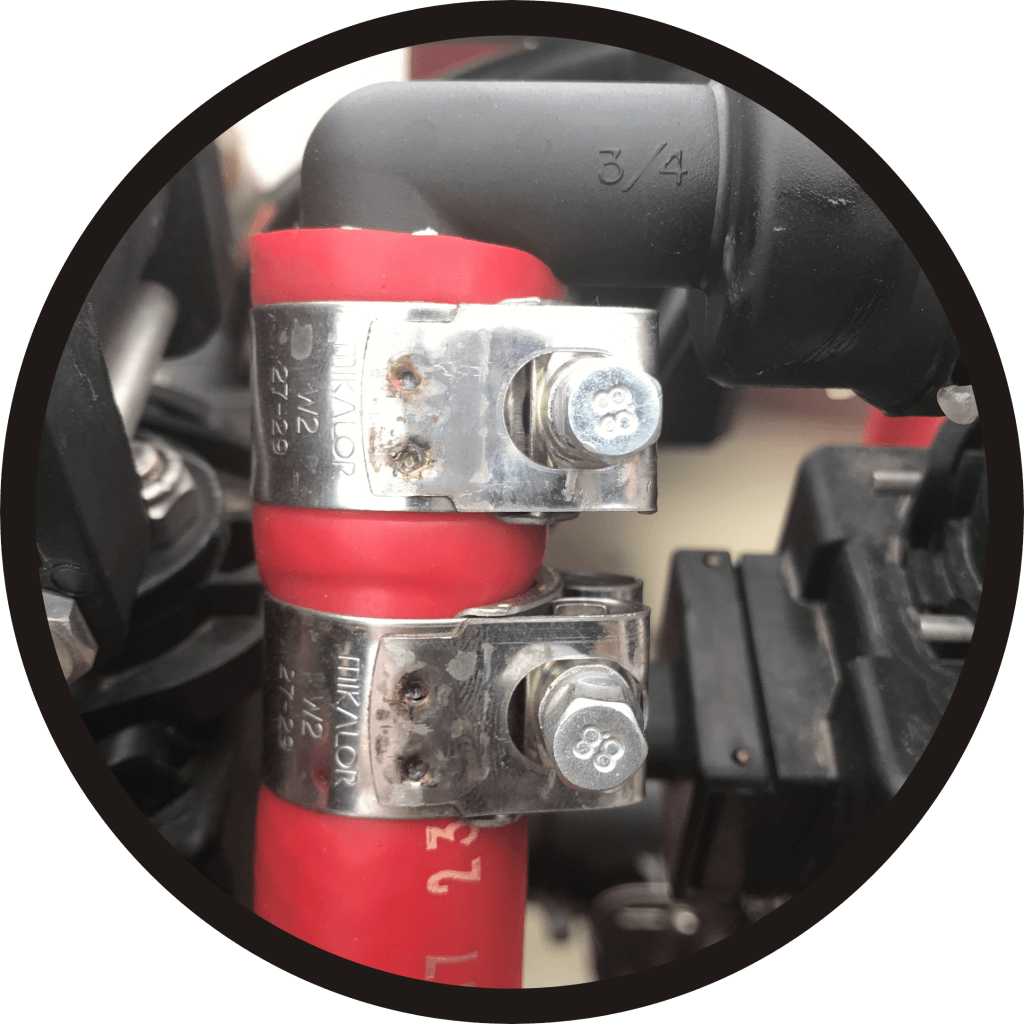
    Use double clamps on pressurized lines for added safety. Wider clamps are better and T-bolt clamps are better than worm-gear.
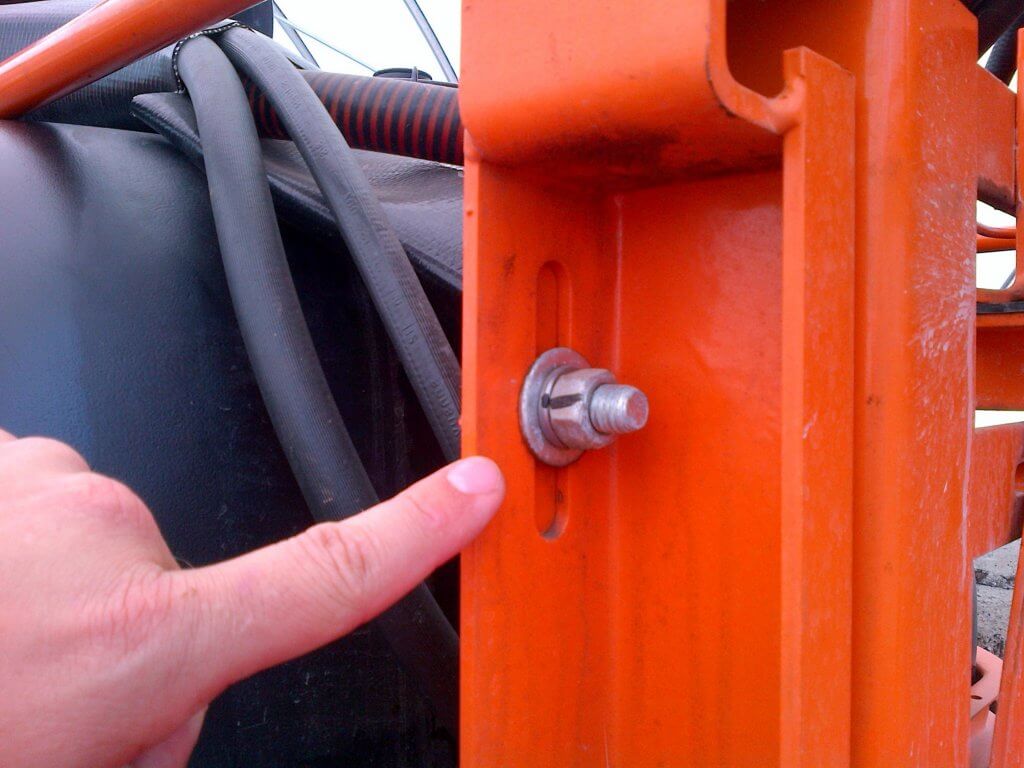
    Put thread release on bolts and re-tighten with a torque wrench (not an impact tool). Use a paint pen to mark nut, washer and bolt for future visual checks. This is called a “Witness Mark”.
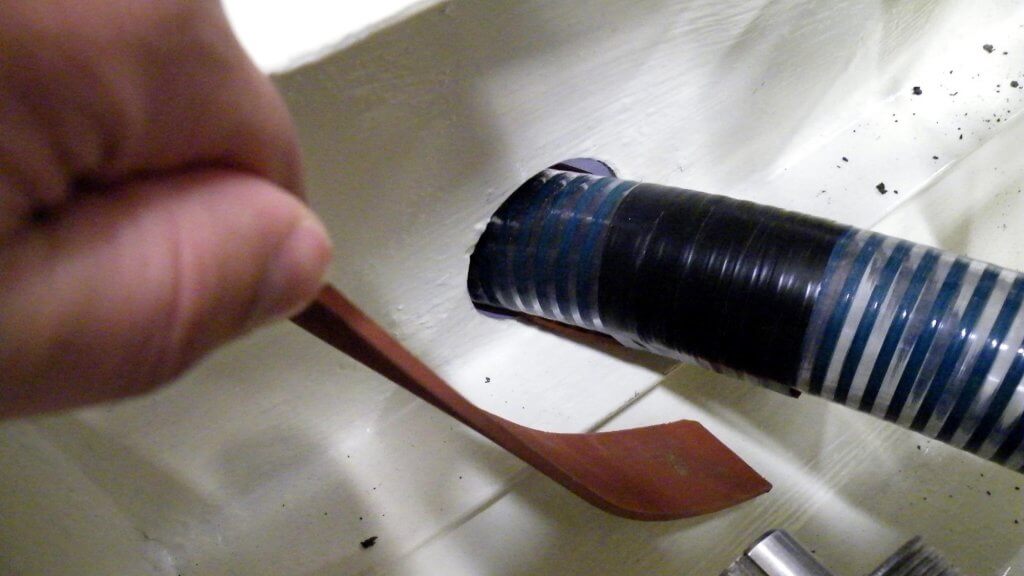
    Protect hoses and wires at rub points. Follow hoses and with a paint pen, number the hose-ends and connections for future reference.
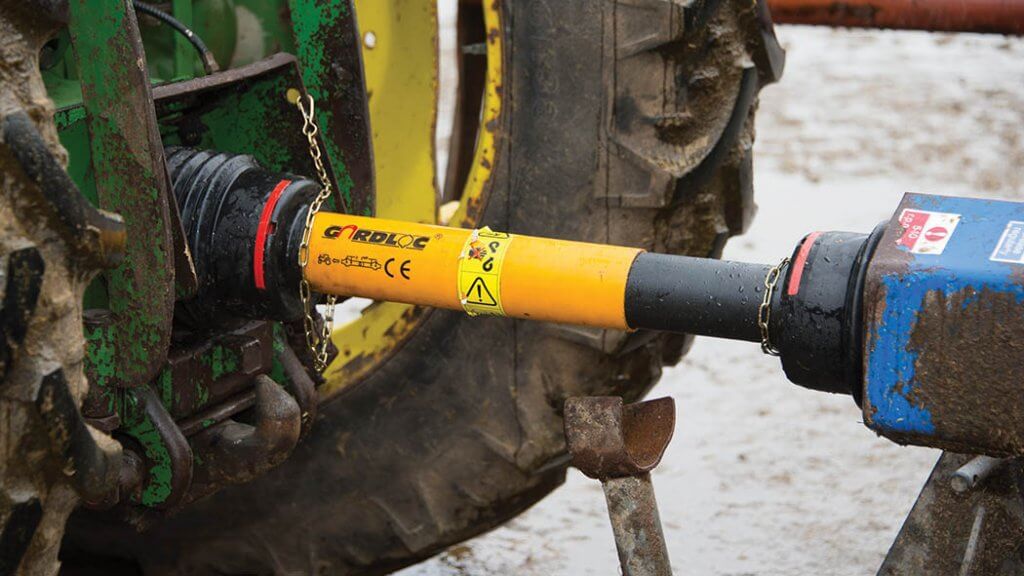
    Using a new tractor? You may have to re-calibrate to account for different gear ratios. When hitching a new sprayer, note that the distance from the ball on the drawbar hitch to the tip of the PTO should be ~14″. Don’t exceed maximum working angles for PTO shafts (usually <25 degrees). If your tractor or implement manufacturer says differently, go with that. And get it in writing.

    Winterizing (Long-term storage)

    If you are preparing the sprayer for long-term storage, follow the normal rinsing process, but don’t reinstall strainers and nozzles.

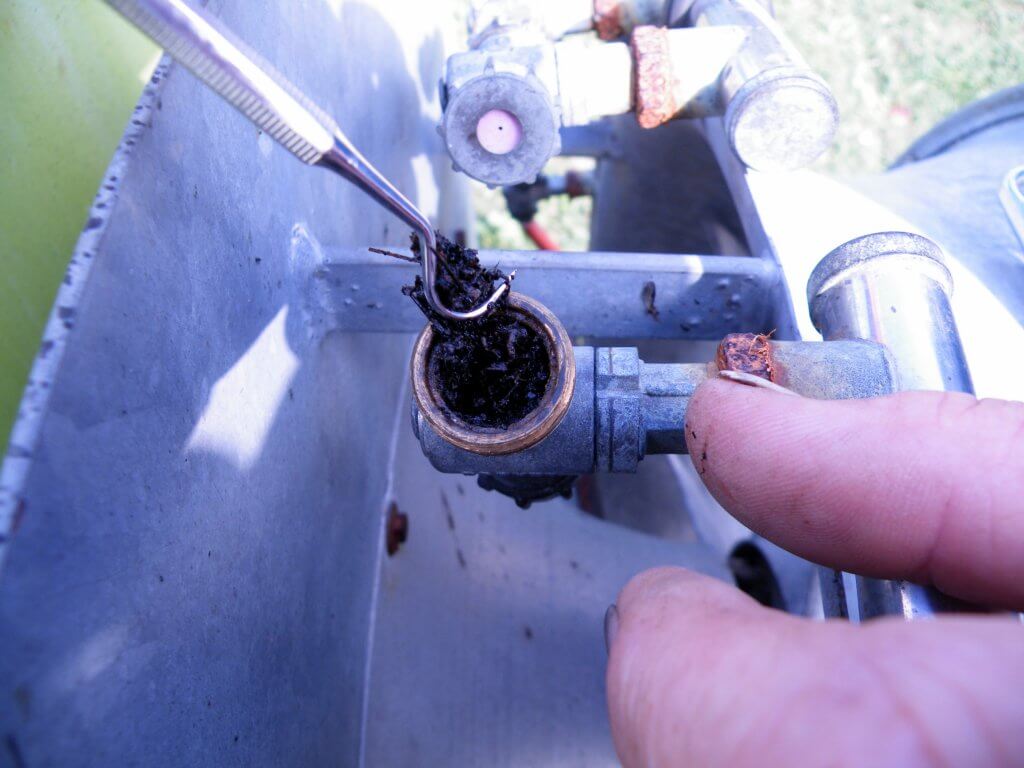
    Look in the nozzle bodies for debris. Discard worn or broken nozzles.
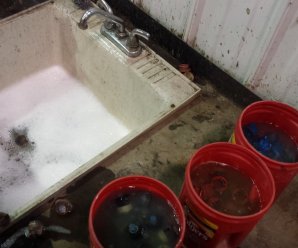
    Soak, scrub, rinse and store nozzles and nozzle strainers. You may replace them once the sprayer is clean, but I prefer to store them separately since they have to come back off during start-up.

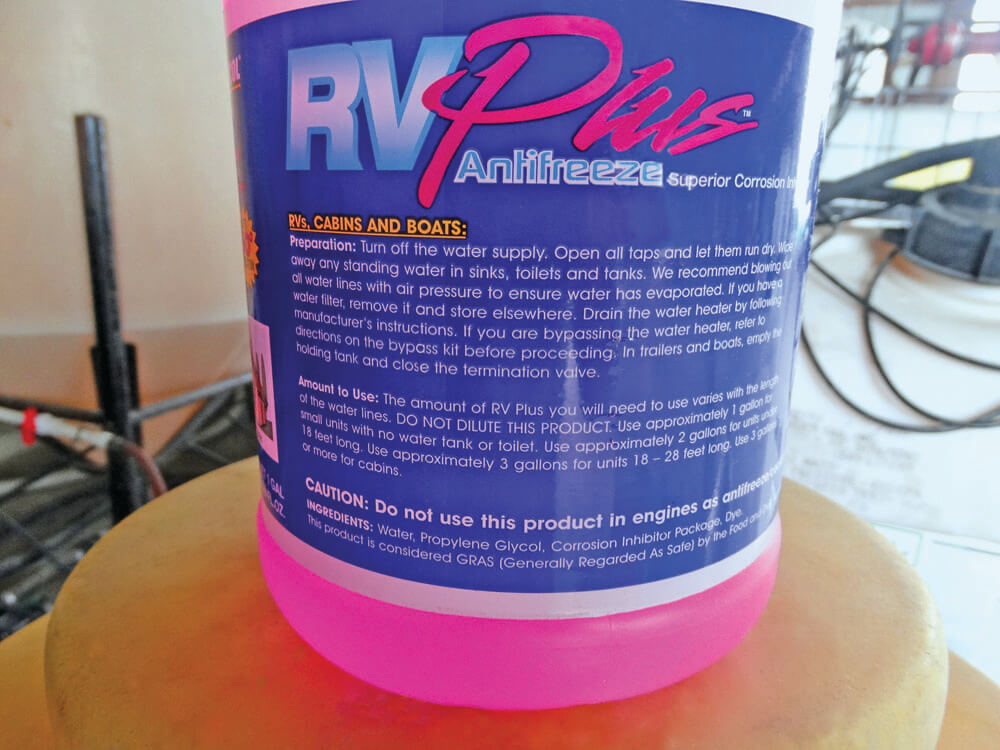
    With the agitation on, circulate undiluted plumbing antifreeze (the sprayer already has 5-10 L (1.25-2.5 gallons) of water in the system from the decontamination process) for five minutes and drain it through the plumbing system (not the booms).

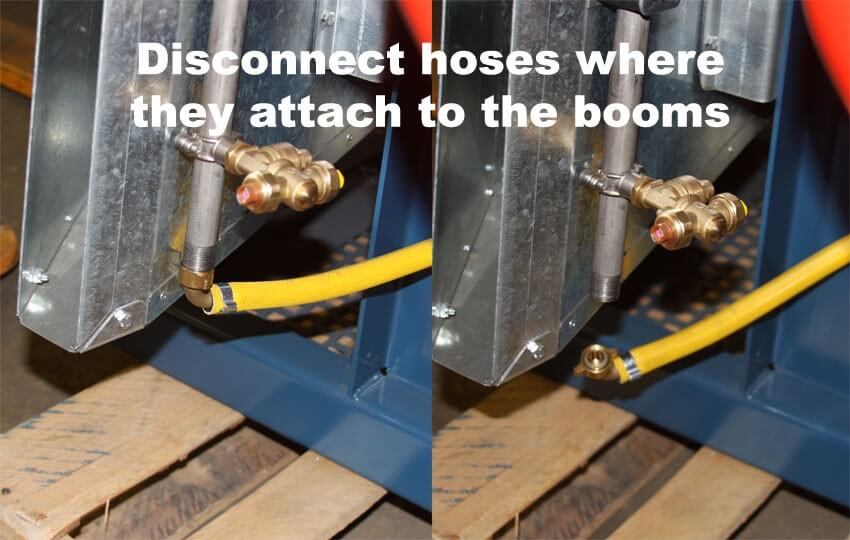
    Disconnect hoses where they attach to the booms and drain as much liquid from the sprayer as possible. (Image from Munckhof Sprayers). Take the time to examine any hose fittings.
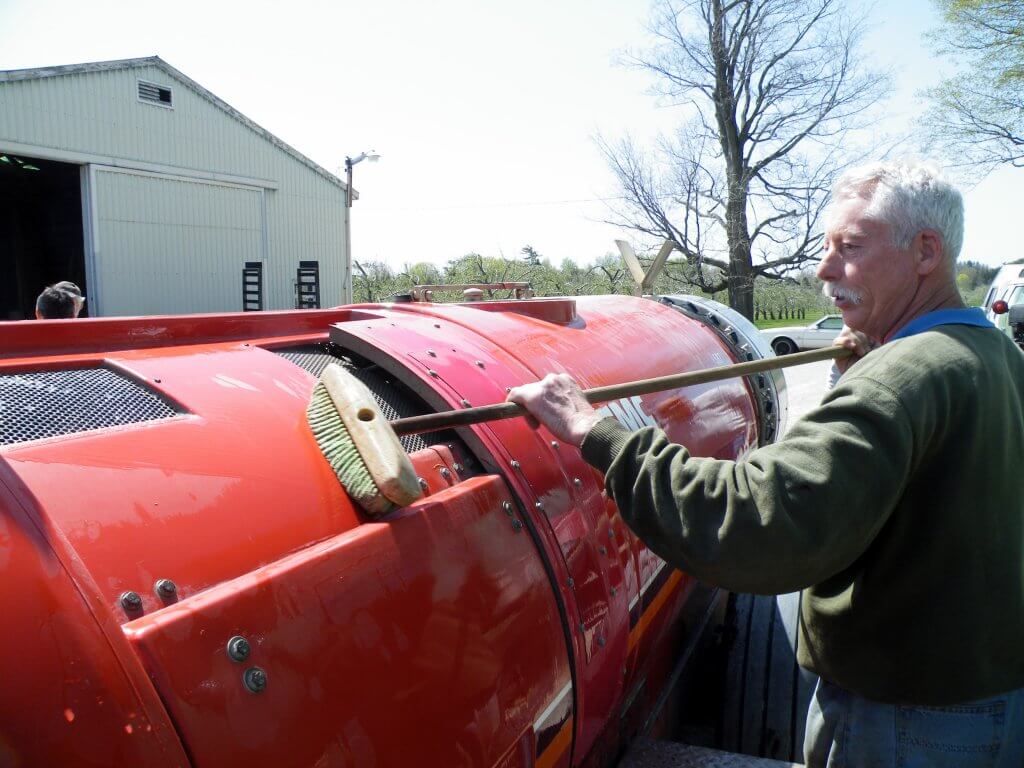
    Clean the sprayer (Triple rinse with a detergent) and scrub the exterior. Do not use pressure washers on bearings, fittings, pumps or any lubricated or moving parts.
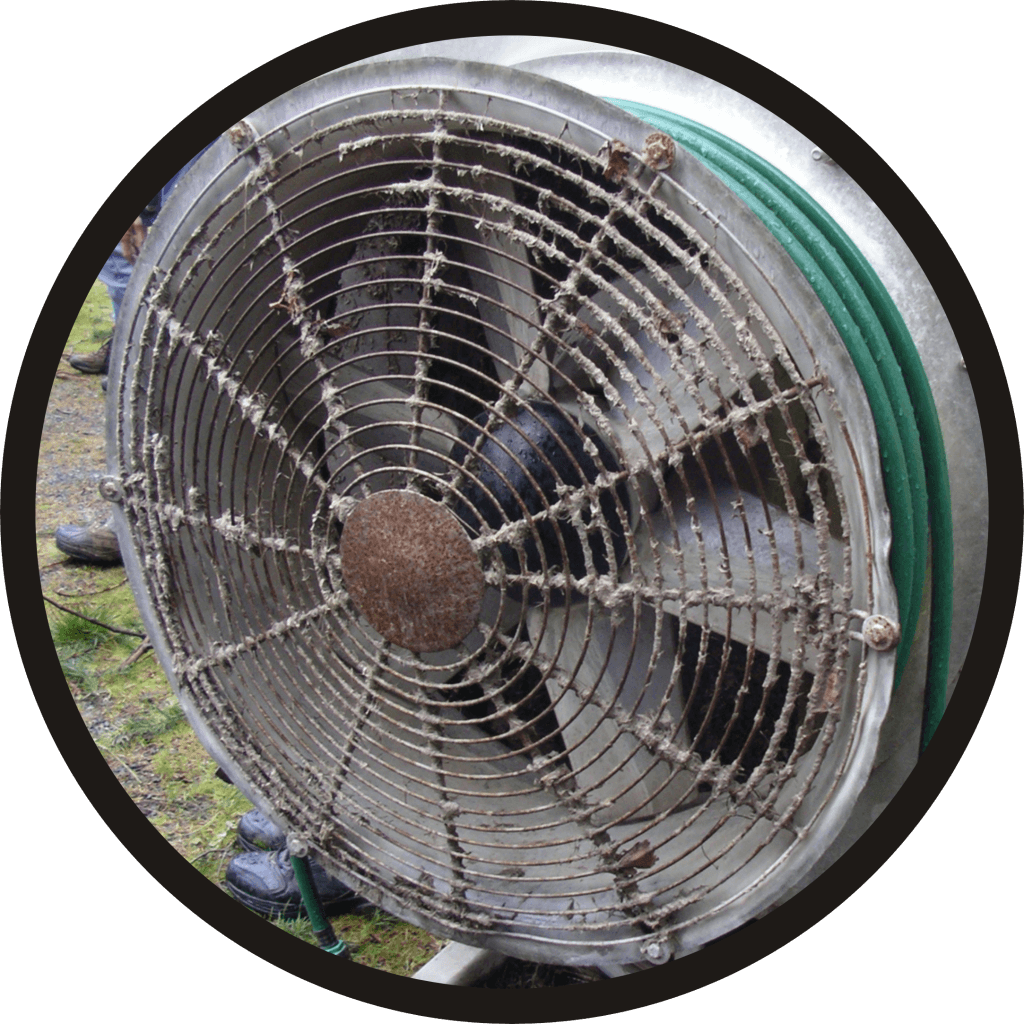
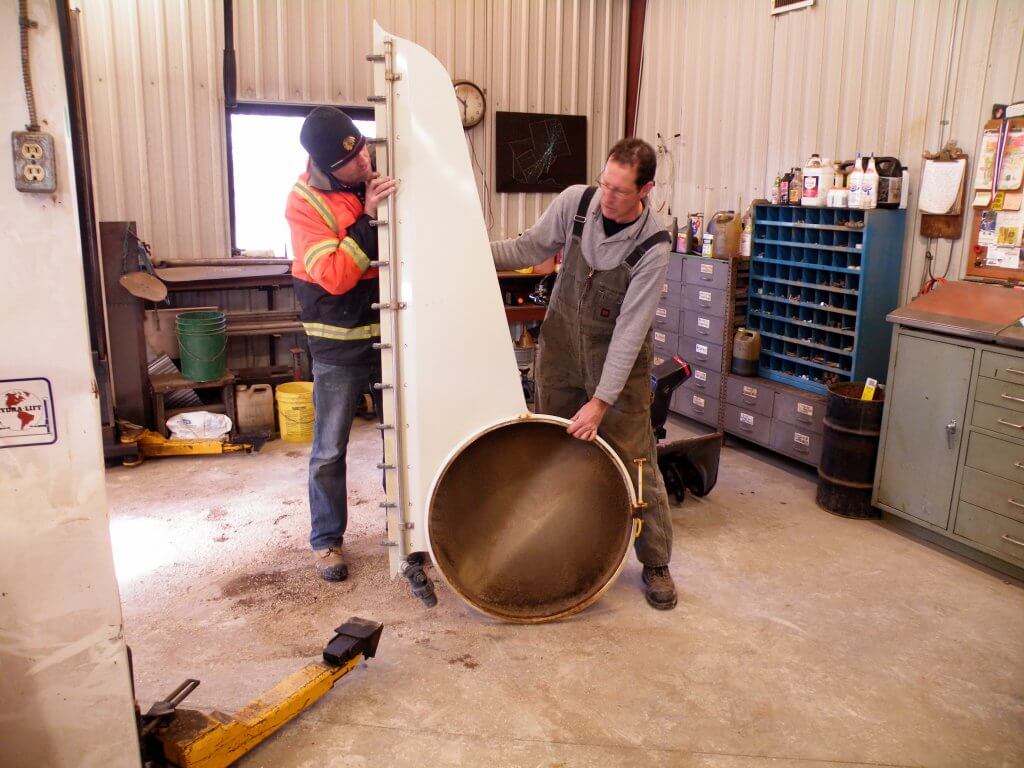
    Examine fan blades for cracks, build-up or nicks that can cause imbalance. Replace (not just repair) punctured entrance grills.
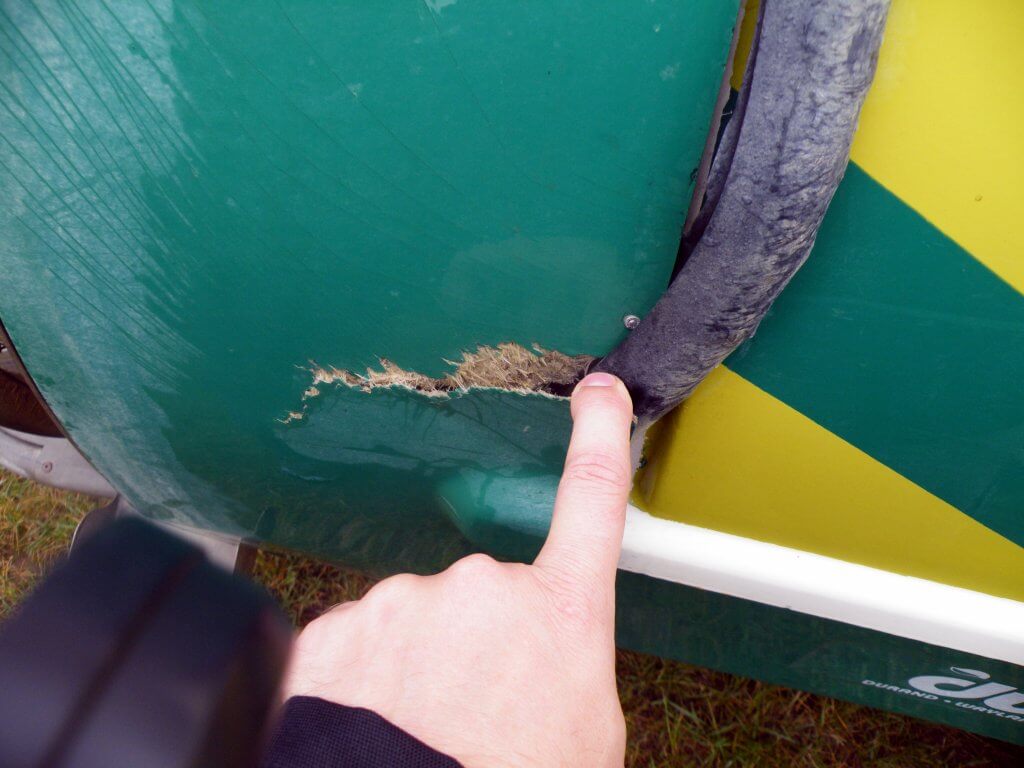
    Don’t ignore tank damage. Poly tanks are prone to sun damage and cracks. Never climb into a tank to repair it. Quite often, replacement is the best option.
    Clean and inspect wheel assemblies. It’s best to do this during winterization to prevent bearing corrosion as the sprayer sits all winter.
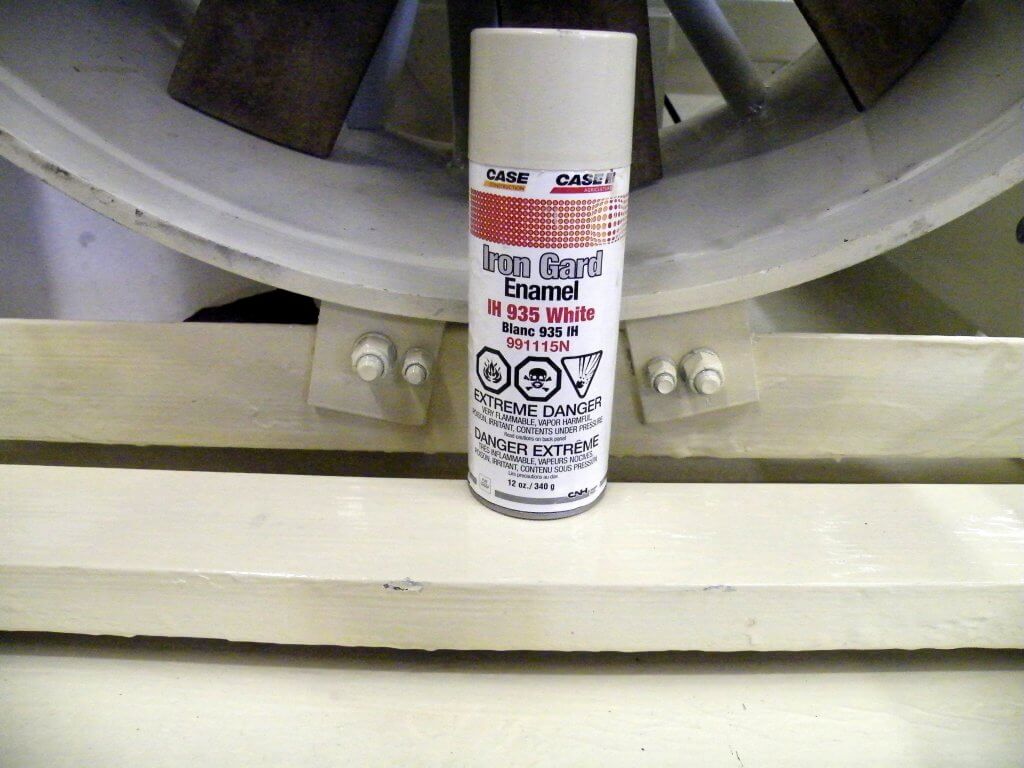
    Remove any rust and repaint (or just touch up). Paint not only looks good, it protects.
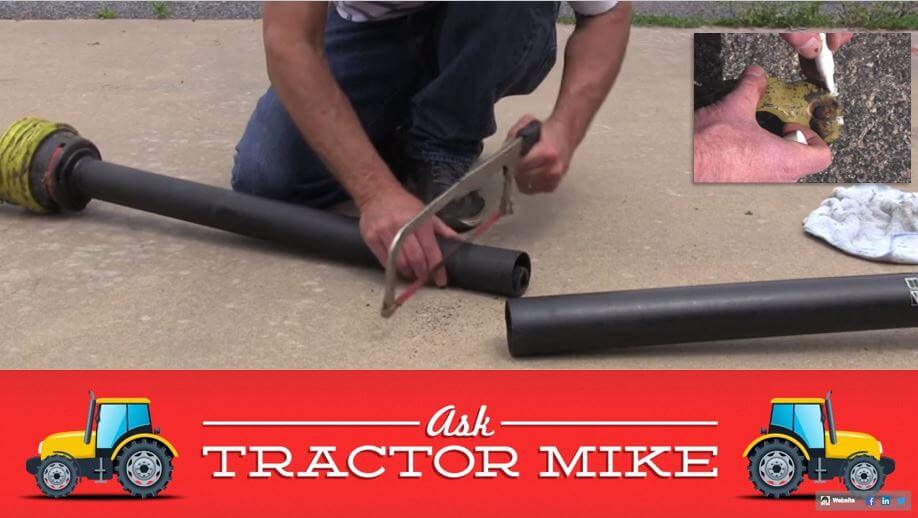
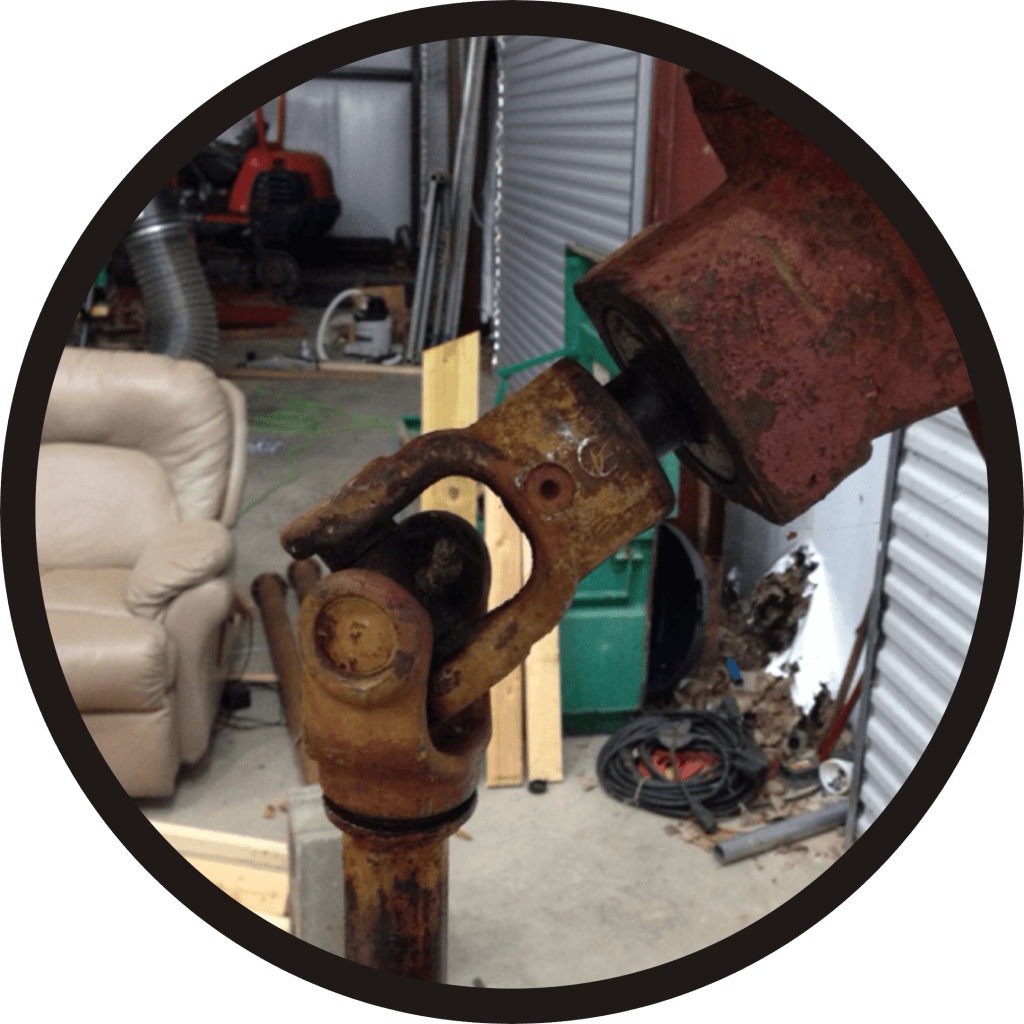
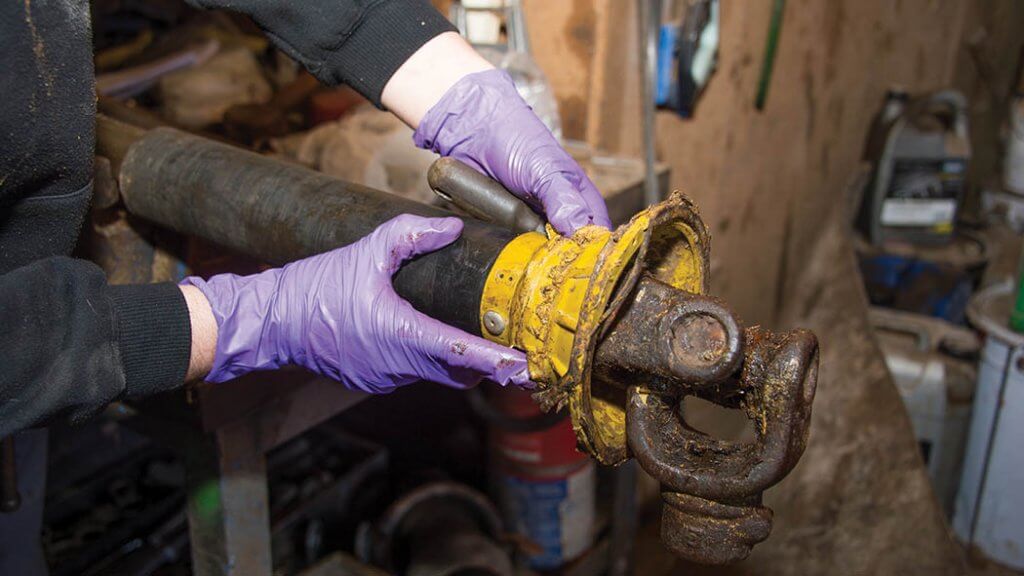
    The excellent YouTube channel Ask Tractor Mike proposed storing the PTO shaft indoors in two pieces, and to cut away a portion of the interior guard to facilitate reassembly later on. Also, use a paint pen to mark the splines on the shaft for easier hook-up (see inset top-right of image).
    RV antifreeze is a 50% solution of antifreeze and water with a rust inhibitor. It should not cause phytotoxicity if sprayed or dumped, but be sure to dispose of it away from water sources during start-up. Turn the pump manually to get antifreeze throughout the system. Close the nozzle bodies, loosely fit the tank lid and store indoors. (Image from Purdue Extension publication PPP-121: Preparing Spray Equipment for Winter Storage and Spring Startup).

    Spring Start-up

    Most operators are guilty of neglecting their airblast sprayers and babying their tractors. Sprayers are precision tools that must be kept in good operating order to prevent costly breakdowns, improve their performance, and increase their lifespan.

    Your car is serviced based on distance travelled. Your sprayer should receive regular maintenance based on working hours, per the manufacturer’s recommendations. Daily sprayer inspections are part of regular maintenance since the operator will (hopefully) find small problems before they become big problems.

    Never assume your sprayers is ready to go right out of long-term storage. Parts seize, scale breaks away from surfaces, and small beasties sometimes choose to eat, or make their homes in, cozy sprayers.

    When planning spring start-up, never assume the winterized sprayer is ready for immediate hook-up. Expect a minimum half day per sprayer.
    Attempting to loosen or shift something that hasn’t moved in several months is risky. Pressure gauges snap off, fittings crack, welds break. Expect the unexpected and either have spare parts on hand, or a plan to get them quickly.
    Parts are most likely to seize during the first spray. Bearings and PTO universal joints, especially.
    Start-up is a good time to lubricate parts. Grease the guard ring bearing every 100 hours, the universal joint cross every 25 hours and the shaft and shear bolt regularly.
    Insects, birds and rodents eat, or make homes in, sprayers. Professional rodent bait/traps, steel wool and peppermint oil/gel are possible solutions.
    Check belt tension, alignment and wear. (Image from Purdue Extension publication PPP-121: Preparing Spray Equipment for Winter Storage and Spring Startup).

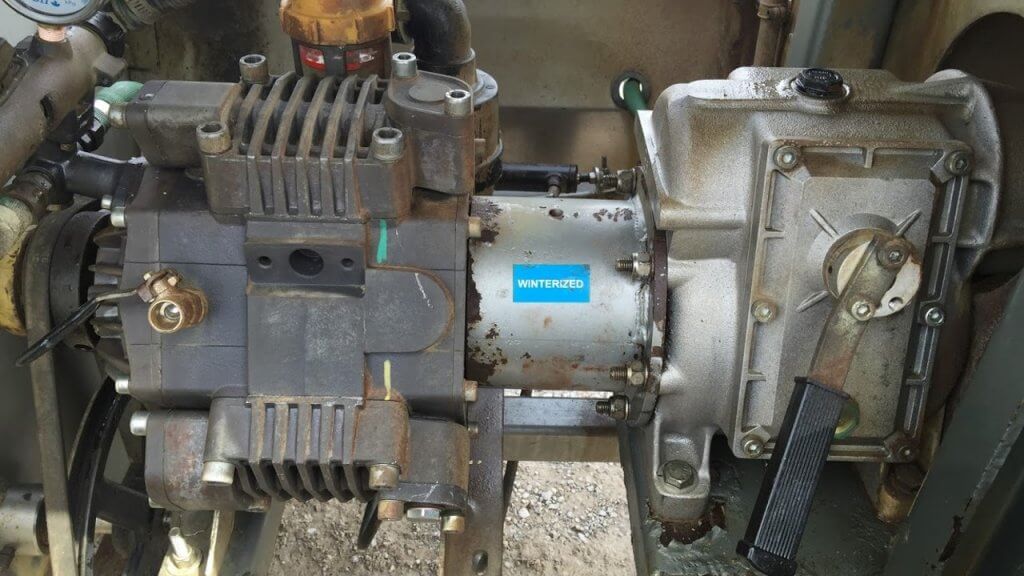
    Pump specific maintenance is beyond the scope of this article. Hypro recommends changing oil after 40 hours of break-in operation and every 500 hours after that. The diaphragms should be replaced every 1,000 hours. Generally speaking, EPDM (black) diaphragms are a better choice for airblast sprayers, while the Desmopan (amber) diaphragms are really for lawn care sprayers.

    Pump maintenance is beyond this article, but change the oil every 500 hr or 3 months. Use a paint pen to write on the pump what type of oil it requires, and then date the filters. Note the “winterized” sticker.

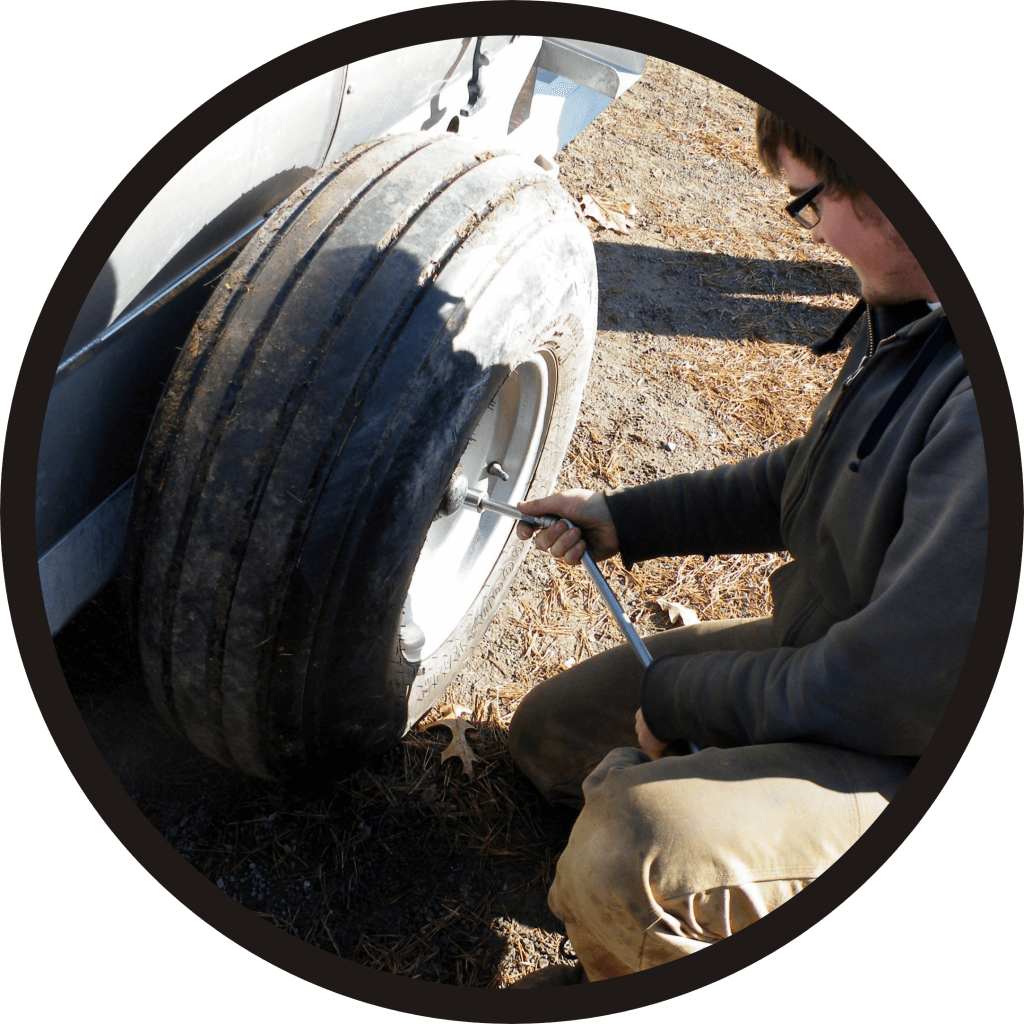
    At minimum, check the tire pressure. Hard tires drive faster, but leave compacted ruts. Soft tires drive slower, but disperse weight better. Airblast sprayer wheel assemblies should be cleaned and inspected as part of regular annual maintenance. Wheel bearing maintenance before long-term storage may prevent water from corroding the bearings.

    Ensure tire pressure matches the ideal stamped on the tire. Or, if using less pressure to avoid spring soil compaction, ensure both tires have the same pressure.

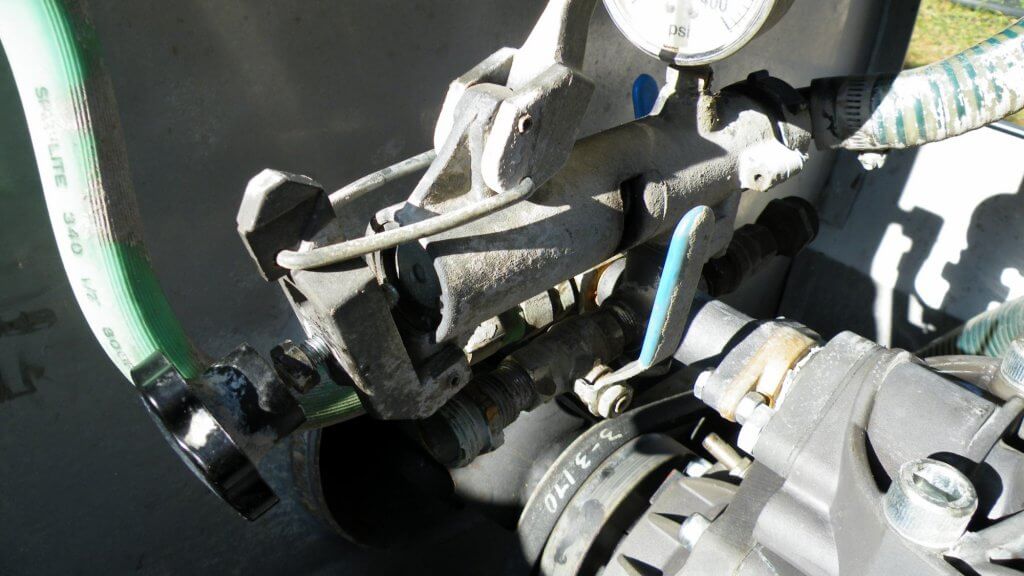
    The relief valve on your sprayer should always be in the bypass position during start-up. If your gauge spikes then the gauge may always read high afterwards and should be replaced.

    A reminder to always set the relief valve to the bypass position when starting up the sprayer. This is one reason why pressure gauges spike and can eventually fail.

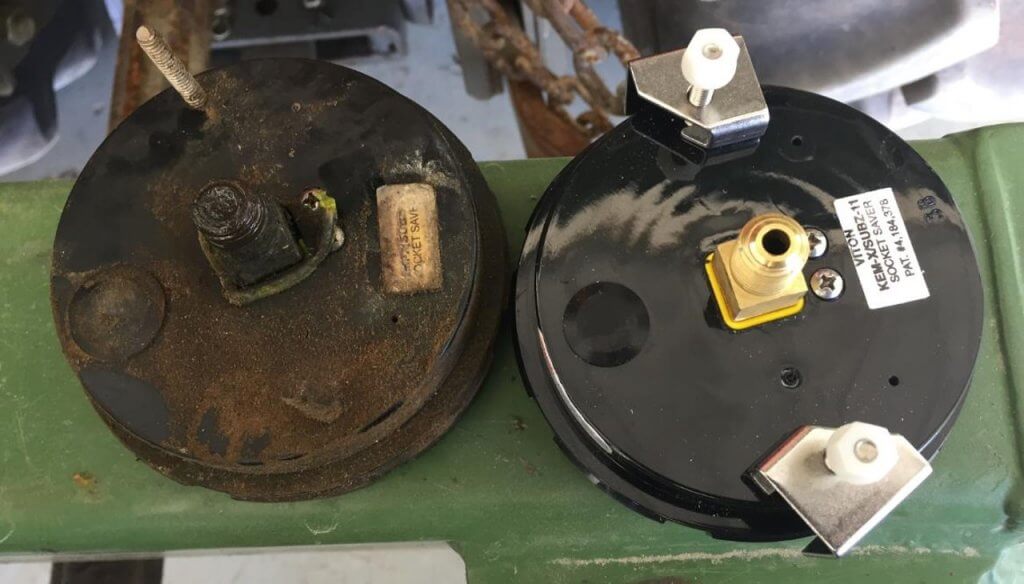
    Replacing leaking, opaque or inaccurate gauges improves sprayer performance. Be sure to use the oil-filled variety of gauge to eliminate a bouncing needle. You can also get suppressors that fit between the gauge and sprayer to prevent pulsing. Consult the article on testing airblast pressure gauge reliability.

    Use a wrench to turn gauges at the nut. Don’t twist them by hand holding the face. Ensure they are not opaque, leaking, plugged or resting above the zero pin.

    Many spray materials do not mix well and one of the common causes of uneven application is poor agitation. If you find deposits at the sump in the bottom of the sprayer after an application, your agitation is insufficient. For mechanical agitators, check for propeller wear and ensure paddles are secure on the agitator shaft. Learn more about agitation here.

    If the agitator shaft is leaking a little, tighten the packing. The packing gland is a common source of leaks. Keep it properly greased. If a leak occurs you can usually repair it by tightening the bolts on the packing gland by ½ a turn, but if that doesn’t work you may have to remove and repack (or replace) it.

    On sprayers with mechanical agitators, look for prop wear and loose or damaged paddles. Fill the sprayer with water and looks for tank leaks. Tighten the bolts 1/2 turn if the packing gland on the agitator shaft is leaking. You may have to remove and repack the gland if the leak persists.
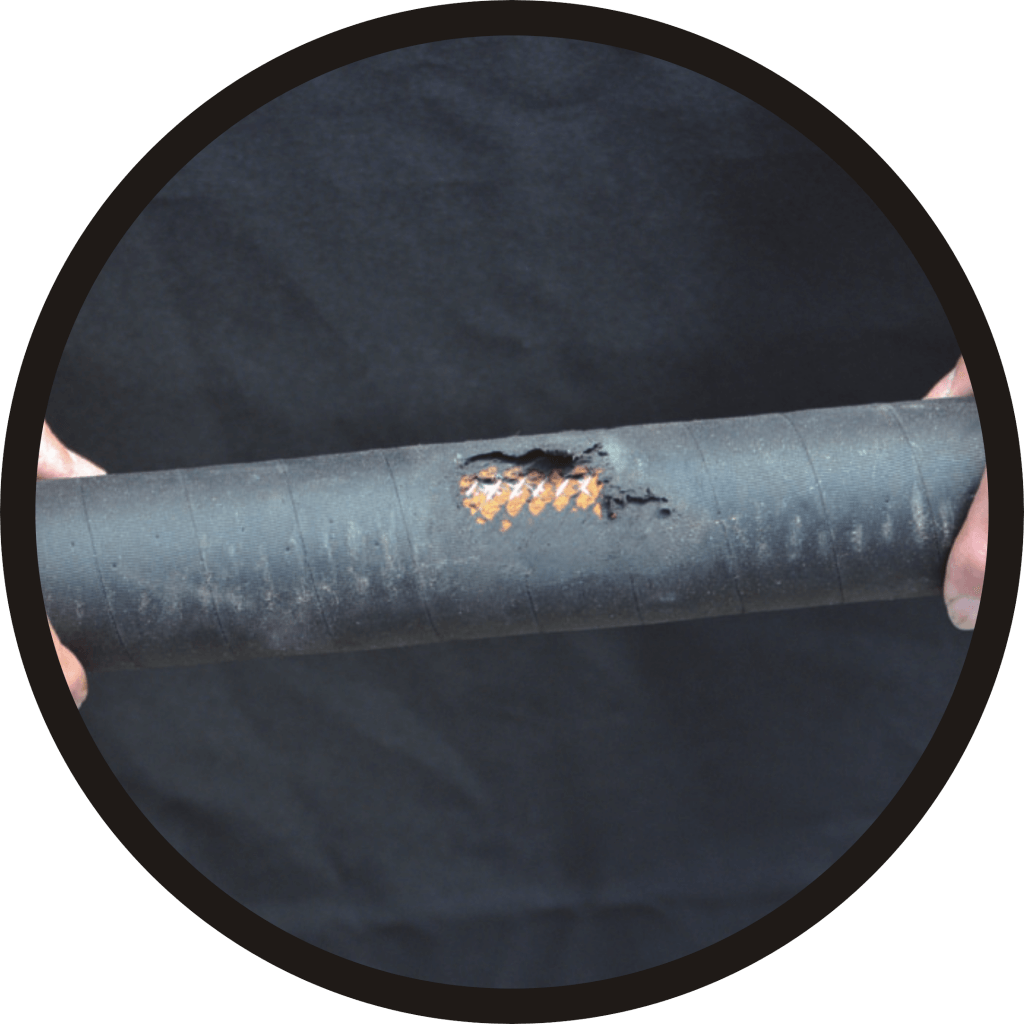
    Look for signs of hose wear and examine the sprayer for leaks while under pressure. Be careful when pressurizing the sprayer for the first time in the spring; this is when lines are likely to come loose or burst. (Image from Purdue Extension publication PPP-121: Preparing Spray Equipment for Winter Storage and Spring Startup).
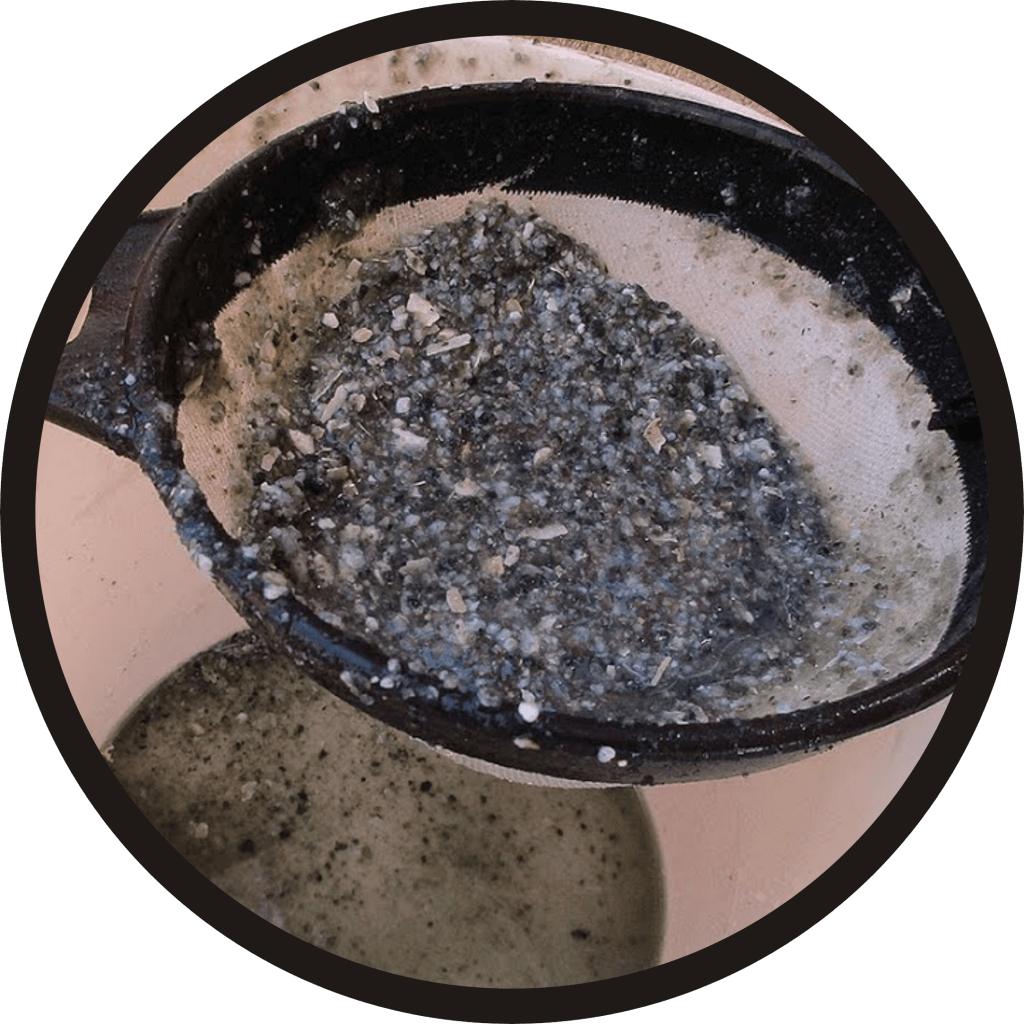
    Minerals chelate (i.e. scale) more readily on stainless steel than plastic tanks. In either case, the first tank of water and leftover antifreeze should be sprayed from the nozzle bodies with no line or nozzle strainers, and no nozzles. Replace them once the tank is sprayed out.

    The last step is calibrating the sprayer, and that process really depends on your definition. If the preceding steps conflict with those of the manufacturer’s, always follow the manufacturer’s. Do this for reasons of safety and to preserve any warranty.

    Thanks to Fred Whitford (Purdue University), Gail Amos and Mark Ledebuhr (Application Insight LLC) for reviewing the content of this article and for their helpful edits.

  • Airblast Productivity and Work Rate Calculator

    Airblast Productivity and Work Rate Calculator

    There are many factors that affect the work rate of an airblast application. If an operator can improve their work rate, without compromising spray efficacy or safety, they improve operational efficiency and save money.

    But how does each variable factor in? Is it worth the cost of a tender truck and operator to fill more efficiently? Should you upgrade to a multi-row sprayer? Should your next planting have longer rows? We have a simple calculator that can help you make these decisions. You can build and compare multiple scenarios to explore the relative impact of small changes to your typical spray program. We recommend making only one change for each scenario so you can better understand the results. Print the comparison page for your records.

    Whether you’re a sprayer operator, or a manager of sprayer operators, this exercise will help you see your spray program in a whole new light. Download a copy of the Airblast Budget and Work Rate Calculator and explore your productivity. You must have Excel to run the spreadsheet, and you must permit the use of macros (you’ll be prompted to accept).

    Spoiler: It’s amazing how changes to travel speed have only a marginal impact on work rate. Often less than 60% of the total spray job is spent actually spraying!

    If you’d like to see just how productive you can be, check out this rare (possibly unique) sprayer from Ed Oxley Farms in Michigan. Built on an OXBO 7550, this sprayer is the fourth iteration of a concept developed over the last 20 years by Ed Oxley Farms and ag engineers from Michigan State University.

    Capable of spraying five rows at a time, this self-propelled beast is a hybrid wrap-around and targeting-tower system that uses CurTec spray heads equipped with tangential fans and wire-mesh basket rotary atomizers.

    That’s not dribbling – that’s purging the boom prior to spraying.

    It sprays a mere 150 L/ha (~ 15 gallons/acre) at a ripping 13 km/h (~8 mph), as seen on the Ag Leader monitor below.

    When row spacing and turn time are accounted for, that means it’s capable of covering almost 15 hectares (~40 acres) per hour.

    And, when not spraying grapes, the boom can be swapped to make it a high-clearance corn sprayer. It doesn’t get much more efficient than this.

    The following videos will show the view from inside and outside the cab. Note that the row that’s straddled is sprayed from an overhead spray head mounted to the centre rack behind the sprayer. The two adjacent rows are covered from one side from vertical spray heads mounted on the chassis. Finally, the boom holds two more overhead spray heads for the outer-most rows.

    Ideally, the boom-mounted spray heads would be suspended vertically inside the row, but it makes for such a wide turn radius that it would take too long to turn… assuming there was enough headland to allow it. They’re also swept-back to minimize the turn radius and reduce the amount of airborne spray that deposits on the sprayer itself.

    A clever design that makes a few compromises to ideal coverage in order to improve productivity. The balance works for them and this sprayer might be a sign of things to come in horticultural crop production systems. Want to see how your sprayer stacks up? Download the calculator and see where you might be able to make improvements.