Category: Nozzles & Droplets

Articles helping with field sprayer nozzle selection

  • Clean Your Nozzles

    Clean Your Nozzles

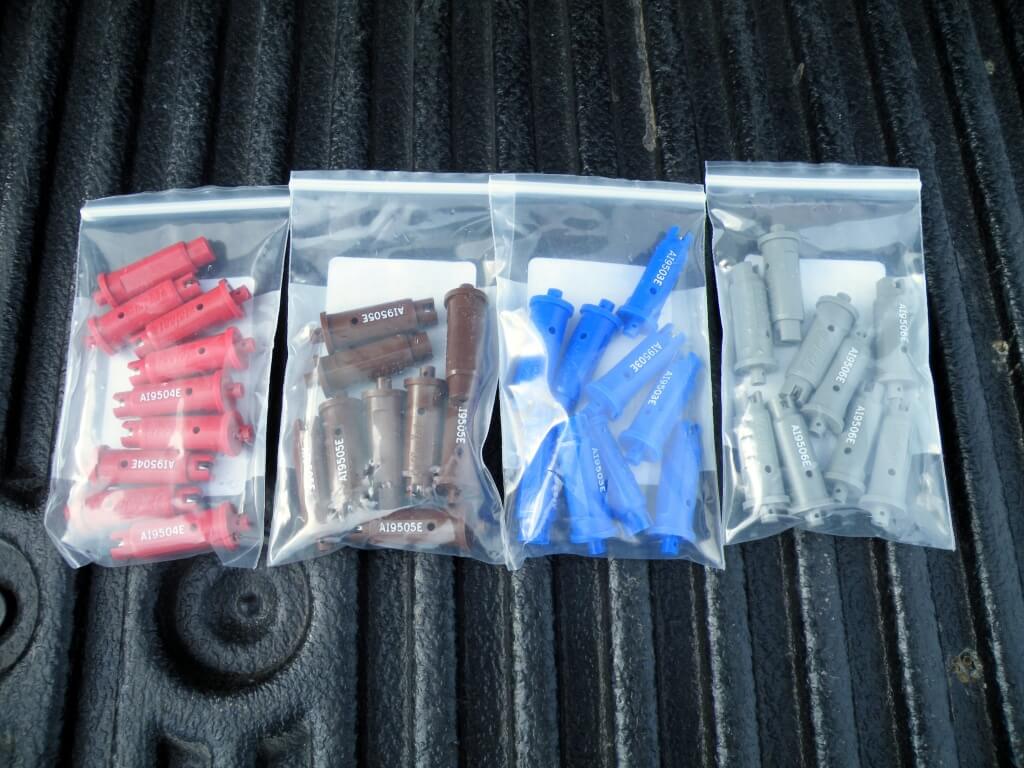
    When operators winterize their sprayers, they should remove all the tips and store them separately. Many store them in large pails with lids. Calibrating the sprayer just prior to winterizing will indicate if the nozzles should be stored, or replaced. Let’s assume each tip flow rate is within 5% of the average output and no more than 5% more than the manufacturer’s pressure tables. Yes, industry standard is 10%, but I always wonder how the spray quality suffers with that much wear. Nozzles are, comparatively, a cheap replacement and it’s not worth skimping. Learn more how to check nozzle flow rate, here.

    Just like any other part of the sprayer that comes in contact with spray liquid, nozzles (and strainers) should be cleaned regularly. And, just like any other part of the plumbing, the best way to do that is to dilute any residues via a series of rinses. For a more rigorous cleaning, one of the intermediate rinses should include a detergent, and soaking during this step is an excellent practice.

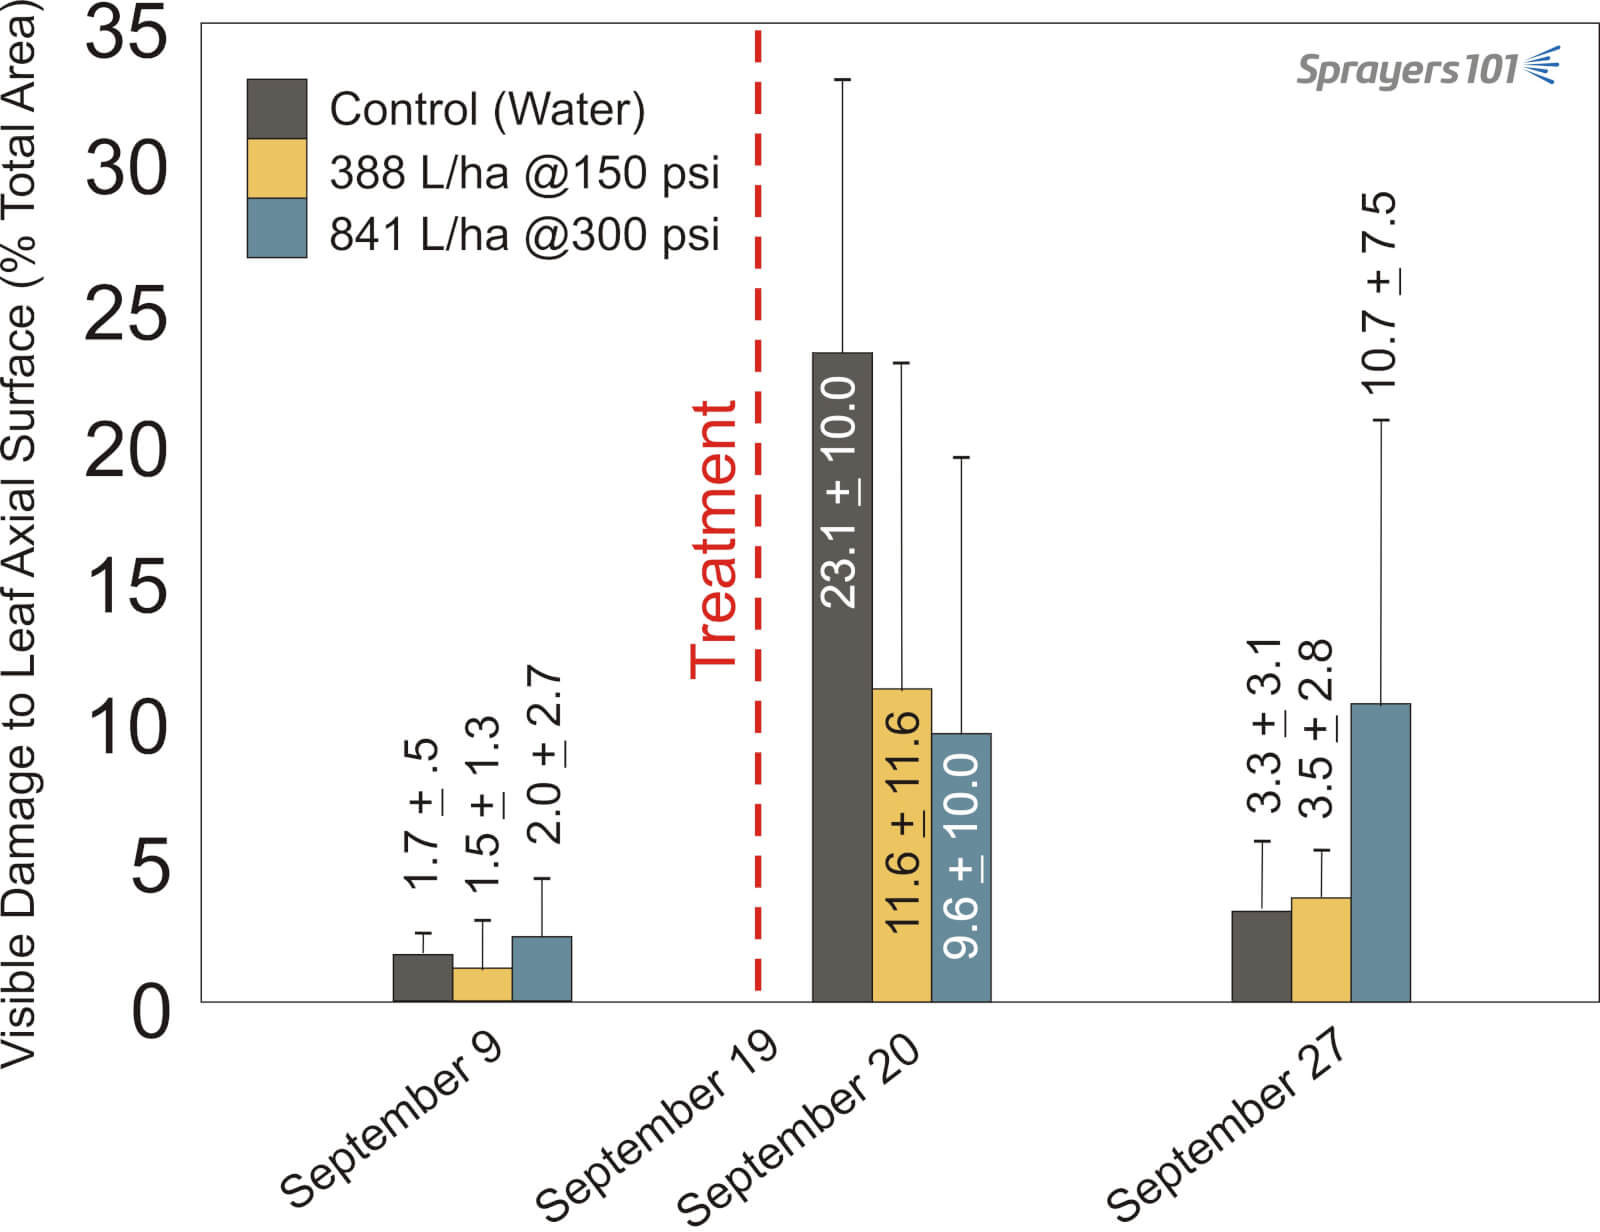
    The orifice of any nozzle is delicate, either machined or molded to exacting standards. Even small changes to the orifice shape results in distorted spray (e.g. spray comes out at undesirable angles), a change to the rate (typically more volume per minute) and a change in the spray quality (typically larger median droplet size). If foreign objects or residues remain in the tips, the subsequent spray job may be less accurate and even damage the tips.

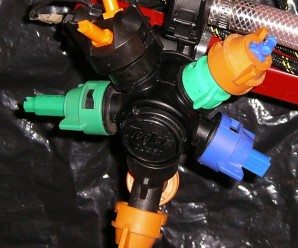
    In the case of air induction nozzles, which are essentially the standard on most boom sprayers, debris and weed seeds can plug the air-intake ports. When that happens, the nozzle will not function as intended. So, while the occasional soaking of nozzles does a great deal of good, they may also have to be scrubbed. Don’t use picks or reamers! There are nozzle cleaning tools out there, but they’re basically toothbrushes so save your old ones (and mark them clearly). Soft bristles are the way to go for removing stubborn residues and cleaning any tip orifices, but we found a nifty new way:

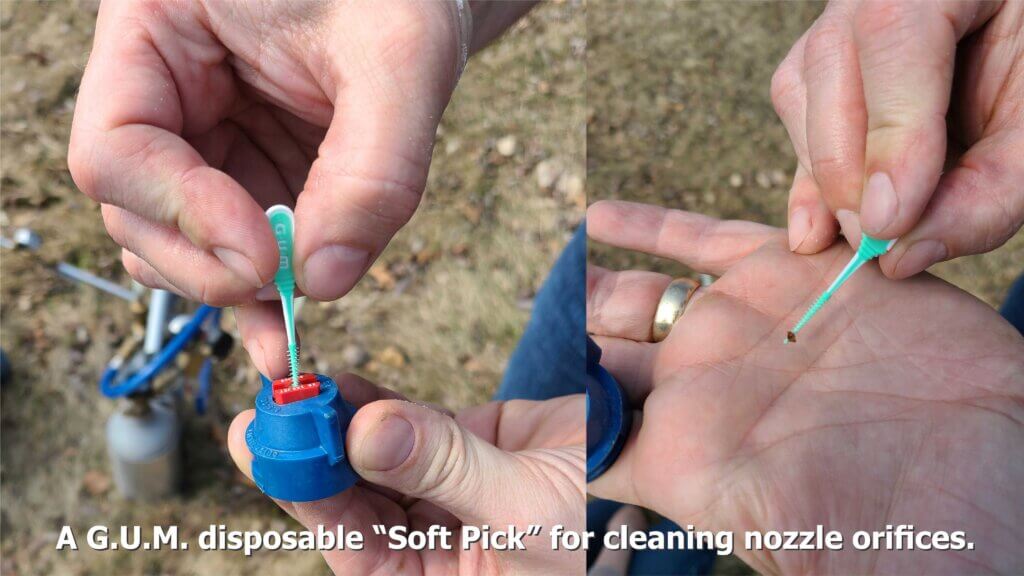
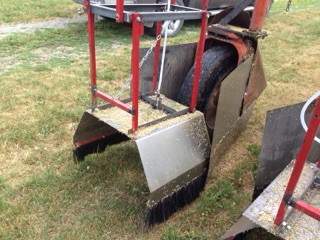
    Occasionally we receive photos like the one below and we’re asked what we think. Well, just the same way we don’t recommend cleaning your sprayer overalls in the family clothes washer, we also don’t recommend the use of dishwashers for nozzles.

    Not a great idea. Certainly not if you intend to ever use this dishwasher for anything else. And where does the rinsate go?

    In an interesting experiment, Lucas Olenick of Wilger tried cleaning tips in a heated ultrasonic cleaner. We haven’t tested this and we don’t know what heat and vibration might do to poly and ceramic components, but surely it’s no more aggressive than hot, soapy water and a bristle brush. Lucas tried several durations with and without detergent and arrived at this recipe:

    “For tough, non-water-soluble pesticides, around 8+ hours in a heated ultra-sonic cleaner with (Dawn) dish soap to come out like brand new. Other solvents may speed this up, but I’d generally suggest against heating solvents at any concentration. For water-soluble pesticides, expect to be within the 3-6+ hours for the first time to be confident enough in not having to flow-test each of the nozzles. With any pesticides, ensure proper care in handling contaminated nozzles and rinsate after cleaning nozzles.”

    The mad genius of Lucas Olenick (@WilgerParts) who used dish detergent and a heated sonic cleaner to unplug tips. Be sure to dispose of rinsate safely. Photo credit: Lucas Olenick.

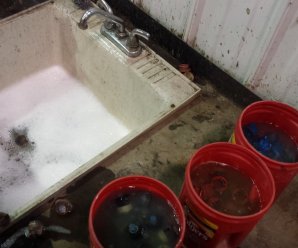
    Don’t have a heated sonic cleaner? No problem. Here’s a step by step:

    1. Wearing gloves, remove all nozzles, strainers, rubber gaskets and tips from the sprayer.
    2. Put them in a large plastic pail and cover them in warm water. Leave them to soak.
    3. Drain the pail, but be aware that the rinsate will have pesticide residue.
    4. Fill a second pail with a solution of the same commercial detergent used to clean the sprayer.
    5. With a toothbrush, scrub the caps, gaskets, strainers and nozzles to remove any residue. Some nozzles can be pulled apart to expose the mixing chamber and facilitate cleaning.
    6. Once scrubbed, leave all the parts to soak in the detergent solution.
    7. Drain the solution, which will contain trace amounts of pesticide, rinse the parts with water and reassemble the nozzles.

    While you’re at it, drop those filters and scrub them alongside the tips. This may seem extreme, but of all the technology on a sprayer, the nozzle has the biggest impact on the effectiveness and efficiency of the spray job. Take the opportunity over the winter months to clean and inspect the tips for damage so the sprayer is ready for calibration in the spring.

    Soak, scrub, rinse and store nozzles and nozzle strainers. You may replace them once the sprayer is clean, but I prefer to store then separately. Photo credit: Jason Boersma (@RVFBoys), Ridge Valley Farms, Ontario.

    Thanks to Jason Boersma (@RVFBoys), Ridge Valley Farms, Ontario, who sparked this article with his tweet: “Great job for a cold winter day, soak & clean all your tips to be ready for spring also saves on down time!”

  • Spray Coverage in Field Tomato

    Spray Coverage in Field Tomato

    Spraying field tomato is difficult – period.

    In Ontario, early variety tomato canopies get very dense in July. The inner canopy is relatively still, humid, cool and a perfect environment for diseases such as late blight. It is challenging to deliver fungicides to the inner canopy and this can lead to inadequate disease control. Matters are slightly improved as the fruit grows and pulls the canopy open, and staked tomatoes might allow for the use of directed sprays, such as drop arms in staked peppers. But, there’s no getting around it – from a droplet’s perspective, it’s tough to get through the outer canopy.

    DSCF0002
    Imagine you are a spray droplet trying to get inside this canopy.

    Study 1 – Qualitative Observations

    In August, 2011 we worked in a market garden operation in Bolton comparing the spray coverage from four different nozzle configurations. We used the growers typical spray parameters: a travel speed of 4.5 km/h (2.8 mph), an operating pressure of about 4 bar (60 psi), a boom height of 45 cm (18 in) above the ground, and a sprayer output of 550 L/ha (~60 gpa). To monitor spray coverage, water sensitive paper was placed face-up in the middle of the tomato canopy. This diagnostic tool turns from yellow to blue when contacted by spray.

    Water-sensitive paper at top of tomato canopy - easy to hit.
    Water-sensitive paper at top of tomato canopy – easy to hit.

    This particular sprayer was equipped with an air assist sleeve that blew a curtain of air into the canopy at about 100 km/h (65 mph) as indicated by an air speed monitor placed at the air outlet. When properly adjusted, air-assist booms have a number of benefits:

    • They part the outer canopy giving spray access to the inner canopy.
    • They rustle leaves to expose all surfaces to spray.
    • They permit the use of smaller droplets, which are more numerous and adhere to vertical surfaces, by entraining them and reducing drift.
    • They extend the spray window by permitting the applicator to operate in slightly higher ambient wind speeds.
    Boom sprayer with air assist sleeve operating.
    Boom sprayer with air assist sleeve operating.

    We sprayed using the four different nozzle configurations, with and without air assist. Our goal was to make qualitative assessments (Good, Moderate, Poor), and here’s what we observed:

    Nozzle Type / Sprayer OutputWith Air AssistWithout Air Assist
    80 degree flat fans /~550 L/ha (60 g/ac)
    • Good coverage in upper canopy
    • Poor / Moderate canopy penetration
    • Low drift
    • Good coverage in upper canopy
    • Poor canopy penetration
    • Moderate drift
    80 degree air induction flat fans /~550 L/ha (60 g/ac)
    • Inconsistent upper canopy coverage
    • Poor canopy penetration
    • “No” drift
    • Inconsistent upper canopy coverage
    • Poor canopy penetration
    • “No”/Low drift
    TwinJet dual 80 degree flat fans /~550 L/ha (60 g/ac)
    • Good coverage in upper canopy
    • Poor / Moderate canopy penetration
    • Moderate Drift
    • Good coverage in upper canopy
    • Poor canopy penetration
    • Moderate/High drift
    Hollow cones /~750 L/ha (80 g/ac)
    • Good coverage in upper canopy
    • Moderate canopy penetration
    • Low drift
    • Good coverage in upper canopy
    • Poor canopy penetration
    • Very High drift

    The air induction nozzles performed poorly. Their Coarse/Very Coarse droplets impacted on the outer canopy, created run-off and resulted in very little canopy penetration. Medium droplets produced by twin fans and conventional flat fans were both inconsistent with inner-canopy coverage, but some advantage may have been observed with air assist. The TwinJets contributed to higher drift (likely because they were too high off the canopy) but otherwise produced coverage similar to the conventional flat fans. From these observations, the convention that spray shape (e.g. cone, fan, twin) has little or no impact on broadleaf canopy penetration holds true.

    Acceptable spray coverage deep in canopy (harder to hit) using hollow cone nozzles.
    Acceptable spray coverage deep in canopy (harder to hit) using hollow cone nozzles and air assist.

    After inspecting the papers deep in the canopy, we were surprised that air assist did not obviously improve canopy penetration. It did seem to help, but it wasn’t a slam-dunk. This may be because finer droplets (<50µm) are not easily seen on water sensitive paper. It might also be because we did not calibrate the air speed to the canopy: too little air and spray impacts on the outer canopy, while too much air forces leaves out of the way and spray is blown into the ground. It was obvious that drift was greatly reduced, so logically the spray had to have gone somewhere – we can only assume it entered the canopy.

    The best results were achieved with hollow cones and air assist. Theoretically, smaller droplets should improve the potential for coverage by sheer number, but they slow quickly and are easily blown off course. Winds were only about 5 km/h (3 mph) during the trials. Had they been higher, the no-air-assist condition would have resulted in poorer canopy coverage. While we feel the air assist improved inner canopy coverage, we attribute much of the performance to the spray volume of 750 L/ha (80 gpa), which was significantly higher than we used with the other nozzles. When we attempted lower volumes using the hollow cones (not shown) the inner canopy coverage was greatly compromised. Higher volumes are a demonstrated means for improving canopy penetration, so this observation is consistent with what was expected.

    The 2011 trial suggested that hollow cone tips used with high volume and air assist, improved canopy coverage and penetration. They are, however, very prone to drift and their use is not recommended without an air assist sleeve to counter the spray drift. Spray volumes over 500 L/ha are highly recommended.

    Study 2 – Quantitative Observations

    In July, 2016 we ran another study in Chatham-Kent. This operation was concerned about spray drift and recently changed from Hardi hollow cones on 25 cm (10″) centres to TeeJet Turbo TwinJets on 50 cm (20″) centres. They wanted to know if they had improved their coverage. We decided to test four nozzles at similar driving speeds and volumes.

    Once again, we used water-sensitive paper. This time we placed two pieces back-to-back (face up and face down) about 1/3 down into the canopy. Then we placed two more in the same orientation about 2/3 down into the canopy. We did this for three plants for each pass. The next four images show the visual drift and weather conditions for each nozzle. Note that only one boom section was nozzled (indicated by a white line) in each condition.

    Condition 1 – Turbo TwinJet (Coarse Spray Quality)

    2016_Tomato_Sprayers_TTJ

    Condition 2 – Hollow Cones (10″ centres – Fine/Medium Spray Quality)

    2016_Tomato_Sprayers_hollowcone

    Condition 3 – XR 110° FlatFan (Fine Spray Quality)

    2016_Tomato_Sprayers_XR

    Condition 4 – TeeJet 3070 (Coarse Spray Quality)

    2016_Tomato_Sprayers_3070

    It was very humid, making it difficult to place and retrieve the papers without smearing them. This made it tricky to discern differences in coverage, and the blurring prevented us from quantifying droplet density (i.e. number of drops per unit area). Nevertheless, papers were scanned and the percent coverage was calculated using the DepositScan software developed by the USDA’s Dr. Heping Zhu. The average percent-coverage (± S.E. n=3) is shown in the image below.

    2016_Tomato_Sprayers_Coverage

    Coverage on the upward-facing papers in the upper portion of the canopy showed excessive coverage for all nozzles but the 3070. Little or no coverage was detected on the downward-facing cards, but without air-assist or a directed application (e.g. drop arms), this was expected. It’s the deeper canopy that’s of particular interest. The only significant difference may lie in the XR flat fan which showed more coverage on the upward facing papers and some (however little) on the downward facing papers.

    This came as something of a surprise given that the XR produced a Fine spray quality and there was no air assist to guide spray into the canopy. I believe the high humidity and low winds played a role in this outcome by reducing evaporation and off-target drift. On a drier, windier day, we likely would not have seen this level of inner canopy coverage for either the XR or the hollow cone. By comparison, the Turbo TwinJet with its Coarse spray quality not only reduces off target drift, but would be more resilient in drier and windier weather and may very well have produced the best coverage by comparison.

    Take Home

    Drawing from both studies:

    • Properly calibrated air assist will reduce drift and has promise to improve canopy penetration/coverage.
    • Spray shape (e.g. twin, hollow cone, flat fan) does not seem to play a role in canopy penetration.
    • Spray quality larger than Coarse may negatively impact canopy penetration in tomato.
    • Coarse spray quality is perhaps the most versatile option when volume is sufficient (>500 L/ha).
    • Fine-Medium spray quality is only a viable option in high humidity and light winds. However, air assist is critical to counter drift, and high spray volumes (>500 L/ha) are still required despite the higher droplet count.
    • Underleaf coverage is exceedingly difficult to achieve, even with finer spray quality and air assist.
    This occurred in Ontario (date and location withheld). The sprayer missed the outer edge of the tomato field during a late blight application. An unintentional field check, and amazing to see the results.
  • Herbicides in Asparagus – A creative solution

    Herbicides in Asparagus – A creative solution

    In 2016, an asparagus grower in southern Ontario picked up a used De Cloet Hi-Boy originally used to spray tobacco. His vision was to create a three-row herbicide sprayer for asparagus and we were invited to participate. His concept was to design shrouds that would contain the herbicide, but not snag the asparagus or drag heavily on the ground. This article follows the development of the sprayer from concept to testing to final product.

    The sprayer itself was a classic three-wheel, self-propelled affair. The asparagus was planted on four foot centres, leaving a three foot alley. While the goal was to hang three shrouds off the boom, we started with one to work out the bugs.

    DSCF3362

    This operation uses 2,4-D to control weeds in the alleys and while a little can hit the asparagus stem up to 12 inches (where the branching starts), we wanted to avoid contact at all costs. That led us to the TeeJet AI 95° flat fan nozzle, which produces a Very Coarse to Extremely Coarse spray quality. A single nozzle could be suspended to span the 3 foot width of the alley.

    DSCF3355
    2016_Asparagus_Herb_Shroud_2

    The first version of the shroud was suspended off the boom from four anchorage points. A certain amount of of play was allowed so the shroud would find plumb (i.e. hang vertically), even when the sprayer boom yawed or pitched over uneven ground.

    The shroud was constructed of sheet metal, angled to reduce the potential for contact with the asparagus branches, and terminated in stiff, nylon brush-style mud flaps commonly seen on trucks. These brushes were cut to a few inches in length to span the distance between the side of the shroud and the ground. This would create a “seal” to prevent spray from escaping, maintaining some degree of contact with uneven ground.

    2016_Asparagus_Herb_Shroud_1

    We tested the first version by placing water sensitive paper in two positions on the ground, just inside the reach of the brushes. We had to be careful not to run them over with the centre wheel of the sprayer. We also adhered two papers to the angled inner walls to see how much, if any, spray was hitting the inside of the shroud.

    Our first pass on June 16th was at 9:00 am, 19.1 ºC (66.4 ºF) with a cross wind of 5 to 7 km/h (3.1 – 4.3 mph). relative humidity was high at 85% and travel speed was slow at 3.2 km/h (2 mph). We started with the .06 AI tip at 50 psi, but we drenched all the targets with excessive coverage because we were travelling so slow. We also found the stiff brushes were creating furrows in the soil, as shown below.

    DSCF3360

    For our second pass, we tried the .04 tip and raised the shroud while dropping the tip to keep it suspended 15 inches over the ground. We were still drenching the targets and noticed the shroud was hitting the asparagus spears, causing physical damage. The damage is shown below – note the dark green on the bent spear.

    DSCF3359

    This led to a decision to flare the side walls more aggressively, bringing them further into the centre of the alley and away from the spears (shown later in the article). This had the added benefit of angling the brushes as well to get a maximum span for weed control in the alley. For the final coverage pass we used the AI .03 tip, which gave more than 45% coverage on the ground, with even distribution, and there was no indication of spray on the papers adhered to the inside of the shroud. This coverage is more than is likely required, and the operator should be able to spray up to 6.5 km/h (4 mph) without compromising coverage.

    DSCF3364
    DSCF3365

    Since the coverage tests, the grower added additional sheet metal fenders to the the existing fenders, encasing the wheels and creating a smooth transition for the shroud to gently deflect the asparagus. The fenders were needed because the grower found the asparagus was being pushed out by the wheel fender only to bounce back in front of the shroud, which snagged the fern and damaged it. The additional fenders keep the fern spread and prevent it getting caught in front of the shrouds.

    2016_Asparagus_Hood_v2_3
    2016_Asparagus_Hood_v2_1
    2016_Asparagus_Hood_v2_2

    The grower was very happy with the sprayer’s performance and planed to build another. Why be satisfied with the status quo when you can tap into your creative side and be innovative? If you don’t think you’re imaginative enough to try upgrading equipment on your farm, here’s a simple test to prove that it’s in you. It’s easy to see the bird in the image below, but with a little concentration you’ll be rewarded with a ski-jumping rabbit.

    2016_Rabbit_Bird

    Thanks to TeeJet for donating the nozzles and water-sensitive paper and to Ray and Brad Vogel of Lingwood Farms for inviting me to participate.

    Learn more about spraying asparagus here.

  • Stop and Spray the Roses – More Efficiently!

    Stop and Spray the Roses – More Efficiently!

    Spraying roses.
    We always admire the photos of sprayers in tulips produced by the Netherlands. Rose protection in Ontario is equally beautiful.

    Nursery growers apply pesticides to a diverse range of plant species. In a perfect world, sprayer operators would adjust their sprayer set-up to match each crop, but this is rarely done because of time constraints and a lack of guidance. Adjustments in product rate and spray distribution should reflect the plant size, row spacing and developmental stage of the crop and pest. Any such adjustments should be performed using a reference point for coverage and a strong history of efficacy.

    To demonstrate the value of sprayer optimization, we marked out three, 65m x 6.5m blocks in a field of roses. One block was an untreated control. One block was the grower’s traditional set up of hollow cones (D4D45) on 50 cm centres at 300 psi and 3.0 mph (841 L/ha). The third block was the experimental condition where we used an optimized set up of hollow cones (D3D45) on 50 cm centres at 150 psi and 3.0 mph (388 L/ha). We validated this condition using an iterative process to dial in the coverage indicated by water-sensitive paper.

    Setting up water-sensitive papers in the rose blocks.
    Setting up water-sensitive papers in the rose blocks.
    Rule-of-thumb fungicide coverage on water-sensitive paper.
    Rule-of-thumb fungicide coverage on water-sensitive paper.

    One application of Folpet + Nova was made on Sep 19, 2011. Roses were photographed before and after the treatment. The photographs were digitized and the amount of powdery mildew appearing on the upper surfaces was determined as a percent of the total visible leaf area. Six replications were randomly selected from each block.

    Visual record of randomly selected roses prior to treatment.
    Visual record of randomly selected roses prior to treatment (September 9).
    Visual record of randomly selected roses following treatment.
    Visual record of randomly selected roses immediately following treatment (September 20).

    There was no significant difference in the amount of mildew presented in the two sprayed blocks one day after the application (September 20). Eight days after application (September 27), there appeared to be better control in the optimized sprayer set up condition versus the grower’s standard set up. The large standard error bars in the grower’s condition made this statistically insignificant. It is unclear why the untreated block presented with the least visual mildew at this point. This preliminary work demonstrates the value of customized application settings and their potential to conserve pesticide, water, and fuel without compromising pesticide efficacy.

    Results of optimizing sprayer set up on the visual occurrence of powdery mildew on rose leaves.
    Results of optimizing sprayer set up on the visual occurrence of powdery mildew on rose leaves. Bars represent standard error of the mean. Unclear why control block presented less mildew on Sept 27.

    The Ontario Farm Innovation Program and the grower co-operator are gratefully acknowledged for making this research possible.

  • If I had a Low Drift Nozzle – Parody

    If I had a Low Drift Nozzle – Parody

    Sung to the tune of “If I had a Rocket Launcher” by Bruce Cockburn

    Here comes the John Deere sprayer — second time today;

    All the insects scatter and hope it goes away;

    How many larvae murdered only Dow can say;

    If I had a low drift nozzle… I’d make somebody spray.

    I don’t believe in modes of action and I don’t believe in rates;

    I don’t believe in agronomists or their shiny steely spades;

    And when I talk with the survivors of that crappy bran bait;

    If I had a low drift nozzle… I would calibrate.

    On canola field margins one hundred thousand wait;

    Smash through truck radiators — or some less humane fate;

    Cry for bertha armyworm, sprayed with organophosphate;

    If I had a low drift nozzle… I would not hesitate.

    I want to raise every chirp — at least I’ve got to try;

    Every time I see them munching, with my compound eyes;

    Situation desperate, echoes of the hoppers cry;

    If I had a low drift nozzle… Some CCA would die.